Start with a tablet, learn layers and values, then practice with intent daily.
If you want to know how to paint digitally with confidence, you’re in the right place. I’ve taught teams and freelancers, shipped client art, and learned from many mistakes. This guide shows how to paint digitally step by step, from setup to polish, with clear drills, pro tips, and real examples you can use today. Read on to go from blank canvas to finished art without guesswork.

Choose your tools and set up a stress-free workspace
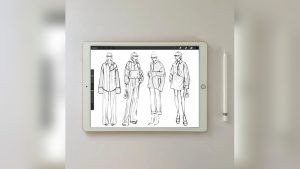
The right tools make learning how to paint digitally easier and faster. Use a pen tablet or a display tablet. A basic pen tablet is cheap and very good for beginners. A display tablet feels more natural but costs more. iPad with Apple Pencil is great for sketching and painting on the go.
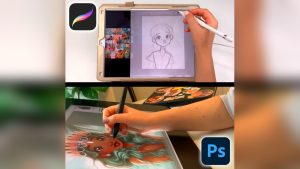
Pick software that fits your style and budget. Photoshop and Clip Studio Paint are great for painting and comics. Procreate is fast and simple on iPad. Krita is a strong free option on desktop. Any of these will work as you learn how to paint digitally, so choose one and commit for a while.
Create a calm and tidy workspace. Sit upright. Keep your wrist neutral. Map your pen buttons to undo and eyedropper. Use a simple brush set to start. Save your file in PSD or a layered format. For sharing online, export in sRGB as PNG or JPEG.
Key setup tips:
- Canvas: start at 3000–4000 px on the long side, 300 DPI for print-ready work.
- Color: work in RGB, sRGB profile, unless you must print in CMYK.
- Shortcuts: learn B for Brush, E for Eraser, Space for Pan, R for Rotate (varies by app).

Understand the core building blocks
If you want to master how to paint digitally, start with the basics. Values show light and dark. They matter more than color. If your values read well, your art will pop. Edges guide the eye. Hard edges add focus. Soft edges add depth and air. Use both with intent.
Layers let you test ideas with no risk. Keep them light at first. Too many layers can slow you down. Learn masks, clipping masks, and blend modes. Soft Light and Multiply are helpful for shade and color tweaks. Smudge can blend, but use it sparingly.
Brushes do not make the artist. A round brush with pressure for size and opacity can paint almost anything. Set a curve that feels natural. If lines wobble, use a small amount of stabilization. As you practice how to paint digitally, stick to a few brushes and learn them well.

A step-by-step workflow you can repeat
This is the workflow I teach when people ask how to paint digitally. Keep it simple and repeatable.
- Define your goal
- Write one clear line: “Warm portrait in soft light” or “Moody sci-fi alley.”
- Gather 5–8 refs: lighting, mood, color, materials.
- Thumbnails and gesture
- Make 6–12 tiny sketches in grayscale.
- Pick the best composition. Flip canvas often to spot issues.
- Clean sketch
- Draw with clear shapes.
- Use simple lines to show form and flow.
- Block-in values
- Paint big shapes in grayscale first. Keep three to five value groups.
- Squint to check read. Fix big issues now.
- Add base color
- Add color on a layer set to Color or Overlay above the values.
- Keep it simple: skin, cloth, metal, sky.
- Light and shade
- Add Multiply for shade, Screen for light.
- Think of your light source. Warm light gives cool shadows, and the reverse.
- Edges and texture
- Sharpen focal points with hard edges.
- Soften background with air or textured brushes.
- Details and polish
- Add just enough detail to sell the story.
- Paint-over photo textures to keep style consistent.
- Final check and export
- Flip canvas, check values, and zoom out.
- Export sRGB PNG for web. Save your layered file.
If you follow this workflow on how to paint digitally, your results will improve fast. Keep each step short. Move on before you get stuck.

Learn light, color, and form the simple way
You cannot master how to paint digitally without a clear sense of light. Think of light as water in the scene. It pours over planes. It fills the air. Use a single strong light at first. Then add a bounce light and rim as you grow.
Color is mood. Start with a limited palette. Try one warm and one cool. Use a color picker to sample from your refs. Aim for hue shifts across light and shade. Avoid pure black shadows and pure white lights unless needed.
Form is shape in space. Show it with value steps. A sphere needs a bright light, mid tone, core shadow, reflected light, and specular highlight. When you paint form well, even simple objects look real. This is the heart of how to paint digitally like a pro.

Practical exercises that build real skill
Here are drills I use to teach how to paint digitally. They are short and give fast gains.
- Ten-value bar: Paint swatches from black to white. Aim for even steps.
- Sphere study: Grayscale sphere under a single lamp. Add a second sphere with bounced light.
- Master study: Copy a painting you love in grayscale. Keep it to 30–60 minutes.
- Limited palette: Paint with only red, yellow, and blue. Learn mixes and control.
- 30-minute daily sketch: Pick one subject per week. Portraits, hands, metal, or clouds.
Do each drill three to five times per week. Keep results in a folder. You will see your growth in weeks, not months.

Common mistakes and how to fix them
When people learn how to paint digitally, they hit the same walls. I did too. Here is how to avoid them.
- Canvas too small: Tiny files break when you add detail. Start larger.
- No value plan: You add color too soon and lose form. Do grayscale first.
- Too many brushes: You search for magic. Use a simple round and one texture brush.
- Over-smooth: The whole piece looks blurry. Add hard edges where you want focus.
- Zoom prison: You live at 300% zoom. Zoom out each minute to check read.
- Never flip: Flipping shows skew and tilt right away. Make it a habit.
Each fix is small. Together they make a big change in how to paint digitally with clarity.
Speed, files, and a clean workflow
Speed comes from simple systems. If you want to scale how to paint digitally, set smart defaults.
- Make a template PSD with your go-to brushes, swatches, and a value check layer.
- Use hotkeys for brush size, rotate, and color pick.
- Build swatch sets per project to stay on palette.
File care:
- Save versions: myfile_v01, v02, v03.
- Backup to cloud and an external drive.
- Export web art in sRGB. Use PNG for crisp edges, JPEG for photos and big scenes.
- For print, check size in inches at 300 DPI and convert to CMYK only if the printer needs it.
A clean pipeline reduces stress and keeps you painting more and fixing less. That is core to how to paint digitally for client work and personal art.
My field notes: what actually moved the needle
I learned how to paint digitally while working long nights on a book cover. My canvas was too small. My values were muddy. The fix was simple. I rebuilt the piece in grayscale at 4000 px and used a single round brush. It clicked. The cover shipped, and the editor booked me again.
Lessons you can use:
- One clear idea beats ten brush packs.
- Strong values first. Color last.
- Show work often. Feedback saves time.
- Practice small, finish big. Short drills feed larger pieces.
Use these notes to speed up your path on how to paint digitally, without the painful detours I took.
Style growth and finding your voice
As you learn how to paint digitally, your style will show up in small choices. The edge you keep sharp. The color you push warm. The brush you favor for hair or clouds. Track what you like. Make a “style board” with art that moves you.
Try this loop:
- Study one artist for a week.
- Steal like a scientist: copy one technique, not the whole look.
- Mix it with your own habits on a new piece.
Your voice is a mix of taste and practice. Keep making. Keep notes. It will emerge.
Frequently Asked Questions of how to paint digitally
What is the best canvas size to start with?
Use 3000–4000 px on the long side at 300 DPI. This gives room to add detail and print small.
Do I need a display tablet to learn how to paint digitally?
No. A simple pen tablet is enough to learn core skills. Upgrade later if you want a screen feel.
Which software is best for beginners?
Procreate, Clip Studio Paint, Krita, and Photoshop all work. Pick one, learn the tools, and stick with it for a few months.
How long does it take to get good?
With daily 30–60 minute practice, you can see real gains in 8–12 weeks. Big leaps come from focused drills and feedback.
How do I blend without making it muddy?
Blend late, after a solid value block-in. Use soft edges in shadow, hard edges in focal areas, and avoid over-smudging.
What brushes should I use to start?
Use a round brush with pressure for size and opacity, plus one textured brush. Learn edge control before chasing brush packs.
What DPI should I use for web and print?
Use 72–144 DPI for web if file size is a concern, but 300 DPI is safe for print. Always export in sRGB for online use.
How do I pick colors that work together?
Choose a limited palette and sample from references. Use warm light with cool shadows or the reverse to create harmony.
Conclusion
You now have a clear plan for how to paint digitally, from setup and values to light, edges, and export. Start small, practice often, and use a repeatable workflow so each piece builds on the last. Your style will grow as you make more art and refine what you love.
Take action today: pick one drill, set a 30-minute timer, and paint. Want more guides like this on how to paint digitally? Subscribe, share your work, or drop a question so I can help you level up.