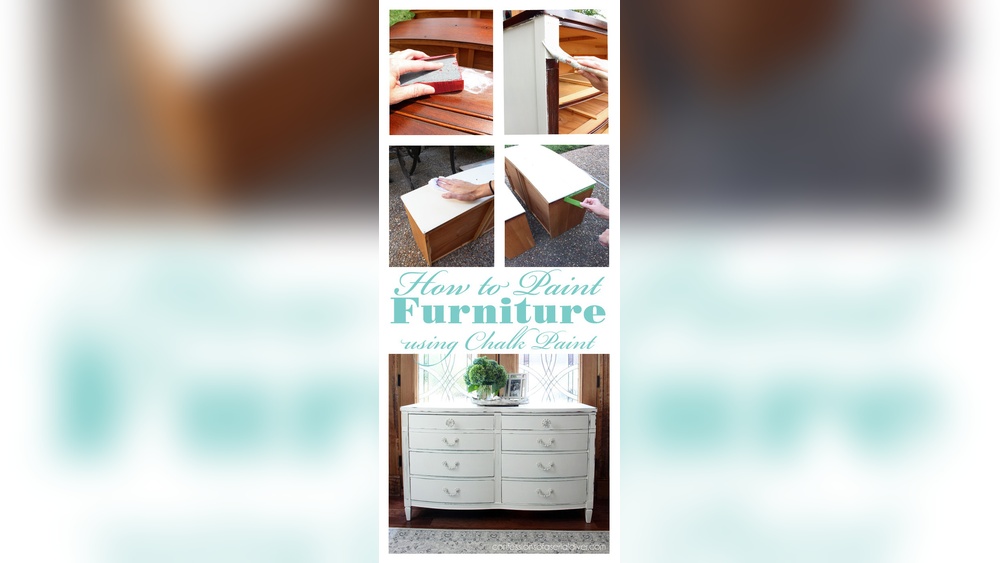
Are you ready to give your old furniture a fresh, stylish look without spending a fortune? Painting DIY furniture in chalk style is the perfect way to transform your pieces with a charming, vintage feel.
Whether you want to brighten up a tired dresser or add character to a plain table, chalk paint makes it easy for you to achieve a smooth, matte finish that looks professionally done. In this guide, you’ll discover simple steps and insider tips that anyone can follow—even if you’ve never painted before.
Keep reading and unlock the secrets to turning your furniture into eye-catching, personalized decor that will impress everyone who sees it!
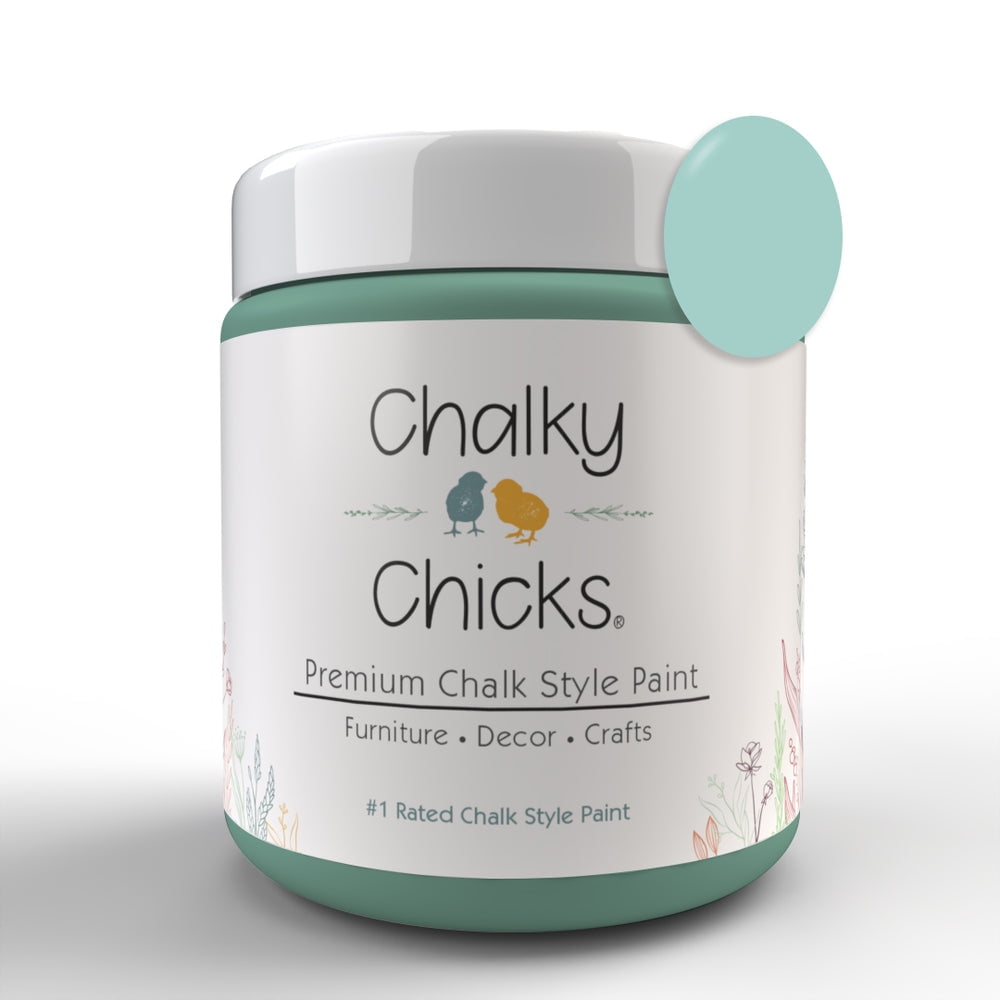
Choosing Chalk Paint
Choosing the right chalk paint is key to a successful DIY furniture project. Chalk paint has a unique texture and finish that sets it apart from regular paint. Picking the best type helps achieve the look and durability you want. This section explains different chalk paints, their benefits, and some popular brands to consider.
Types Of Chalk Paint
Chalk paint comes in several forms. There are pre-mixed paints ready to use. These are convenient and offer consistent results. Powdered chalk paint requires mixing with water before use. It allows customization of thickness and texture. Some chalk paints include wax or sealant for added protection. Each type suits different project needs and skill levels.
Benefits Over Regular Paint
Chalk paint sticks well to many surfaces without sanding. It creates a matte, vintage look that is hard to match. The paint dries quickly, letting you finish faster. You can easily distress chalk paint for a shabby chic effect. It needs less prep work, saving time and effort. Chalk paint also works great for small touch-ups and repairs.
Popular Brands
Several brands make high-quality chalk paint. Annie Sloan is a top choice known for rich colors and smooth finish. Rust-Oleum offers affordable options widely available in stores. FolkArt chalk paint is popular for crafting and smaller projects. Each brand has its strengths and price points. Testing a small area helps find the best fit for your furniture.

Credit: www.countrychicpaint.com
Preparing Furniture
Proper preparation is the key to a smooth chalk paint finish on your DIY furniture. It helps the paint stick better and last longer. Taking time to prepare ensures the best results and a professional look.
Cleaning And Sanding
Start by cleaning the furniture well. Use mild soap and water to remove dust and dirt. Let it dry completely before sanding. Sand the surface lightly to remove old paint or varnish. Use fine-grit sandpaper for smoothness. This step helps the chalk paint grip the surface better.
Repairing Imperfections
Check the furniture for cracks or holes. Fill any imperfections with wood filler. Allow the filler to dry fully. Sand the filled areas smooth to match the surface. Fixing these flaws creates a flawless base for painting.
Removing Hardware
Remove all handles, knobs, and hinges. This makes painting easier and cleaner. Use a screwdriver to take off hardware carefully. Store the pieces safely for reattaching later. Painting without hardware prevents smudges and uneven spots.
Applying Base Coat
Applying the base coat is the first major step in painting DIY furniture with chalk style paint. This layer forms the foundation for the final look. It helps the paint stick better and gives a smooth surface for the next coats. Taking time to apply the base coat carefully improves the overall finish.
Selecting The Right Brush
Use a brush made for chalk paint. These brushes have soft, natural bristles. They help spread paint evenly without leaving streaks. Avoid synthetic brushes as they may leave marks. A medium-sized brush works well for most furniture pieces. Choose one that feels comfortable in your hand.
Techniques For Smooth Coverage
Start by dipping the brush lightly into the paint. Apply the paint with long, even strokes. Work along the grain of the wood if possible. Avoid overloading the brush to stop drips and thick spots. Paint in thin layers to build up color slowly. Lightly brush in different directions for texture.
Drying Times
Let the base coat dry fully before adding more layers. Chalk paint usually dries fast, about 30 minutes to an hour. Check the paint by gently touching it. If it feels sticky, wait longer. Proper drying prevents smudging and uneven surfaces. Patience here leads to better results.
Credit: www.hozakovainteriery.cz
Layering And Distressing
Layering and distressing add charm and depth to DIY chalk style furniture. These techniques give your piece a unique, vintage look. They help highlight details and create texture. Layering paints builds color richness. Distressing reveals the base layers and wood beneath.
Both steps require patience and creativity. You can use different colors and tools. Light sanding brings out the worn, aged effect. These simple tricks make your furniture stand out with character.
Adding A Second Color
Start with a base coat in a light or neutral shade. Let it dry fully before the next step. Choose a second color that contrasts or complements the first. Apply this layer sparingly with a brush or sponge. Focus on edges and raised details for a natural look. The second color adds depth and interest.
Creating Distressed Effects
Use fine sandpaper or a sanding block to distress your paint. Lightly rub areas where natural wear happens, like corners and edges. Sand in small circles or back-and-forth motions. The goal is to reveal some of the base paint or wood. Avoid over-sanding to keep a balanced look. Distressing makes your furniture feel well-loved and aged.
Blending Paints
Blending helps soften harsh lines between colors. Use a dry brush or soft cloth to gently mix edges while paint is still wet. Work in small sections and use light strokes. You can also dab with a sponge for texture. Blending creates smooth color transitions and a more natural finish. It ties all layers together beautifully.
Sealing And Finishing
Sealing and finishing are key steps after painting your DIY furniture with chalk paint. These steps protect your work and enhance durability. Without sealing, the paint can chip or wear off easily. A good finish also gives your furniture a polished, professional look. Choose the right product and apply it carefully to keep your piece beautiful for years.
Choosing The Right Wax Or Sealant
Wax and sealants protect chalk paint differently. Wax gives a soft, matte finish and adds a slight sheen. It works well for items with low traffic. Sealants, like polyurethane or acrylic, create a harder, more durable surface. They are perfect for furniture that gets heavy use. Pick a product based on the furniture’s purpose and your desired look.
Applying Protective Coats
Apply wax or sealant in thin, even layers. Use a clean brush or cloth for waxing. Rub the wax gently in circular motions. Let it dry before buffing with a soft cloth. For sealants, use a high-quality brush. Apply multiple thin coats, allowing each to dry fully. Avoid thick layers to prevent drips and uneven texture. Proper application ensures lasting protection.
Maintaining Chalk Paint
Keep your chalk-painted furniture looking fresh with simple care. Dust regularly using a soft, dry cloth. Clean spills quickly with a damp cloth and mild soap. Avoid harsh chemicals or scrubbing pads. Reapply wax every six months to maintain the finish. For sealants, touch up any scratches with a matching product. Proper maintenance preserves your furniture’s charm.

Credit: www.countrychicpaint.com
Creative Techniques
Creative techniques bring your DIY chalk paint furniture to life. They add personality and charm beyond basic painting. These methods make pieces unique and eye-catching. Experimenting with different styles can refresh old furniture beautifully.
Stenciling Designs
Stenciling adds patterns and shapes easily. Choose simple or intricate stencil designs. Secure the stencil on the furniture surface. Use a small brush or sponge to dab chalk paint over the stencil. Remove the stencil carefully for a crisp design. Let the paint dry fully before handling. This technique works well on tabletops, drawers, and cabinet doors.
Using Paint Blending
Paint blending creates smooth color transitions and depth. Start with a base color on the furniture. While it is still wet, apply a second color beside it. Use a soft brush to blend the two colors softly together. Work quickly before the paint dries. This method adds a subtle ombre or weathered effect. It looks great on large flat surfaces and curved edges.
Adding Texture
Texture adds dimension and interest to flat furniture. Mix chalk paint with baking soda or plaster for a thicker consistency. Apply this mixture with a palette knife or stiff brush. Create patterns, swirls, or rough patches as desired. Let it dry completely before sanding lightly for a distressed look. Textured finishes give a rustic, vintage feel to your piece.
Common Mistakes To Avoid
Painting furniture with chalk paint can transform old pieces into charming decor. Avoiding common mistakes saves time and improves results. Some errors may ruin your project or cause extra work. Knowing what to avoid helps you get a smooth, lasting finish.
Over-sanding
Sanding too much removes the wood’s natural texture. It can make the surface uneven and rough. Light sanding is enough to clean and prep the furniture. Use fine-grit sandpaper and sand gently to avoid damage.
Applying Thick Paint Layers
Applying thick layers causes drips and uneven drying. Thick coats may crack or peel over time. Spread thin layers of chalk paint evenly. Wait for each layer to dry before adding the next one.
Skipping Sealants
Sealants protect your painted furniture from scratches and stains. Skipping sealant leaves the surface vulnerable to damage. Use wax or a clear topcoat to seal the paint. This step ensures durability and a polished look.
Diy Chalk Paint Recipes
Creating your own chalk paint is simple and fun. It saves money and lets you control colors and texture. DIY chalk paint recipes use common ingredients found at home. These mixes work well on many furniture types. You get a smooth, matte finish with a vintage look. Let’s explore easy recipes and tips to customize your paint.
Homemade Chalk Paint Mixes
Start with basic ingredients like latex paint, plaster of Paris, and water. Mix 1 cup of paint with 2 tablespoons of plaster of Paris. Stir well until smooth and lump-free. Adjust the consistency with water for thicker or thinner paint. This mix dries quickly and adheres well to wood surfaces. Use a brush or sponge for application. Let it dry fully before sanding or waxing.
Custom Color Creation
Choose any latex paint color as your base. Add small amounts of plaster to maintain chalky texture. Test your mix on a scrap piece before painting furniture. Mix colors by blending different latex paints together. You can create soft pastels or bold hues easily. Keep notes of your ratios to replicate favorite shades later. This method gives you full control over the final look.
Cost-effective Solutions
DIY chalk paint is cheaper than store-bought versions. Plaster of Paris and paint are inexpensive and last long. Use leftover paint from other projects to save even more. Avoid expensive primers as chalk paint sticks well to most surfaces. This approach reduces waste and lowers the cost of furniture makeovers. It’s a budget-friendly way to refresh old pieces beautifully.
Project Ideas
Chalk paint is perfect for refreshing old furniture. It gives a soft, matte finish that fits many styles. This section shares fun project ideas for your next DIY chalk paint adventure. Each project type works well with chalk paint and brings new life to your pieces.
Tables And Chairs
Tables and chairs often need a fresh look. Chalk paint can brighten worn surfaces and hide scratches. Use light colors for a shabby chic style. Dark colors create a bold, modern look. Distress the edges for a vintage feel. A simple wax finish protects the paint and adds charm.
Dressers And Cabinets
Dressers and cabinets are great for chalk paint makeovers. Choose soft pastels for a calm, cozy room vibe. Bright colors add energy and fun. Paint the whole piece or just the drawers for contrast. Add stencils or hand-painted designs for a unique touch. Finish with wax to seal and protect.
Outdoor Furniture
Outdoor furniture can look amazing with chalk paint. Pick weather-resistant wax or sealant to keep paint safe. Soft blues and greens blend with garden surroundings. Chalk paint works well on wood, metal, and even plastic. Refresh old garden chairs or tables for a stylish outdoor space. Repaint yearly for the best results.
Frequently Asked Questions
How To Make Paint Look Like Chalk Paint?
Mix latex paint with plaster of Paris to create a chalky texture. Apply with a brush in crisscross strokes. Let dry, then seal with wax for a matte finish.
What Is Chalk Style Furniture Paint?
Chalk style furniture paint is a matte, velvety paint that adheres well without sanding. It creates a vintage, distressed look easily.
How To Make Wood Look Distressed With Chalk Paint?
Apply a base chalk paint color and let it dry. Lightly sand edges and surfaces to reveal wood or base coat. Add a second paint color for depth. Finish with clear wax to seal and enhance the distressed look.
Is It Better To Paint Furniture With Chalk Paint Or Regular Paint?
Chalk paint offers easy application and a matte, vintage look without priming. Regular paint provides a smoother, durable finish but needs prep work. Choose chalk paint for quick, rustic styles; select regular paint for a polished, long-lasting result.
Conclusion
Painting DIY furniture in chalk style brings charm and freshness to any space. Start with simple steps and enjoy the creative process. Use light strokes and let each layer dry well. Add wax or sealant for a smooth, lasting finish.
Experiment with colors to match your style. This technique works well on old or new furniture alike. With patience, your piece will look unique and beautiful. Try it today and give your furniture a cozy, vintage feel. Small changes can make a big difference in home decor.