
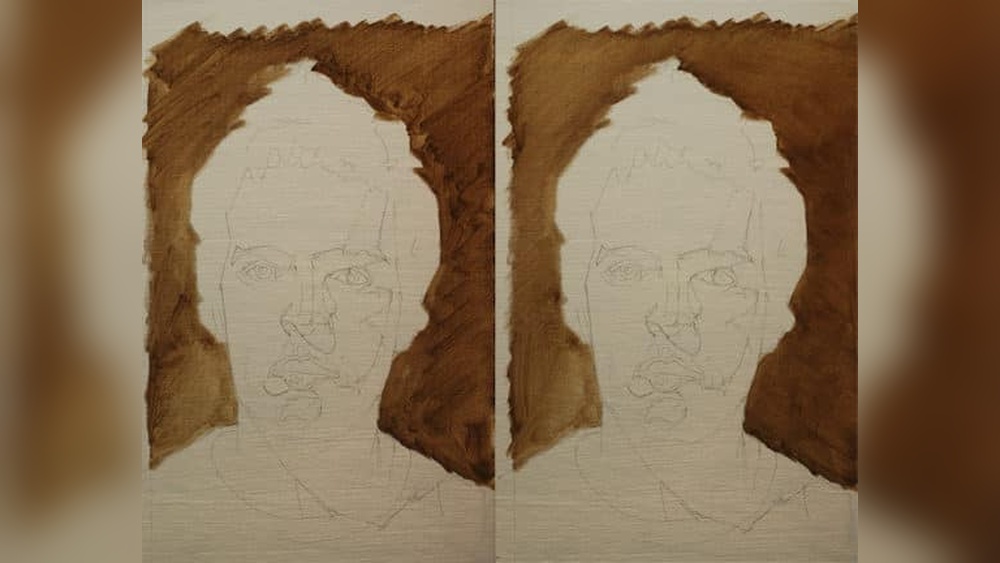
Quick answer: To paint a portrait in oil step by step: tone the canvas, draw the head with accurate proportions (eyes roughly halfway down the head, the nose about halfway between brows and chin), and make a thin monochrome underpainting of the main light and shadow shapes. Then block in big color masses for skin, hair and background, refine the features from large to small, soften and sharpen edges deliberately, and finish with highlights and accents. Work thin to thick, fat over lean.
Portraits feel intimidating because we are all experts at reading faces. A slightly misplaced eye or an overly dark shadow is instantly noticeable. The good news is that a reliable, step-by-step process removes most of the guesswork and lets you focus on one problem at a time.
This guide shows how to paint a portrait in oil step by step, with proportions, a beginner palette, skin tone mixing, the full painting sequence, edge control and common mistakes. For guidance on choosing colors and paint quality for skin, see our guide to the oil paints that suit portrait work.
Materials for Oil Portrait Painting
- Canvas or panel, 11 x 14 or 12 x 16 inches is a comfortable size for a life-size or slightly smaller head
- Oil paints (see palette below)
- Odorless mineral spirits for thinning early layers and cleaning
- A painting medium (such as linseed oil or an alkyd medium) for later layers
- Brushes: medium and small filberts (sizes 2 to 8), a few flats, a small round for details, a soft blending brush
- Palette knife and a palette with plenty of mixing space
- Rags or paper towels
- Reference: a well-lit photo with clear light and shadow, or a live sitter
- A mirror for checking the painting in reverse
A Beginner-Friendly Portrait Palette
Many portrait painters use a limited palette to keep skin tones harmonious. A popular option is the Zorn-style palette and its expanded variations.
| Palette | Colors | Why use it |
|---|---|---|
| Limited (Zorn-style) | Titanium white, yellow ochre, cadmium red light (or vermilion hue), ivory black | Harmonious, natural skin tones; black acts as a cool blue in mixes |
| Expanded | Add burnt sienna, raw umber, ultramarine blue, alizarin crimson or a permanent alternative | More range for cool shadows, deeper skin tones and backgrounds |
| Full | Add cadmium yellow light, viridian or phthalo green, cerulean blue | Saturated accents, complex lighting, varied backgrounds |
Starting with a limited palette teaches you to see skin in terms of value, temperature and saturation rather than reaching for a tube labeled “flesh.”
Portrait Proportions to Know
Faces vary, but these average guidelines help you place features before refining them to your subject:
- Eyes: roughly halfway between the top of the head and the chin. Beginners often place them too high.
- Eye spacing: about one eye-width apart.
- Nose: the bottom sits about halfway between the brow line and the chin.
- Mouth: the line between the lips sits about one-third of the way from the nose to the chin.
- Ears: top aligns roughly with the brow, bottom with the base of the nose.
- Width of the mouth: corners often align roughly with the pupils.
Always measure your actual subject. These rules are starting points, not formulas.
How to Paint a Portrait in Oil: Step-by-Step
Step 1: Tone the canvas
Apply a thin wash of burnt sienna or raw umber thinned with mineral spirits and wipe it back to a mid-light tone. A toned surface makes it easier to judge skin values, which are usually darker than they appear against white canvas.
Step 2: Draw the head
With thinned paint or charcoal, draw the overall egg shape of the head and the tilt of the face. Mark a center line and the lines for the eyes, nose base and mouth. Indicate the hairline, ears and neck.
Compare angles and distances constantly. Measuring with a brush handle held at arm’s length helps check proportions.
Step 3: Map the shadow shapes
Squint at your subject to simplify. Draw the shapes of the main shadows: under the brow, along the side of the nose, beneath the nose and lower lip, under the chin, and on the shadow side of the face. These shapes, more than outlines, will define the likeness.
Step 4: Monochrome underpainting
Fill in the shadow shapes with a thin, transparent mix of burnt umber or raw umber. Wipe out lighter areas with a rag. When finished, the underpainting should read like a sepia photograph of the head. This stage lets you confirm drawing and values before adding color.
Step 5: Block in the background
Paint the background around the head with a thin layer. Establishing the background early helps you judge skin tone and edges, because colors are always relative to their surroundings.
Step 6: Block in skin tones in big masses
Mix three main skin values: a light, a mid-tone and a shadow. Paint these broad areas first, using a filbert, without worrying about features. Keep shadow areas relatively thin and transparent, and light areas slightly thicker.
Step 7: Add the halftones and temperature shifts
Between light and shadow lies the halftone, where the form turns. Faces also shift in color across zones:
- Forehead: often slightly more yellow or golden.
- Cheeks, nose and ears: often warmer and redder, due to blood vessels near the surface.
- Jaw and chin: often cooler, with bluish or greenish hints, especially on men with facial hair.
These shifts are subtle. Push them gently.
Step 8: Refine the features, large to small
Work on the eye sockets before the eyes, the nose’s planes before the nostrils, and the mouth’s shape before the lips’ edges. Always build features from the surrounding structure.
- Eyes: the eyeball is a sphere; the white of the eye is rarely pure white and is usually shaded, especially at the corners. The upper lid casts a shadow on the eye.
- Nose: think of it as planes (bridge, sides, ball, wings). Avoid outlining nostrils; paint them as dark accents with soft edges.
- Mouth: the upper lip often faces down and is darker; the lower lip faces up and catches light. The corners are often soft.
Step 9: Paint the hair
Paint hair as a mass with light, shadow and halftones, not individual strands. Add a few strands only at the edges and where the light hits. Soften the hairline where it meets the forehead.
Step 10: Edge control
Edges create focus and realism:
- Sharp edges: near the focal point, often around the eyes, and where strong contrast occurs.
- Soft edges: where forms turn gradually, such as the cheek’s shadow edge.
- Lost edges: where the head merges with a background of similar value.
Step 11: Highlights and accents
Add the brightest highlights last: the catchlight in the eyes, the tip of the nose, the lower lip, the forehead. Use thicker paint. Add darkest accents in the nostrils, corners of the mouth and where the eyelids meet.
Step 12: Step back and assess
Look at the portrait in a mirror or photograph it in black and white. Check proportions, values and likeness. Make targeted corrections rather than repainting everything.
Mixing Skin Tones in Oil
| Skin tone | Starting mix (light area) | Shadow mix |
|---|---|---|
| Fair | White + yellow ochre + small amount of cadmium red light | Add raw umber or a touch of ultramarine and burnt sienna |
| Medium | White + yellow ochre + burnt sienna + touch of red | Add burnt umber and a little ultramarine |
| Olive | White + yellow ochre + raw umber + touch of green | Add raw umber and ultramarine |
| Deep | Burnt sienna + burnt umber + touch of white and red | Burnt umber + ultramarine; cool highlights with blue-tinted white |
Skin tones are always relative. Adjust mixes by comparing them directly against your subject, holding your loaded palette knife near the reference.
Oil Painting Techniques for Portraits
Direct painting (alla prima)
Paint the portrait in one session while the paint is wet. Fresh and lively, but requires confident decisions.
Indirect painting (layering)
Build the portrait in multiple dried layers: underpainting, dead coloring, refinement and glazes. Slower but allows high refinement.
Glazing
Thin transparent layers over dried paint can adjust color temperature, deepen shadows or unify skin tones.
Scumbling
Thin, semi-opaque light paint over darker dried layers can soften transitions and create luminous skin effects.
Oil Painting Portrait Tips for Beginners
- Use bigger brushes longer than you think.
- Keep shadows thin and transparent, lights thicker and opaque.
- Do not outline features. Use value and edge changes instead.
- Clean brushes between light and shadow mixes to avoid muddy skin.
- Compare constantly: is this area lighter or darker, warmer or cooler than that one?
- Paint from good reference with a clear light source, ideally one main light from the side and above.
For more focused advice on refining your portrait work, our article on tips for painting portraits with oil paints goes deeper into specific challenges.
Lighting Your Subject
The lighting on your sitter or in your reference photo determines how readable the portrait will be. A single light source placed to the side and slightly above the head, often called “Rembrandt lighting” when it creates a small triangle of light on the shadow-side cheek, gives clear planes of light and shadow that are easier to paint than flat frontal light. Avoid photos taken with on-camera flash, which flatten form and produce harsh highlights. If you paint from life, keep the light in a fixed position for every session so shadows stay consistent.
Common Mistakes
- Eyes placed too high. Check that they sit near the middle of the head.
- Skin tones too pink or orange. Neutralize with a touch of green or gray.
- Shadows too dark or black. Use warm, transparent darks with color.
- Overblended skin. Results in a plastic look. Leave some brushwork and varied edges.
- Detail too early. Painting eyelashes before the eye socket is right wastes time.
- Neglecting the background. It affects how skin colors read.
Oil Pastels and Portraits
Some beginners ask how oil pastels compare for portraits. Oil pastels are a different medium: they are sticks of pigment bound in wax and oil, used directly on paper or board. They are good for quick, vivid color studies and practicing value and color relationships before committing to oil paint. However, they do not blend or layer like oil paint and are harder to use for fine detail. Many artists use oil pastel sketches as preparatory studies and then paint the final portrait in oils.
FAQs
How do you oil paint a portrait for beginners?
Tone the canvas, draw the head with basic proportions, create a monochrome underpainting, block in big masses of skin color, refine features from large to small, then add edges, highlights and accents. A limited palette makes skin tones easier.
What colors do you need for oil portrait painting?
A limited palette of titanium white, yellow ochre, cadmium red light and ivory black can produce a wide range of skin tones. Adding burnt sienna, raw umber, ultramarine blue and alizarin crimson expands your options.
How long does it take to paint an oil portrait?
A small alla prima portrait can take a few hours. A layered, refined portrait may take weeks because each layer needs to dry before the next.
Why do my oil portraits look muddy?
Muddy skin usually comes from overmixing, dirty brushes, or mixing complements carelessly. Keep separate brushes for light and shadow mixes and mix fewer colors at once.
Should I paint portraits from photos or life?
Both are valuable. Life painting trains your eye for subtle color and form. Photos are convenient and allow longer work. Choose photos with clear lighting and avoid flash.
What brushes are best for oil portraits?
Filberts are popular for portraits because they make soft, rounded strokes. Flats help with planes and sharp edges, and small rounds work for details like eyes and hair.
Final Thoughts
Painting a portrait in oil step by step is far more manageable when you separate the problems: drawing, values, color, then edges and details. Use a limited palette, keep shadows thin and lights thick, and refine features from large to small. Each portrait you paint will build your eye and your confidence.
Choosing the right colors makes mixing skin tones easier and more natural. See our guide to the best oil paints for portraits before building your portrait palette.





One Comment