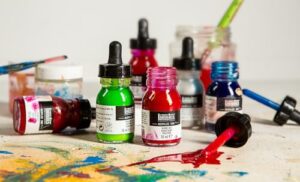
Quick answer: To paint Starry Night in acrylic, sketch the main shapes (cypress on the left, village and hills along the bottom, moon top right, swirling sky), block in flat base colors in dark-to-light order, then build the sky with short, curved, directional strokes of blues, whites and yellows. Add the stars and moon as thick yellow-white halos, darken the cypress with layered greens and browns, and finish with small highlight strokes. Use heavy-ish paint with little water so each stroke keeps its texture, just as Van Gogh’s did.
Van Gogh painted The Starry Night in June 1889 while staying at the asylum in Saint-Rémy-de-Provence. The original, now at the Museum of Modern Art in New York, is oil on canvas, but its energetic brushwork translates beautifully into acrylic. Learning how to paint Starry Night in acrylic is one of the best exercises for understanding directional strokes, color temperature and visible texture.
This tutorial breaks the painting into manageable stages with a color list, canvas size suggestions and the specific stroke patterns that give the sky its movement. You do not need to copy every mark. The aim is to capture the rhythm and glow of the original.
Before You Start: What Makes Starry Night Work
Spending a few minutes studying a good reproduction pays off. Notice these features:
- Everything is made of strokes. There are almost no smooth blends. The sky, hills and cypress are built from short, distinct dashes of color laid side by side.
- Strokes follow form. In the sky they curl and swirl; in the hills they roll; in the cypress they flicker upward like flames.
- Warm against cool. Yellow stars and moon glow because they sit against deep blues. That contrast drives the whole image.
- Halos around lights. Each star is surrounded by concentric rings of lighter color, giving a pulsing effect.
- A dark vertical anchor. The cypress on the left balances the busy sky and leads the eye upward.
Materials
Surface
The original is roughly 29 x 36 inches, about a 4:5 proportion. For a manageable acrylic version, choose 11×14 or 16×20 inches. Both are close to the original’s shape. A stretched canvas or a sturdy canvas panel both work.
Brushes
- Large flat (about 1 inch) for blocking in
- Medium flat or bright (#8 to #10) for sky strokes
- Medium filbert (#6 to #8) for curved strokes and the cypress
- Small round (#2 to #4) for stars, windows and details
- Optional: small palette knife for thick halos
Paint colors
| Color | Use |
|---|---|
| Ultramarine blue | Deep sky, shadows, dark swirls |
| Phthalo blue or Prussian blue | Intense darks and blue-green sky passages |
| Cerulean or cobalt blue (or a light blue mix) | Lighter sky strokes |
| Titanium white | Mixing tints, highlights |
| Lemon or cadmium yellow light | Stars, moon, bright accents |
| Yellow ochre | Warm halos, village lights, muted greens |
| Cadmium orange or a red-yellow mix | Moon center and warm accents |
| Sap green or a mixed green | Hills, cypress, blue-green sky notes |
| Burnt umber | Cypress darks, village roofs, darkening blues |
| Mars black (optional) | Deepest cypress shadows, used sparingly |
A starter acrylic set with a broad range of colors covers most of this list. If you are working from a set, our review of the Fantastory acrylic paint set for beginners and hobby painters looks at whether it includes the blues and yellows a project like this needs.
Other supplies
- Palette (a stay-wet palette helps acrylics stay workable longer)
- Two water containers and paper towels
- Pencil or white charcoal for sketching
- Spray bottle to mist paint on the palette
- Printed reference image
Step 1: Tone the Canvas
Brush a thin wash of ultramarine blue mixed with a little burnt umber across the whole canvas. This removes the white, makes gaps between strokes less obvious, and gives you a dark foundation that makes later yellows sing. Let it dry fully, about 10 to 20 minutes for a thin acrylic layer.
Step 2: Sketch the Composition
Use white charcoal or a light pencil line. Keep it loose; you are placing big shapes, not drawing details.
- Horizon: draw the line of hills about a third of the way up from the bottom, rolling gently from left to right.
- Cypress: sketch a tall flame-like shape on the left, rising from the bottom edge almost to the top of the canvas and taking up about a fifth of the width.
- Village: block the village as small rectangles and triangles in the lower middle, with a church spire pointing up near the center.
- Moon: a circle in the top right corner with a crescent inside it.
- Stars: mark about eleven circles scattered across the sky. Vary their sizes.
- Swirl: draw the large S-shaped swirl that moves across the center of the sky, from left to right, with a big spiral in the middle.
Step 3: Block In Base Colors
Lay flat base colors before any textured strokes. Work dark to light.
- Cypress: dark mix of burnt umber, sap green and a touch of ultramarine.
- Hills: deep blue-green, made from ultramarine, phthalo and a little green.
- Village: dark blues for buildings, with burnt umber for roofs.
- Sky: mid ultramarine blue lightened with a little white.
- Moon and stars: a flat yellow ochre base inside each circle.
Do not worry about neatness. These colors will mostly be covered, but they establish the value structure: darkest at the cypress and village, mid-tones in the sky, lightest at the stars.
Step 4: Paint the Swirling Sky
This is the heart of the painting and takes the longest. Keep paint fairly thick, use little or no water, and let each stroke stay visible.
Stroke technique
- Load a flat or filbert brush with two colors at once, for example dark blue on one side and a lighter blue on the other, so each stroke carries variation.
- Make short strokes, about the length of your thumb, following a curve. Lift the brush at the end of each stroke rather than dragging back.
- Place strokes side by side, like tiles, not on top of each other in a blend.
Building the sky in order
- Dark band: start at the top and around the edges with the darkest blues, following gentle horizontal curves.
- Main swirl: paint the central S-curve using lighter blues and blue-whites, with strokes following the direction of the swirl. In the central spiral, curl strokes inward toward the middle.
- Blue-green notes: add strokes of blue mixed with a touch of green or yellow ochre to break up the blue, especially near the swirl and along the hills.
- Lighter accents: sprinkle strokes of pale blue and white along the swirl edges to suggest movement and glow.
- Around the stars: leave space for halos; paint strokes that circle each star in rings.
Mist your palette regularly so the paint does not dry while you work. If an area dries too fast to layer wet-into-wet, simply add the next strokes on top once dry. Van Gogh’s sky is full of overlapping marks, so that works naturally.
Step 5: Paint the Stars and Halos
- Core: paint the center of each star with bright yellow mixed with a little white.
- First ring: around the core, add a ring of yellow ochre or soft yellow.
- Second ring: add a ring of pale blue-white or pale green-yellow strokes circling the star.
- Outer ring: blend into the sky with a ring of lighter blue strokes.
- Texture: for a thicker, impasto feel, apply the core and first ring with a palette knife or a heavily loaded brush.
Vary the sizes. A few large stars and several smaller ones create depth. The bright star just to the right of the cypress, usually identified as Venus, is one of the largest and brightest.
Step 6: The Moon
Paint the crescent in bright yellow with a hint of orange at its core. Surround the moon with a glowing disk of yellow ochre and pale yellow strokes, then add rings of pale blue and white around it, just as with the stars but larger. The moon should be the warmest, brightest point in the upper right.
Step 7: Hills and Village
Hills
Use rolling strokes that follow the curve of the hills. Mix dark blue with green for the base, then add lighter blue and blue-green strokes along the top edges where the sky light catches them.
Village
- Paint buildings in dark blues with simple, blocky strokes.
- Add roofs in darker blue-gray or burnt umber.
- Paint the church spire as a tall, thin dark shape pointing upward.
- Add windows as small dots or dashes of yellow ochre and yellow with a small round brush.
- Outline a few buildings loosely with a darker line, which echoes the drawn quality of the original.
Step 8: The Cypress
The cypress should feel like a dark flame. Use a filbert brush and make long, curved strokes that move upward and twist slightly.
- Start with the darkest mixes of burnt umber, green and blue.
- Add strokes of deep green, then slightly lighter green on the right edges where moonlight might catch.
- Add a few warm brown and ochre strokes to suggest the branches.
- Let the top of the cypress break into thin, flickering tips that reach into the sky.
Step 9: Final Highlights and Adjustments
Step back several feet and compare with the reference.
- Add extra white or pale blue strokes where the sky needs more glow.
- Strengthen dark outlines around shapes that look blurry.
- Brighten star cores with a final dab of yellow-white.
- Check the overall balance: the swirl should lead the eye across the sky; the cypress and moon should frame it.
Common Mistakes and How to Fix Them
The sky looks blended and soft
Too much blending or too much water. Use thicker paint, shorter strokes, and stop blending on the canvas.
Colors look flat
Probably too few variations of blue. Add strokes with a touch of green, white or ochre to break up large blue areas.
The stars do not glow
They need more contrast. Darken the sky around them slightly and make the halos lighter and more defined.
Muddy greens in the cypress
Overmixing complements creates mud. Keep cypress mixes simple and layer separate strokes rather than blending.
Paint dries too fast
Use a stay-wet palette, mist the palette, work in sections, and consider an acrylic retarder medium in small amounts following the label.
How Long Does This Painting Take?
On an 11×14 canvas, many hobby painters complete a Starry Night study in three to five hours over one or two sessions. A 16×20 canvas with more detailed strokes can take longer. Allow the sky the most time, because it contains the most strokes.
Variations to Try
- Palette knife version: build the entire sky with knife strokes for heavier texture.
- Limited palette: use only ultramarine, yellow ochre, white and burnt umber for a quieter, more unified version.
- Your own town: keep the sky and cypress but replace the village with your own street or skyline.
- Small format: paint a 5×7 or 8×10 version as a gift card or ornament.
FAQs
Is Starry Night hard to paint in acrylic?
It is approachable for beginners because it relies on visible strokes rather than smooth realism. The main challenge is patience with the many sky strokes.
What colors do I need to paint Starry Night?
Ultramarine and a darker blue, a light blue, titanium white, yellow, yellow ochre, orange, a green and burnt umber cover the painting.
What size canvas is best for a Starry Night copy?
An 11×14 or 16×20 canvas works well because both are close to the original’s proportions and large enough for expressive strokes.
Did Van Gogh paint Starry Night in acrylic?
No. Acrylic paint did not exist in 1889. The original is oil on canvas, but acrylics can recreate the brushwork well.
How do you make acrylic look like Van Gogh’s brushstrokes?
Use thick paint with little water, load the brush with two colors, make short directional strokes and avoid blending them together on the canvas.
Can kids paint Starry Night?
Yes. Simplify it to the swirl, a few stars, the moon and the cypress. Older kids often enjoy the stroke-by-stroke approach.
Final Thoughts
Painting Starry Night in acrylic teaches you to think in strokes, to use warm and cool contrast, and to let texture carry energy. Keep paint thick, follow the direction of each form and resist blending. If you need a full palette to tackle it, see our detailed breakdown of the Fantastory acrylic paint set and its color range.