Are you ready to bring your acrylic paintings to life with beautiful, realistic trees? Painting trees can seem tricky, but with the right steps, you can create stunning artwork that captures their natural beauty.
In this guide, you’ll discover simple, clear techniques to paint trees with acrylics, even if you’re a beginner. By following these step-by-step instructions, you’ll gain confidence and improve your skills quickly. Keep reading, and soon you’ll be turning blank canvases into vibrant landscapes full of life.
Choosing The Right Materials
Choosing the right materials is the first step to painting beautiful trees with acrylic. Good supplies make your work easier and your painting better. You need to pick paints, brushes, and surfaces carefully. Each choice affects your painting style and final look.
Selecting Acrylic Paints
Use high-quality acrylic paints for bright colors and smooth blending. Choose colors like green, brown, yellow, and white for natural tree tones. Buy tubes or bottles that offer thick, rich paint. This helps you create texture and depth in your tree art.
Brush Types And Sizes
Pick brushes with firm, synthetic bristles made for acrylic paint. Use small round brushes for fine details like branches and leaves. Flat brushes work well for covering large areas like the tree trunk and background. Have different sizes ready to make your painting easier and more precise.
Canvas And Paper Options
Choose canvas or acrylic paper designed to hold acrylic paint well. Canvas gives a textured surface and lasts long. Acrylic paper is smooth and good for practice or quick sketches. Pick a size that fits your painting space and comfort. Always prepare your surface with a primer for best results.
Credit: www.youtube.com
Preparing Your Workspace
Preparing your workspace is the first step to painting trees with acrylic. A clean, well-organized area helps you focus and work faster. It reduces distractions and makes painting more enjoyable. Getting your space ready sets a strong base for your art.
Setting Up Your Painting Area
Choose a flat surface like a table or easel for painting. Make sure it is stable and easy to reach. Cover it with old newspapers or a plastic sheet. This protects your workspace from paint spills. Keep your area neat to avoid accidents.
Organizing Supplies
Gather all your painting tools before starting. Place brushes, paints, water cups, and palettes within arm’s reach. Group similar items together for quick access. Clean brushes before using new colors. This saves time and keeps colors pure.
Lighting And Comfort Tips
Good lighting shows true colors and details. Use natural daylight or a bright white lamp. Avoid harsh shadows on your canvas. Sit on a comfortable chair with good back support. Take breaks to stretch and relax your eyes.
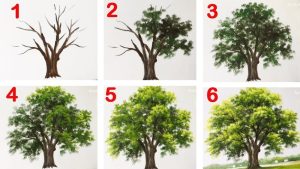
Sketching The Tree Outline
Sketching the tree outline is the first step in painting trees with acrylic. It sets the foundation for the entire artwork. A good sketch guides your brush and helps capture the tree’s shape and form. Taking time to sketch carefully makes painting easier and more accurate.
Start with simple shapes and light lines. This keeps the sketch flexible for changes. Focus on the tree’s main structure before adding details. A clear outline ensures your tree looks natural and balanced on the canvas.
Basic Tree Shapes
Most trees can be broken down into simple shapes. Use circles, ovals, and triangles to represent leaves and branches. The trunk often looks like a rectangle or a slightly curved line. These shapes help you see the tree clearly and plan your painting.
Think of the tree as a combination of these shapes. This makes it easier to sketch quickly. Avoid drawing every leaf or branch at this point. Capture the overall form and size first.
Positioning On Canvas
Decide where the tree will stand on your canvas. Place it so the composition feels balanced. The tree should not be too close to edges or too small. Consider the background and other elements around it.
Draw light guidelines for the ground and horizon. This keeps the tree grounded and realistic. Good positioning creates a pleasing and natural scene.
Using Pencils For Light Sketches
Use a soft pencil, like 2B or 4B, for sketching. These pencils make light lines that are easy to erase. Avoid pressing too hard to keep the sketch faint. Light sketches help prevent paint from cracking later.
Sketch gently and build up shapes slowly. This allows easy corrections and adjustments. Clean, light lines give you a smooth start for painting your tree.
Painting The Tree Trunk
Painting the tree trunk is a key part of creating a realistic tree. The trunk gives the tree its structure and depth. You need to focus on colors, textures, and light to make it look natural. This section explains how to paint the trunk step by step using acrylic paint.
Mixing Brown Shades
Start by mixing different brown shades for the trunk. Use colors like burnt sienna, raw umber, and a little black. Mix small amounts of white to create lighter browns. Test the colors on a scrap paper to see how they look. This mix helps create the base color of the trunk.
Creating Texture With Brush Strokes
Use a dry brush technique to add texture to the trunk. Lightly drag your brush downwards to mimic bark patterns. Vary the pressure to make rough and smooth areas. Use different brush sizes for fine details and bigger shapes. Texture gives the trunk a more natural and rough look.
Adding Shadows And Highlights
Shadows add depth and make the trunk look three-dimensional. Use darker browns or a bit of black in crevices and shaded areas. Add highlights with lighter browns and touches of white on areas that catch light. Blend these softly for smooth transitions. Shadows and highlights bring the trunk to life.
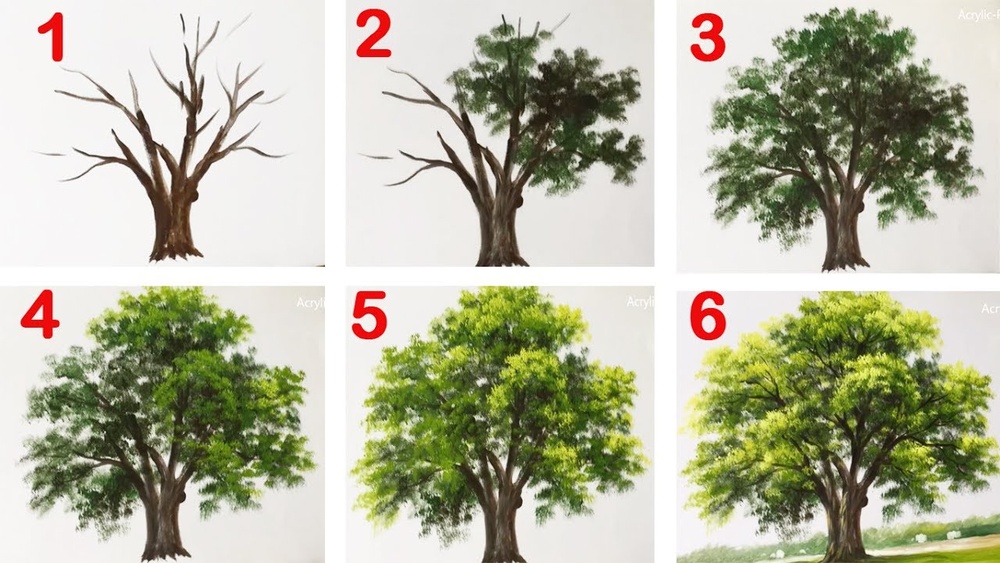
Adding Branches And Twigs
Adding branches and twigs brings life to your acrylic tree painting. These small details create depth and realism. They help the tree look natural and full. The right technique makes a big difference. Focus on how to paint them carefully for best results.
Layering Techniques
Start with thicker branches using a darker paint layer. Let it dry before adding thinner branches on top. Use lighter colors for upper layers. This method builds depth and shows branch structure clearly. Layering makes branches appear closer or farther from view. It adds texture and complexity to your painting.
Using Thin Brushes
Select thin brushes for fine branches and twigs. These brushes allow precise strokes. Hold the brush lightly and use gentle movements. Avoid pressing hard to keep lines thin. Thin brushes help create delicate, natural-looking twigs. They add detail without cluttering the painting.
Varying Branch Thickness
Paint branches with different thicknesses for a realistic look. Start with thick branches at the base. Gradually make branches thinner as they spread out. Twigs should be the thinnest. This variation mimics real tree growth. It also makes the tree visually interesting and balanced.
Credit: www.craftsy.com
Painting Leaves And Foliage
Painting leaves and foliage adds life to your tree artwork. It brings color and texture to the branches. Using acrylic paints, you can create natural and vibrant leaves. This part of the painting makes the tree look full and real.
Focus on the shapes, colors, and light effects. Small details make a big difference. Follow these steps to paint leaves and foliage with ease.
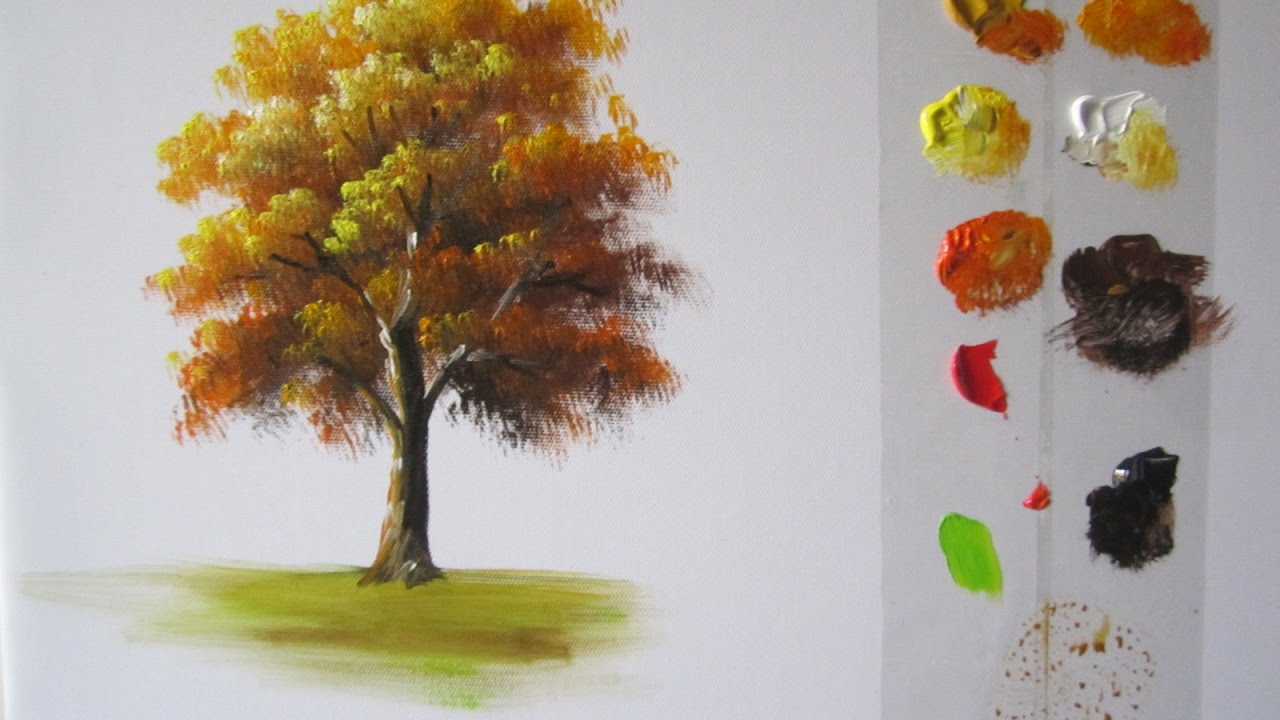
Mixing Green Tones
Start by mixing different greens. Use blue and yellow as base colors. Add small amounts of white to lighten the green. For darker shades, add a bit of black or brown. Mix enough paint to cover the leaf areas. Try to create at least three green tones for variety.
Applying Leaf Patterns
Use a small brush to paint leaf shapes. Dab the brush lightly to create texture. Paint clusters of leaves instead of single ones. Vary the size and direction for a natural look. Leave some spaces to show light passing through. Avoid painting every leaf exactly the same.
Creating Depth With Light And Shadow
Add lighter green or yellow to show light on leaves. Use darker greens or browns for shadow areas. Paint shadows under leaf clusters and near branches. This contrast gives the tree a three-dimensional feel. Blend colors softly to avoid harsh lines. Depth makes the foliage look rich and alive.
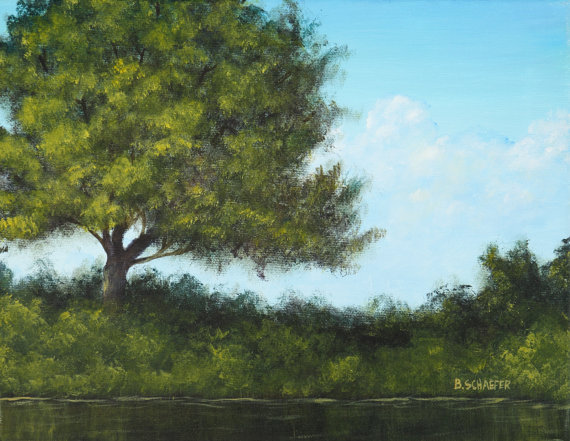
Enhancing Background Elements
Enhancing background elements in your acrylic tree painting adds depth and interest. The background sets the scene and supports the main subject. Careful attention to the sky, horizon, and ground creates a balanced composition. These details help the trees stand out and make the painting feel alive.
Sky And Horizon Tips
Start with a smooth gradient for the sky. Use light blue at the top and fade to white near the horizon. This creates distance and space. Paint soft clouds with gentle brush strokes to avoid harsh lines. Keep the horizon low to give more room for the trees. Light colors here make the trees pop.
Ground And Surroundings
Use darker and earthy colors for the ground. Browns, greens, and ochres work well. Add texture with small brush strokes to suggest grass or dirt. Place shadows under the trees to anchor them. Small plants or rocks add interest without distracting from the main trees. Keep the details subtle to maintain focus.
Blending Techniques
Blend colors smoothly to avoid sharp edges. Use a dry brush or soft brush to soften transitions. Blend sky and horizon colors gently for a natural look. On the ground, blend shadows softly into light areas. Blending creates a sense of unity and realism in the painting. It also helps the background support the trees without stealing attention.

Credit: colorbyfeliks.com
Final Touches And Details
Final touches bring your tree painting to life. They add depth and realism. Details make your artwork stand out. This part needs patience and a steady hand. Small changes can make a big difference.
Adding Highlights
Use a lighter color to add highlights on leaves and branches. This shows where the light hits. It creates a 3D effect. Dab the paint gently with a small brush. Focus on edges and tips of branches. Highlights give your tree a fresh, vibrant look.
Correcting Mistakes
Check your painting for any mistakes or rough spots. Use a clean, damp brush to soften unwanted lines. Let the paint dry before fixing big errors. You can paint over mistakes with the base color. Take your time; fixing errors improves the final result.
Sealing Your Painting
Seal your work to protect it from dust and damage. Use a clear acrylic varnish for a smooth finish. Apply thin layers with a soft brush. Allow each layer to dry completely. Sealing preserves colors and keeps your painting looking fresh for years.
Common Mistakes To Avoid
Painting trees with acrylic can be fun and rewarding. Many beginners make simple mistakes that affect their results. Avoiding these errors helps your painting look more natural and vibrant. Focus on key points to improve your technique and enjoy the process more.
Overworking The Paint
Too much brushing can spoil your painting. Acrylic dries quickly, so keep your strokes light. Overworking makes the paint muddy and dull. Let layers dry before adding details. This keeps colors fresh and clear.
Ignoring Light Source
Light affects how trees look in your painting. Decide where the light comes from before you start. Paint shadows and highlights to add depth. Without light direction, trees look flat and fake.
Using Too Much Water
Acrylic paint mixes well with water, but too much weakens it. Thin paint loses color strength and control. Use small amounts to keep vibrant colors. Thick paint helps create texture and detail.
Tips For Practice And Improvement
Improving your tree painting skills takes time and practice. Small steps help build confidence and technique. Focus on simple exercises and learn from each attempt. Patience and curiosity are key to progress.
Experimenting With Styles
Try different painting styles to find what suits you. Use thick brush strokes for a rough look. Use thin lines for detailed branches and leaves. Mix styles to create unique effects. Experimenting helps you discover new ways to express trees.
Studying Real Trees
Observe trees closely in nature or photos. Notice leaf shapes, branch patterns, and colors. Study how light hits the tree and creates shadows. Practice copying these details in your paintings. Understanding real trees improves your art’s realism and feel.
Regular Painting Routine
Set aside time daily or weekly to paint trees. Consistent practice helps improve control and speed. Try quick sketches to capture tree shapes fast. Longer sessions allow you to add details and refine. A steady routine builds skill and keeps you motivated.
Frequently Asked Questions
What Materials Do I Need To Paint Trees With Acrylic?
You need acrylic paints, brushes, a palette, water, canvas, and paper towels. Choose various brush sizes for details and texture. Prepare a clean workspace with good lighting for best results.
How Do I Start Painting Tree Trunks In Acrylic?
Begin with a base color using a medium brush. Add darker shades for shadows and lighter tones for highlights. Use vertical strokes to mimic bark texture and create depth.
What Techniques Enhance Tree Foliage In Acrylic Painting?
Use dabbing or stippling with a sponge or brush to create leaves. Layer different green shades for realism. Add highlights and shadows to show light and depth.
How Long Does Acrylic Paint Take To Dry On Canvas?
Acrylic paint typically dries in 15 to 30 minutes. Drying time depends on paint thickness and environmental conditions. Thin layers dry faster, allowing quick layering.
Conclusion
Painting trees with acrylic becomes easier with each step you try. Start with simple shapes and build details slowly. Use the right colors to show light and shadow well. Practice helps you create more natural and lively trees. Keep your brush strokes loose and enjoy the process.
Soon, your paintings will look full of life and depth. Keep experimenting and learning new techniques. Remember, every painting teaches something new. Your trees will grow more beautiful over time. Just paint, have fun, and watch your skills improve.