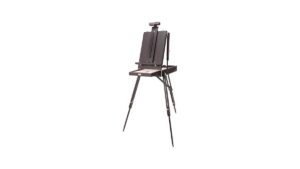
A French easel arrives looking like a compact wooden suitcase, and then reveals three legs, a drawer, a palette, a sliding mast and more wing nuts than seems strictly necessary. It is one of the most versatile easels ever designed, combining storage, a palette and a sturdy tripod in one box. It is also notorious for confusing first-time owners.
This guide explains how to put together a French easel step by step, from the first time you unbox it to everyday setup and packing away. It also covers the parts by name, adjustment tips, fixes for wobble and stuck legs, and how to keep the wood and hardware in good shape.
Quick answer: To put together a French easel, stand the closed box upright with the handle on top, loosen the wing nuts on the two front legs and swing them out, then pull the rear leg out to form a tripod and tighten all three. Extend each leg to the height you want and lock it. Open the lid, raise it into an upright mast and tighten its knob, slide out the drawer and set the palette on top. Finally, slide the upper canvas clamp up, place your canvas on the lower support, lower the clamp onto it and tighten.
Know the Parts Before You Start
| Part | What it does |
|---|---|
| Box body | Main frame; holds the drawer and attaches the legs |
| Lid / mast | Opens and rises to support the canvas |
| Front legs (2) | Hinged at the front corners; swing out and down |
| Rear leg (1) | Slides or swings out from the back to complete the tripod |
| Leg extensions | Inner sections that slide out to adjust height |
| Wing nuts and knobs | Lock legs, mast angle and clamps |
| Drawer | Stores paint tubes and tools; slides out the front |
| Palette | Sits on or in the drawer; often removable |
| Lower canvas support | Ledge or bracket the canvas rests on |
| Upper canvas clamp | Slides down the mast to grip the top of the canvas |
| Shoulder strap and handle | For carrying when closed |
Designs vary slightly between makers, and “half box” versions are narrower, but the sequence is very similar. If you are buying an easel for a child, a French box may be heavier and more complex than needed; our guide to the best easels for kids compares simpler adjustable options.
First-Time Unboxing Checks
- Inspect for shipping damage. Check corners, hinges and legs for cracks.
- Count the hardware. Wing nuts, washers and bolts should be attached or in a small bag. Note how many there are.
- Tighten loose screws. Hinges and drawer runners sometimes loosen during shipping. A small screwdriver fixes this.
- Test moving parts. Open and close the drawer, raise the lid and slide the leg extensions to feel how they move before standing it up.
- Read the maker’s diagram. Even a simple sketch can clarify which knob controls which part.
How to Put Together a French Easel, Step by Step
Step 1: Position the box
Stand the closed easel upright on the ground, handle on top and drawer facing you. Some people find it easier to lay the box on its back for the first time; either works. Make sure the latches are closed so the lid does not swing open unexpectedly.
Step 2: Release the front legs
- Locate the wing nuts at the top of each front leg, near the box corners.
- Loosen them a few turns, enough for the legs to swing but not so much that the nuts come off.
- Swing each front leg down and out at a slight angle. Many boxes have a natural stop where the leg sits correctly.
- Tighten the wing nuts to lock the leg angles.
Step 3: Deploy the rear leg
- Find the rear leg, usually folded flat along the back or underside of the box.
- Loosen its knob or wing nut.
- Pull the leg out and back until the easel stands as a stable tripod.
- Tighten the knob. The box should now stand on its own.
Step 4: Adjust leg height
- Loosen the knob on one leg’s extension section.
- Slide the inner leg down to the desired length. Hold the box with your other hand so it does not tip.
- Tighten the knob firmly.
- Repeat on the other legs, adjusting until the box is level and the drawer is at a comfortable height, usually around waist height for standing work.
Step 5: Open the lid and raise the mast
- Open the latches on the front of the box.
- Lift the lid up and back. The lid is the base of the canvas mast.
- Find the knob on the side or back that sets the mast angle; tighten it with the mast vertical or slightly tilted back.
- If the mast has a sliding extension, loosen its knob, raise it to suit taller canvases and tighten.
Step 6: Open the drawer and palette
- Slide the drawer forward. Many drawers lock in an open position or rest on runners.
- Lift out the palette, add paint, and place it back on top of the drawer, or set it on the open drawer frame depending on the design.
Step 7: Mount the canvas
- Set the lower canvas support at the right height. On many French easels, the bottom edge of the lid acts as the support.
- Loosen the upper clamp knob and slide the clamp up the mast.
- Place your canvas on the lower support, leaning against the mast.
- Slide the clamp down until it grips the top edge of the canvas, then tighten the knob.
- Give the canvas a gentle tug to check it is secure.
Tips for a Smoother First Assembly
- Work on a flat floor rather than carpet or grass the first time, so you can see clearly when the box is level.
- Loosen, move, tighten one part at a time. Loosening every knob at once is the fastest way to have the whole easel sag sideways.
- Mark your favorite height. A small pencil line or piece of tape on each leg extension lets you hit the same height every time.
- Keep the drawer closed until the legs are locked; an open, loaded drawer shifts the balance forward.
Adjusting for Different Painting Styles
| Style | Adjustment |
|---|---|
| Standing oil or acrylic painting | Legs long, mast vertical, canvas center near eye level |
| Seated painting | Legs shortened, mast slightly back, palette close |
| Watercolor | Many French easels allow the mast to tilt toward horizontal so washes do not run |
| Large canvas | Raise mast extension; spread legs wider; add weight under the box |
| Small panel studies | Lower the clamp; keep the box at a comfortable working height |
How to Pack a French Easel Away
- Remove the canvas. Loosen the clamp, lift the canvas off and place it in a wet panel carrier if needed.
- Clean the palette. Scrape excess paint or cover the palette, then set it back in the drawer.
- Close the drawer. Make sure tubes and tools sit flat so it slides shut.
- Lower the mast. Retract the extension, loosen the angle knob and fold the lid back down onto the box. Close the latches.
- Retract the legs. Loosen each extension knob, slide the inner sections up and lightly retighten.
- Fold the legs. Loosen the front leg wing nuts and swing the legs back up alongside the box. Fold the rear leg in. Lightly snug all knobs.
- Attach the strap. Check the strap clips before lifting.
Troubleshooting Common French Easel Problems
| Problem | Likely cause | Fix |
|---|---|---|
| Easel wobbles | Loose wing nuts or uneven legs | Tighten all knobs; level legs; hang weight under the box |
| Legs slide down while painting | Worn threads or knob not tight enough | Tighten firmly; replace worn wing nuts or add a washer |
| Front legs will not swing out | Wing nut too tight or wood swollen | Loosen the nut further; let damp wood dry |
| Drawer sticks | Humidity swelling or paint residue | Clean runners; rub with candle wax or paraffin |
| Mast will not stay upright | Angle knob loose or stripped | Tighten or replace the knob and bolt |
| Canvas slips | Clamp not tight or canvas too small | Tighten clamp; use a panel holder insert for small panels |
| Wing nuts keep getting lost | Nuts loosened completely during setup | Loosen only a few turns; carry spares |
French Easel vs Half Box vs Field Easel
| Feature | Full French easel | Half box easel | Aluminum field easel |
|---|---|---|---|
| Storage | Large drawer and palette | Narrower drawer | None built in |
| Weight | Heaviest | Moderate | Lightest |
| Setup complexity | Most knobs and steps | Similar but smaller | Simplest |
| Canvas capacity | Largest | Medium | Small to medium |
| Stability | Very stable when weighted | Stable | Needs weight in wind |
| Best for | Car-access painting, studio double duty | Travel with some storage | Hiking and quick studies |
The assembly steps in this guide apply closely to half box easels as well; the main difference is a smaller drawer and sometimes a simpler mast.
Practice Routine for New Owners
Set the easel up and take it down five times in a row at home before your first outdoor session. The first attempt might take ten minutes; by the fifth, most people are down to two or three. Pay attention to which wing nuts you tend to over-loosen and which leg you always forget to lock. Those small habits are what cause wobble and lost parts in the field.
Safety Tips
- Keep fingers clear of hinges and leg joints when folding; they can pinch.
- Do not lift the easel by the mast or extended legs; carry it closed by the handle or strap.
- On slopes, place one leg downhill and adjust its length so the box stays level.
- In wind, use a smaller canvas and hang weight from the box to prevent tipping.
- Supervise children closely; French easels are heavy and have many moving parts.
Care and Maintenance
- Wipe it down after each use. Paint, dust and sand can wear moving parts.
- Keep the wood dry. Let a damp easel air-dry fully before closing it up; trapped moisture can warp wood and swell drawers.
- Wax sliding parts. A light rub of paraffin or candle wax on leg extensions and drawer runners keeps them smooth.
- Check hardware regularly. Tighten loose screws, replace stripped wing nuts and keep spares in the drawer.
- Refinish occasionally. A light sanding and a coat of wood oil or finish protects older easels.
- Store upright or flat in a dry place, away from radiators and damp basements.
Is a French Easel Right for You?
French easels are a classic choice for painters who want an all-in-one kit for indoor and outdoor work. They suit oil and acrylic painters who value storage and a sturdy tripod, and they work well when you can park close to your painting spot.
They are less ideal for long hikes because of their weight, and for young children because of their size and complexity. Lighter options such as half box easels, pochade boxes on tripods or simple aluminum field easels may be better in those situations. For kids, a sturdy adjustable studio or tabletop easel is usually easier and safer.
FAQs
How do you set up a French easel?
Swing out the front legs and rear leg to form a tripod, extend and lock the legs, raise the lid as a mast, open the drawer and palette, then clamp your canvas in place.
How do you close a French easel?
Remove the canvas, close the drawer, fold down the mast and lid, retract the leg extensions, then fold the legs back against the box and lightly tighten all knobs.
Why does my French easel wobble?
Loose wing nuts and uneven leg lengths are the usual causes. Tighten every knob, level the legs and hang a weight from the box for extra stability.
What size canvas fits a French easel?
Many full-size French easels hold canvases up to roughly 30 to 34 inches tall, depending on the mast extension. Check your model’s specifications.
Can you use a French easel for watercolor?
Yes. Many French easels let the mast tilt toward horizontal, which suits watercolor washes.
Are French easels good for kids?
They can be used by older kids with supervision, but they are heavy and have pinch points. Simpler adjustable kids’ easels are usually a better choice for younger children.
Final Thoughts
Putting together a French easel follows a clear sequence: legs out, legs extended, mast up, drawer open, canvas clamped. After a few practice setups at home, it becomes second nature, and you will have a portable studio that lasts for years with simple care. If you are equipping a younger painter instead, choose something lighter and simpler from our roundup of top adjustable easels for children.