Quick answer: Here is how to start acrylic painting without wasting money or motivation: buy a small set of quality colors (white, black or a dark brown, and a warm and cool version of red, yellow and blue), three to five synthetic brushes, a few canvas panels and a stay-wet or disposable palette. Then spend your first sessions on short exercises (a value scale, a color wheel, a gradient and a simple sphere) before attempting a full painting. Small, frequent sessions beat occasional marathons.
The hardest part of starting acrylic painting is rarely the painting. It is the shopping list, the fear of wasting expensive canvas, and the gap between the picture in your head and what appears on the first panel. Most new painters either buy too much gear or jump straight into a complex landscape, get frustrated and stop.
This guide is a practical starting plan. It covers what to buy (and skip), how to set up a workspace in a small home, what to paint in your first sessions, a 30-day practice schedule and the habits that help beginners improve quickly.
Why Acrylic Is a Good First Paint
- Water cleanup. No solvents needed for painting or brush washing.
- Fast drying. You can layer and correct mistakes within minutes rather than days.
- Versatility. Thin it like watercolor, use it thick like oil, or pour it. One medium teaches many techniques.
- Low odor. Suitable for apartments and shared spaces with basic ventilation.
- Forgiving surfaces. Acrylic works on canvas, paper, wood, cardboard and more.
The main challenge is that same fast drying, which makes blending tricky at first. Simple tools like a spray bottle and a stay-wet palette solve most of it.
Beginner Acrylic Supply List
Paint
Start with a limited palette rather than a 48-color set. A limited palette teaches color mixing, which is the core skill of painting. A good starter palette:
- Titanium white (buy a larger tube; you will use the most of it)
- A warm yellow and a cool yellow (for example, a cadmium-type yellow medium and a lemon yellow)
- A warm red and a cool red (a cadmium-type red and a magenta or crimson)
- A warm blue and a cool blue (ultramarine and phthalo or cerulean)
- Burnt umber or burnt sienna
- Optional: Mars black or Payne’s gray
Quality matters more than quantity. Very cheap paints often contain more filler and less pigment, so they dry chalky and need several coats. A mid-range student or artist line in a handful of colors usually teaches more than a huge bargain set. Our guide to the best acrylic paint brands for beginners and beyond compares options by budget.
Brushes
- A 1-inch flat for backgrounds and large areas
- A medium flat (around size 8 to 10) for general painting
- A medium filbert for blending and soft shapes
- A small round (size 2 to 4) for details
- A liner or rigger for fine lines (optional)
Synthetic brushes suit acrylic well because they hold their shape when wet and handle the paint’s stickiness better than soft natural hair.
Surfaces
- Pre-primed canvas panels (8×10 or 9×12 inches) for practice paintings
- A pad of acrylic or mixed-media paper for exercises
- One or two stretched canvases for when you are ready to make a “real” piece
Other essentials
- A palette: a stay-wet palette, disposable palette paper, or a ceramic plate
- A palette knife for mixing
- Two water containers (one for rinsing, one for clean water)
- A spray bottle for misting paint
- Paper towels or rags
- An apron or old clothes
Starter Kit Budget Tiers
| Tier | What it includes | Who it suits |
|---|---|---|
| Minimal | Six-color student set, three synthetic brushes, paper pad, plate palette | Trying acrylic to see if you enjoy it |
| Balanced | Eight to ten quality colors, five brushes, canvas panels, stay-wet palette, palette knife | Committed beginners planning to paint weekly |
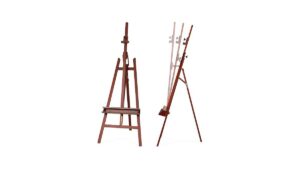
| Expanded | Balanced kit plus a few mediums (gloss medium, slow-drying medium), a tabletop easel and varnish | Beginners ready to explore glazing, blending and finishing |
You can always add colors and tools later. It is far more frustrating to own 60 tubes and not know how to mix a convincing green than to own eight and know them well.
Setting Up a Small Painting Space
- Choose good light. Natural daylight from a window (without direct sun on the canvas) is ideal. Otherwise, use daylight-balanced bulbs so colors look accurate.
- Protect the surface. Cover your table with a plastic tablecloth, kraft paper or a cheap shower curtain.
- Arrange by hand. If you are right-handed, keep the palette and water on your right so you do not reach across wet paint.
- Raise the canvas. A tabletop easel or a box behind the panel lets you paint at a slight angle, which reduces distortion compared to painting flat.
- Keep it set up. If possible, leave your space ready. Not having to unpack everything makes short sessions far more likely.
Your First Acrylic Painting Session
Do not try to make a masterpiece. Your first session is for getting to know the paint.
- Squeeze out pea-sized amounts of each color around the edge of your palette.
- Paint swatches of every color straight from the tube on a sheet of paper. Label them.
- Mix each color with white in three steps to see its tints.
- Try thin and thick strokes. Add a few drops of water to one swatch and compare with paint straight from the tube.
- Watch it dry. Notice how quickly thin paint dries and that colors darken slightly.
- Clean up properly. Wash every brush with soap and water and reshape the tips.
Six Beginner Exercises Worth Doing First
1. Value scale
Paint a row of nine squares from pure white to black (or your darkest dark), with even steps between. Values (lightness and darkness) matter more than color for making a painting read correctly.
2. Color wheel
Mix secondary and tertiary colors from your primaries. You will learn which yellow and blue make a bright green and which make a dull one.
3. Gradient blend
Blend from one color to another across a strip of paper, such as blue to white or yellow to red. This is the foundation of skies, backgrounds and soft shading.
4. Shaded sphere
Paint a circle and shade it to look three-dimensional: a highlight, a light side, a shadow side, a core shadow and a cast shadow. This teaches form, which applies to everything from apples to faces.
5. Simple landscape
Paint a sky gradient, a line of distant hills, a closer hill and a foreground. Use only three or four colors. It combines blending, value and layering.
6. Still life from life
Set a single object, such as a mug, a lemon or an egg, under a lamp and paint it. Observing real light is the fastest way to improve.
A 30-Day Acrylic Practice Plan
| Week | Focus | Suggested exercises |
|---|---|---|
| Week 1 | Knowing the paint | Swatches, value scale, color wheel, gradients |
| Week 2 | Shapes and form | Shaded spheres, cubes and cylinders; one simple fruit |
| Week 3 | Landscapes and layering | Sky gradients, silhouette sunsets, layered hills, a simple tree |
| Week 4 | Complete paintings | Two small finished paintings, one from a photo and one from life |
Aim for 20 to 45 minutes, four or five days a week. Short, regular practice builds skill faster than one long session on the weekend.
Basic Techniques to Learn Early
- Blocking in: Cover the canvas with big, simple shapes before details.
- Layering: Paint dark to light or general to specific, letting each layer dry.
- Wet-on-wet blending: Blend two wet colors quickly for soft transitions.
- Dry brushing: Use a nearly dry brush for texture such as grass or wood grain.
- Glazing: Brush a thin, transparent layer over dry paint to shift color.
Each technique becomes easier when your paint has good pigment strength and consistent body. Our Daler-Rowney acrylic paint review looks at how one beginner-friendly range performs in these techniques.
Habits That Help Beginners Improve
- Use reference. Paint from photos you took or from real objects. Painting from imagination is harder and slows learning early on.
- Squint often. Squinting simplifies a scene into big light and dark shapes, which helps you see values.
- Step back. Look at your painting from a few feet away every 10 minutes.
- Keep everything. Date your practice pieces. Comparing week one with week four is motivating.
- Copy to learn. Following tutorials or copying paintings you admire (for practice, not for sale) teaches decisions you would not think of yourself.
- Finish paintings. Even ones you dislike. Finishing teaches more than abandoning a piece halfway.
Cleaning Up After Each Session
A good cleanup routine protects your brushes and keeps the next session easy to start. It takes about five minutes.
- Wipe brushes on a paper towel to remove most of the paint.
- Rinse in lukewarm water, then lather each brush with mild soap in your palm, working toward the ferrule where paint hides.
- Rinse until clear, reshape the tip with your fingers and lay brushes flat or hang them bristles down to dry.
- Cover or scrape the palette. Close a stay-wet palette’s lid, or peel off a sheet of palette paper. Dried paint on a plastic or glass palette usually peels away after a soak.
- Dispose of paint water responsibly. Let it sit so solids settle, pour off the clear water and throw the sludge in the trash rather than sending lots of paint down the drain.
How to Pick Good Reference Photos
Beginners often choose photos that are too complicated. A good practice reference has a clear subject, strong light from one direction and a simple background. Backlit silhouettes, single objects on a plain table and landscapes with three distinct layers (sky, distance, foreground) all work well.
Use your own photos where possible. You understand the scene better, and you avoid copyright problems if you later want to share or sell the work. Converting a reference to black and white on your phone is a quick way to check whether its values are strong enough to paint.
Common Beginner Mistakes
| Mistake | What happens | Better approach |
|---|---|---|
| Buying a huge cheap set | Chalky, weak colors and little mixing practice | Fewer, better colors |
| Starting with details | Flat, disconnected paintings | Big shapes first, details last |
| Using too much water | Weak, streaky paint that may not adhere well | Small amounts of water or a medium |
| Overworking drying paint | Streaks and lifted layers | Let layers dry, then repaint |
| Starting too big | Paint dries before you can blend, and progress feels slow | Small panels, 8×10 or 9×12 |
| Letting paint dry in brushes | Ruined brushes | Rinse brushes during and after every session |
When to Upgrade Your Supplies
Upgrade when your materials, not your skills, are holding you back. Signs include colors that will not cover in two coats, brushes that will not hold a point, or paint drying on the palette faster than a stay-wet palette can handle. Replace one item at a time, beginning with the paints you use most (usually white and your favorite blue).
FAQs
What do I need to start acrylic painting?
A small set of quality acrylic colors including white, three to five synthetic brushes, canvas panels or acrylic paper, a palette, a palette knife, two water containers, paper towels and a spray bottle.
Is acrylic painting easy for beginners?
Acrylic is one of the more beginner-friendly paints because it cleans up with water and dries fast enough to correct mistakes quickly. The fast drying makes blending harder at first, but tools like a stay-wet palette help.
What should I paint first with acrylics?
Start with exercises such as a value scale, a color wheel, a gradient and a shaded sphere. Then try simple subjects like a silhouette sunset, a single fruit or a basic landscape.
Do I need an easel to start painting?
No. You can paint flat on a table or prop a panel against a box. An inexpensive tabletop easel is helpful later because painting upright reduces distortion.
Should beginners buy student or artist grade acrylics?
Either can work. Student paint is cheaper for practice, while artist paint has more pigment and mixes cleaner. Many beginners buy student colors and artist-grade white, which they use most.
How long does it take to get good at acrylic painting?
It varies by person and practice time. With short sessions several days a week, many beginners see clear improvement within a few months, especially in color mixing and blending.
Next Step
Starting acrylic painting is simpler than it looks: a limited palette, a few good brushes, small surfaces and a short daily habit. Work through the six exercises, follow the 30-day plan and finish every painting, even the ones that feel like failures.
When you are ready to choose your first tubes or replace a disappointing starter set, browse our comparison of beginner-friendly and professional acrylic paints to find colors that make learning easier.