Quick answer: Bob Ross typically painted on an 18×24 inch stretched canvas (about 45.7 x 61 cm) on The Joy of Painting, usually in landscape orientation. He covered it with a thin coat of a white wet-on-wet base before painting, which let colors blend directly on the surface. For a digital version of the same proportions, set up a 3:4 canvas, for example 7200 x 5400 pixels at 300 DPI, or 2400 x 1800 pixels for screen-only practice.
It is a surprisingly common question: what size canvas did Bob Ross use? People who paint along with old episodes want to match his compositions, and digital painters want to reproduce his proportions in an app. The answer helps with both, and it also explains a lot about why his paintings look the way they do.
This article covers the canvas he used, why that size suited his method, how to match it for traditional and digital painting, and how to adapt his compositions to other sizes. If you are setting up a digital file for this kind of landscape, our guide to the best canvas size for digital painting covers resolution and DPI choices in more depth.
The Canvas on The Joy of Painting
The standard canvas on the show was an 18×24 inch stretched canvas, generally presented horizontally so it was 24 inches wide and 18 inches tall. The proportions are 3:4, which happens to fit a television frame of that era well; older TV screens were 4:3, so the canvas filled the screen nicely in close-ups.
He did not use 18×24 for absolutely everything. Episodes occasionally featured other shapes, such as ovals or vignettes created by masking off part of a rectangular canvas with paper or tape, and there were some smaller and differently shaped works. But when people picture a classic Bob Ross landscape, the 18×24 rectangle is what they are seeing.
Multiple versions of each painting
It has been widely reported that Bob Ross painted each design more than once: a reference version before taping, the version painted on air, and often another for instructional books. Many of these paintings were reportedly donated or kept by the company that managed his work. The practical point for painters is that those 30-minute demonstrations were well rehearsed, so do not be discouraged if your first attempt takes longer.
Why 18×24 Suited His Method
Wet-on-wet needs room to move
Bob Ross used the wet-on-wet (alla prima) oil technique, laying paint into a still-wet base. Large brushes and a big palette knife need space to make sweeping strokes, so a small canvas would have constrained the method. At 18×24, a 2 inch brush can paint a whole sky in a few passes and a knife can cut convincing mountain ridges in a single stroke.
Big enough to read on camera
Viewers needed to see brushwork clearly. A medium-large canvas showed details such as happy little trees and highlights on mountain edges without needing extreme zoom.
Small enough to finish in one session
The show ran about 26 minutes per episode. An 18×24 is large enough for drama but small enough to complete a full landscape in that time with large tools and a simplified approach.
A classic landscape shape
The 3:4 ratio is wide enough for a horizon, mountains and foreground, while still leaving room for a tall tree or a dramatic sky. It is less extreme than panoramic formats, which makes composition forgiving.
The Base Coat: What Made the Canvas Work
Before starting, Bob Ross covered the entire canvas with a very thin, even layer of a slow-drying white oil base, sold under his brand as Liquid White. Its job was to keep the surface wet and slippery so subsequent colors would blend directly on the canvas. Darker variations (Liquid Black, Liquid Clear) were used for night scenes or when a white base would weaken dark colors.
If you paint along with episodes, this base coat matters as much as canvas size. Without it, wet-on-wet blending behaves very differently, and skies tend to look streaky. Apply it thinly with a 2 inch brush using criss-cross strokes, then smooth it with long horizontal strokes. Too thick a layer makes later paint slide around and turn muddy.
Matching the Bob Ross Canvas at Home
Traditional painting
- Size: 18×24 inch stretched canvas, used horizontally for most episodes.
- Surface: A pre-primed, medium-texture cotton canvas works. Smoother surfaces make blending easier for beginners.
- Depth: A standard or gallery profile is fine; it only affects framing and display.
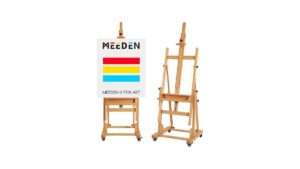
- Easel: Wet-on-wet painting with big brushes pushes on the canvas, so a sturdy easel that clamps top and bottom prevents wobble.
- Base coat: A thin white wet-on-wet base or a similar slow-drying medium.
Digital painting
Digital artists who want the same proportions should set up a 3:4 landscape canvas. A few options:
| Purpose | Canvas size (pixels) | DPI | Notes |
|---|---|---|---|
| Full print-quality 18×24 | 7200 x 5400 | 300 | Large file; prints at actual size with high detail |
| Print at moderate quality | 3600 x 2700 | 150 | Good for canvas prints viewed from a distance |
| Practice and screen sharing | 2400 x 1800 | Any | Light, fast brushes on most devices |
| Quick sketches | 1600 x 1200 | Any | Fast and responsive on tablets |
One common confusion here is between canvas size and image size. Canvas size in an app is the workspace; image size includes pixel count and resolution together. Our explainer on canvas size vs image size clears up how the two interact and why it matters when you print.
Brushes that mimic his tools digitally
- A large, textured flat brush for skies and water, used with criss-cross strokes
- A fan brush preset for trees and foliage
- A palette knife or smudge brush with hard edges for mountains
- A small liner brush for branches and signature-style details
Working at a large pixel size makes these brushes feel closer to their physical counterparts, because each stroke covers proportionally similar space.
A Digital Wet-on-Wet Workflow, Step by Step
Digital apps do not have wet paint, but you can approximate the sequence and feel of a classic episode on a 3:4 canvas.
- Create the canvas. Set a 3:4 landscape file, for example 4800 x 3600 pixels at 200 DPI, a middle ground between performance and print quality.
- Fill a base layer. Fill with a pale warm white or a light gray-blue instead of pure white. This mimics the effect of a white wet base tinting every color slightly.
- Paint the sky on its own layer. Use a large textured brush with low opacity and criss-cross strokes, then blend with a soft smudge or blender brush.
- Add distant mountains. On a new layer, block in shapes with a hard-edged brush, then use a lighter color along one edge for highlights. Lower the layer opacity or add a pale blue overlay to push them back.
- Build middle ground. Paint hills and tree lines slightly darker and more saturated than the mountains.
- Paint foreground trees last. A fan or bristle brush stamped upward creates evergreen shapes. Keep them darkest and most detailed.
- Add highlights and reflections. Use a small brush for tree highlights and a horizontal smudge stroke for water reflections.
- Flatten a copy and adjust. Duplicate, merge and use levels or curves to unify contrast, keeping the layered file as a backup.
Keeping each depth zone on a separate layer is the digital advantage: you can adjust atmosphere at any time without repainting.
Basic Supplies for an 18×24 Wet-on-Wet Painting
- One 18×24 stretched canvas, pre-primed
- Thin white wet-on-wet base or a slow-drying oil medium
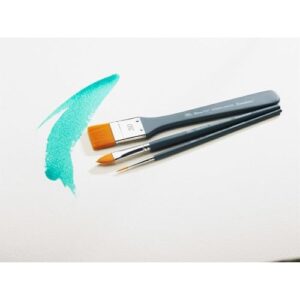
- A 2 inch and a 1 inch flat bristle brush for skies, water and foliage
- A fan brush for evergreen trees and grass
- A small round or liner brush for branches and fine detail
- One large and one small palette knife for mountains and highlights
- Odorless mineral spirits or a similar solvent for cleaning, plus rags
- A limited oil palette: a dark blue, a dark brown, a deep green, a yellow, a red and titanium white
Expect to use generous amounts of white and dark blue at this size. Wet-on-wet painting lays paint down quickly, so set out more than you think you need before starting.
Framing and Displaying an 18×24
An 18×24 is a common poster and photo size, so frames are easy to find. Choose a canvas frame or floater frame deep enough for the stretcher bars. Note that oil paintings done wet-on-wet can take weeks to dry through, especially where paint is thick, so frame carefully and wait several months before applying a final varnish.
Adapting Bob Ross Paintings to Other Sizes
Not everyone has an 18×24 on hand. You can still follow along on other sizes.
| Your canvas | Ratio | How to adapt |
|---|---|---|
| 9×12 | 3:4 | Same shape at half the size. Use smaller brushes, such as a 1 inch instead of 2 inch |
| 12×16 | 3:4 | Same shape, two-thirds scale. Composition transfers exactly |
| 16×20 | 4:5 | Slightly squarer. Bring side elements a bit closer to center |
| 11×14 | About 4:5 | Similar to 16×20. Simplify foreground detail |
| 24×36 | 2:3 | Wider. Extend the horizon or add a tree at one side |
| 30×40 | 3:4 | Same shape, larger. Use bigger tools and more paint |
Canvases in the 3:4 family (9×12, 12×16, 30×40) need no rethinking at all. For other ratios, focus on keeping the horizon placement and the main elements in similar relative positions.
Composition Lessons From His Canvas Choice
Studying how Bob Ross used his 18×24 reveals a few repeatable composition habits:
- Low or high horizon, rarely centered. He often placed the horizon below the middle, giving the sky space, or used tall mountains to break it.
- Framing trees. Large trees on one or both sides lead the eye inward and hide the edges of the canvas.
- Diagonal paths. Rivers, paths or shorelines often run diagonally from foreground to background, adding depth.
- Atmospheric layers. Mountains get lighter and bluer as they recede, created by mixing more of the base color into the paint.
- Odd numbers. Clusters of three or five trees look more natural than even groups.
These ideas work on any size, but the 3:4 frame makes them easy to apply.
Tips for Painting Along With Episodes
- Pause often. The show moves quickly. Pause after each stage and catch up before continuing.
- Prepare your palette in advance. Lay out all colors before pressing play.
- Use thin base coats. Too much base makes everything slide and blend into mud.
- Clean brushes between colors. Wipe or rinse in odorless thinner and shake out excess to avoid muddy mixtures.
- Accept differences. Your painting does not have to match. The method is the lesson.
- Work in a ventilated space when using solvents with oil paint.
FAQs
What size canvas does Bob Ross use on the show?
He typically used an 18×24 inch stretched canvas, usually hung horizontally.
Did Bob Ross ever use other canvas sizes?
Yes. Some episodes featured ovals, vignettes and other shapes, often made by masking a rectangular canvas, and there were occasional smaller pieces. The 18×24 rectangle was his standard.
What is the digital equivalent of a Bob Ross canvas?
Any 3:4 landscape canvas. For full print quality at actual size, use 7200 x 5400 pixels at 300 DPI. For practice, 2400 x 1800 pixels works well.
Can I paint Bob Ross style on a smaller canvas?
Yes. A 9×12 or 12×16 has the same 3:4 shape, so compositions transfer directly. Use proportionally smaller brushes.
Why did Bob Ross cover the canvas in white first?
The thin white base kept the surface wet so colors could blend directly on the canvas, which is essential to the wet-on-wet method.
How long does a Bob Ross painting take for a beginner?
Many beginners need one to three hours to complete an episode’s painting, since pausing and catching up adds time.
Final Thoughts
Bob Ross’s go-to canvas was an 18×24 inch rectangle in a 3:4 landscape format, paired with a thin white wet base that made his blending possible. Match that shape on any 3:4 canvas or digital file and his compositions will translate cleanly. For help choosing pixel dimensions and resolution that suit landscape painting on screen, see our guide to the ideal digital painting canvas size for print and screen.