
Painting your own botanical wall art is more than just a creative project—it’s a way to add a personal touch to your home. You don’t need to be an artist or spend a lot of money on supplies. With some planning, a few basic materials, and a little patience, you can make a wall piece that will surprise you. In this guide, you’ll learn step-by-step how to design, sketch, and paint beautiful botanical art, even if you’re a beginner. You’ll also discover tips that most guides miss, common mistakes, and how to avoid them. Get ready to turn a blank wall into your own green sanctuary.
Why Choose Botanical Wall Art?
Botanical art brings the calm of nature indoors. Leaves, flowers, and plants have timeless beauty that fits almost any room style. Unlike printed posters, your hand-painted work feels unique and alive. Painting botanicals also lets you learn about different plants and develop your observation skills. Recent surveys show that 63% of people feel more relaxed in rooms with green or nature-inspired art. Plus, botanical designs never go out of style.
Gathering Your Materials
Before you start, collect everything you’ll need. The right materials make a big difference in the final result.
Basic Supplies
- Canvas or wall: Stretched canvas (16×20 inches is good for beginners), or paint directly on a primed wall.
- Acrylic paints: At least 5-8 colors, including greens, blues, yellows, browns, and white.
- Brushes: A set with flat, round, and detail brushes.
- Palette or plate: For mixing colors.
- Water cup: To clean brushes.
- Pencil and eraser: For sketching.
- Painter’s tape: For clean edges (if working on a wall).
- Paper towels or rags: To wipe brushes and fix mistakes.
Optional Extras
- Reference images or real plants: Use photos, botanical books, or actual leaves and flowers.
- Palette knife: For texture.
- Spray bottle: To keep acrylic paint moist.
Material Cost Comparison
Here’s a quick comparison of common surfaces for botanical art:
| Surface | Pros | Cons | Average Price (USD) |
|---|---|---|---|
| Canvas | Portable, easy to hang | Can warp if cheap | $8–$20 |
| Wood Panel | Very durable, smooth | Heavier, needs priming | $10–$30 |
| Wall | Large space, no frame needed | Permanence, prep needed | Free (if painting at home) |
Tip: If you’re unsure, start with a small canvas before moving to a wall.

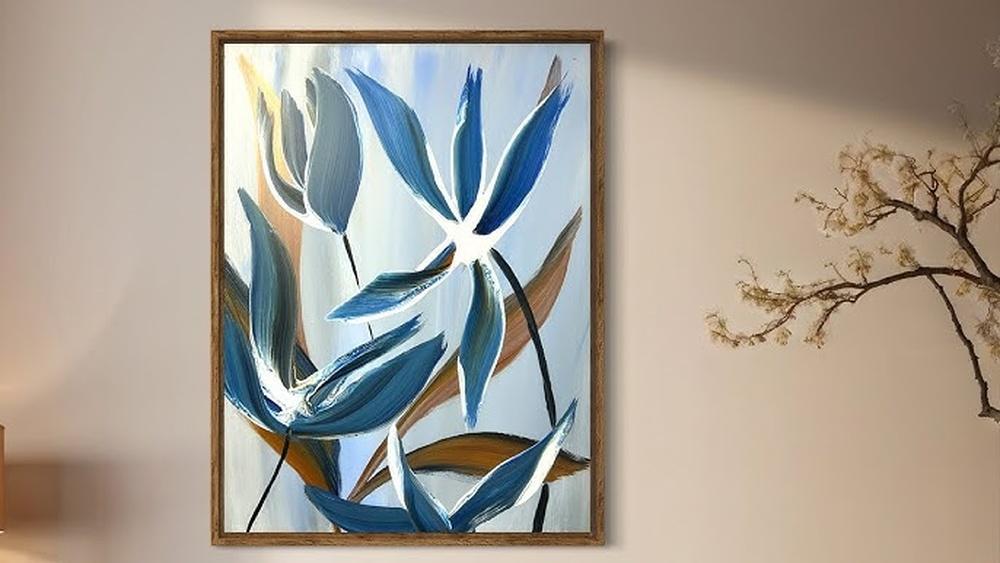
Credit: www.amazon.com
Choosing Your Botanical Theme
Every great painting starts with a vision. Decide on the mood and style you want.
- Monstera leaves: Modern and bold.
- Wildflowers: Soft and romantic.
- Ferns and palms: Tropical and fresh.
- Cacti and succulents: Fun and trendy.
- Mixed bouquet: Colorful and full.
Think about your room’s colors and how much detail you want. Simple leaf shapes are easier for beginners, while flowers like roses or orchids need more practice.
How To Find Reference Images
Look at plant guides, Pinterest, or take your own photos at a garden. For accurate colors and shapes, real plants work best. Try not to copy a single photo exactly—combine elements for a personal touch.
Sketching Your Design
Sketching is the secret step that makes painting easier. Don’t skip it!
- Use a light pencil to draw basic shapes. Start with ovals for leaves and circles for flowers.
- Arrange your design. Place large leaves or blooms first, then fill gaps with smaller details.
- Avoid pressing hard—you’ll erase most lines later.
- Step back and check the balance. Do some areas look too crowded or empty?
Sketching Tips Most Beginners Miss
- Overlap leaves for depth. Real plants aren’t flat!
- Vary size and angle of leaves or flowers. This makes the art feel natural.
- Leave space for background details or color washes.
Painting The Background
A well-chosen background makes your botanicals pop.
Solid Color
If you like clean, modern looks, paint the canvas with a flat color first. Use a large flat brush and cover the whole surface. Let it dry fully before adding plants.
Color Wash
For a softer effect, thin your paint with water and brush on light, uneven layers. This creates a dreamy look behind the leaves.
Patterned Background
Add subtle dots, stripes, or even faint leaves. Keep it gentle so the main plants stand out.
Background Types Compared
| Background Type | Best For | Difficulty | Time Needed |
|---|---|---|---|
| Solid Color | Modern, bold art | Very Easy | 20 min |
| Color Wash | Soft, relaxed mood | Easy | 30–40 min |
| Patterned | Whimsical, layered looks | Moderate | 45–60 min |
Pro insight: Let your background dry at least 1 hour before painting details, or colors may mix unintentionally.
Painting Botanical Elements
Now For The Fun Part—painting Your Plants!
Blocking In Shapes
- Use a medium brush and fill the main leaves or petals with a base color.
- Paint each shape separately, leaving a thin gap between them. This keeps colors clean.
- Don’t worry about details yet—just block in the basic forms.
Adding Layers And Details
Once the base is dry, start layering.
- Use lighter and darker shades to show light and shadow.
- Add leaf veins or petal lines with a thin brush.
- Mix a little white with your color for highlights, or a touch of black/brown for shadows.
Creating Realistic Effects
- For soft edges on petals, dab with a slightly wet brush.
- For sharper lines, use a small, round detail brush.
- To make leaves look glossy, add a thin highlight along one side.
Working With Mistakes
Acrylic paint is forgiving. If you make a mistake, let it dry, then paint over it. For small errors, use a damp cotton swab to wipe away the paint before it dries.
Advanced Tip: Mix a tiny bit of the background color into your greens and browns. This ties the whole piece together and prevents colors from looking too “fake.”
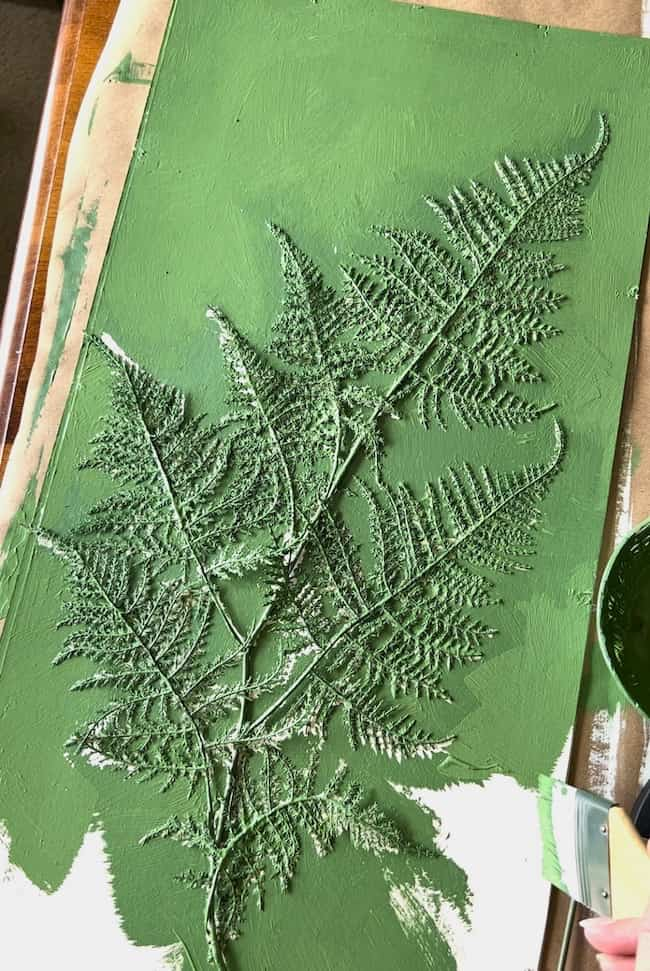
Credit: perfectingplaces.com
Layering And Final Touches
Building up your painting in layers gives it depth.
Second And Third Layers
- Add shadows under overlapping leaves.
- Deepen the color in the center of flowers.
- Use a dry brush to add soft texture to petals or stems.
Outlining (optional)
Some styles look great with thin outlines. Use a fine brush and dark paint, or a waterproof pen once the painting is dry. Outline only some edges for a natural look.
Details That Make A Difference
- Add tiny dots or lines for pollen in flowers.
- Paint small veins in leaves with a mix of white and your main color.
- Soften any harsh lines with a damp brush.
Not-so-obvious insight: Sometimes, less detail looks better. Step back often. If your painting looks good from a few feet away, you’re on the right track.
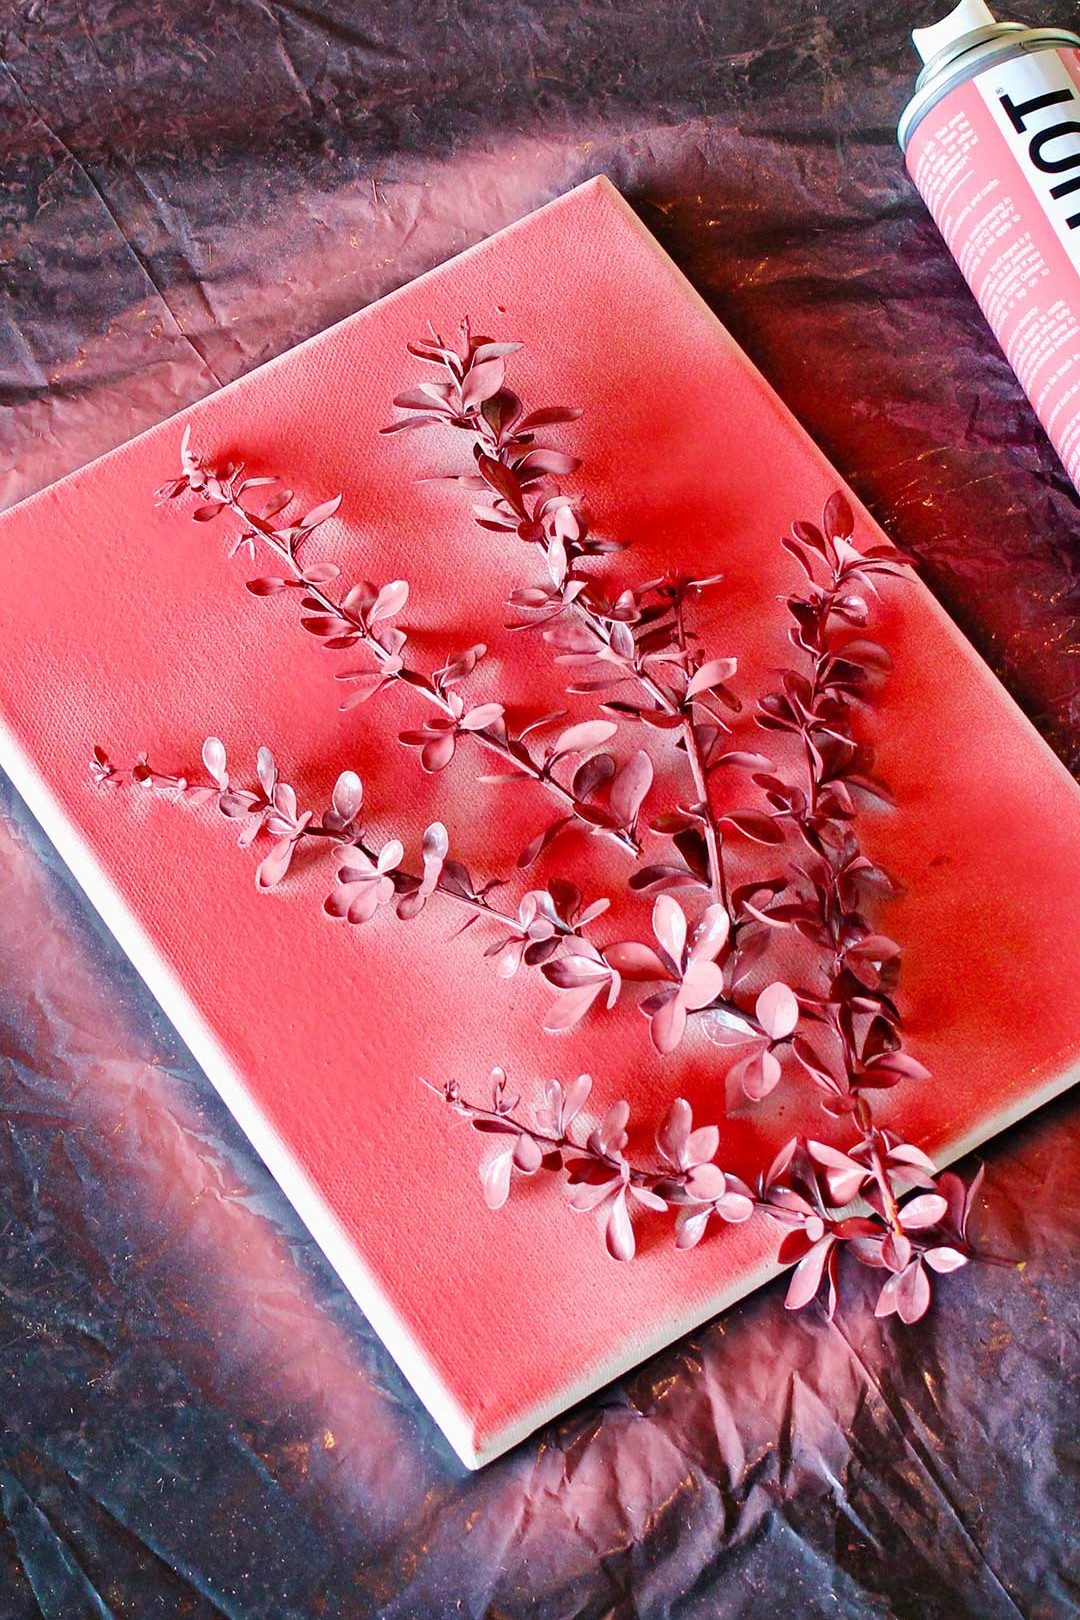
Sealing And Hanging Your Artwork
To protect your work, seal it with a clear acrylic spray (matte or glossy). This keeps dust and sunlight from fading your colors. Follow the instructions on the spray and use it in a well-ventilated area.
Let the painting dry completely before hanging. If you painted directly on the wall, remove any painter’s tape slowly for crisp edges.
Common Beginner Mistakes (and How To Avoid Them)
- Using too much paint: Thick blobs can crack or take forever to dry. Apply thin layers.
- Skipping the sketch: Results often look messy or unbalanced.
- Overmixing colors: If you blend too much, colors turn dull. Mix gently and test on scrap paper.
- Ignoring light direction: Pick a light source (left/right/top) and keep highlights consistent.
- Not stepping back: Check your work from a distance every 10–15 minutes.
Inspiration And Variations
Once you finish your first piece, try these ideas:
- Paint a set of three small canvases with different leaves for a gallery wall.
- Use metallic gold or silver for leaf veins.
- Try minimalist style: One simple branch on a white background.
- Make seasonal art (spring flowers, fall leaves, etc. ).
- Add a short quote or botanical name in neat handwriting.
Inspiration: The Brooklyn Museum’s Georgia O’Keeffe collection shows how powerful simple plant forms can be.
How Long Does It Take?
Most botanical wall art projects take 2–4 hours. Complex designs or large walls may need a weekend. Allow for drying time between layers.
Sample Project Timeline
| Step | Estimated Time |
|---|---|
| Gathering materials | 15–20 min |
| Sketching design | 30 min |
| Painting background | 20–40 min |
| Painting botanicals | 1–2 hrs |
| Final touches & sealing | 30 min |
Displaying Your Artwork
Choose a spot with good natural light, but not direct sun (which can fade colors). Hang at eye level, or above a couch or bed for maximum effect. If painting on canvas, use a simple frame or leave edges unframed for a modern look.
Extra tip: Invite friends to see your art. Sometimes, you’ll get new ideas or spot details you missed.
Frequently Asked Questions
How Can I Make My Botanical Painting Look More Realistic?
Use reference images or real plants to capture details. Add shadows and highlights, and vary leaf shapes. Don’t use only one shade of green—mix different greens for a natural look.
What Type Of Paint Is Best For Botanical Wall Art?
Acrylics are best for beginners. They dry fast, are easy to layer, and work on both canvas and walls. If you want a softer look, try watercolors on paper, but you’ll need a frame with glass.
Can I Paint Botanical Art Directly On My Wall?
Yes! Just make sure the wall is clean, dry, and primed. Use painter’s tape for edges and plan your design before starting.
What If I Make A Mistake While Painting?
Let the paint dry, then paint over the mistake with your background color or the correct shade. For small errors, a damp cloth can remove fresh paint.
Where Can I Find Good Botanical Reference Images?
Try online plant databases, Pinterest, or botanical books. Visiting a local garden or park and taking photos is also a great way to find inspiration.
Painting your own botanical wall art is a journey as much as a destination. Each brushstroke brings you closer to a space that feels more like you. With practice, you’ll discover your own style and maybe even inspire others to add a touch of green to their lives.
Credit: welcometonanas.com


