
Painting a rainbow is a wonderful art project for kids. It’s colorful, fun, and easy to understand. Rainbows are also a great way to teach children about colors, shapes, and creativity. But if you want to make the experience successful and memorable, you need some helpful tips and a clear plan.
This article will guide you step by step, from getting the right materials to adding finishing touches. Whether you are a parent, teacher, or simply someone who loves art, you’ll find everything you need here to help kids paint a beautiful rainbow.
Why Painting Rainbows Is Great For Kids
Rainbows capture children’s imagination. The bright colors and simple shape make them a favorite subject for kids’ art. Painting a rainbow helps children in several ways:
- Learning colors: Kids can practice naming and identifying basic colors.
- Hand-eye coordination: Using a brush or other tools improves motor skills.
- Creativity: Kids can add their own twist, such as clouds, sun, or animals.
- Following instructions: Painting a rainbow in order helps kids learn to follow steps.
Most of all, painting a rainbow is fun and gives a sense of achievement.
Materials You Need
Before starting, gather all the needed supplies. This avoids interruptions and makes the activity smooth. Here’s a simple list:
- Paper or canvas: Use thick paper (like watercolor paper) or a small canvas.
- Paint: Washable tempera or watercolor paints are best for kids.
- Brushes: Different sizes for thick and thin lines.
- Water cup: For cleaning brushes between colors.
- Palette or plate: To mix and hold paint.
- Aprons or old shirts: To protect clothes from paint.
- Paper towels: For spills and cleaning.
- Pencil: To sketch a light outline (optional).
- Masking tape: To hold the paper in place.
Some parents add extras like glitter or stickers for more fun.
Credit: www.hellowonderful.co
Choosing The Right Paint
The type of paint matters for both ease and safety. Here’s a quick comparison of popular options for kids:
| Paint Type | Pros | Cons |
|---|---|---|
| Tempera | Easy to clean, non-toxic, bright colors | Can crack on thin paper, not waterproof |
| Watercolor | Soft colors, easy to blend, washable | Colors can bleed, needs thicker paper |
| Acrylic | Bright, strong colors, dries fast | Harder to clean, not always washable |
For most young children, tempera or watercolor is best. Always check the label for non-toxic and washable.
Planning Your Rainbow
Take a few minutes to plan before the brushes touch the paper. This step is often skipped, but it makes a big difference.
- Talk about rainbows: Show kids a real photo of a rainbow. Ask what colors they see.
- Explain the order: Rainbows always have colors in the same order. The classic order is red, orange, yellow, green, blue, indigo, violet.
- Sketch an outline: For young kids, lightly draw the rainbow arcs with a pencil. This gives a guide to follow.
Some kids like to use only three or four colors. That’s fine. The goal is to enjoy and learn.
Step-by-step Instructions
Now it’s time to paint! Here’s a step-by-step guide:
1. Prepare Your Space
Cover the table with newspaper or plastic. Put on aprons. Set out all materials within easy reach.
2. Draw The Rainbow Arcs
Lightly sketch seven arcs (like a giant letter “C”) for the rainbow. Start small inside and make each arc a little bigger. If the child is very young, you can skip this and let them paint freely.
3. Paint The Colors
Begin with the top arc (red). Use a clean brush for each color or rinse between colors. Remind kids to paint slowly and stay within the lines.
Order of colors:
- Red
- Orange
- Yellow
- Green
- Blue
- Indigo
- Violet
Let each color dry a little before adding the next to avoid smudging.
4. Add Details
After finishing the main rainbow, kids can add:
- Clouds at the ends using white paint or cotton balls
- Sun peeking behind the rainbow
- Raindrops or a simple background
5. Let It Dry
Place the painting in a safe spot to dry completely. This usually takes 20–30 minutes for tempera, or less for watercolor.
Making It More Fun
Want to keep kids excited and involved? Try these ideas:
- Use sponges: Dip a small sponge in paint for a textured rainbow.
- Glitter: Sprinkle glitter on the wet paint for a sparkling effect.
- Stickers: Add star or heart stickers around the rainbow.
- Stamps: Use rubber stamps to decorate the sky or ground.
These small touches help each child’s painting feel unique.
Common Mistakes And How To Avoid Them
Kids (and adults) sometimes face small problems while painting rainbows. Here’s how to solve them:
- Colors mix together: Let each color dry a little before painting the next arc.
- Paper curls: Use thicker paper and tape it down with masking tape.
- Forgotten color order: Keep a color chart nearby for reference.
- Paint drips: Use less water on the brush, and tap off extra paint before starting.
- Lost interest: Keep the session short (20–30 minutes), and let kids add their own creative ideas.
Often, small “mistakes” make the painting special.
Practical Tips For Grown-ups
Adults can help make the rainbow painting session smoother and more enjoyable:
- Prepare everything in advance: Kids lose focus if you hunt for supplies during the project.
- Show, don’t just tell: Paint a small sample rainbow alongside younger kids.
- Praise effort, not just results: Celebrate each child’s unique rainbow, even if the colors are out of order or lines are wobbly.
- Take breaks: For longer sessions, a short snack or story break can help kids refocus.
- Display the art: Hang finished rainbows on the wall or fridge. This boosts confidence.
If you’re working with a group, set up painting stations to avoid crowding.
Comparing Painting Tools For Rainbows
Not sure which tool is best for painting rainbows with kids? Here’s a simple comparison:
| Tool | Age Group | Best For | Notes |
|---|---|---|---|
| Paintbrush | All ages | Classic rainbow arcs | Use small and medium sizes |
| Sponge | 3–6 years | Textured rainbows | Easy to hold, less control |
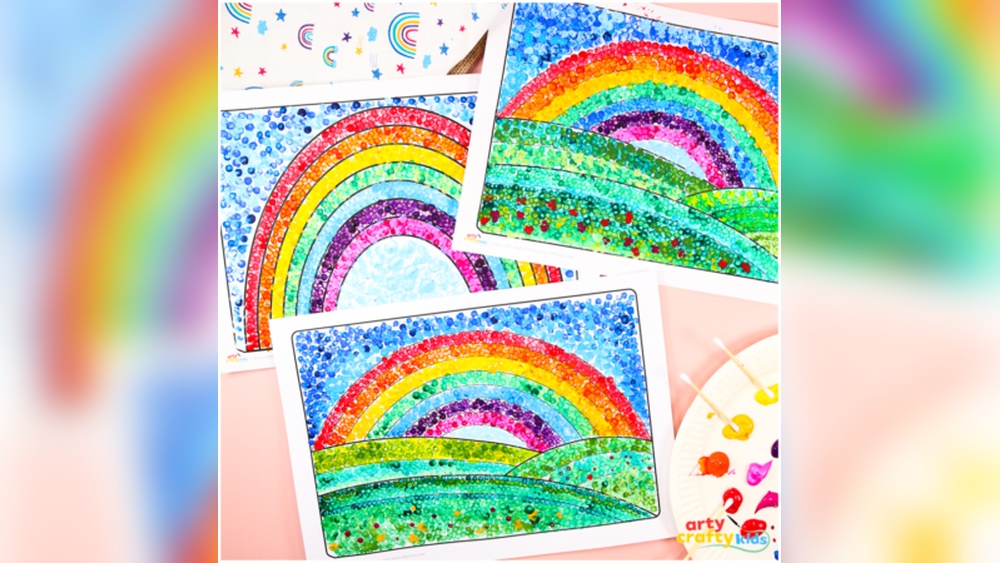
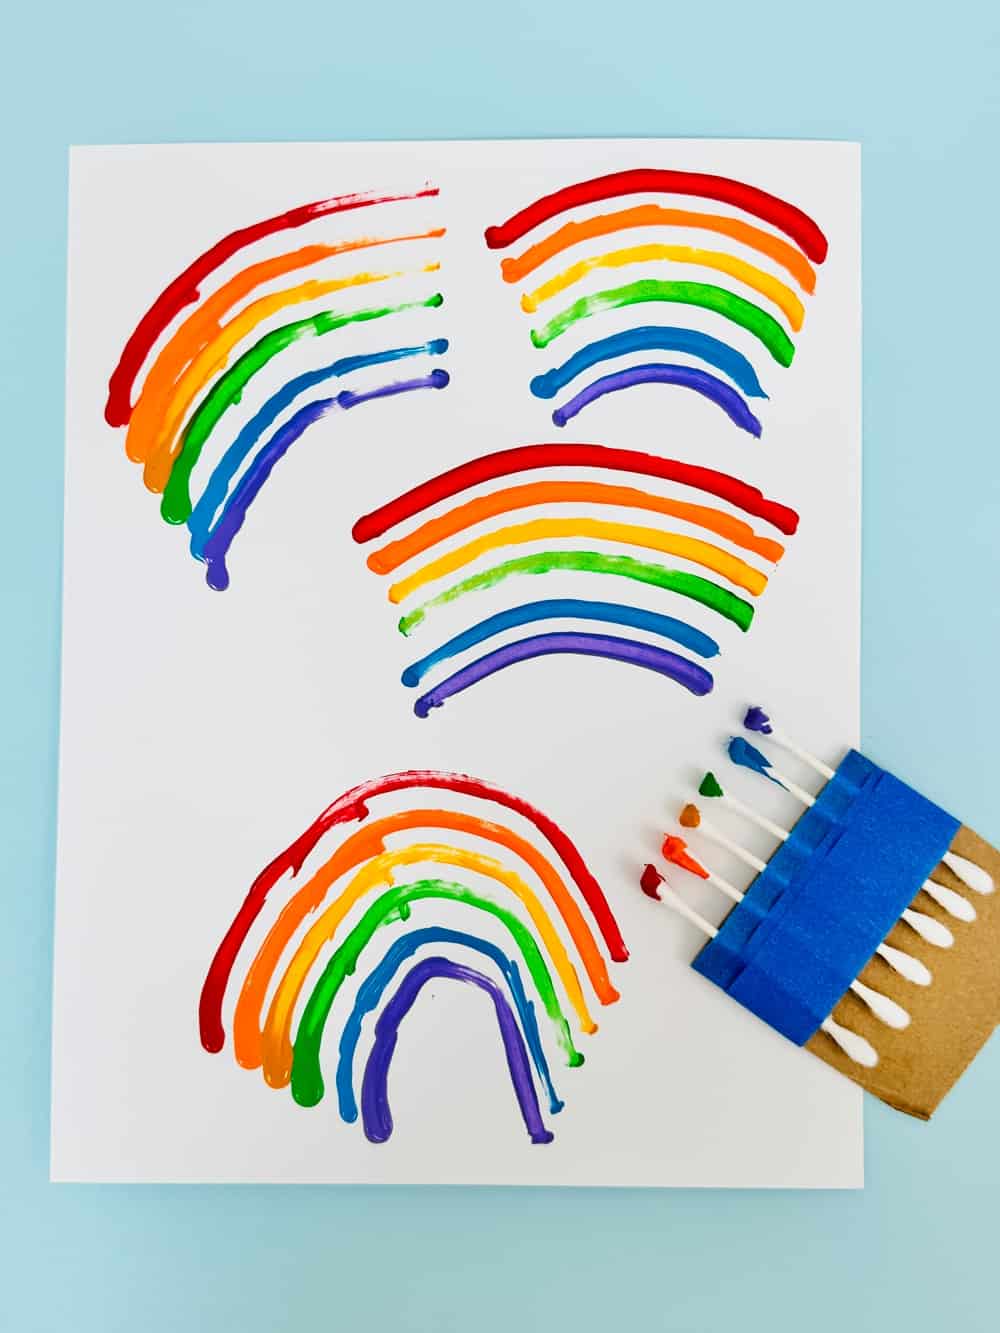
| Q-tip/Cotton swab | 4+ years | Dotted rainbows | Great for detail and fun effects |
| Fingers | 2–5 years | Messy, sensory fun | Supervised use only |
Choose what fits your child’s age and comfort level.
Non-obvious Insights For Better Rainbows
Some tips are not obvious, but they make a big difference:
- Use two shades of each color for depth: Try adding a lighter or darker tone to each arc. This makes the rainbow look more real.
- Start with the biggest arc: Painting from outside in (red first) helps keep colors clean and prevents smudging.
- Let kids choose background colors: A blue sky or a sunset background makes each painting unique.
- Group rainbows: Let kids work together on one big rainbow. This encourages teamwork.
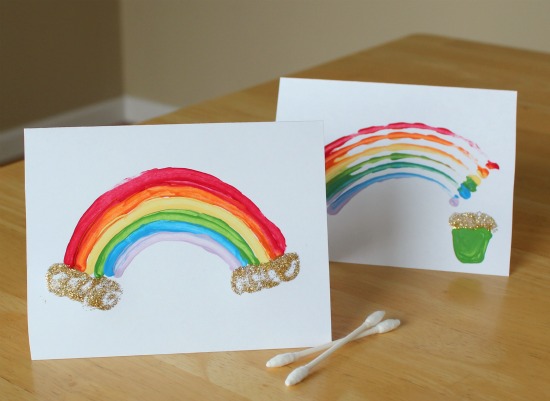
Credit: makeandtakes.com
Rainbow Painting Variations
Once you master the basic rainbow, try these fun variations:
- Rainbow collage: Cut colored paper strips and glue them in an arc shape.
- Nature rainbows: Use flower petals, leaves, or colored stones for each arc.
- Digital rainbows: Let older kids try drawing rainbows on a tablet or computer.
- Rainbow mobiles: Paint rainbows on small pieces of cardboard, punch a hole, and hang them as mobiles.
These variations keep the activity fresh and interesting for kids who have done it before.
Keeping Kids Safe
Safety is important, even with simple art projects. Here’s how to keep kids safe:
- Supervise at all times: Especially with young children.
- Use non-toxic supplies: Check paint labels for “non-toxic” and “child-safe.”
- Clean hands after painting: Some kids may touch their face or eyes.
- Ventilate the room: Open a window if using strong-smelling paints.
- Check for allergies: Some children may react to art supplies.
If you want more about art safety, check official resources like the CDC Art Safety Page.

Credit: bowitzkis.com
Displaying And Sharing The Finished Rainbow
Once your child’s rainbow is dry, celebrate their work. Here are some ideas:
- Framing: Use a simple frame to protect and display the painting.
- Photo sharing: Take a picture and share it with family or classmates.
- Art wall: Start a special wall or board for kids’ artwork.
- Art shows: Organize a “mini-gallery” at home or in class for kids to show their rainbows.
Displaying art gives kids pride and encourages them to create more.
Frequently Asked Questions
What Colors Are In A Rainbow And In What Order?
A classic rainbow has seven colors in this order: red, orange, yellow, green, blue, indigo, violet. You can remember this by the acronym “ROYGBIV.” Some rainbows in nature may look like they have fewer colors, but these are the main ones.
What Age Is Best For Painting Rainbows?
Painting rainbows is suitable for kids as young as 2 or 3, with help. Older children (5–10) can do more detailed rainbows. Adjust the project based on the child’s age and skill. For example, younger kids can use wider brushes or even fingers.
How Do I Keep The Colors From Mixing Or Smudging?
Let each color dry for a few minutes before starting the next one. Use a clean brush for each color or rinse the brush well. Taping down the paper also helps prevent smudges from moving artwork.
Can I Use Markers Or Crayons Instead Of Paint?
Yes! Markers, crayons, and colored pencils work well for making rainbows, especially for younger kids or in settings where paint is not allowed. The main idea is to enjoy using colors and shapes.
How Do I Make The Rainbow Painting Last Longer?
Use thicker paper (like watercolor paper) and keep the painting out of direct sunlight. You can also spray a light coat of art fixative (with adult help) to protect the colors. Framing behind glass helps too.
Painting a rainbow is more than just an art project. It’s a chance for children to learn, create, and feel proud. With a bit of preparation and these tips, you’ll help every child paint a rainbow that shines bright—on paper and in their hearts.


