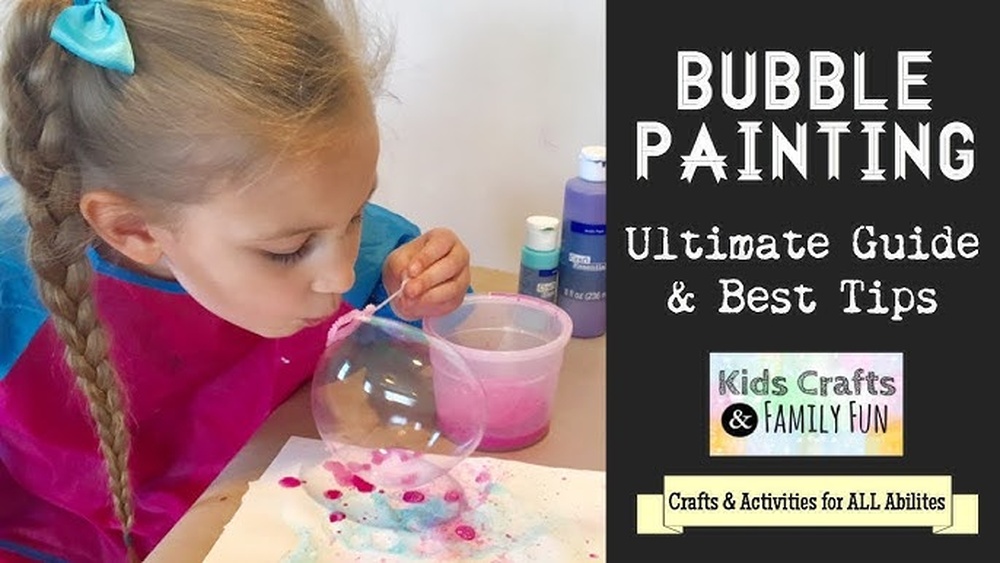
Quick answer: For bubble painting with kids, mix about 2 tablespoons of washable tempera with 1 tablespoon of dish soap and 2 tablespoons of water in a wide cup. A child blows gently through a straw (outward only) until bubbles rise above the rim, then presses paper lightly onto the bubbles to print a lacy, cell-like pattern. Repeat with other colors, let it dry, and use the print as a background or cut it into shapes.
Bubble painting produces a pattern no brush can copy: overlapping rings and tiny cells that look like sea foam, frogspawn or stained glass. It is also one of the more mess-contained paint activities, since the paint stays inside a cup and the child only touches the paper to the top of the foam.
This guide explains how to do bubble painting for kids with a reliable paint-to-soap ratio, the safest blowing setup, tips for crisper prints, and project ideas for the finished paper. For a wider menu of techniques at different ages, see our main guide to painting for kids.
How Bubble Painting Works
Dish soap lowers the surface tension of water, which lets it stretch into bubbles. Paint mixed into the soapy water colors the bubble walls. When paper touches the foam, the bubbles pop and leave their colored outlines behind. Bigger bubbles leave wide rings; tiny bubbles leave a fine, dense texture.
The balance matters. Too much paint makes the mixture heavy, so it will not foam. Too little paint gives you bubbles but a print so pale it barely shows. Most of the troubleshooting in bubble painting comes back to this ratio.
Supplies for Bubble Painting
- Washable liquid tempera in 3 or 4 bright colors. Liquid watercolor also works and gives more transparent results.
- Liquid dish soap. Clear or lightly colored soaps keep the paint color truer.
- Water.
- Wide, short cups or small bowls (a 6 to 8 ounce cup or a yogurt pot is a good size). Short cups let bubbles crest over the rim faster.
- Straws, one per child per color. Wider straws make more bubbles with less effort.
- Paper: white cardstock or watercolor paper. Lighter paper works but may wrinkle.
- A tray or baking sheet under the cups to catch overflow.
- Smock and wipes.
The Bubble Paint Recipe
| Ingredient | Amount per cup | Adjust if… |
|---|---|---|
| Washable liquid tempera | 2 tablespoons | Add 1 teaspoon more if prints are pale |
| Dish soap | 1 tablespoon | Add 1 teaspoon more if it will not foam |
| Water | 2 tablespoons | Add a splash if mixture is thick and sluggish |
Stir gently so you do not create foam before the child begins. Test it yourself first: one or two seconds of blowing should start a pile of bubbles. If it takes longer, add a little soap and water.
How to Do Bubble Painting for Kids: Step by Step
- Teach blowing out, not sucking in. This is the most important step. Have children practice blowing through a straw into a cup of plain water before paint appears. Ask them to make a “motorboat” sound while blowing; it is hard to inhale while doing it. A small hole cut near the top of the straw, about an inch from the end in the child’s mouth, lets air escape if they accidentally inhale and prevents liquid coming up.
- Set up the cups. Place one cup per color on a tray. Fill each only about one-third full so bubbles reach the rim quickly without overflowing too much.
- Blow bubbles. The child blows gently and steadily until a dome of bubbles rises an inch or so above the rim.
- Print. Hold the paper flat and lower it onto the bubble dome. Touch lightly; do not push down into the cup. Lift straight up.
- Repeat and layer. Blow again and print on another area or overlap colors. Let the first color sit for a minute or two before overlapping for clearer rings.
- Dry flat. Prints usually dry within 30 to 60 minutes. Soap residue can leave the surface slightly tacky until fully dry.
Alternative for younger children: bubble wands and machines
Children under about four may struggle with straws or may inhale. Instead, adults can blow the bubbles and the child does the printing. Another method is to dip a bubble wand in the paint mixture and blow bubbles directly at paper taped to a wall or laid on the ground outside. The bubbles land and pop, leaving circles. It is messier but very exciting.
Tips for Better Bubble Prints
- Use bright, saturated colors. Soap dilutes paint, so light colors like yellow can almost disappear. Magenta, turquoise, purple and orange print well.
- Print darker colors last. Rings of dark blue over yellow look crisp; yellow over dark blue barely shows.
- Touch, don’t press. Pressing collapses the dome and smears paint into a blotch.
- Add a little glycerin (about half a teaspoon) to the mixture for bubbles that last longer, if you have it on hand.
- Use smaller paper pieces (around 4 x 6 inches) for young children. They are easier to control above a cup.
- Refresh the mixture. After several prints, the paint can separate. Stir gently and add a few drops of paint.
Watercolor Painting Tips for Kids Using Bubble Prints
Swapping tempera for liquid watercolor changes the look completely: the bubble rings become translucent and overlap like glass. A few watercolor painting tips for kids apply here:
- Use watercolor paper. It absorbs liquid without buckling as much as standard paper.
- Layer light to dark. Watercolor is transparent, so a pale layer under a darker one stays visible.
- Combine with a wash. After the bubble print dries, children can brush a pale wash over parts of the page to tint the background.
- Do not overwork. Watercolor gets muddy when brushed over many times while wet.
The same blowing skill transfers to straw blow painting, where children push drops of watery paint across paper instead of making bubbles. Doing both on the same day makes a fun comparison.
Bubble Painting Project Ideas
The print itself is often just the beginning. Once dry, bubble paper becomes material for other crafts.
Under the sea scene
Print in blues and greens, then cut out fish shapes from other paper and glue them on. The bubble texture reads as water or foam.
Bubble flowers
Print circles of pink, purple and orange. After drying, cut around each print to make petals or full blooms and add green paper stems.
Planets and space
Print several colors on separate sheets, cut circles from each, and glue them on black paper as planets. Add white paint dots for stars.
Greeting cards
Print on folded cardstock. The pattern needs no other decoration; children can add a message inside.
Bubble wrap print combination
Older kids can combine a bubble print with a bubble wrap print (paint applied to bubble wrap and pressed on paper) and compare the two kinds of circles.
Bubble Painting by Age
| Age | Approach | Notes |
|---|---|---|
| 2 to 3 | Adult blows bubbles; child prints | Do not give straws with paint to this age |
| 4 to 5 | Child blows with a vented straw after practice | Close supervision; one color at a time |
| 6 to 8 | Independent blowing and printing; layering colors | Introduce overlapping and color choices |
| 9 and up | Use prints in collage, cards or mixed media | Try watercolor version and compare |
Troubleshooting Bubble Painting
| Problem | Cause | Fix |
|---|---|---|
| No bubbles form | Not enough soap, or too much paint | Add 1 tsp soap and a splash of water |
| Prints are faint | Too little paint | Add paint a teaspoon at a time; use darker colors |
| Prints are blotchy, not ringed | Paper pushed into the cup | Lower paper gently; touch the top only |
| Bubbles overflow everywhere | Cup too full or blowing too hard | Fill one-third; blow gently; use a tray |
| Child tastes the mixture | Inhaling through the straw | Use a vented straw or switch to adult-blown bubbles |
| Paper curls | Lightweight paper and wet mixture | Use cardstock; flatten under a book once dry |
Choosing Colors That Print Well
Because soap and water dilute the paint, color choice has more effect on bubble prints than on brushed paintings. Use this as a rough guide when picking cups for a session.
| Color | How it prints | Pairs well with |
|---|---|---|
| Magenta or hot pink | Strong, clear rings | Purple, orange, turquoise |
| Turquoise or bright blue | Strong; reads as water | Green, purple, white paper |
| Purple | Strong; good overlap color | Pink, blue |
| Orange | Medium; bright on white | Pink, red, yellow |
| Yellow | Weak; may vanish when diluted | Use first, under darker colors |
| Black | Very strong; can dominate | Use sparingly for outlines of rings |
Analogous groups, such as blue, turquoise and purple, overlap without going muddy. Mixing complements like orange and blue in the same spot can turn grayish, which some kids like and others do not.
Bubble Painting With a Group
Bubble painting works for a classroom, playdate or party, with a few changes to the setup.
- Stations, not shared cups. Set up color stations, each with its own cup and a stack of individual straws. Children carry their paper from station to station.
- Name the straws. Write each child’s initial on their straws with a permanent marker so no one picks up another child’s straw.
- Pre-mix in a pitcher. For more than six children, mix a larger batch in a measuring jug and top up cups as they run low.
- Use small paper. Index-card sized pieces mean each child can make many prints, and you can combine them later into a group collage.
- Have one adult per station for children under six, mainly to watch for inhaling.
Safety Notes
- Dish soap and paint are not meant to be swallowed. If a child gets a mouthful, have them spit it out and rinse with water. Check the product labels for any additional guidance and contact poison control if you are concerned.
- Use washable, non-toxic paints with age-appropriate labeling.
- Give each child their own straw and do not share.
- Children with asthma or breathing difficulties may tire quickly from blowing; let them take breaks or have an adult blow.
- Bubble mixture on hard floors is slippery. Wipe spills right away.
Cleanup
Bubble painting cleans up more easily than most paint activities because the paint is diluted with soap. Pour leftover mixture down the sink with running water, rinse cups, and throw away used straws (or wash reusable ones with a straw brush). Wipe the tray with a damp cloth. Washable tempera on skin comes off with warm water.
FAQs
What is the ratio for bubble paint?
A reliable starting ratio is 2 parts washable tempera, 1 part dish soap and 2 parts water, such as 2 tablespoons paint, 1 tablespoon soap and 2 tablespoons water. Add soap if it will not foam and paint if prints are pale.
How do I stop kids from sucking up bubble paint?
Practice blowing into plain water first, cut a small vent hole near the top of the straw, and have children hum or make a motorboat sound while blowing. For children under four, let an adult blow the bubbles.
Can you do bubble painting with watercolors?
Yes. Liquid watercolor mixed with soap and a little water makes translucent, glassy rings. Use watercolor paper for less buckling.
What paper is best for bubble painting?
White cardstock or watercolor paper gives the clearest prints and does not curl much. Thin paper works but may wrinkle and tear.
Why are my bubble prints so faint?
The mixture likely has too little paint for the amount of soap and water. Add paint a teaspoon at a time and choose deep colors rather than pale ones.
What age is bubble painting good for?
Children from about four can usually blow bubbles with a straw safely after practice. Younger children can do the printing while an adult blows the bubbles.
Final Thoughts
Bubble painting rewards a little preparation: get the soap-to-paint balance right, teach the outward breath, and keep the paper touch light. After that, children can fill sheets with rings and cells that become oceans, flowers and planets. For more ideas that build on the same playful approach, explore our collection of creative kids’ painting techniques.