
Painting on smooth river stones is a creative, relaxing activity that turns ordinary rocks into beautiful pieces of art. Whether you want to make unique gifts, decorate your garden, or simply enjoy a new hobby, painting stones is simple to start and offers endless possibilities.
With the right materials and a bit of patience, anyone can learn to paint on river stones—even if you have never painted before.
Many people are surprised by how satisfying it feels to pick up a smooth stone, imagine a design, and watch colors bring it to life. You do not need to be an artist to make something that is both attractive and meaningful.
In fact, painted stones are popular around the world for kindness projects and home decor. This article will guide you step by step, showing you how to select stones, prepare them, choose the right paints, and avoid mistakes that often frustrate beginners.
Let’s dive in and discover how to paint on smooth river stones with confidence.
Choosing And Collecting River Stones
The first step is finding the right stones. Look for smooth, flat river stones because they are easier to paint and let your designs show clearly. These stones are usually found in riverbeds, lakesides, or even in landscaping stores. Avoid stones with sharp edges or rough surfaces, as paint does not stick well to them.
- Size matters: Stones that fit comfortably in your hand (about 2 to 5 inches wide) are best for most designs.
- Shape: Round or oval stones work well for animals, faces, or mandalas. Odd-shaped stones are better for abstract designs or landscapes.
- Color: Light gray or white stones make colors pop. Darker stones can also be used, but you may need extra layers of paint.
Always wash collected stones with warm soapy water and a brush. This removes dirt and oil, allowing the paint to stick. Let the stones dry completely before moving to the next step.
Buying Vs. Collecting Stones
Some artists prefer to buy stones from craft stores. These are already cleaned and selected for painting, saving time. However, collecting stones from nature is more personal and often free. Just be sure to follow local rules about taking rocks from rivers or parks.
Here’s a quick comparison:
| Method | Pros | Cons |
|---|---|---|
| Collecting from Nature | Free, personal connection, unique shapes | Time-consuming, not always allowed |
| Buying from Stores | Convenient, clean, consistent size | Costs money, less unique |
Preparing The Stones
Preparation is a step many beginners skip, but it makes a big difference. After cleaning, inspect each stone for cracks or loose pieces. You want a solid, smooth surface.
- Dry completely: Even a little moisture can ruin your paint job.
- Sand rough spots: Use fine sandpaper to smooth out bumps. Wipe away dust with a damp cloth and let dry.
- Prime the surface: Applying a thin layer of acrylic gesso or white acrylic paint helps your colors stay bright and prevents paint from soaking into the stone. Let the primer dry for 1-2 hours.
A well-prepared stone makes your artwork look professional and last longer.
Selecting The Right Paints And Tools
Choosing the right materials is key to success. For painting on river stones, the best paints are acrylics. They are water-based, dry quickly, and come in many colors. Avoid watercolor or oil paints; they do not work well on rocks.
Paint Types
- Acrylic craft paint: Good for most designs, affordable, and easy to clean.
- Acrylic paint pens: Great for fine lines, details, or writing words. Paint pens are less messy and very beginner-friendly.
- Outdoor acrylic paint: Use this if your stones will be placed outside. It resists rain and sun better.
Essential Tools
- Brushes: Get a variety: small round brushes for details, flat brushes for backgrounds, and liner brushes for outlines.
- Palettes: Use a plastic plate or palette for mixing colors.
- Water cup: For cleaning brushes.
- Paper towels: For drying brushes and cleaning mistakes.
- Sealant: A clear acrylic spray or brush-on sealant protects your finished art.
Here’s a quick comparison of paint options:
| Paint Type | Best Use | Durability |
|---|---|---|
| Acrylic Craft Paint | Indoor stones, large designs | Medium |
| Acrylic Paint Pens | Details, fine lines, lettering | Medium |
| Outdoor Acrylic Paint | Garden or outdoor stones | High |
Designing Your Stone
Before you start painting, spend a few minutes planning your design. This saves time and reduces mistakes.
- Sketch first: Use a pencil to lightly draw your design on the stone. Most pencil marks will be covered by paint.
- Simple is better: Bold, simple designs stand out more than complicated ones, especially on small stones.
- Color selection: Choose 2-4 main colors. Too many colors can look messy.
- Inspiration: Look at nature, patterns, or popular themes like animals, mandalas, or words.
A fun tip: Hold the stone in your hand, turn it around, and see if its shape suggests a natural design (like a heart, animal, or mountain). Many artists let the stone “tell” them what to paint.

Credit: www.walmart.com
Painting Techniques
Painting on stones is not the same as painting on paper or canvas. Here are some beginner-friendly techniques to try:
Layering
Apply paint in thin layers, letting each one dry before adding the next. This helps colors stay bright and prevents smudging.
Blending
While acrylics dry quickly, you can blend colors by working fast and using a damp brush. Try blending blue and white for a sky or adding shadows to make designs pop.
Dotting
Use the tip of a brush, a toothpick, or even a cotton swab to make dots for mandalas or flower centers. Dots create texture and are easy for all ages.
Outlining
After painting your design, outline shapes with a black or dark paint pen. This makes colors stand out and gives your art a clean look.
Adding Text
For stones with words or quotes, write your text in pencil first. Then, use a fine paint pen to trace over the lines.
Drying And Sealing
Let your painted stone dry for at least 1 hour before handling. For thicker paint, wait longer. Once dry, apply a sealant to protect your art.
- Spray sealant: Hold the can about 8-10 inches from the stone and spray lightly. Use 2-3 coats for outdoor stones.
- Brush-on sealant: Use a clean brush for even coverage. Avoid thick layers, as they can cause streaks.
Sealing is essential if you want your stone to last, especially outside. It protects from water, sun, and scratches.
Common Mistakes And How To Avoid Them
Learning to paint stones takes practice. Here are some mistakes beginners often make—and how to avoid them.
- Skipping cleaning or priming: Paint will peel or fade if the stone is dirty or unprimed.
- Too much paint at once: Thick paint takes longer to dry and is likely to smudge. Use thin layers.
- Not letting paint dry: Be patient. Rushing causes colors to mix or designs to blur.
- Using wrong sealant: Some sprays can make colors run. Always use acrylic sealants made for crafts.
- Ignoring the back: Paint or seal the back of the stone to prevent moisture from causing damage.
A little patience and preparation go a long way.
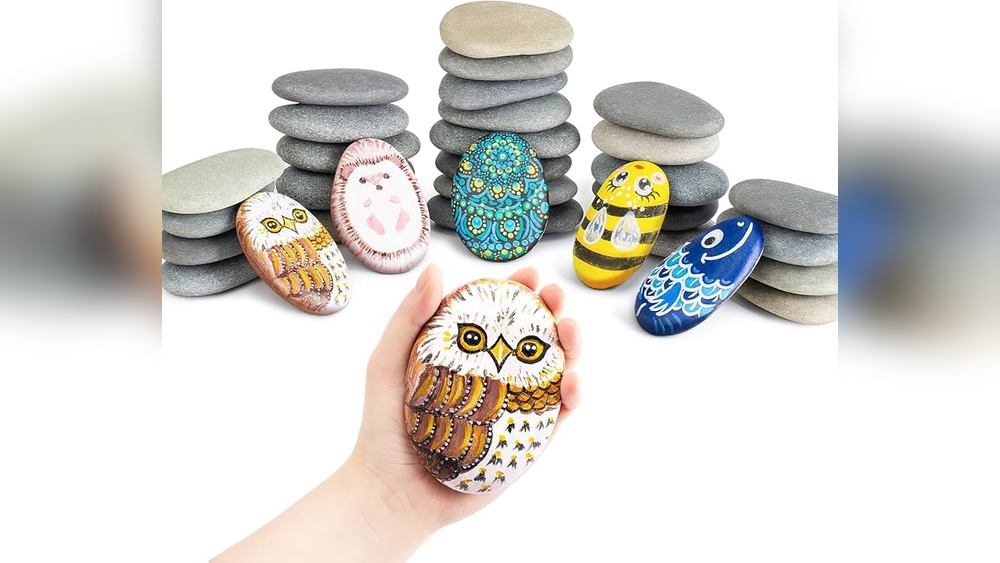
Creative Ideas For Painted Stones
Once you master the basics, try these fun ideas:
- Kindness rocks: Paint positive words or images and leave them in public places to brighten someone’s day.
- Garden markers: Paint names of herbs or vegetables on stones to label your garden.
- Story stones: Create a set of stones with different images. Use them to tell stories with children.
- Seasonal decor: Paint stones for holidays—pumpkins for Halloween, snowmen for winter, hearts for Valentine’s Day.
Painted stones make unique gifts or keepsakes. Their small size makes them perfect for sharing and collecting.

Credit: www.amazon.com
Caring For Your Painted Stones
Stone art is durable, but a little care helps it last.
- Indoor stones: Wipe with a soft cloth if dusty. Keep away from direct sunlight to prevent fading.
- Outdoor stones: Reapply sealant each year. Place in areas with good drainage to avoid water damage.
- Storage: If you make many stones, store them in a box with soft padding to prevent scratches.
A common insight: Painted stones left outdoors may fade or chip over time, especially in harsh weather. This is normal. Many artists enjoy refreshing their stones with new designs each season.
Troubleshooting: When Things Go Wrong
Sometimes, problems happen even with careful work. Here’s how to fix common issues.
- Paint peels off: Make sure stones are clean and dry before painting. Use primer.
- Colors look dull: Try using a white base coat or more layers of paint.
- Sealant turns milky: This happens if the stone is not fully dry. Always let paint dry before sealing.
- Design smudges: Wait longer between layers, and use finer brushes for details.
If you make a mistake, let the paint dry, then paint over it with your background color and try again. Stone painting is very forgiving.

Credit: www.walmart.com
Inspiration And Community
Painting stones is more fun when shared. Join online groups or local clubs to swap ideas, join challenges, and see what others are making. Sharing your work inspires others and helps you grow.
For more ideas and global stone painting projects, visit Wikipedia’s page on rock painting.
Frequently Asked Questions
How Do I Make Sure The Paint Sticks To The Stone?
The key is to clean and dry the stone well before painting. Priming with gesso or white acrylic paint also helps paint stick better and makes colors stand out.
Can I Use Markers Or Pens Instead Of Paint?
Yes, acrylic paint pens are excellent for details or writing. Avoid regular markers—they fade and wash off easily.
What Sealant Is Best For Outdoor Stones?
Use a clear acrylic spray sealant made for outdoor use. Apply 2-3 thin coats, letting each layer dry completely.
How Long Does Painted Stone Art Last?
With proper sealing, painted stones can last several years indoors. Outdoors, designs may fade after a year or two, especially in harsh weather.
Do I Need To Sand Every Stone Before Painting?
Not always, but sanding helps if the stone is rough or uneven. Smooth stones are easier to paint and give better results.
Painting on smooth river stones is simple, rewarding, and open to endless creativity. With the right steps, even beginners can create art that lasts and brings joy. Gather your stones, pick up your brushes, and start painting—you’ll soon have a collection of beautiful stones to share, keep, or give as gifts.


