
Painting offers endless creative paths, but sometimes brushes and rollers feel too predictable. If you want to add texture, depth, and surprise to your artwork, sponge painting techniques are a fantastic way to explore. Whether you are a beginner or an experienced artist, sponges can help you create effects that are hard to achieve with traditional tools. These techniques are not just for walls—they work beautifully on canvas, paper, furniture, and even crafts. Let’s look at how you can use sponges to make your next painting project stand out.
Why Use Sponges For Painting?
Sponges are unique because they have natural holes and uneven surfaces. When you dip a sponge in paint, it doesn’t hold or release color in the same way as a brush. This creates interesting patterns—some parts are strong, others are soft, making the final look more dynamic. Sponges are also cheap, easy to clean, and come in many shapes and sizes. You can use natural sea sponges for organic patterns or synthetic sponges for more control.
Many artists and designers use sponges for faux finishes, clouds, stone textures, and more. Even famous muralists sometimes use a sponge to add highlights or blend colors quickly.
Essential Tools And Materials
Before you start, gather these basics:
- Sponges: Try a few types—natural, synthetic, and kitchen sponges.
- Paints: Acrylics are best for most surfaces, but watercolors work for paper.
- Palette or plate: To dab off excess paint.
- Paper towels or rags: For cleaning and adjusting moisture.
- Protective sheet: To keep your work area tidy.
- Gloves (optional): To keep your hands clean.
A practical tip: cut your sponges into smaller pieces. This gives you more control, especially for details and edges.
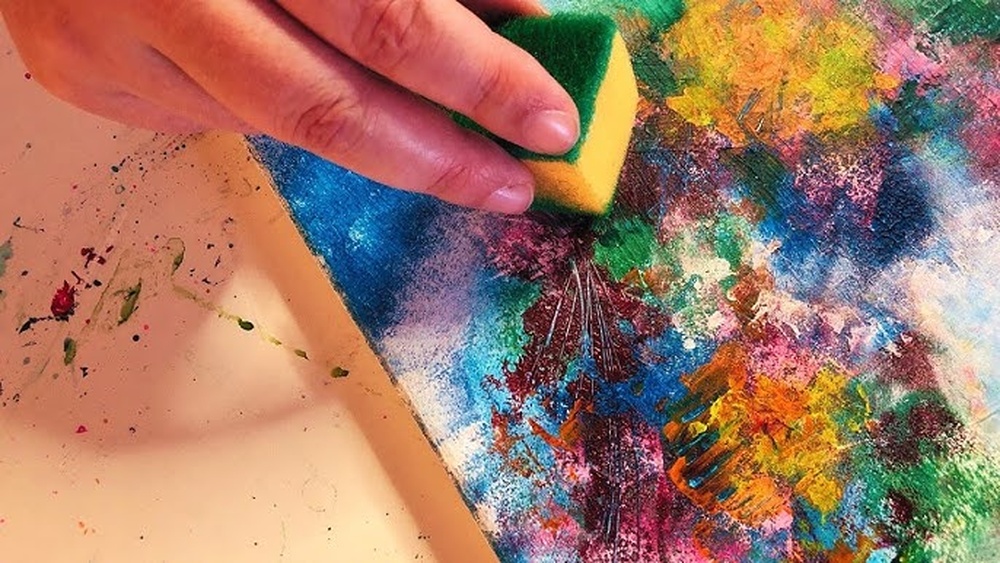
1. Basic Sponge Dabbing
The most common sponge technique is simple dabbing. Dip the sponge lightly in paint, blot off extra on your palette, and gently tap the sponge onto the surface. This creates a soft, mottled effect perfect for backgrounds.
If you want a stronger look, dab with more pressure or use less paint. For a lighter touch, use a nearly dry sponge. This is a great way to cover large areas quickly and add a sense of movement.
Example
Many artists use sponge dabbing to paint clouds in the sky. Start with a blue base, then dab white paint softly in cloud shapes. The uneven sponge pattern makes the clouds look fluffy and natural—much more realistic than brush strokes.
2. Layered Sponge Effects
You can build up color and texture by layering different shades. Start with a mid-tone base, then sponge on lighter and darker colors in stages. Wait for each layer to dry before adding the next.
This method is ideal for faux finishes like stone, marble, or old plaster. By using at least three colors and overlapping them, your wall or canvas will have more depth and interest.
Data Comparison
Here’s how the number of layers affects the look and time needed:
| Number of Layers | Visual Depth | Approx. Time |
|---|---|---|
| 1 | Flat, basic | 10 min/m2 |
| 2 | Some depth | 20 min/m2 |
| 3+ | Rich, complex | 30+ min/m2 |
3. Sponge Rolling Technique
Instead of dabbing, you can roll a cylindrical sponge across your surface. This creates long, streaky patterns that look great for wood grain, marble veins, or abstract backgrounds.
Cut a kitchen sponge into a roll, or buy a special sponge roller. Dip it in paint, remove excess, and roll with steady pressure. For a more random effect, twist your wrist as you roll.
4. Sponge Stamping
With a craft knife, cut simple shapes into your sponge—circles, triangles, or even leaves. Dip the shaped sponge into paint and stamp onto your surface. This technique is perfect for decorative borders or adding repeated motifs.
It’s important not to overload the sponge with paint. Dab on a paper towel first, or your stamp will look blurry.
Practical Example
You can make a patterned wall border by cutting a star shape, dipping in gold acrylic, and stamping along the top edge of a wall. Kids love this method for decorating their rooms or making cards.
Credit: urartstudio.com
5. Color Blending With Sponges
Blending colors with sponges is much easier than with brushes. Place two or three colors side by side, then use a clean, damp sponge to gently tap where the colors meet. The transition will be soft and natural.
This technique is useful for painting sunsets, ocean waves, or backgrounds that change from one color to another. It’s also helpful in portrait painting for blending skin tones smoothly.
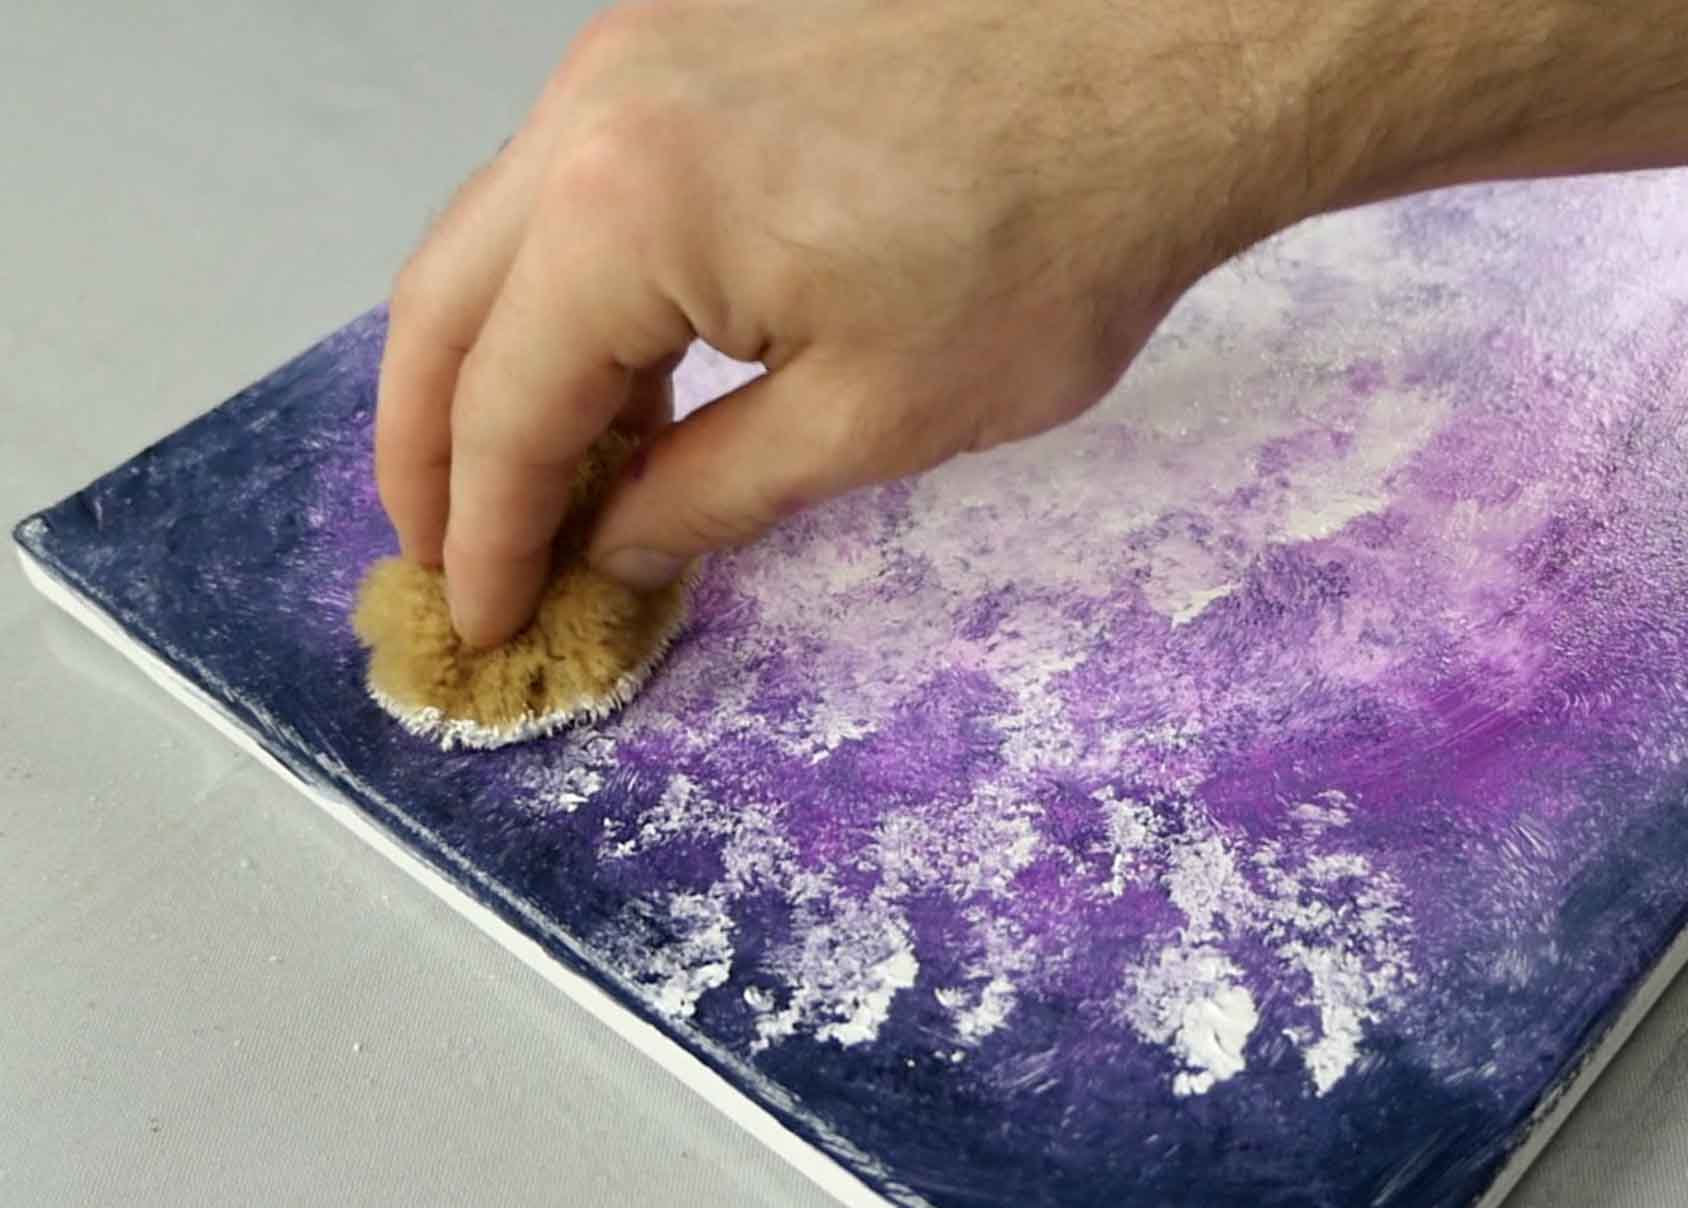
6. Creating Texture With Dry Sponges
A dry sponge picks up very little paint. When you dab with it, the result is rough, scratchy texture—great for stone, bark, sand, or rust effects.
For even more texture, let one layer of paint dry, then use a dry sponge with a contrasting color over the top. The rough surface will catch only the high points.
Table: Wet Vs. Dry Sponge Effects
| Technique | Look | Common Uses |
|---|---|---|
| Wet Sponge | Smooth blending | Skies, water, gradients |
| Dry Sponge | Rough texture | Rocks, bark, concrete |
:max_bytes(150000):strip_icc()/diy-sponge-painted-room-1974313-06-dae5abefe4cb4b88bc873bb4145e2691.jpg)
Credit: www.thespruce.com
7. Faux Finishes: Stone, Marble, And More
Many interior designers use sponges to create faux finishes that mimic stone, marble, or old walls. The secret is layering at least three colors and using random dabbing and rolling.
For marble, start with a light base, add medium tones with a sponge, then lightly dab white or silver for highlights. For stone, use gray, brown, and ochre, overlapping and blending as you go.
This method is popular in both home decor and theater set design. It’s much cheaper than using real stone, and you can customize the colors to fit any space.
8. Cloud And Sky Painting
Sponges are the best tool for painting realistic skies. Start with a blue background, then use a clean sponge to dab on different whites, blues, and even hints of pink or orange for sunrise or sunset.
The uneven sponge surface makes clouds look fluffy and soft. For added depth, layer lighter colors on top and blend the edges with a damp sponge.
9. Underwater And Water Effects
Want to paint water, bubbles, or underwater scenes? Use a sponge to create soft gradients and highlights. For waves, dab white or light blue in curved lines. For bubbles, use a small round sponge and stamp gently.
Blending with a sponge is especially helpful when painting reflections or light patterns on the water’s surface.
10. Landscape Textures: Grass, Foliage, Bark
Sponges can quickly add natural textures to landscapes. Use a small, rough sponge for grass or tree leaves—dab in different greens and yellows for a realistic look. For tree bark, a dry sponge with brown and gray paint gives a cracked effect.
A non-obvious tip: rotate your sponge as you dab. This prevents repeating the same pattern, making foliage look more natural.
11. Abstract Art With Sponges
Abstract artists often use sponges to build up color fields, add texture, or create unexpected patterns. The random nature of the sponge means no two strokes are alike, which is perfect for expressive painting.
Try layering bold colors and letting each layer dry before adding more. You can also use sponges to remove paint, revealing colors underneath for a distressed look.
12. Sponge Techniques For Crafts And Furniture
Sponge painting isn’t just for canvases or walls. You can use it to decorate:
- Wooden boxes and frames
- Flower pots
- Furniture (tables, chairs)
- Greeting cards
Sponge dabbing is a fast way to update old furniture. Just clean the surface, apply a base coat, then sponge on accent colors. Seal with clear varnish for durability.
13. Using Multiple Sponges For Complex Effects
Don’t limit yourself to one sponge. Use different shapes and sizes in the same artwork. For example, a large sea sponge for the background, and a small piece for details or highlights.
Switching sponges as you work helps you control both large areas and tiny details. Some artists even glue small sponge pieces to sticks for more control.
14. Cleaning And Reusing Sponges
To keep your sponges in good shape:
- Rinse with warm water immediately after use.
- Squeeze out as much paint as possible.
- Wash with mild soap if needed.
- Let them air dry.
If your sponge gets stiff or dirty, cut off the affected part. Never leave a sponge soaking in paint or water—it will break down faster.

Credit: www.youtube.com
15. Common Mistakes And How To Avoid Them
Many beginners make the same errors with sponge painting. Here’s what to watch out for:
- Too much paint: Overloading the sponge leads to blobs and smears. Always dab off excess before touching your surface.
- Repeating patterns: Using the same part of the sponge creates a “stamp” look. Rotate the sponge often and use different edges.
- Working too wet: If your sponge is soaked, the paint will run and blend too much. Squeeze out extra water.
- Rushing layers: Let each layer dry before adding another, or colors will mix and turn muddy.
A helpful tip: practice on scrap paper or an old box before starting on your real project. This helps you get a feel for how much paint and pressure to use.
16. Advanced Sponge Painting Tips
For those ready to take their skills further:
- Masking: Use tape or stencils to keep sponge patterns within certain areas.
- Mix media: Combine sponge techniques with brushwork, palette knife, or even finger painting for unique effects.
- Add shimmer: Try metallic or pearlescent paints with a sponge for extra shine.
Another trick: use a spray bottle to lightly mist your surface before sponging. This helps the paint blend more softly.
17. Choosing The Right Sponge For Each Effect
Different sponges create different results. Here’s a quick guide:
| Sponge Type | Best Use | Pattern |
|---|---|---|
| Natural sea sponge | Organic textures (clouds, stone) | Irregular, soft |
| Synthetic sponge | Controlled patterns, stenciling | Consistent, even |
| Kitchen sponge | Crafts, large areas | Medium, open texture |
18. Safety And Clean-up
Most acrylic paints are safe, but always wash your hands after painting. Use gloves if your skin is sensitive. Keep paint away from your eyes and mouth. For big projects, work in a well-ventilated area.
Dispose of paint water responsibly—don’t pour it down the drain if you’re using oil-based paints.
19. Where To Find Inspiration
If you need ideas, look around you! Nature is full of sponge-like patterns—clouds, rocks, tree bark, even animal fur. Many museums and galleries show sponge painting in modern art. Online platforms like Pinterest and Instagram offer endless examples.
Don’t be afraid to experiment. Sometimes the best effects come from happy accidents.
20. Learning From Experts
Many professional painters share their sponge techniques in workshops and online courses. Watching an experienced artist helps you learn tricks that books can’t teach.
For reliable resources, check out WikiHow’s guide on sponge painting. It includes step-by-step tutorials and visuals for every skill level.
Frequently Asked Questions
How Do I Choose The Right Paint For Sponge Techniques?
Acrylic paints are the most popular because they dry fast and work on many surfaces. For paper, you can use watercolors. If you’re painting walls or furniture, make sure to use paints designed for those materials.
Why Does My Sponge Pattern Look Too Harsh Or Too Soft?
If your pattern is too harsh, you may be using too much paint or pressing too hard. Dab off extra paint, and use a lighter touch. If it looks too soft, let your paint dry between layers or use a drier sponge.
Can I Use The Same Sponge For Different Colors?
Yes, but wash the sponge well between colors to avoid muddying. For best results, keep a few sponges for light, medium, and dark tones.
Are There Surfaces Where Sponge Painting Doesn’t Work Well?
Very smooth or shiny surfaces (like glass or plastic) may not hold the paint unless you use a special primer. Always test your technique on a small area first.
What’s A Good Beginner Project For Sponge Painting?
Try making a simple sunset or cloud scene on canvas or thick paper. Use two or three colors and practice blending with a sponge. You’ll quickly see how easy it is to create impressive effects.
Painting with sponges is creative, forgiving, and fun. With a little practice and the right approach, you can transform any surface into a work of art—full of texture, color, and personality. Let your imagination guide you, and enjoy the process as much as the results!


