Digital portrait painting blends classic art fundamentals with modern speed and control.
You want lifelike faces. You want skin that glows. You want eyes that feel alive. But getting there in a digital app can feel slow and messy. Layers pile up. Colors turn muddy. Edges look off. I’ve been there. The right learning path changes everything. In this guide, I show how to use proven portrait methods in a digital workflow. I also review top portrait books that translate beautifully to tablet or desktop. If you want portraits that look luminous and real, these picks will help you get there.
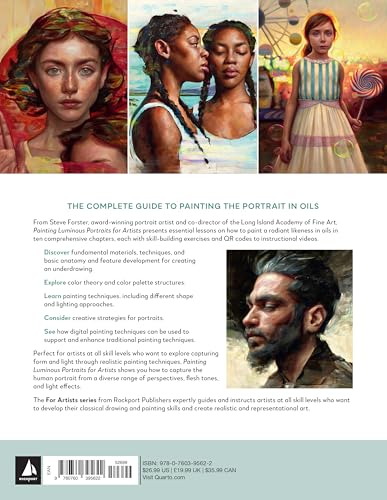
Painting Luminous Portraits: Features, Light, Form

This book focuses on facial features, skin, and the play of light. It shows how small value shifts create life. It teaches edges that suggest form, not just outlines. The visuals and step-by-steps make complex ideas simple.
If you do portrait painting digital, this guidance is gold. You get a clear path for luminous skin in apps like Procreate or Photoshop. You also learn how to plan light for mood. The advice on color temperature helps you avoid dull skin and gray shadows.
Pros:
- Practical breakdown of eyes, nose, lips, and ears
- Great coverage of light, shadow, and edge control
- Clear color temperature advice for lively skin
- Easy exercises that adapt well to layers and brushes
- High-quality images that show subtle value changes
Cons:
- Focuses on oil methods, so you must translate steps for digital
- Not a beginner anatomy book
- Some demos assume comfort with drawing basics
My Recommendation
If your portraits look flat, start here. This book helps you build skin that glows. It suits artists who want realism and depth. It is ideal if you do portrait painting digital and need a roadmap to stunning light and skin.
| Best for | Why |
| Digital painters fixing muddy skin | Teaches warm/cool balance and value control |
| Artists seeking luminous light | Great section on light direction and edge quality |
| Intermediate realists | Feature-by-feature demos that adapt to layers |
Portrait Painting Atelier: Old and Modern Methods

This atelier guide blends Old Master practice with present-day use. It covers drawing, block-in, and value structure. It explains sight-size, envelope, and comparative measurement. You get step-by-step builds that train your eye.
In portrait painting digital, this helps you plan layers like a pro. Think grisaille on one layer, then glazes on top. The book shows how to design edges and shapes that read well at a glance. The cross-over from oil to digital is smooth and logical.
Pros:
- Strong drawing and value foundations
- Classic layer logic that maps well to digital stacks
- Teaches edge hierarchy for clean reads
- Focus on big shapes before detail
- Clear methods for measurement and accuracy
Cons:
- Traditional focus can feel slow to impatient learners
- Less emphasis on color variety
- Few digital-specific examples
My Recommendation
Pick this if you want clear structure. It is great for portraits that look solid at any zoom. If you work in portrait painting digital, you can follow its stages with layers. It is ideal if you want strong drawing and values that hold up under any lighting.
| Best for | Why |
| Digital artists who rush details | Forces big shapes and values first |
| Realism and classical style fans | Old Master workflow made simple |
| Layer-based learners | Grisaille-to-glaze maps to digital layers |
Beautiful Portraits in Oils: Master Skin Tones

This book focuses on diverse skin tones and color nuance. It gives you palettes, charts, and demos. It shows how light, chroma, and hue shifts change the look of skin. It also covers features like hair, lips, and eyes with care.
In portrait painting digital, you can build swatch sets from the book. Use HSB sliders to match the charts. Apply soft light or color layers to glaze. The lessons help you fix color bias and avoid chalky highlights or dead shadows.
Pros:
- Strong coverage of ethnic and tonal diversity
- Practical skin swatches you can convert to digital palettes
- Clear fixes for common color mistakes
- Feature demos that translate to digital brushes
- Simple steps that guide beginners through finish
Cons:
- Oil-first approach may confuse a few beginners
- Printed palette colors may look different on screens
- Focus is realism, not stylized design
My Recommendation
Get this if skin tones are your pain point. It gives you a method to build clean palettes. It is perfect for portrait painting digital when you need quick, repeatable color choices. Turn its charts into swatches, then glaze with confidence.
| Best for | Why |
| Artists struggling with skin color | Palettes and charts simplify mixing and matching |
| Digital swatch builders | Easy to convert to HSB or LAB sets |
| Beginner to intermediate painters | Step-by-step demos are gentle and clear |
Beginner’s Guide to Creating Portraits

This beginner guide teaches core ideas fast. It covers structure, planes, and proportion. It then shows how to find your own style. The lessons are short and clear, which helps you move with speed.
It maps well to portrait painting digital. You can practice each drill on a new layer. You can test brushes without fear. The book is a gentle on-ramp if you want to start now and grow with a plan.
Pros:
- Beginner-friendly steps and short drills
- Focus on structure and planes for solid heads
- Style-building tips for personal voice
- Translates well to digital layers and brush tests
- Great for daily practice habits
Cons:
- Not a deep dive on lighting or color theory
- Less coverage of advanced anatomy
- Some examples feel brief for late intermediates
My Recommendation
This is for new artists and for anyone stuck at the start. It gives you small wins fast. In portrait painting digital, it helps you build skill with low stress. Use it to set a routine and grow your style with time.
| Best for | Why |
| Complete beginners | Short lessons and simple tasks |
| Busy learners | Quick drills fit tight schedules |
| Style seekers | Guidance on finding your visual voice |
How to pick the best portrait painting digital guides
I look for books that teach thinking, not just copying. You want methods that work in any medium. That includes oil, pencil, or a tablet. If a method is sound, it will work on a screen too.
Check for clear steps and strong images. Look for structure, anatomy, and light. Make sure the author shows process, not only final art. Aim for lessons you can test in your app right away.
I also check how ideas map to layers. Good books teach stage order. Block in, values, color, then edges. That is easy to mirror in Photoshop, Procreate, or Clip Studio Paint.
My testing method for digital translation
I test each lesson in a real digital workflow. I start on an iPad with Procreate. I also test in Photoshop on desktop. I use default brushes, then move to custom sets.
I set up a clean layer stack. Sketch. Value. Color. Glaze. Detail. I compare the results with the book’s intent. If the core ideas hold up, the book passes my test.
I also check speed. Good methods save time. They prevent color mud and edge chaos. They help you ship portraits that look strong at any zoom.
Key skills that matter for portrait painting digital
Values first. If your values are right, the face will read. Squint at your reference. Check light and shadow groups. Keep them simple.
Edges next. Hard edges draw the eye. Soft edges turn form. Lost edges add life. Use them to guide focus.
Color last. Control warms and cools. Avoid pure white on skin. Check hue shifts around cheeks, nose, and ears. Think life, not plastic.
Digital tool tips that map to classic methods
Use layers for stages. Keep a grisaille layer to lock down values. Add a color layer set to soft light or color mode. Then glaze with low opacity brushes.
Pick brushes that match intent. Use a hard round for crisp edges. Use a soft round for blends. Try a textured brush to add tooth and avoid the “airbrush” look.
Save swatches for skin. Use limited palettes. Warm lights and cool shadows or the reverse. Keep your wheel tight to avoid chaos.
Common mistakes I see and quick fixes
Problem: muddy skin. Fix: lock values first in grayscale. Add color on a separate layer. Use low opacity glazes to keep clean chroma.
Problem: plastic look. Fix: add temperature shifts at planes. Warm around the nose and cheeks. Cool on the jaw plane and temples.
Problem: dead eyes. Fix: check the value of the sclera. It is not white. Add a soft occlusion at the upper lid. Paint a clean, small spec to bring life.
Practice plan for the next 30 days
Week 1: Heads as simple boxes and planes. Do three per day. Keep it quick. Use a big brush and no details.
Week 2: Grisaille heads from photo refs. Two per day. Focus on value groups. No color yet.
Week 3: Add color glazes. Keep palettes small. Try front light, side light, and rim light. One study per day.
Week 4: One full portrait. Then one stylized portrait. Limit time to eight hours each. Review and note what to fix next.
Mapping these books to your digital workflow
Use Luminous Portraits for skin and light. Build a tight swatch set from its advice. Set a color glaze layer and keep opacity low. Watch how edges and temperature shifts bring life.
Use the Atelier book for your base. Start with accurate drawing. Use envelopes and block-ins. Commit to values before color.
Use Beautiful Portraits in Oils when building diverse palettes. Convert swatches to your app. Label them for light, mid, and dark. Save them by ethnicity and lighting type.
Use the Beginner’s Guide when you feel stuck. Do a few drills before a session. It warms up your eye and hand. Your portraits will tighten up faster.
Software notes for 2026-era artists
Today’s tools are powerful. Procreate, Photoshop, and Clip Studio Paint are strong picks. You can build any classic workflow in them. Brushes are mature and fast.
Focus on brush behavior and layer setup. Name layers by stage. Sketch, Values, Color, Glaze, Detail. Keep your file tidy. This reduces friction and saves time.
Use reference tools like grids and symmetry if needed. Use a value check layer on top. Fill it with black and set to color mode. Toggle it to test your values fast.
Choosing brushes that feel like oil, pencil, or charcoal
Try a bristle brush for textured skin. It breaks up blends in a natural way. Use it to avoid plastic blends. Keep your pressure low for soft passes.
Use a controlled smudge brush for edge work. Do not over-smudge. Instead, paint both sides of an edge, then kiss them with a soft stroke. This keeps form intact.
For hair, use grouped strands, not single lines. Block shape and value first. Add a few sharp strands at focal points. This sells the look without fuss.
Reference and lighting choices that help
Pick one clear light source. Side light shows form well. Front light is gentler and hides structure. Rim light adds drama but needs care.
Use high-res references. Zoom for structure checks. Do not trace. Instead, compare angles and distances. This builds accuracy fast.
If you can, shoot your own refs. Control the light. Use a soft key light and a fill. Add a kicker if you need shape on dark hair.
Edge strategy that sells realism in digital
Keep sharp edges at the focal point. Often that is the eyes and the mouth. Let other edges go soft or lost. This feels like a lens and reads well.
Check cast shadows. The edge is sharper near the caster. It softens as it moves away. Paint that shift for more depth.
Use scumbles to bridge tones. Lightly pass a textured brush across a turn. It creates a natural mix of hue and value. That is life in a portrait.
Color strategy for skin across tones
Think hue families. Light zones can tilt warm. Shadow zones can tilt cool. Or reverse, depending on the light. Keep harmony first.
Use chroma changes to show blood flow. The cheeks, lips, and ears often go richer. The jaw and forehead planes are calmer. Watch for subtle greens in beards or around the mouth.
Never use pure white for highlights. Use a warm near-white in light. Or a cool near-white for cool light. It will sit better on the form.
Short checklist before you call a portrait done
Zoom out and squint. Does the face read as a whole? If not, simplify shapes. Make big areas calm and clear.
Flip canvas. Check for tilt and proportion issues. Fix them with the lasso or warp if needed. Small shifts can save a piece.
Check value separation. Light group and shadow group should stay distinct. If they blend, your form will flatten. Restore the gap with careful glazes.
FAQs Of portrait painting digital
What is portrait painting digital?
It is making portraits with apps instead of paint. You use layers, brushes, and swatches. The core art skills are the same.
Which app is best to start?
Procreate and Photoshop are great. They are fast and stable. Both handle layers and brushes well.
How do I get natural skin tones?
Lock values first. Then glaze color with low opacity. Use warm and cool shifts by plane.
How do I stop my portraits from looking plastic?
Add texture and edge variety. Use scumbles and light noise. Avoid over-smoothing blends.
How long does it take to improve?
With daily drills, you will see gains in weeks. With a plan, big jumps can come in months. Keep it simple and steady.
Final Verdict: Which Should You Buy?
If you want glow and skin mastery, choose Painting Luminous Portraits. For structure and value strength, pick Portrait Painting Atelier.
Need diverse skin guidance? Get Beautiful Portraits in Oils. Total beginners should start with the Beginner’s Guide. Any pick will lift your portrait painting digital right away.