Are you ready to bring your landscapes to life with the rich texture and vibrant colors of oil paint? Oil painting landscapes can seem challenging at first, but with the right tips, you’ll find it easier to capture the beauty of nature on your canvas.
Whether you want to create glowing skies, lush trees, or reflective water, mastering a few key techniques will transform your work. You’ll discover simple yet powerful oil painting tips that help you avoid common mistakes, create depth, and make your scenes truly stunning.
Let’s dive in and unlock your potential to paint breathtaking landscapes with confidence!
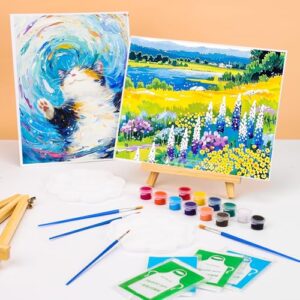
Choosing Materials
Choosing the right materials is the first step in painting beautiful landscapes with oil paints. Quality supplies help bring your vision to life. The right tools make painting easier and more enjoyable. Focus on selecting paints, brushes, and canvas that suit your style and skill level. This section guides you through each choice.
Selecting Oil Paints
Choose oil paints with rich, vibrant colors. Look for paints with high pigment concentration. They give better coverage and blend smoothly. Start with a basic palette of primary colors and earth tones. This mix helps create natural landscape colors. Invest in student-grade paints if you are a beginner. Upgrade to professional-grade as you gain experience.
Picking Brushes
Use brushes made for oil painting. Hog bristle brushes are stiff and durable. They hold thick paint well and create texture. Soft brushes, like sable or synthetic, work for details and smooth areas. Select various brush sizes. Large flat brushes cover wide spaces quickly. Small round brushes add fine details like leaves or branches.
Preparing The Canvas
Start with a primed canvas to protect your work. Use linen or cotton canvases with a smooth surface. Apply a thin layer of gesso if the canvas is unprimed. Let it dry completely before painting. A well-prepared canvas absorbs paint evenly. It prevents cracking and enhances color vibrancy.
Planning Your Scene
Planning your scene is the first step in painting landscapes with oil. It helps you organize your ideas and create a strong foundation. A well-planned scene guides your brush and colors. It ensures your painting looks balanced and clear. Spend time on this stage to avoid confusion later.
Sketching The Composition
Start by drawing a simple sketch of your landscape. Use light pencil lines to mark main shapes. Focus on the horizon and key elements like trees or hills. Keep the sketch loose to allow changes. This helps you see how parts fit together. A good sketch sets the stage for your painting.
Establishing Focal Points
Choose one or two focal points for your scene. These areas attract the viewer’s eye first. It could be a bright tree, a mountain peak, or a river bend. Make these points stand out by size or color. Avoid placing focal points in the center. Use the rule of thirds to create balance and interest.
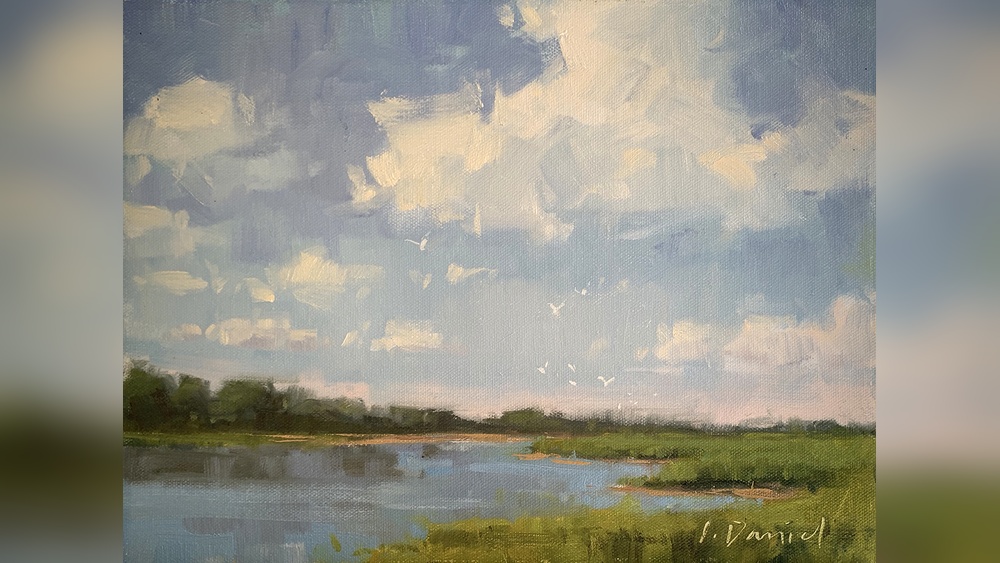
Mapping Light And Shadow
Plan where the light hits and where shadows fall. Light defines shapes and adds depth to your painting. Note the direction of sunlight or moonlight. Mark shadow areas with darker tones or cooler colors. This contrast gives your scene a three-dimensional feel. Proper light and shadow mapping improves realism and mood.
Mixing Colors
Mixing colors is a key skill for painting landscapes in oil. It helps create depth and realism in your artwork. Proper color mixing brings nature’s subtle tones to your canvas. It also allows you to capture light, shadow, and atmosphere accurately.
Understanding how to blend colors makes your landscapes more natural and vibrant. You learn to avoid flat or unnatural hues. Mixing colors carefully supports the overall mood of your painting.
Creating Natural Greens
Pure green paint often looks artificial. Mix blues and yellows to create varied green tones. Add small amounts of red or brown to mute brightness. This mimics natural foliage shades.
Use Ultramarine Blue or Phthalo Blue with Cad Yellow or Lemon Yellow. Adjust ratios to get cool or warm greens. Experiment with adding touches of burnt sienna for earthiness. These mixtures give leaves and grass a realistic look.
Mixing Sky Tones
Skies rarely appear as a single color. Blend different blues and whites to capture the sky’s depth and light. Use Cerulean Blue for a bright sky or mix with Titanium White for softer tones. Add a hint of Alizarin Crimson for a sunset effect. This variety brings your sky to life.
Final Touches and Details
Adding final touches and details can elevate your oil painting landscapes to a new level. These finishing steps refine your work and add character. Pay attention to small elements like highlights, reflections, and textures. They make your painting more engaging and realistic.
Highlighting and Accents
Use lighter colors to highlight areas where light naturally falls. This technique adds dimension and focus. Apply highlights sparingly to avoid overpowering the scene. Accents can also be added with small brush strokes to emphasize texture and detail.
Adding Texture
Texture adds interest and realism to your landscapes. Use a palette knife or dry brush technique to create rough surfaces like rocks or tree bark. Experiment with different tools to achieve the desired effect. Texture can make your painting more tactile and visually appealing.