PaintingProGuide is reader-supported. When you buy through links on this page we may earn an affiliate commission at no extra cost to you.
The best oil painting classes for beginners are the ones that put you in front of a real painting problem every session, with someone who can see your canvas and tell you what to fix. Oil paint has a few rules, such as fat over lean, solvent safety and how long layers take to dry, that are much easier to learn from a person than from trial and error. But the right format depends on your schedule, budget, learning style and how much feedback you want.
This guide compares the main kinds of beginner oil painting classes, from community art center courses and private ateliers to online video courses and live virtual classes. It explains what a good beginner class should cover, the questions to ask before you sign up, and what supplies most classes expect you to bring. At the end there is a short list of starter supplies sold on Amazon that match a typical beginner materials list.
Quick answer: For most beginners, an in-person multi-week course at a local art center or community college is the best start: structured lessons, live feedback on your canvas, and a teacher who can show you solvent-safe studio habits. If there is nothing nearby or your schedule is unpredictable, a live online class with critique is the next best option, while self-paced video courses suit motivated learners on a budget. Arrive with a basic kit such as the Ohuhu 24-color oil paint set and a varied brush set with a palette knife like the COBBIA 25-piece brush set.
Types of Oil Painting Classes at a Glance
| Class Type | Best For | Format | Key Strength | Typical Cost Level |
|---|---|---|---|---|
| Community art center or rec department course | Most beginners | Weekly sessions over several weeks | Structure and live feedback | Low to moderate |
| Community college non-credit or credit class | Learners who want depth and accountability | Semester or term | Thorough curriculum | Moderate |
| Private studio or atelier | Serious learners wanting classical training | Small groups, often ongoing | Close instruction and rigor | Higher |
| One-day workshop | Trying oils before committing | Single session or weekend | Fast introduction | Low to moderate |
| Live online class | Busy schedules, remote learners | Scheduled video sessions | Real-time feedback from home | Low to moderate |
| Self-paced video course | Self-motivated, budget learners | Recorded lessons | Flexibility and low cost | Low |
| Paint-and-sip event | Social fun | One evening | Low pressure | Low to moderate |
Cost levels are relative and vary widely by city and instructor. Remember to add supplies on top of class fees: a beginner kit of paint, brushes, panels, solvent and medium is a real part of the budget, and some studios include shared materials while others expect you to bring everything.
One caution: most paint-and-sip events use acrylic, not oil, because acrylic dries in time for guests to take paintings home. If the goal is learning oil, check the medium before booking.
How We Chose
The class guidance on this page reflects how oil painting is commonly taught and what beginners need to learn first. We do not endorse specific schools or platforms. The supply picks at the end are based on Amazon listing details checked in October 2026, how well each matches a typical beginner class materials list, and how widely each is reviewed by Amazon buyers.
- Feedback: how much individual critique a format provides.
- Structure: whether lessons build in a logical order.
- Studio safety: whether solvents and ventilation are taught and handled properly.
- Flexibility and cost: how the format fits real schedules and budgets.
What a Good Beginner Oil Class Should Teach
Whether in person or online, a beginner course should cover these topics. Use this as a checklist when reading class descriptions:
- Materials and setup: paints, brushes, surfaces, mediums, solvents and how to set up a palette.
- Studio safety: ventilation, odorless solvents, rag disposal and cleanup.
- Value and drawing: seeing light and shadow, simple underpainting.
- Color mixing: working from a limited palette, mixing neutrals, color temperature.
- Core techniques: toning the canvas, blocking in, fat over lean, wet-on-wet, glazing and scumbling.
- Subjects: usually still life first, then landscape, with portraits in later courses.
- Finishing: drying times, varnishing and storing oil paintings.
In-Person Classes: What to Expect
Most community classes meet once a week for two to three hours over several weeks. The first session often covers materials and a simple exercise such as a value study. Instructors usually demonstrate, then walk around the room giving individual feedback while you paint. That moment, when someone looks at your canvas and points to the one edge or value that is wrong, is the main reason to choose in-person learning.
Ask whether the studio has ventilation, whether solvents are allowed, and whether the class uses solvent-free methods. Many studios now restrict solvents or require odorless mineral spirits in closed containers. Ask also how wet paintings get home, since oil paintings will not be dry at the end of class; a wet canvas carrier or a cardboard box helps.
Online Classes: Live vs. Self-Paced
Live online classes
Live classes run on a schedule through video. The better ones let you show your canvas on camera or upload photos for critique. You get structure and some feedback without travel. Check class size: in a large group, you may get little individual attention.
Self-paced video courses
Recorded courses on large learning platforms and individual artist sites let you learn at any hour and repeat lessons. They are inexpensive and flexible but provide little or no feedback. They work best for disciplined learners who will paint along with each lesson and compare results honestly.
Free video lessons
Free tutorials can be excellent, but they are rarely structured as a progression. If you use them, plan your own sequence: materials, value, color mixing, then subjects.
Ateliers and Workshops: When They Make Sense
An atelier is a small studio built around one teacher or a group of teachers, often following a classical sequence such as drawing from casts before painting, then monochrome painting before full color. It is the most rigorous route and suits people who already know they want serious training. For a true beginner, a part-time atelier evening class can be an excellent foundation, but a full-time program is a big commitment to make before you know you enjoy oils.
Weekend workshops are the opposite: short, intense, and often focused on a single subject or technique taught by a visiting artist. They are a great way to try oils, or to fill a gap later, but a single workshop rarely builds the habits a multi-week course does. A sensible path for many people is a one-day workshop to test the waters, then a multi-week beginner course, then workshops on specific subjects.
Getting the Most From Any Class
- Paint between sessions. Even two short practice sessions a week make class feedback far more useful, because you bring new problems to solve.
- Keep a simple log. Note the palette, medium and technique for each painting so you can repeat what worked.
- Photograph your work in progress. Black-and-white photos reveal value problems that color hides.
- Ask about one thing at a time. Focused questions get more useful answers than “what is wrong with this?”
- Repeat the exercises. The second attempt at a class exercise, done at home, is often where the lesson finally clicks.
Questions to Ask Before You Enroll
- Is the class taught in oil, or acrylic with some oil content?
- Is it designed for complete beginners?
- What is the materials list, and is any material provided?
- What is the solvent policy?
- How large is the class, and how is feedback given?
- Can I see examples of student work or the instructor’s own work?
- What happens if I miss a session?
Want to get a head start before your first class? Our guide on how to start oil painting as a beginner covers setup and first exercises, and how to paint fog in oil is a good practice project for soft edges and value control.
Supplies That Help
Most beginner classes publish a materials list. A typical list includes a basic set of oil colors with a large white, a few brushes in flat, filbert and round shapes, a palette knife, canvas panels, odorless solvent and a medium. The products below fit those first two lines. Instructors often specify colors, so check the list before buying.
Starter Supplies at a Glance
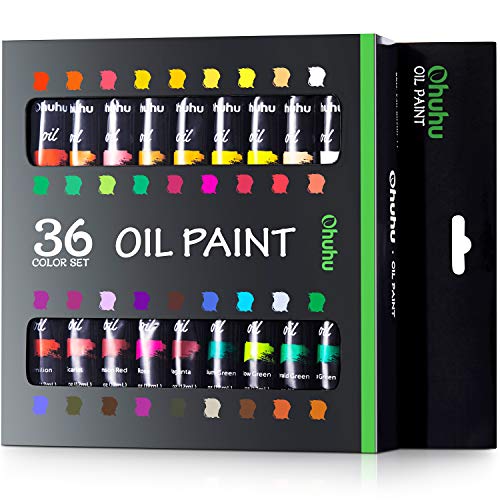
- Ohuhu Oil Paint Set, 24 Colors — Best starter paint set for a first class
- Ohuhu Oil Paint Set, 36 Colors — Best for students who want more ready-made colors
- COBBIA 25 pc Brush Set with Palette Knife and Roll — Best brush kit to carry to class
- Hoplito 36 Pcs Bulk Flat and Round Brushes — Best low-cost backup brushes
| Product | Best For | Key Spec | Key Strength | Price Tier |
|---|---|---|---|---|
| Ohuhu 24 Oil Colors | First oil class | 24 x 12 ml tubes incl. titanium white | Broad basic palette | $$ |
| Ohuhu 36 Oil Colors | Wider ready-made range | 36 x 12 ml tubes | More colors without mixing | $$ |
| COBBIA 25 pc Brushes | Carrying tools to class | 25 brushes, palette knife, cloth roll | Portable, many shapes | $$ |
| Hoplito 36 Brushes | Spares and cleanup brushes | 18 flats and 18 rounds | Very low cost | $ |
1. Ohuhu Oil Paint Set, 24 Colors — Best for a first oil class
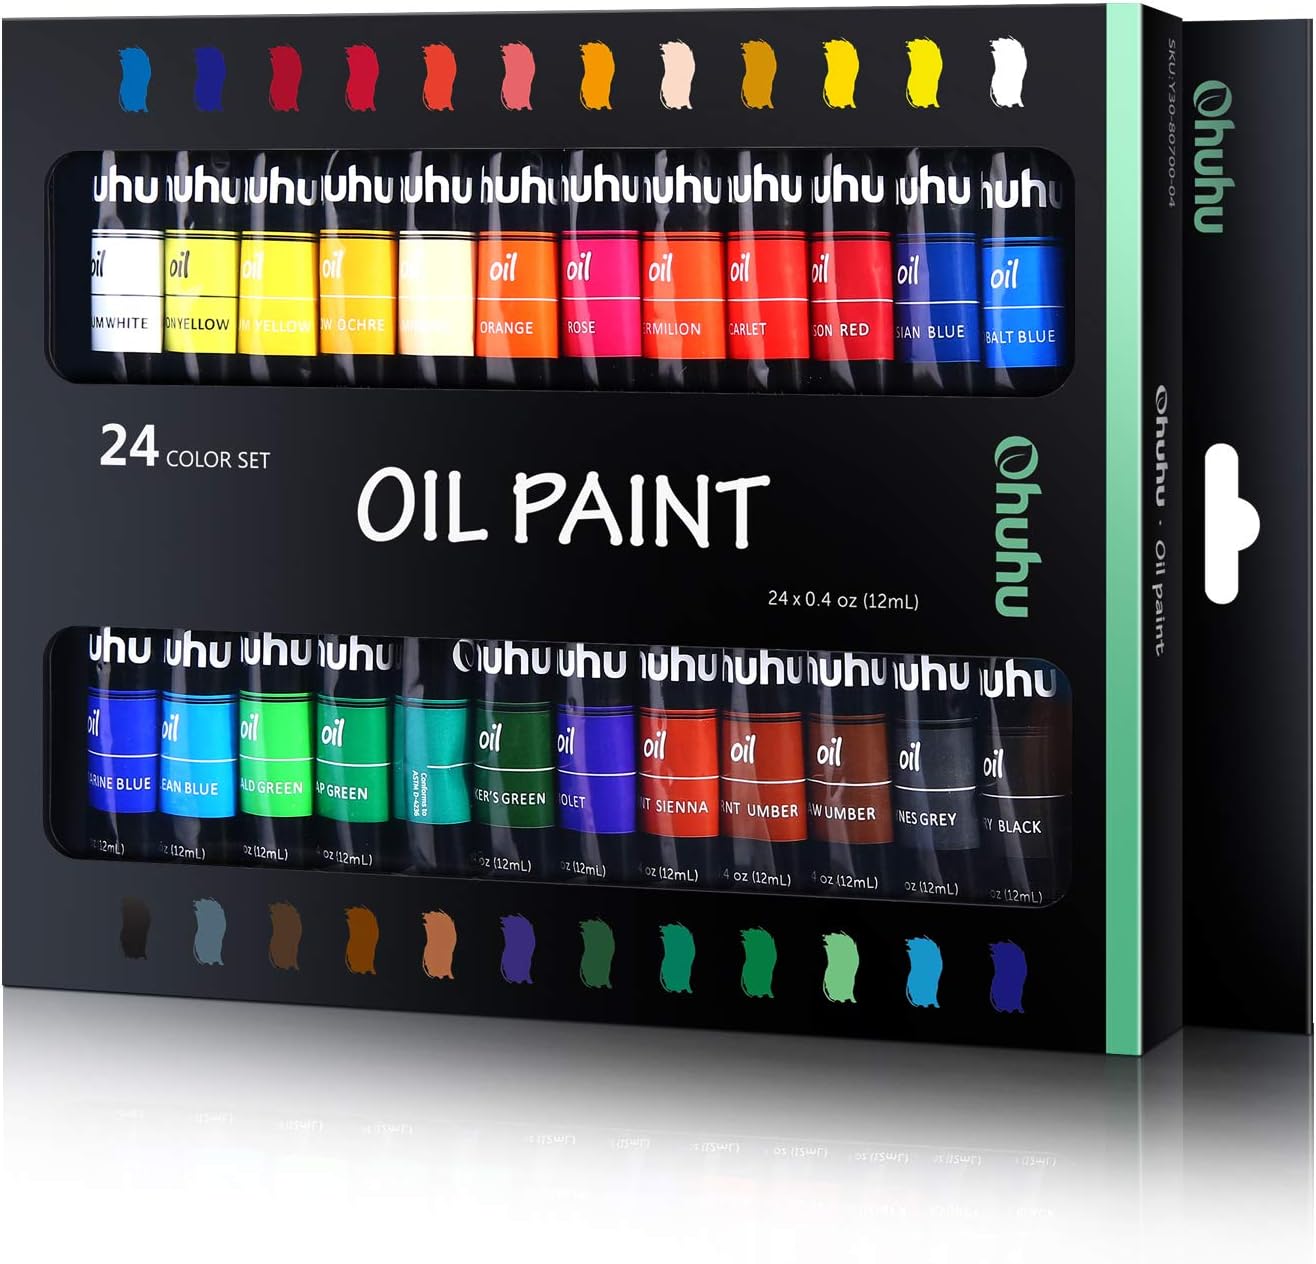
Ohuhu’s set includes 24 oil-based colors in 12 ml tubes. The listing names colors such as titanium white, lemon yellow, medium yellow, yellow ochre, orange, vermilion, crimson red, Prussian blue, cobalt blue and ultramarine blue, which covers the primaries and earths most beginner lists require.
Twelve milliliters is small, so you will run out of white first. Buy a separate large tube of titanium white before your first class.
Best suited for: Beginners who need a complete basic palette for a first course.
Key features:
- 24 oil colors, 12 ml each
- Includes titanium white, yellows, reds, blues and earths
- Listed as non-toxic
Pros:
- Covers a typical class list
- Low cost
- Portable tubes
Cons and limitations:
- Small tubes
- Student-grade
- White runs out fast
Buying consideration: Compare the color names with your class materials list and buy any missing colors individually.
2. Ohuhu Oil Paint Set, 36 Colors — Best for a wider ready-made range

The 36-color version adds more ready-made hues in the same 12 ml tubes, with the same base colors listed. More colors can save mixing time, though many instructors prefer limited palettes so students learn to mix.
Best suited for: Students who want variety for personal projects outside class.
Key features:
- 36 oil colors, 12 ml each
- Same base colors as the 24-color set
- Listed as non-toxic
Pros:
- More colors
- Good value per tube
Cons and limitations:
- Small tubes
- More colors than a beginner class usually needs
Buying consideration: Use the extra colors at home, but follow your instructor’s palette in class.
3. COBBIA 25 pc Brush Set with Palette Knife and Cloth Roll — Best for carrying tools to class

This set includes 25 synthetic brushes in detail, flat, filbert, fan, dagger, cat’s tongue, round, angle and rigger shapes, plus a palette knife and a portable canvas roll. The listing notes glued and riveted ferrules to keep brushes secure.
The roll is the practical win for classes: brushes travel protected and are easy to lay out at your station.
Best suited for: Students who carry supplies to a studio each week.
Key features:
- 25 synthetic brushes in many shapes
- Palette knife
- Portable cloth roll
Pros:
- Portable
- Shape variety
- Includes palette knife
Cons and limitations:
- Synthetic bristles are softer than hog bristle often used for oil
- More brushes than you need early on
Buying consideration: For thick oil paint, also consider a couple of stiffer bristle brushes if your instructor recommends them.
4. Hoplito 36 Pcs Bulk Flat and Round Brushes — Best for spares and cleanup

This bulk pack contains 18 flat and 18 round nylon brushes with aluminum ferrules and plastic handles. They are inexpensive enough to use for toning canvases, applying gesso or as spares when your good brushes are drying.
Best suited for: Spare and rough-work brushes.
Key features:
- 18 flat and 18 round brushes
- Nylon bristles
- Plastic handles
Pros:
- Very low cost
- Plenty of spares
Cons and limitations:
- Basic quality
- Not ideal for fine work
Buying consideration: Keep these for toning, rough block-ins and gesso so your better brushes last longer.
Buying Guide: How to Choose an Oil Painting Class
Instructor
Look at the instructor’s own work and teaching experience. A good painter is not always a good teacher, so read class descriptions and, if possible, talk to former students.
Class size and feedback
Smaller classes mean more individual attention. Ask how critique works.
Curriculum
Look for a logical progression from materials and value to color and subjects.
Safety practices
A good studio teaches ventilation, solvent handling and rag disposal.
Schedule and commitment
Choose a format you can attend consistently. Missing sessions breaks the progression.
Materials
Check what is provided and what you must buy. Budget for supplies in addition to class fees.
Common Mistakes to Avoid
- Booking an acrylic paint-and-sip to learn oils. Check the medium.
- Buying supplies before seeing the materials list. Instructors often specify colors.
- Choosing only free video tutorials. Without structure or feedback, progress can stall.
- Skipping homework. Practice between sessions is where most progress happens.
- Ignoring solvent policies. Bring the right solvent and container.
- Forgetting a way to carry wet paintings home. Oil paintings stay wet for days.
FAQs
Are oil painting classes worth it for beginners?
Yes, especially in person. Live feedback helps you learn oil-specific rules like fat over lean and safe solvent use much faster.
Can I learn oil painting online?
Yes. Live online classes with critique are closest to in-person learning; self-paced courses suit disciplined learners.
What should I bring to my first oil painting class?
Follow the materials list. Typically: oil colors with a large white, a few brushes, a palette knife, canvas panels, odorless solvent and rags.
How long does it take to learn oil painting?
Most beginners grasp the basics within a multi-week course, but skills keep improving with regular practice over months and years.
Are paint-and-sip classes oil or acrylic?
Usually acrylic, because it dries quickly. Check before booking if you want to learn oils.
Do I need to know how to draw before taking an oil painting class?
No. Beginner classes usually include simple drawing and value exercises.
Final Recommendation
Start with an in-person multi-week course if one is available near you. Choose a live online class with critique if your schedule or location makes that difficult, and use self-paced video courses to supplement either. For supplies, check your materials list, then start with a basic set like the Ohuhu 24-color oils plus a large white, and carry your tools in a kit like the COBBIA brush roll.