
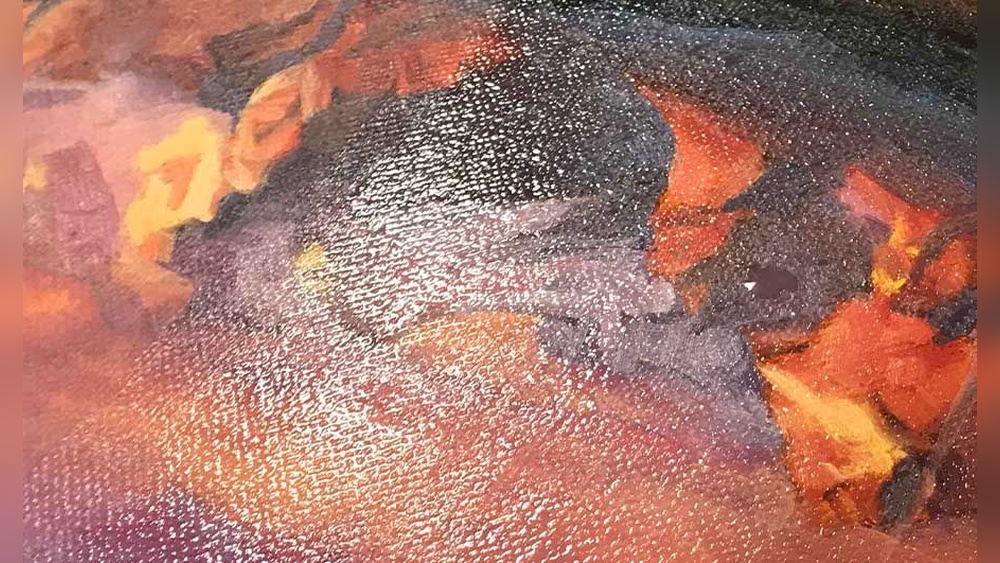
Quick answer: To varnish an oil painting correctly, wait until the paint is thoroughly dry (traditionally 6–12 months, longer for thick impasto, unless your varnish maker states otherwise), clean the surface, and work flat in a warm, dust-free room. Apply one or two thin, even coats of a removable picture varnish with a soft, wide brush, working in one direction, and let each coat dry before the next. If you need to show or sell the painting sooner, use a temporary retouch varnish first.
Most varnishing disasters on oil paintings trace back to two decisions: varnishing before the paint was ready, and putting on too much at once. Getting those right matters more than any brand or technique. This guide walks through how to varnish an oil painting correctly from start to finish: how to tell when the paint is ready, how retouch varnish fits in, which varnish types suit which paintings, the exact brushing sequence, and how to handle special cases like water-mixable oils and oil pastels.
Why Oil Paintings Need Varnish
Oil paint dries by oxidation, not evaporation. The oil absorbs oxygen and slowly forms a tough film, a process that continues for months and, at a chemical level, years. During that time, the surface can attract airborne dirt, smoke, and grease that work into the paint. A final varnish provides a removable barrier. Decades later, a conservator can dissolve the dirty or discolored varnish and replace it without disturbing the paint beneath.
Varnish also restores visual depth. As oil paint dries, some areas “sink in” and look dull and patchy, especially darks and passages painted with less oil. A good varnish saturates those areas so colors look the way they did when wet. Choosing a product that stays clear and removable is part of doing the job correctly; our overview of oil painting varnishes worth considering can help once you know the basics below.
When Is an Oil Painting Ready to Varnish?
The traditional guidance is to wait six months to a year before final varnishing, and longer for very thick paint. Being touch-dry is not enough: the surface can feel dry within days while the layers beneath are still curing and moving. If you seal them too soon, the varnish may crack, wrinkle, or become partially bonded to the paint, making later removal risky.
| Paint application | Typical wait before final varnish |
|---|---|
| Thin layers, glazes, lean underpainting | About 6 months |
| Average layers, moderate texture | 6–9 months |
| Heavy impasto or slow-drying colors and oils | 12 months or more |
| Alkyd-modified paint or fast-drying mediums | Often sooner; follow paint and varnish maker guidance |
Some modern synthetic varnishes are formulated to be applied once the thickest paint is firm and dry to the touch rather than after a full year. If you use one of these, follow the manufacturer’s instructions precisely. A simple practical test: press a fingernail gently into the thickest area at an inconspicuous edge. If it leaves a dent, the paint is not ready.
Retouch Varnish: The Temporary Solution
Retouch varnish is a very thin, dilute varnish applied once the paint is touch-dry, often a few weeks after painting. It does two jobs:
- Evens out sinking-in so you can judge colors accurately and continue painting over dull areas.
- Provides interim protection so you can exhibit, photograph, or deliver a painting before it is ready for final varnish.
Because retouch varnish is thin and breathable, it does not stop the paint from curing. When the drying period is over, you apply the final varnish over it. Tell buyers when a painting has only retouch varnish so they know a final coat is still needed.
Choosing a Varnish for Oil Paintings
| Varnish type | Characteristics | Considerations |
|---|---|---|
| Natural resin (damar, mastic) | Traditional, warm glow, high gloss | Tends to yellow and become brittle with age; can become harder to remove over time |
| Synthetic low-molecular-weight resin | Very clear, high saturation similar to natural resins | More stable and less prone to yellowing; removable with mild solvents |
| Synthetic acrylic resin (solvent-based) | Clear, durable, available in gloss to matte | Non-yellowing; requires ventilation; removable with appropriate solvents |
| Aerosol picture varnish | Convenient, no brush marks | Harder to build an even film on large works; needs ventilation and practice |
Most contemporary painters choose a synthetic varnish for its clarity and stability. Sheen is a personal choice: gloss gives the deepest darks, while satin and matte reduce glare at the cost of some richness. Our comparison of the best varnishes for oil paintings covers specific options for each finish and budget.
Avoid water-based acrylic polymer varnishes on oil paintings unless the manufacturer specifically says they are suitable. And never use household polyurethane or furniture finishes; they are not designed to be removed safely from artwork.
Tools and Workspace
- Final picture varnish (and solvent recommended by the maker, if thinning is allowed)
- Soft, wide flat brush, around 2–3 inches, used only for varnish; a soft hake or synthetic varnish brush works well
- A clean, shallow dish for pouring varnish
- Lint-free cloth and a soft dusting brush
- Gloves and a respirator rated for organic vapors when working with solvent-based varnish
- Supports to raise the painting off the table
- A large cardboard box or clean sheet to tent over the painting as it dries
Choose a well-ventilated room with good lighting and little dust. Moderate room temperature, about 65–75°F, with low to moderate humidity helps the varnish level and dry evenly. Cold, damp conditions can cause blooming, a cloudy haze in the varnish.
How to Varnish an Oil Painting Correctly: Step by Step
1. Confirm the Paint Is Cured
Check the date, run the fingernail test on the thickest area, and consider the paint’s oil content and any slow-drying colors such as titanium white or alizarin-type reds in heavy layers.
2. Clean the Surface Gently
Dust with a soft brush, then wipe with a barely damp lint-free cloth if there is grime, and let the surface dry completely. Avoid strong cleaners. Oil paintings that hung in a kitchen or near smoking may need more careful cleaning first; in that case, consult a conservator for valuable works.
3. Set Up Flat
Lay the painting face up on supports so the edges are raised off the table. Working flat lets the varnish level and keeps it from running.
4. Prepare the Varnish
Stir gently rather than shaking, to avoid bubbles. Pour a modest amount into your dish so you never dip a dusty brush back into the bottle. If the label allows thinning, follow its ratio exactly.
5. Brush on a Thin First Coat
Load the brush, tap off excess, and work from one edge to the other in long, parallel strokes, slightly overlapping each pass. Work steadily in sections and avoid rebrushing areas that have begun to set, which causes drag marks and cloudiness. On textured paintings, use the tip of the brush to work varnish into crevices without leaving pools.
6. Inspect at a Low Angle
Look across the surface with a light source to the side. Missed spots look dull; fix them right away while the varnish is wet. Lift out hairs or dust with a clean brush tip.
7. Tent and Dry
Cover the painting with a box or tent held clear of the surface to keep dust off. Drying times vary widely, from several hours to a day or more depending on the product and conditions.
8. Apply a Second Coat if Needed
If the sheen is uneven or you want more protection, apply a second thin coat at right angles to the first once the first is dry. Two thin coats are typical; more are rarely necessary.
9. Let It Cure Before Framing or Wrapping
Allow at least several days for the varnish to harden before framing or wrapping. Fresh varnish can mark or stick to framing rebates, plastic wrap, or glassine.
Brush or Spray: Which Is Better for Oil Paintings?
Brushing gives you the most control over film thickness and works on canvases of any size. It is the usual choice for smooth or moderately textured paintings. The risks are brush marks and missed patches, both of which improve with practice and a good soft brush.
Spraying avoids brush marks entirely and reaches into deep impasto without pooling. It works well on small and medium paintings but is harder to keep even across large canvases, and the fine mist means you need outdoor space or serious ventilation plus a respirator. Some painters combine the two: a brushed first coat for coverage, then a light sprayed coat to even the sheen. Whichever method you choose, several light coats beat one heavy one.
How to Varnish Water-Mixable Oil Paintings
Water-mixable oils dry by oxidation just like traditional oils once the water evaporates, so the same principles apply: wait for thorough drying, then apply a removable picture varnish. Some paint makers offer varnishes designed for water-mixable oils that can be thinned with water; traditional solvent-based picture varnishes are also generally compatible once the paint has cured. Always check the paint manufacturer’s guidance, since formulations differ.
What About Oil Pastels?
Oil pastels are a different medium. They contain a non-drying oil and wax binder, so they never fully harden the way oil paint does. Standard oil painting varnish is not appropriate. Instead, artists usually protect oil pastel work with a spray fixative or varnish formulated specifically for oil pastels, applied in several light coats, and frame the piece behind glass with a mat to keep the surface from touching the glazing. Test any spray on a scrap first, since it can darken colors slightly.
Common Mistakes When Varnishing Oil Paintings
- Varnishing too early. The most common cause of cracking and wrinkling.
- Applying one heavy coat. Thick varnish dries unevenly and is prone to bloom and drips.
- Working upright with a brush. Leads to runs and sags.
- Over-brushing. Going back over tacky varnish leaves streaks and clouding.
- Shaking the bottle. Creates bubbles that dry into the film.
- Using the wrong product. Household finishes or acrylic polymer varnish can create permanent problems.
- Not recording what you used. Write the varnish type and date on the back of the canvas; it helps future conservators.
Troubleshooting
| Issue | Possible cause | What to do |
|---|---|---|
| Cloudy bloom | Humidity, cold room, thick coat | Warm, dry room; thinner coats; some blooms can be revived by a conservator or removed and reapplied |
| Patchy sheen | Missed spots, sunken areas | Second thin coat; consider retouch varnish before final next time |
| Wrinkling or cracking | Paint not fully cured | Seek conservation advice for valuable works; wait longer next time |
| Dust trapped | Dirty room or brush | Tent while drying; dedicated clean brush |
| Tacky after days | Thick application, cool conditions | Allow more time in a warm, well-ventilated room |
For a broader look at caring for oil paintings after varnishing, including light, humidity, framing, and storage, see our guide on how to varnish and protect oil paintings for the long term.
Related Reading
FAQs
How long should an oil painting dry before varnishing?
Traditionally six months to a year, and longer for heavy impasto. Some modern varnishes are designed for earlier application once the paint is firm; follow the specific product instructions.
What is the best oil paint varnish?
Many painters prefer a removable synthetic varnish because it stays clear and resists yellowing. The best choice depends on the sheen you want and how soon you need to varnish; our dedicated comparison covers the options.
Can I use the same varnish for oil and acrylic paintings?
Some solvent-based synthetic picture varnishes are labeled for both oil and acrylic paintings. Check the label, because many water-based acrylic varnishes are not recommended for oils.
What is retouch varnish used for?
Retouch varnish evens out dull, sunken areas and provides temporary protection while the paint continues to cure. A final varnish is applied over it once the painting is fully dry.
How do you varnish a water-mixable oil painting?
Wait until the paint has thoroughly dried, then apply a removable picture varnish suitable for oils, either a traditional solvent-based one or a water-mixable-compatible product recommended by the paint maker.
Should you varnish oil pastel artwork?
Not with oil painting varnish. Use a spray fixative or varnish formulated for oil pastels and frame the work behind glass with a mat.
Final Thoughts
Correct varnishing is mostly about timing and restraint: wait for the paint to cure, protect interim work with retouch varnish, and apply thin, even coats flat in a clean room. Follow that order and your painting will look its best and stay removable for future cleaning. To pick the right product for your next finished piece, explore our reviewed list of protective finishes for oil paintings.




