If you’ve just got your drawing tablet or are thinking about getting one, you might wonder how to get started without feeling overwhelmed. Setting up your drawing tablet correctly is the first step to unlocking your creativity and making your digital art flow smoothly.
Whether you’re a beginner or someone upgrading to a new device, this guide will walk you through every essential step. You’ll learn how to connect your tablet, install the right software, and customize settings that fit your style. By the end, you’ll be ready to draw with confidence and bring your ideas to life like a pro.
Keep reading to discover the simple, clear steps that make setting up your drawing tablet easy and fun!
Types Of Drawing Tablets
Drawing tablets come in different types. Each type suits different needs and skill levels. Knowing these types helps you choose the right one for your art. The two main types are screenless tablets and screen tablets. Both have unique features and benefits.
Screenless Tablets
Screenless tablets, also called graphic tablets, do not have a built-in display. You draw on a flat surface while looking at your computer screen. These tablets are usually more affordable and lightweight. They are easy to carry and use anywhere.
Artists need good hand-eye coordination to use screenless tablets well. The pen movements on the tablet match the cursor on the monitor. These tablets are great for beginners and those on a budget. They allow you to use your current computer monitor for viewing your work.
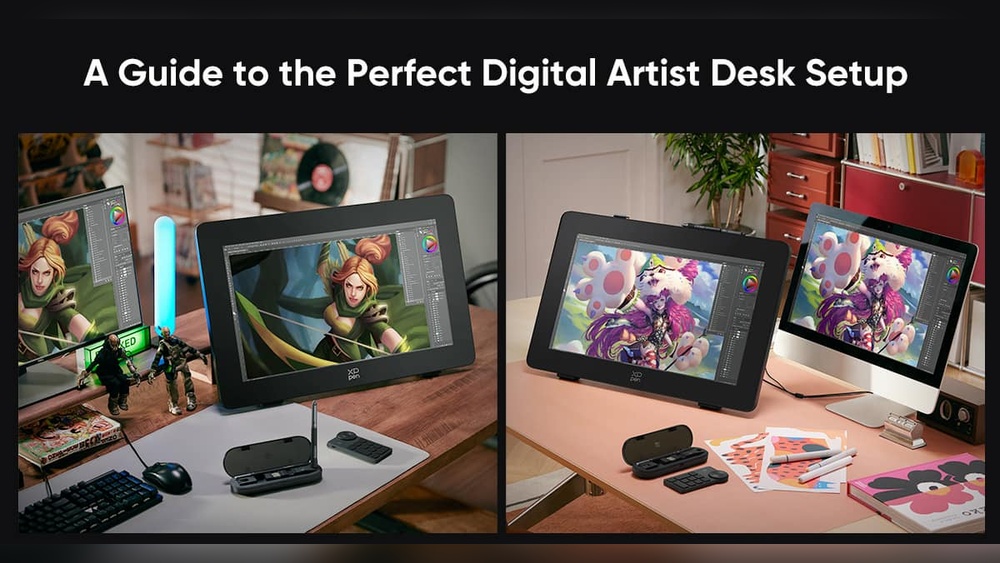
Screen Tablets
Screen tablets, also known as pen displays, have a built-in screen. You draw directly on the tablet surface, seeing your strokes in real time. This makes the drawing experience more natural and similar to paper. It reduces the learning curve for new users.
Screen tablets tend to be more expensive and heavier than screenless ones. They are perfect for artists who want precise control and immediate visual feedback. These tablets often support high resolution and color accuracy. Ideal for professionals and serious hobbyists.

Credit: www.etsy.com
Choosing The Right Tablet
Choosing the right drawing tablet is important for a smooth start. The tablet must fit your needs and skill level. This choice affects your comfort and the quality of your work. Tablets vary by price, size, and features. Understanding these differences helps pick the best one for you.
For Beginners And Budget Users
Beginners need tablets that are easy to use and affordable. Small to medium sizes work well. These tablets are light and simple, so learning feels natural. Basic pressure sensitivity helps with line control. Screenless tablets are common here. They connect to your computer and let you draw while watching the screen. These are cheaper and last long. They also help improve hand-eye coordination. Brands like Wacom and Huion have good entry-level options. Look for tablets with good driver support and simple setup.
For Professionals And Precision Work
Professionals need tablets with high precision and more features. Larger active areas give more space to draw. High pressure levels allow fine line variation. Pen displays with built-in screens feel like drawing on paper. This reduces the gap between hand and eye movement. Color accuracy and screen resolution matter for detailed work. These tablets support advanced software like Photoshop and Illustrator. They often have programmable buttons for shortcuts. Brands like Wacom Cintiq and XP-Pen Artist are popular choices. Investing here improves workflow and output quality.
Setting Up Your Tablet
Setting up your drawing tablet is the first step toward creating digital art. A proper setup ensures smooth performance and a better drawing experience. Follow simple steps to connect your tablet and prepare it for use.
Unboxing And Hardware Setup
Open the box carefully and check all items. You should find the tablet, pen, cables, and a user manual. Connect the tablet to your computer using the included USB cable or wireless connection. Place the tablet on a flat surface for stability. Charge the pen if required. Make sure the pen has batteries or is fully charged. Keep the pen close to the tablet for easy access.
Installing Drivers And Software
Visit the tablet manufacturer’s website to download the latest drivers. Drivers help your computer recognize the tablet correctly. Run the installer and follow on-screen instructions. Restart your computer after installation. Install any recommended software for drawing and tablet settings. Open the software to customize pen pressure, button functions, and tablet area. Test the pen on the tablet to check responsiveness and accuracy.
Configuring Tablet Settings
Configuring your drawing tablet’s settings helps improve your drawing experience. Proper setup ensures the tablet responds accurately and feels natural. Adjusting settings tailors the device to your style and workflow.
Focus on calibrating the pen for accuracy. Customize buttons and shortcuts for quick access to tools. These adjustments make your creative process smoother and faster.
Calibrating The Pen
Calibration aligns the pen’s tip with the cursor on the screen. Without calibration, your drawings might feel off or lag behind.
Start by opening the tablet’s driver software. Find the calibration section and follow the on-screen instructions. Usually, you tap the pen on specific points shown on the screen.
Repeat the steps until the cursor matches the pen tip perfectly. Test the calibration by drawing simple shapes. Adjust if the cursor still feels misaligned.
Customizing Buttons And Shortcuts
Tablet buttons and pen buttons can be set to perform different actions. Assign shortcuts for tools you use often, like undo or brush size.
Open the tablet settings and locate the button customization area. Click on each button to assign a function. Choose from keyboard keys, mouse clicks, or application commands.
Set shortcuts that suit your drawing flow. This reduces time spent searching menus and speeds up your work. Experiment with different setups to find what feels best.
Connecting To Drawing Software
Connecting your drawing tablet to software is the next key step. It allows you to create digital art with precision and ease. The tablet acts as a tool, but the software brings your ideas to life. Choosing the right program and setting it up correctly improves your experience.
Below are important tips on compatible programs and optimizing software for tablet use. These help you get started quickly and work smoothly.
Compatible Programs
Many drawing tablets work with popular art software. Programs like Adobe Photoshop, Corel Painter, and Clip Studio Paint support tablet input. Free options include Krita and MediBang Paint. Some tablets come with bundled software too.
Check the tablet’s website or manual for a list of supported programs. Also, confirm your computer’s operating system matches the software requirements. This prevents connection or performance issues.
Choose software that fits your skill level and project type. Beginners may prefer simpler programs. Professionals might need advanced tools and brushes. Your drawing style also matters—some programs suit comics, others painting or design.
Optimizing Software For Tablet Use
After installing your drawing software, customize settings for better tablet performance. Enable pressure sensitivity in the brush options. This makes strokes vary with pen pressure, mimicking real drawing.
Adjust pen buttons and shortcuts within the software to speed up your workflow. Map the tablet area to match your screen size for better accuracy. Calibrate the pen if the cursor does not align properly.
Turn on smoothing or stabilization features if your lines appear shaky. Lower the input lag by closing unnecessary background programs. Regularly update the software and tablet drivers to avoid bugs.

Credit: ciadapostagem.com.br
Drawing Techniques For Beginners
Starting with a drawing tablet can feel strange. It takes time to get used to the digital pen and screen. Beginners need to learn simple techniques to improve quickly. These methods help build confidence and skill while using the tablet.
Practice is key. Small daily exercises make a big difference. Focus on smooth lines and basic shapes first. Using the right techniques makes drawing easier and more fun.
Adapting To Hand-eye Coordination
Drawing on a tablet differs from paper. You often look at the screen, not your hand. This can cause confusion at first.
Try these tips to adjust:
- Practice simple strokes while watching the screen.
- Keep your hand steady and move slowly.
- Use grid lines or guides to help place strokes.
- Repeat basic shapes like circles and squares.
With time, your brain connects hand movement to screen display. This skill improves with regular practice.
Using Layers And Tools
Layers are a powerful feature in drawing software. They let you separate parts of your artwork. For example, sketch on one layer and color on another.
Benefits of layers:
- Easy to fix mistakes without ruining the whole drawing.
- Try different colors or effects freely.
- Organize your work step-by-step.
Explore basic tools like brushes, erasers, and selection. Each tool offers different effects. Experiment to see how they change your lines and shading.
Keep tool use simple at first. Focus on mastering one or two before adding more. This approach builds a solid foundation for digital drawing skills.
Troubleshooting Common Issues
Troubleshooting common issues with your drawing tablet can save time and reduce frustration. Many problems arise from simple settings or connection errors. Understanding how to fix these can keep your creative flow steady. This section covers key problems and easy fixes to get your tablet working smoothly.
Pen Not Responding
The pen may stop working due to low battery or connection problems. Check if the pen needs charging or new batteries. Make sure the tablet is properly connected to your computer. Restarting the tablet and computer can also help reset the connection. If the pen still does not respond, try using it on a different device to rule out hardware failure.
Cursor Misalignment
Cursor misalignment happens when the pen tip does not match the cursor on screen. Calibrate your tablet using the software provided by the manufacturer. Calibration adjusts the cursor position to match the pen tip accurately. Avoid using the tablet on uneven or reflective surfaces. Update the tablet drivers to ensure proper alignment and performance.
Driver Conflicts
Driver conflicts can cause the tablet to freeze or behave oddly. Uninstall any old or conflicting tablet drivers before installing new ones. Visit the tablet maker’s website to download the latest driver version. Disable automatic driver updates to prevent unwanted changes. Restart your system after installation to apply changes correctly.
Maintaining Your Drawing Tablet
Maintaining your drawing tablet ensures it stays in top shape for years. Regular care keeps the tablet responsive and the screen clear. This helps you create art smoothly without interruptions. Proper maintenance also prevents damage and costly repairs.
Cleaning Tips
Turn off the tablet before cleaning. Use a soft, dry cloth to wipe the screen gently. Avoid harsh chemicals or sprays. For stubborn smudges, lightly dampen the cloth with water. Never press hard on the screen to avoid scratches. Clean the pen tip and body regularly to remove dirt. Keep the tablet in a dust-free area when not in use.
Protecting The Screen And Pen
Use a screen protector to guard against scratches and fingerprints. Replace the screen protector if it becomes worn out. Store the pen in its holder to avoid damage. Avoid dropping or banging the pen on hard surfaces. Replace pen nibs frequently to maintain drawing accuracy. Keep the tablet and pen away from extreme heat and moisture. Handle both tools with care to extend their lifespan.
Credit: www.etsy.com
Frequently Asked Questions
Do You Need A Program To Use A Drawing Tablet?
Yes, you need a drawing or graphic software to use a drawing tablet. Popular programs include Photoshop, Procreate, and Illustrator.
What Is The Difference Between A Graphic Tablet And A Drawing Tablet?
A graphic tablet usually lacks a screen and connects to a computer. A drawing tablet often has a built-in display for direct drawing. Graphic tablets are affordable and portable, while drawing tablets offer a natural, screen-based drawing experience but cost more.
What Drawing Tablets Work With Krita?
Krita works well with most drawing tablets, including Wacom, Huion, XP-Pen, and Gaomon models. Both screenless and pen display tablets support Krita. Ensure your tablet drivers are updated for best performance.
How To Setup A Wacom Tablet?
Connect your Wacom tablet to your computer via USB or Bluetooth. Install the latest drivers from Wacom’s official website. Calibrate the pen in the settings. Customize button functions and pressure sensitivity. Open your drawing software and start creating.
Conclusion
Setting up a drawing tablet is simple with the right steps. Connect the tablet to your computer carefully. Install the necessary drivers from the official website. Adjust the tablet settings to fit your drawing style. Practice regularly to improve hand-eye coordination.
Keep your workspace comfortable and free of distractions. Remember, patience helps you get used to the device. Soon, creating digital art will feel natural and enjoyable. Enjoy the process and explore your creativity fully.