
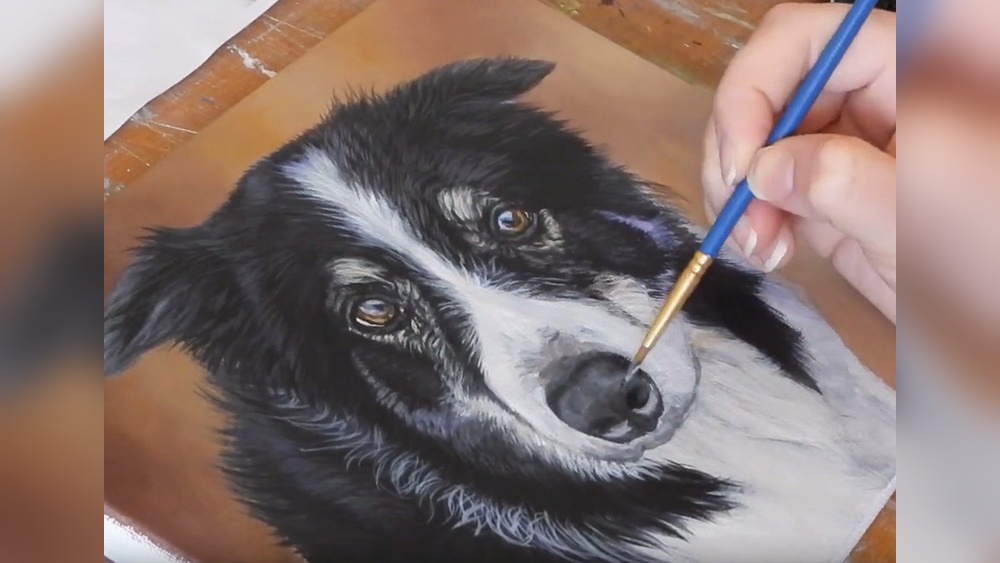
Quick answer: To paint a dog with acrylic paint, choose a sharp reference photo taken at the dog’s eye level, transfer the outline, and paint the background first. Block in the dog’s coat in three values (shadow, midtone, light), then layer fur strokes that match the breed’s coat type, from dark to light. Paint the eyes and nose with care, adding a wet-looking highlight to each, and finish with the lightest fur highlights and a few stray hairs over the edges.
Dog portraits are among the most rewarding paintings you can make, partly because someone always recognizes the dog. That also raises the stakes. A cat or deer can be generic, but a dog portrait needs to look like a particular dog, with its own face shape, coat and expression.
This guide explains how to paint a dog with acrylic paint by working through the decisions that matter most: choosing a reference, reading the coat type, mixing the right colors, and handling the eyes and nose. The approach works for a quick loose painting or a detailed commission-style portrait.
Step Zero: The Reference Photo
The single biggest factor in a good dog painting is the photo you paint from. Look for these:
- Taken at the dog’s eye level, not looking down from a standing height.
- Natural light from one side, such as from a window or outside on an overcast day.
- Sharp focus on the eyes. Even if the body is soft, the eyes must be crisp.
- An expression that feels typical of the dog: alert, relaxed, goofy.
- High resolution so you can zoom in on fur direction and eye details.
Crop the photo to your canvas proportions before you start. If your canvas is 8×10, crop to a 4:5 ratio so your composition transfers accurately.
Know the Coat Before You Paint It
Different coats need different brushwork. Identifying the coat type first tells you which brushes and strokes to use.
| Coat type | Example breeds | Brush approach |
|---|---|---|
| Short and smooth | Labrador, Beagle, Boxer, Dachshund | Smooth blending with a filbert; tiny strokes only at edges and transitions |
| Medium double coat | German Shepherd, Husky, Corgi | Short layered strokes; denser around neck ruff |
| Long and silky | Golden Retriever, Cocker Spaniel, Shih Tzu | Long flowing strokes with a liner or long filbert; clumps of hair, not single strands |
| Wiry | Schnauzer, Wire Fox Terrier | Short, broken, irregular strokes; dry brushing; scruffy texture |
| Curly | Poodle, Doodles, Bichon | Small C and S curls, dabbing; focus on clumps of curls in light and shadow |
Treat fur as groups of hair, not individual strands. Even long coats fall into clumps that catch light on top and fall into shadow underneath.
What You Need
- Surface: Smooth canvas panel, gessoed hardboard or fine-weave canvas, 8×10 to 12×16 inches.
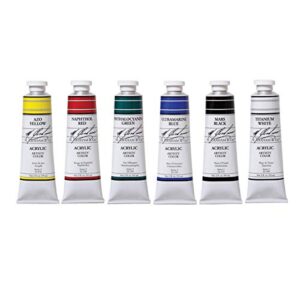
- Paints: Titanium white, burnt umber, burnt sienna, raw umber, yellow ochre, ultramarine blue, cadmium yellow medium, cadmium red light, and optionally Payne’s gray.
- Brushes: #10 flat, #6 and #4 filberts, #2 and #0 rounds, a #1 liner, and a small fan brush.
- Extras: Stay-wet palette, graphite transfer paper, a spray bottle and a retarder medium if you like longer blending time.
Because dog portraits involve many subtle browns, grays and creams, paint quality shows. Low-pigment paint tends to dry darker and duller than it looked wet, which makes matching a coat harder. Our guide to the best acrylic paints for pet portraits compares coverage and color shift across popular brands.
Mixing Common Dog Coat Colors
- Yellow Lab / Golden: Yellow ochre + white + touch of burnt sienna for midtone; raw umber + yellow ochre for shadow; white + cadmium yellow for highlights.
- Chocolate: Burnt umber + burnt sienna; shadows with ultramarine added; highlights with raw sienna and white.
- Black: Ultramarine + burnt umber; highlights in blue-gray reflecting the sky.
- Tan and black (shepherd, Rottweiler): Paint tan areas with burnt sienna + yellow ochre; keep the transition into black soft and fur-textured.
- White or cream: Warm off-white for light side, cool gray-blue for shadow; reserve pure white for a few highlights.
- Merle: Base of blue-gray, then irregular dark patches with soft edges.
How to Paint a Dog With Acrylic Paint in 8 Stages
Stage 1: Transfer the Drawing
Use a grid or graphite transfer paper to get the outline accurate. Dog likeness depends on exact placement of eyes, nose and ear shape, so precision here saves hours later. Mark the main color boundaries, the eye shapes and the nose. Keep lines light.
Stage 2: Paint the Background
Choose a background that flatters the coat. Cool blues and greens make warm coats glow; warm ochres and muted reds make black and gray coats stand out. A simple soft gradient keeps attention on the dog. Paint slightly inside the dog’s outline so you can overlap fur later.
Stage 3: Block In Three Values
Squint at the reference to simplify. Paint the shadow areas first with your darkest coat mix, then the midtones, then the light areas. Use a flat or filbert and big shapes. At this point the dog should look like a simple, posterized version of itself. If it already resembles the dog at this stage, the finished painting will too.
Stage 4: Eyes
Paint the eyes early so you can make sure the likeness is right before investing in fur. Dog eyes are usually dark brown, amber or, in some breeds, blue.
- Fill the eye shape with a dark brown or near-black.
- Paint the iris in a warmer brown or amber, leaving a dark rim.
- Paint the large, round pupil in near-black.
- Darken the top third of the eye where the upper lid and brow shade it.
- Add a small, sharp white catchlight on the light side, plus a faint secondary reflection on the lower edge of the iris if visible in the reference.
- Paint the eyelid rims, often dark, and a hint of moisture along the lower lid.
Stage 5: Nose and Mouth
The nose has a pebbly texture. Paint it in a dark base, then dab tiny dots of slightly lighter gray on the top surface. Add a soft highlight on the top of the nose and a sharper one on the tip if it looks wet. Paint the nostrils darker than the rest of the nose. For an open mouth, paint the tongue in pink with darker shadows near the back, and add a wet highlight.
Stage 6: Build the Fur
Now apply brushwork that matches the coat type from the table. Work from dark to light in two to four passes. Follow the direction of growth: hair flows back from the nose, around the eyes, down the cheeks and neck, and along the body toward the tail. On the chest, many coats form a ridge or swirl where hair meets from both sides.
For smooth coats, blend the transitions while wet and only add tiny strokes where fur meets background. For long coats, lay in big clumps first, then refine with the liner. For curly coats, dab clusters of small curls, keeping the darkest curls in shadow areas.
Stage 7: Ears
Ears have their own fur direction. Floppy ears hang down with hair flowing toward the tips. Upright ears have short fur on the back and longer, lighter hairs inside. Paint the inner ear with a soft pink-brown and the outer edge slightly darker to give thickness.
Stage 8: Final Highlights and Edges
Add the lightest highlights on the top of the head, the bridge of the nose, cheekbones and the top of the back. Use a liner with thinned paint to pull a few stray hairs over the background edge; this removes any cut-out look. Add whiskers and eyebrow hairs sparingly. Step back several feet and compare with your reference.
Common Problems in Dog Portraits
- It doesn’t look like the dog: Usually the eyes are slightly misplaced or the muzzle length is off. Measure with a ruler against the reference and correct before adding more fur.
- Fur looks like straw: Too many individual strokes with no clumping. Group hair into larger shapes with shadows under each clump.
- Black dog looks flat: You need blue-gray highlights reflecting light from the sky. Pure black fills shapes but shows no form.
- Eyes look lifeless: Missing lid shadow or catchlight. Darken the top of the iris and add a crisp white dot.
- Background clashes: Re-glaze with a color that is cooler or warmer than the coat, and lower its intensity.
Loose and Stylized Alternatives
Not every dog painting has to be realistic. Some popular alternatives:
- Pop-art dog: Bright, unrealistic colors in flat shapes. Great for practicing value, since the colors can be anything as long as the lights and darks are right.
- Loose painterly portrait: Big brush, few strokes, and a focus on capturing expression quickly. Try a 45-minute limit.
- Silhouette: A dog’s profile against a sunset is simple but very recognizable if the outline is accurate.
- Line and wash: Thin acrylic washes with a few crisp ink lines. Acrylic inks suit this style; see our acrylic ink review for how inks compare with thinned tube paint.
How Lighting Changes the Way You Paint a Dog
The same dog can look completely different under different light, and that changes your palette and brushwork.
| Lighting | What you will see | How to handle it |
|---|---|---|
| Soft overcast daylight | Gentle shadows, true coat colors | Easiest for beginners; focus on subtle value shifts |
| Strong side light | Deep shadows, bright highlights, clear form | Great for drama; keep shadow edges soft on fur |
| Backlight (sun behind dog) | Glowing rim light around fur edges | Paint the dog slightly darker; add a thin warm rim with a liner |
| Indoor warm lamp | Orange cast on light side, cool shadows | Warm up highlights with yellow; push shadows toward blue |
Shadows on fur almost always pick up a bit of color from the surroundings. A dog on green grass will show greenish tones under the chin and belly. Adding a hint of that reflected color makes the dog look like it belongs in its setting rather than pasted on.
Protecting and Presenting a Finished Dog Portrait
If the portrait is a gift or a commission, finishing matters. Let the painting dry for at least a few days, then apply a clear isolation coat followed by two thin coats of acrylic varnish. Satin is a common choice for portraits because it keeps darks rich without strong glare. Paint the canvas edges a neutral color or continue the background around them if you plan to hang it unframed. Sign the front discreetly and write the dog’s name and date on the back.
Time Planning
A detailed 8×10 inch realistic dog portrait typically spans several sessions. A rough plan:
- Session 1: Drawing, background and value block-in (1 to 2 hours).
- Session 2: Eyes, nose, mouth and first fur pass (2 hours).
- Session 3: Fur layers and ears (2 hours).
- Session 4: Highlights, edges, corrections and varnish once dry (1 hour).
Breaking it up helps you come back with fresh eyes. Many errors are obvious the next day that were invisible after hours of staring.
FAQs
How do you paint a dog step by step for beginners?
Choose a simple side or front view with clear light, transfer the outline, paint the background, block in shadows, midtones and lights, then add eyes, nose and fur details. Start with a short-haired dog, which is easier than a long or curly coat.
What is the easiest dog to paint?
Short-haired dogs with one solid color, such as a black or yellow Labrador, are usually easiest. Their smooth coats need blending rather than complex fur strokes.
How do I paint dog fur that looks soft?
Group hairs into clumps, keep edges soft, and blend transitions while the paint is still wet. A slightly dry, worn brush and light pressure help create a feathery look.
Should I paint the eyes first?
Painting the eyes early is a good idea because they are key to likeness. If the eyes look right, you know the rest of the portrait will hold together.
What size canvas is best for a dog portrait?
An 8×10 or 11×14 inch canvas works well for a head-and-shoulders portrait. Larger sizes allow more detail but take more time and paint.
How do I paint a white dog?
Use warm off-whites in the light, cool blue-grays and lavender grays in the shadows, and save pure white for the brightest highlights. Shadows are what give white fur its shape.
Next Step
Pick a reference of a dog you know well and paint a small 6×6 inch study using only three values. That exercise trains you to see the structure under the fur. When you are ready to tackle a full portrait, consider your paint set too; our breakdown of acrylic paint brands by tinting strength and price can help you find colors that mix clean coat tones without turning chalky.



One Comment