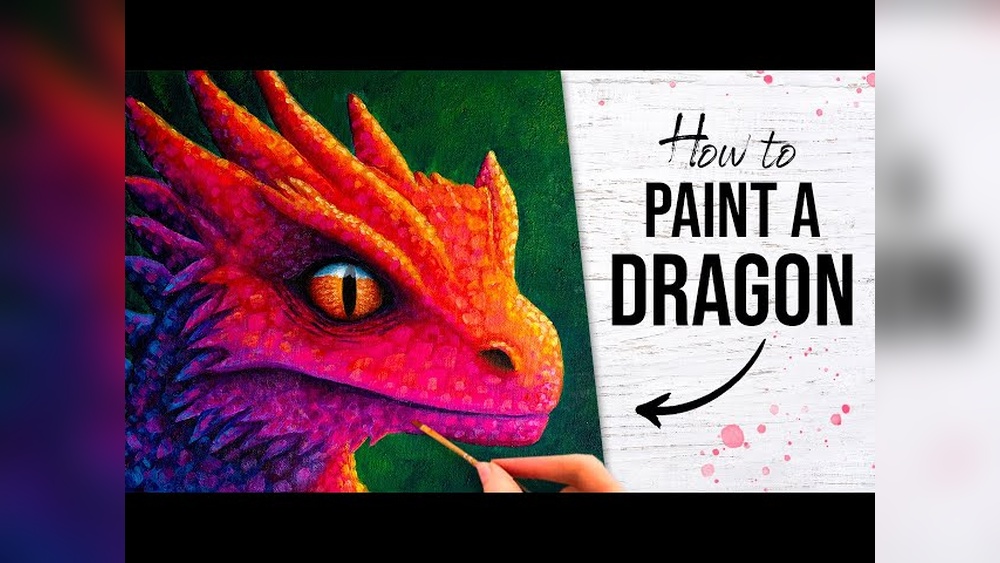
Quick answer: To paint a dragon with acrylic paint, design the creature first with a clear silhouette, bat-like wings built on finger bones, and a curving S-shaped neck and tail. Paint the background, block in the dragon’s body with a midtone, then add form shadows and a strong light source. Build scales with small curved strokes or dry brushing, paint translucent wing membranes with thin glazes, and finish with glowing eyes, fire or rim lighting and sharp highlights on horns and claws.
Dragons are the one subject where you get to invent everything: color, anatomy, mood and setting. That freedom is exciting, and it is also why many dragon paintings feel unconvincing. Without a real animal to copy, painters guess at how wings fold or how scales wrap around a neck, and the result looks stiff.
The fix is to borrow from real animals. Wings come from bats, scales from reptiles, posture from big cats and birds of prey. This guide on how to paint a dragon with acrylic paint walks through design, color, scales, wings and lighting, then puts it all together in a step-by-step process.
Design Before You Paint
Spend more time on the drawing than you think you need. A dragon with a weak design will not be saved by good brushwork.
Start With the Silhouette
Fill in your dragon sketch with solid black. Can you still tell what it is and what it is doing? A strong silhouette has clear wing shapes, a readable head and a dynamic line through the neck, body and tail. Overlapping limbs and wings that merge into the body make the shape hard to read.
Use a Line of Action
Draw a single flowing curve, often an S shape, that runs from the head through the spine to the tail tip. Build the dragon along it. This gives movement even in a resting pose.
Borrow Real Anatomy
- Wings: Model them on bat wings. There is an arm bone, a forearm, then several long finger bones that fan out with membrane stretched between them. The wing folds at the joints like an umbrella.
- Legs: Big cats, lizards and birds all work. Decide whether the dragon walks on its toes (like a cat) or flat-footed (like a bear) and keep it consistent.
- Head: Combine crocodile jaws, horse or lizard skull shapes, and horns that grow from the back of the skull.
- Scales: Look at snakes and crocodiles. Scales are larger on the back and smaller on the face, joints and belly.
Choosing a Dragon Color Scheme
A strong color scheme makes the painting feel intentional. Limit yourself to a dominant color, a secondary color and an accent.
| Dragon type | Body colors | Accent | Background |
|---|---|---|---|
| Fire dragon | Deep crimson, burnt sienna, near-black shadows | Orange-yellow fire glow | Dark smoky sky or volcanic glow |
| Ice dragon | Pale blue, white, lavender shadows | Cyan or teal eyes | Snowy peaks, cool gray sky |
| Forest dragon | Olive and sap green, ochre belly | Gold or amber eyes | Misty forest |
| Storm dragon | Slate blue, Payne’s gray | White-violet lightning | Dark clouds |
| Golden dragon | Yellow ochre, raw sienna, warm whites | Deep red or purple | Sunset sky |
Fantasy work often depends on saturated color, and that is where pigment quality is most visible. Cheaper paints tend to lose intensity when mixed. Our guide to the most vibrant acrylic paint brands compares color strength across student and artist lines.
Materials
- Surface: 16×20 or 12×16 inch canvas, or a smooth panel for detailed scales.
- Paints: Titanium white, a warm and cool version of each primary (cadmium yellow light, yellow ochre, cadmium red, alizarin crimson or quinacridone magenta, ultramarine, phthalo blue), burnt umber, burnt sienna and optionally a metallic gold or iridescent medium.
- Brushes: Large flats for background, medium filberts for body, small rounds for scales, a liner for claws and edges, and an old stiff brush for dry brushing.
- Extras: Sponge, glazing medium, spray bottle, stencil mesh or netting (optional, for scale texture).
Five Ways to Paint Dragon Scales
Scales can take forever if you paint each one individually. Choose a method based on how close the viewer will be and how much time you have.
1. Suggested Scales
Paint the form with light and shadow first, then add a few scale shapes only in the light areas and along edges. The viewer’s eye fills in the rest. Fastest and often most effective.
2. Curved Strokes
With a small round or filbert, paint rows of small C-shaped strokes, with each row overlapping the last. Work from the tail toward the head so scales overlap in the right direction.
3. Dry Brushing Over Texture
Paint the body dark, let it dry, then drag a nearly dry brush loaded with a lighter color across the surface. The paint catches on canvas weave and suggests scaly texture. Works best on coarse canvas.
4. Mesh Stencil
Hold fishnet fabric, onion bag mesh or a scale stencil against the dry body and sponge a lighter or iridescent color over it. Then glaze over the result to integrate it with the shading. Use sparingly; overuse looks mechanical.
5. Individually Painted Scales
For close-up portraits, paint each scale with a dark edge on its lower side, a midtone body and a small highlight on its top edge. Scale size should shrink around the eyes, joints and belly.
Whichever method you use, remember that scales follow the form. On a cylindrical neck, rows curve around it. Scales on the shadow side should be darker and less defined than those in light.
Painting Wings That Look Real
- Paint the bones first. Arm, forearm and finger bones in the body color, with highlights along their tops.
- Glaze the membrane. Mix thin, transparent color with glazing medium and fill the spaces between bones. Wings often look lighter and warmer where light passes through them.
- Add veins. With a liner, paint thin, branching lines from the bones into the membrane in a slightly darker color.
- Show the fold. Where the membrane bunches near the body, add soft dark creases.
- Edge treatment. The trailing edge of the wing can be slightly scalloped between finger tips, with small tears for an older dragon.
Translucent effects respond well to fluid-bodied paint, which glazes more evenly than thick paint. Our review of a fluid acrylic range discusses how this type of paint behaves in glazes.
How to Paint a Dragon With Acrylic Paint: Full Walkthrough
Step 1: Transfer the Design and Tone the Canvas
Tone the canvas with a thin wash that supports your color scheme, such as warm red-brown for a fire dragon or cool gray-blue for an ice dragon. Transfer the drawing with graphite paper or chalk.
Step 2: Paint the Background
Block in the sky, mountains or cave walls with big brushes. Keep background values contrasting with the dragon: a dark dragon on a lighter sky, or a light dragon against darkness. Add atmospheric perspective by making distant elements lighter and cooler.
Step 3: Block In the Dragon
Fill the dragon’s shape with its midtone color. Paint the belly plates, which are often a lighter contrasting color. Keep this layer flat and simple.
Step 4: Establish Light and Shadow
Decide on your main light source and stick to it. Paint form shadows on the sides of the neck, body, legs and tail facing away from the light. Use cast shadows where wings and limbs block light. Squint to check that the dragon reads as a solid 3D form before adding any scales.
Step 5: Scales and Texture
Choose one of the scale methods above. Focus detail on the head and the area closest to the viewer. Let scales fade into shadow elsewhere.
Step 6: Wings
Paint bones, membrane glazes and veins. If the light is behind the wing, make the membrane glow with warm, lighter color.
Step 7: Head, Eyes and Horns
Eyes are the focal point. A glowing eye is painted by starting with a bright core (pale yellow or white), surrounding it with the eye color, and letting that color bleed slightly onto the surrounding scales as a soft glow. Add a dark slit pupil. Paint horns as tapered cylinders with ridges, darkest at the base and lightest at the tips.
Step 8: Fire, Smoke or Magic
For fire, paint the hottest part nearly white-yellow at the mouth, moving through yellow, orange and red to dark smoke at the edges. Fire lights everything near it, so add warm orange reflections on the dragon’s jaw, chest and the ground. Smoke is best painted with thin, soft glazes of gray and a sponge.
Step 9: Final Highlights and Edges
Add specular highlights on claws, horns, teeth and the wettest-looking scales. A thin rim light along the edge of the silhouette separates the dragon from a dark background. Sharpen edges near the focal point and soften those farther away.
Plan Values With a Thumbnail First
Before committing to a large canvas, make two or three small value thumbnails, about 3×4 inches, using only black, white and two grays. These take five minutes each and answer the questions that ruin dragon paintings later: Where is the darkest dark? Where is the brightest light? Does the dragon separate from the background?
A reliable structure is to place the strongest contrast at the head. For example, a pale glowing eye against a near-black head, set against a mid-value sky. Wings and tail can sit in middle values so they support rather than compete. If every part of the dragon has the same contrast, the eye wanders without a place to rest.
Thumbnails also help with color later. Once you know an area should be dark, you can choose any dark color that fits the scheme, such as deep violet, dark teal or crimson-brown, and it will still read correctly.
Painting Horns, Claws and Teeth
These small hard surfaces add realism because they contrast with the textured scales.
- Horns: Paint a dark base, then rings or ridges that curve around the form. Ridges are lighter on top and cast tiny shadows below. Horns usually fade from dark at the base to pale ivory or gray at the tip.
- Claws: Treat them like curved cones. Dark underside, mid-value body, a sharp highlight along the top curve.
- Teeth: Avoid pure white. Use warm off-white with gray at the gum line and between teeth. A small sharp highlight on the front teeth suggests wetness.
Mistakes That Make Dragons Look Flat
- Scales everywhere at equal detail. The painting becomes a pattern rather than a form. Reduce detail in shadows.
- No consistent light source. Shadows pointing in different directions destroy the illusion of volume.
- Wings too small. A creature that size needs a wingspan well beyond its body length to look flight-capable.
- Stiff posture. Add a curve to the neck and tail along a line of action.
- Fire without light. Flames must cast warm light on nearby surfaces.
Ideas by Skill Level
Beginner: A dragon silhouette flying across a full moon or sunset. Paint a gradient sky, then a black dragon shape with a slightly lighter rim on one side.
Intermediate: A coiled dragon head and neck portrait with suggested scales and glowing eyes.
Advanced: A full dragon breathing fire in a landscape, with reflected firelight, smoke glazes and detailed wings.
FAQs
What is the easiest way to paint a dragon for beginners?
Start with a silhouette against a colorful sky or moon. It teaches shape and composition without the challenge of scales and lighting.
How do you paint dragon scales quickly?
Paint the form with light and shadow, then suggest scales only in the light areas and along edges. A mesh stencil sponged with a lighter color is another fast option.
How do you paint glowing eyes in acrylic?
Paint a pale core, surround it with a saturated color, and glaze that color softly onto the area around the eye. Keep surroundings darker so the glow stands out.
What colors make a dragon look scary?
Dark values with high contrast, deep reds, near-blacks and a small bright accent like glowing yellow eyes tend to look menacing. Strong under-lighting also adds drama.
How do I paint dragon wings that look see-through?
Glaze thin, transparent layers of color between the wing bones, and make the membrane lighter and warmer where light passes through. Add darker veins with a liner brush.
Can I use metallic paint on a dragon?
Yes. Metallic or iridescent paint works well as a final accent on scales or horns. Apply it sparingly over a shaded base so the dragon still reads as a 3D form.
Final Thoughts
Good dragon paintings combine invention with observation. Design the silhouette first, borrow anatomy from real animals, commit to one light source and let detail fade into shadow. Once the fundamentals are in place, color and effects become the fun part. If your reds and blues look dull next to the images in your head, consider upgrading your palette, and our comparison of acrylic brands ranked for color strength is a good place to start.