Ready to add a cool, spooky touch to your rock collection? Painting a skull rock with acrylics is easier than you think, and you don’t need to be an expert artist to create something eye-catching. Learn how to paint skull rock with simple steps that will transform your ordinary stone into a masterpiece.
Imagine turning a simple stone into a striking piece of art that grabs attention and sparks conversations. In this guide, you’ll discover step-by-step tips and tricks that make the process smooth and fun. Whether you want to decorate your garden, Halloween party, or just explore a new hobby, this skull rock painting tutorial will help you bring your creative vision to life.
Let’s get started and unlock your artistic side!
Choosing The Right Rock
Choosing the right rock is the first step to painting a skull rock with acrylics. The rock you select affects how your paint looks and how easy it is to work on. Different rocks have different surfaces, sizes, and shapes. These features change the way your skull design will turn out. Picking the best rock helps your paint stick better and your art last longer.
Smooth Vs Rough Surfaces
Smooth rocks are easier to paint on. The paint spreads evenly and details show well. Smooth surfaces help you draw clean lines for the skull features. Rough rocks have bumps and cracks. They add texture but can make painting harder. Rough surfaces may cause the paint to chip or look uneven. Choose smooth rocks for a neat and clear skull design. Rough rocks suit a more natural, rustic look.
Ideal Sizes And Shapes
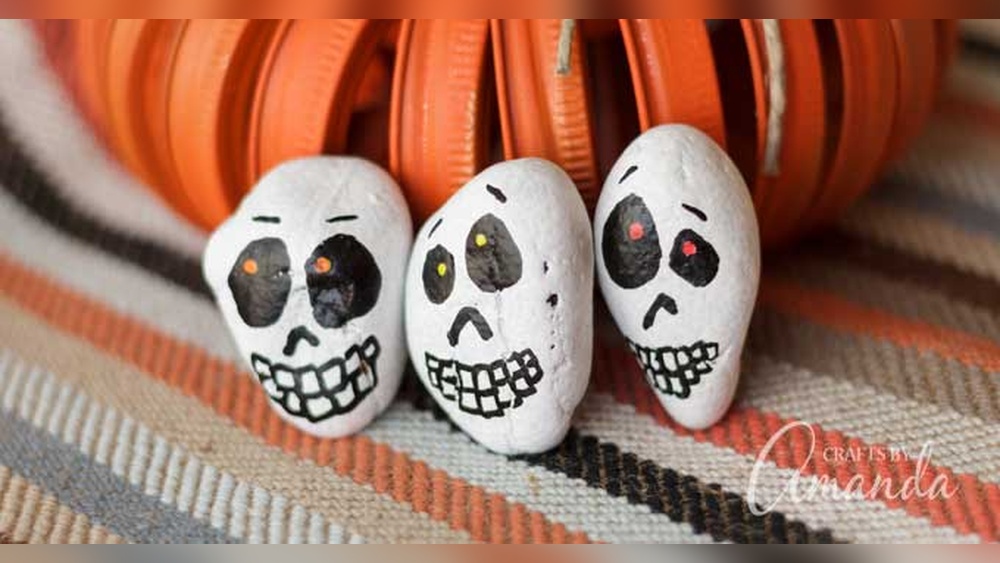
Pick rocks that fit well in your hand. Medium-sized rocks are best for painting skulls. Too small rocks leave little space for details. Very large rocks can be hard to handle. Round or oval shapes work great for skull designs. Flat rocks give a good base for drawing. Avoid rocks with sharp points or odd shapes. They can make painting tricky and distort the skull image.

Credit: craftsbyamanda.com
Gathering Supplies
Gathering the right supplies is the first step to paint a skull rock with acrylics. This makes the painting process smooth and enjoyable. Knowing what materials to use helps you create a detailed and lasting design. Below are the key supplies needed to start your skull rock painting project.
Essential Acrylic Paints
Choose high-quality acrylic paints for bright and lasting colors. White and black are important for the skull base and shadows. Add colors like red, blue, or yellow to decorate and highlight details. Select paints that work well on stone surfaces for better adhesion.
Brushes And Tools
Use different brush sizes to paint large areas and fine details. Flat brushes cover broad surfaces quickly. Fine round brushes help create sharp lines and small shapes. A palette or mixing tray is useful to blend colors. Keep paper towels nearby to clean brushes and control paint amount.
Primers And Sealers
Apply primer to the rock before painting to create a smooth base. A white or clear acrylic primer works best for skull rocks. After painting, use a sealer to protect your artwork. Sealers keep colors bright and shield the paint from chips and water. Choose a matte or glossy finish based on your style preference.
Preparing The Rock
Preparing the rock is the first step in painting a skull rock with acrylics. A clean and smooth surface helps paint stick better and last longer. Taking time to prepare the rock ensures a neat and vibrant final design. Follow simple steps to get your rock ready for painting.
Cleaning And Drying
Start by washing the rock with warm water and soap. Use a brush to remove dirt and dust. Rinse the rock well to clear away soap. Let the rock dry completely. A dry rock prevents paint from peeling or bubbling. Drying may take a few hours or a full day depending on the weather.
Applying Primer
Apply a primer layer to the dry rock. Primer creates a smooth base for acrylic paint. It also improves paint adhesion and color brightness. Use a brush to spre