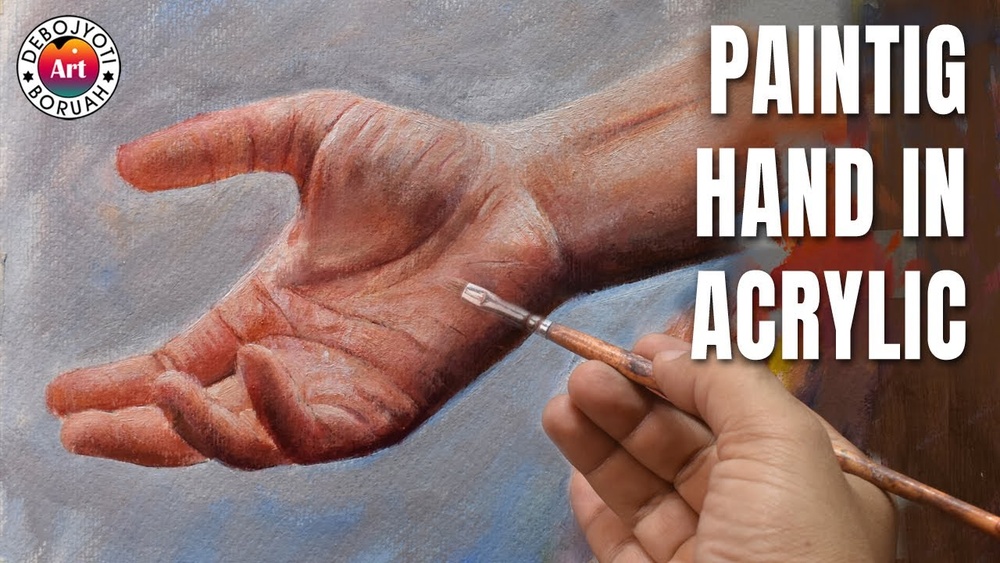
Painting hands with acrylic paint can feel tricky, but it doesn’t have to be. If you want to create realistic, expressive hands in your artwork, understanding the shapes, shadows, and highlights is key.
You’ll learn how to break down the complex anatomy into simple blocks, build up tones step-by-step, and add those final details that bring your painting to life. Whether you’re a beginner or looking to improve your technique, this guide will give you clear, easy steps to master painting hands with acrylics.
Ready to transform your skills and make your paintings stand out? Let’s dive in!
Credit: www.artgraphica.net
Materials And Setup
Preparing the right materials and workspace is key to painting hands with acrylic paint. A neat setup helps you focus on details and capture the hand’s form. Choosing quality paints, brushes, and surfaces sets the foundation for your artwork. Organize your tools close by to keep the flow smooth during painting.
Essential Acrylic Paints
Select basic colors for mixing natural skin tones. Use white, burnt sienna, raw umber, cadmium red, and yellow ochre. These shades help create shadows, midtones, and highlights. Avoid too many colors at first to keep mixing simple. High-quality acrylic paints offer good coverage and blend well.
Brush Types And Sizes
Use a mix of brush shapes and sizes for detail and coverage. Flat brushes fill larger areas quickly. Round brushes allow precision for knuckles and creases. Small detail brushes help with fine lines around nails and wrinkles. Synthetic brushes hold acrylic paint well and clean easily.
Canvas And Surface Preparation
Choose a smooth canvas or acrylic paper to capture fine details. Prime the surface with gesso to improve paint adhesion. Let the primer dry completely before starting. A clean, flat surface prevents paint from soaking unevenly. Stretch or tape your canvas to keep it tight and wrinkle-free.

Credit: www.youtube.com
Basic Hand Anatomy
Understanding the basic anatomy of the hand is essential for realistic acrylic painting. The hand has complex shapes formed by bones, muscles, and skin. Knowing these parts helps you paint each finger and joint correctly.
Focus on the structure beneath the skin to create depth. This knowledge guides your brush strokes and color choices. It makes your painting look natural and alive.
Key Bones And Joints
The hand contains 27 bones, divided into three groups. The carpals form the wrist, the metacarpals make up the palm, and the phalanges are the finger bones.
Each finger has three phalanges except the thumb, which has two. Joints connect these bones and allow movement. The knuckles are the visible joints on the back of the hand.
Major Planes Of The Hand
The hand has flat and curved planes that catch light differently. The palm is mostly flat with slight curves near the base of fingers. The back of the hand has more pronounced curves due to bones.
Notice the planes on each finger segment. They form shapes like rectangles or trapezoids. Painting these planes helps show the hand’s volume and direction.
Muscle And Skin Texture
Muscles under the skin create subtle bulges and dips. The skin stretches over the knuckles, making them look raised. Small wrinkles appear near joints and where the skin folds.
Texture varies on different hand parts. The palm is softer and smoother. The back has visible veins and tendons. Capturing these details adds realism to your acrylic painting.
Sketching The Hand
Building base tones is a crucial step when painting hands with acrylic paint. It sets the foundation for realism and depth. Start with a well-mixed palette that matches the skin tone of the hand. Apply mid-tones evenly to create a smooth transition between light and shadow. Gradually add light and dark values to shape the hand’s form. This approach helps capture the natural look of skin and the hand’s structure.
Mixing Skin Tone Palette
Mix colors like white, red, yellow, and a small amount of blue or brown. Adjust the ratio to match the skin tone you want to paint. Use a palette knife or brush to blend the colors well. Keep the tones natural and avoid overly bright or dull mixes. Test the color on a scrap paper before applying it to your painting.
Applying Mid-tones
Start by painting the mid-tone base over the entire hand area. Use a medium-sized brush for smooth coverage. Apply the paint in thin layers, allowing each layer to dry slightly. The mid-tone acts as the middle value between highlights and shadows. This layer helps unify the skin tone and prepares the surface for further details.
Establishing Light And Shadow
Add darker shades to areas where shadows naturally fall, like between fingers and under knuckles. Use a mix with more brown or red for shadowed regions. Apply lighter tones on raised areas such as finger joints and the back of the hand. Blend edges softly to create a natural gradient. This step shapes the hand and gives it a three-dimensional look.
Building Base Tones
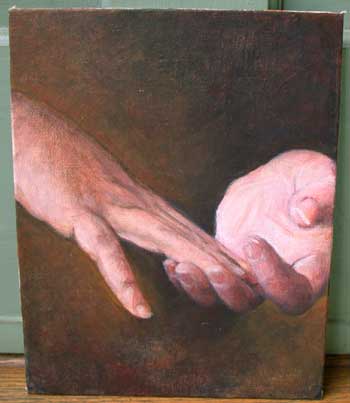
Adding shadows and depth gives your painted hands a realistic look. Shadows show the shape and form of fingers and palm. Depth helps the hand appear three-dimensional on the canvas. Without shadows, the hand looks flat and lifeless. Use careful shading to create natural curves and contours.
Using Darker Tones
Select darker tones that match your base skin color. Mix a little burnt umber or dark red with your mid-tone. Apply these darker colors where the light does not hit, such as under fingers and between knuckles. Keep the edges soft for smooth transitions. Avoid harsh lines to keep the hand looking natural.
Defining Knuckles And Joints
Knuckles and joints are key areas to define with shadows. Add small, subtle dark patches around these spots. Use a fine brush to paint thin lines or dots that suggest wrinkles and folds. Blend the edges gently to avoid sharp contrasts. This technique shows the hand’s structure and movement.
Avoiding Flat Black Shadows
Pure black makes shadows look harsh and unnatural. Instead, mix dark shades with colors like blue, purple, or brown. This creates richer, more lifelike shadows. Use black sparingly, only to deepen the darkest spots. Layer your shadows gradually for a smooth, realistic effect.
Adding Shadows And Depth
Blending techniques are key to painting hands with acrylic paint. They help create smooth transitions and realistic forms. Blending lets you soften colors and shapes to mimic skin texture. It also controls how light and shadow play on the hand’s surface. Using different blending methods, you can add depth and life to your painting. Below are some important blending tips to improve your hand paintings.
Smooth Color Transitions
Smooth color transitions make the hand look natural and round. Start by applying mid-tone colors as a base. Then add lighter and darker shades while the paint is still wet. Use a soft, clean brush to gently mix the edges. Work quickly to avoid hard lines. Thin layers help create gradual changes in color. This technique mimics how light fades softly on skin.
Maintaining Hard Edges
Not all edges should be soft. Hard edges define knuckles, nails, and joints. Use a smaller brush to paint crisp lines where needed. Avoid blending these areas too much. Hard edges add structure and clarity to the hand. They prevent your painting from looking blurry or flat. Balance soft blending with sharp details for better results.
Balancing Realism And Style
Blending can be realistic or stylized depending on your goal. For realism, use subtle blending and smooth gradients. For style, exaggerate shadows or highlights with stronger contrasts. Experiment with both methods to find your voice. Keep the skin tones believable but feel free to simplify forms. This balance keeps your painting interesting and expressive.
Credit: www.reddit.com
Highlighting Details
Painting hands with acrylic paint is challenging for many artists. Mistakes can make hands look unnatural or flat. Avoiding common errors helps create realistic and expressive hands. Focus on understanding the hand’s form and color nuances for better results.
Ignoring Hand Structure
Hands have complex shapes with bones, muscles, and joints. Ignoring this structure makes the painting look stiff or wrong. Study the hand’s anatomy before painting. Break the hand into simple forms like blocks and cylinders. This approach improves accuracy and depth.
Overusing Pure Black And White
Pure black and white colors can make skin look fake. Shadows rarely contain pure black. Highlights are rarely pure white. Mix colors to create natural shadows and highlights. Use dark browns, blues, or purples for shadows. Add warm tones like yellow or pink for highlights.
Skipping Reference Use
Painting without references leads to mistakes in proportions and colors. Use photos or real hands as references. Observe light, shadow, and skin details carefully. References guide you to paint hands more realistically. They help capture subtle shapes and tones.
Frequently Asked Questions
Can You Paint Hands With Acrylic Paint?
Yes, you can paint hands with acrylic paint. Use basic shapes, layer mid-tones, shadows, and highlights for realism.
Can You Use Acrylic Paint On Hands?
Acrylic paint is not safe for skin as it contains chemicals. Use body-safe paints designed for hands instead.
Do You Wet The Brush Before Using Acrylic Paint?
Wetting the brush before using acrylic paint depends on your technique. Slightly dampen it for smooth blending and softer edges. Avoid soaking the brush, as too much water thins the paint excessively and weakens color intensity. Use clean water to control paint consistency effectively.
Does Dawn Dish Soap Remove Acrylic Paint?
Dawn dish soap effectively removes fresh acrylic paint from skin or surfaces. Apply soap, rub gently, then rinse with warm water.
Conclusion
Painting hands with acrylic paint takes patience and practice. Start with simple shapes and build layers slowly. Focus on light, shadow, and the hand’s structure. Use a few colors to keep skin tones natural. Keep blending smooth but keep some edges sharp.
Small details bring your painting to life. Enjoy the process and watch your skills improve. Each hand you paint will look more realistic. Keep practicing, and you will create beautiful acrylic hand paintings.