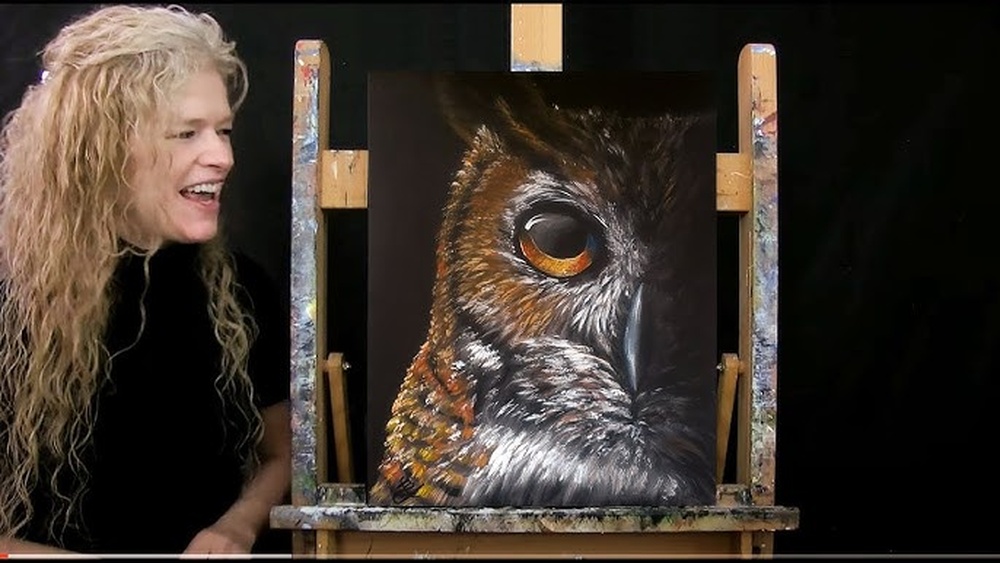
Quick answer: To paint an owl with acrylic paint, sketch the body as a large egg shape with a slightly flattened circle for the head, then mark the facial disk as two overlapping circles around the eyes. Block in the body in mid-tone browns, paint the eyes early with a bright iris, black pupil and sharp catchlight, and build feathers in layers of small, overlapping U-shaped strokes from dark to light. Finish with a soft, light rim around the facial disk and fine feather tips along the edges.
Owls are among the most popular wildlife subjects because their faces are so expressive. Those large, forward-facing eyes give owls an almost human look, and the soft feathering of the facial disk frames them perfectly. The challenge is getting all that feather texture without turning the owl into a busy, scratchy mess.
This guide on how to paint an owl with acrylic paint uses a great horned owl or barred owl as the main example, perched and facing forward, on a 12×16 inch canvas. A separate section adapts the process for barn owls, snowy owls and simple stylized owls.
Owl Features to Get Right
An owl is basically a feathered egg with a big round face. A few structural details separate a convincing owl from a cartoon.
- The head is wide and flat-faced, almost as wide as the body. There’s very little visible neck; the head sits directly on the shoulders.
- The facial disk is a ring of fine, radiating feathers around each eye, often outlined with a darker rim. It works like a satellite dish for sound and is the key to an owl’s look.
- The eyes face forward and are very large. In many species the iris is yellow or orange; barred owls and barn owls have dark brown, almost black eyes.
- The beak is small and hooked, partly hidden by feathers, sitting between and slightly below the eyes.
- Ear tufts on species like great horned owls are feather tufts, not ears. Not all owls have them.
- The body feathers are patterned in bars, streaks or spots that differ by species.
- Feet are usually feathered with sharp, dark talons gripping a branch.
Materials
- Canvas or panel, 11×14 to 16×20 inches.
- Brushes: a 1-inch flat, a size 8 filbert, a size 4 and size 2 round, a 10/0 liner, and a worn fan brush or old filbert for soft feather texture.
- Paints: titanium white, burnt umber, raw umber, burnt sienna, yellow ochre, ultramarine blue, cadmium yellow medium or hansa yellow, and cadmium orange (for orange-eyed species).
- Flow improver, glazing medium and a stay-wet palette.
Owl color mixes
| Area | Mix |
|---|---|
| Darkest feather markings | Burnt umber + ultramarine |
| Warm brown body | Burnt umber + burnt sienna |
| Mid-tone feathers | Raw umber + yellow ochre + white |
| Cream and buff feathers | White + yellow ochre + touch of burnt sienna |
| Cool gray feathers | White + ultramarine + raw umber |
| Yellow iris | Cadmium yellow + a touch of orange |
| Beak | Blue-gray (white + ultramarine + umber), dark at base |
Owls are painted almost entirely in earth tones, so the quality of your umbers, siennas and ochre matters. Clean earth pigments give rich, varied browns instead of flat mud. For help building a reliable earth palette, see our guide to the best acrylic paint brands for natural, earthy color.
How to Paint an Owl With Acrylic Paint: Step by Step
Step 1: Paint the background and branch
Choose a background that sets off the owl. A deep blue night sky with a pale moon, a muted forest green, or a soft blurred bokeh of greens and golds all work. Paint it loosely. Then block in the branch the owl will perch on in dark brown, with a few lighter streaks for bark texture. Let it dry.
Step 2: Draw the owl
- Draw a large egg shape for the body, narrower at the bottom.
- Draw a wide, slightly flattened circle for the head overlapping the top of the egg.
- Draw a vertical center line through the head and body.
- Draw two large circles for the facial disk on each side of the center line, overlapping in the middle. Place the eyes in the center of each circle, roughly halfway down the head.
- Add the small, hooked beak on the center line just below the eyes.
- Sketch ear tufts if your species has them, wings folded along the sides of the body, and feet gripping the branch.
Step 3: Block in the body
Fill the body and head with mid-tone brown, using a filbert. Paint darker areas along the sides of the body and under the head where feathers are in shadow. Paint the facial disk a lighter buff or cream color, and leave the eyes unpainted for now.
Step 4: Paint the eyes
Paint the eyes early so you can frame them with feathers. For a yellow-eyed owl:
- Fill the iris with bright yellow.
- Paint a large round black pupil. Owl pupils can be very large, especially in low light.
- Darken the top of the iris slightly with orange or ochre to show the shadow of the brow.
- Paint a thin dark rim around the eye.
- Add a crisp white catchlight overlapping the pupil and iris, in the same position on both eyes.
For dark-eyed owls like barred owls, paint the eye in dark brown, with a slightly lighter warm brown on the lower half and a strong catchlight. Without the catchlight, dark eyes look like empty holes.
Step 5: Define the facial disk
The facial disk is made of fine feathers that radiate outward from each eye. With thinned paint and a liner, paint short strokes radiating from the eye toward the edge of the disk, in cream and light gray-brown. Add a darker rim around the outer edge of the disk; on great horned owls it’s often dark brown or black, and on barred owls it’s ringed with concentric brown lines.
Paint a pale “V” or “X” shape above and between the eyes where the brows meet. This shape is distinctive in many owls and gives the face its expression.
Step 6: Paint the beak
Paint the beak in blue-gray or dark gray, depending on species. Add a light highlight on the top curve and darken the tip. Pull a few feathers over the base of the beak so it looks tucked into the face.
Step 7: Build feather texture
Owl feathers are soft, so avoid hard, scratchy strokes. Work in layers:
- Dark pass: paint the darkest feather markings, such as horizontal bars on the chest of a great horned owl, or vertical streaks on a barred owl’s belly, using a small round and thinned dark paint.
- Feather shapes: on the wings and shoulders, paint small, overlapping U-shapes or scalloped strokes in mid-tone, like fish scales. Start at the bottom and work up so upper feathers overlap lower ones.
- Light pass: paint lighter edges on each feather group with cream or light buff, especially on the chest and wing coverts.
- Soft texture: with a worn fan brush and a very small amount of light paint, flick soft feather texture over the chest and belly.
Step 8: Wings and tail
Folded wings have long flight feathers (primaries) that extend toward the tail. Paint them as long, overlapping shapes with lighter edges and dark bars across them. The tail peeks out below the wings and usually has horizontal bands.
Step 9: Feet and talons
Most owl feet are feathered, so paint them as soft, fluffy cream or buff shapes wrapping around the branch. The talons are sharp, curved and dark gray or black. Add a small highlight on each talon so they look glossy.
Step 10: Final details
Add soft, light feather tips along the edges of the head and body where they meet the background. Glaze a little shadow under the head and along the side of the body facing away from the light. Make sure the eyes remain the sharpest, most contrasting area of the painting.
Painting Different Owl Species
| Species | Key features | Palette notes |
|---|---|---|
| Great horned owl | Ear tufts, yellow eyes, barred chest, white throat patch | Warm browns, buff, dark bars |
| Barred owl | No ear tufts, dark eyes, concentric facial rings, vertical belly streaks | Gray-browns, cream |
| Barn owl | Heart-shaped white face, dark eyes, golden back | White, golden ochre, soft gray |
| Snowy owl | White body with dark bars or spots, yellow eyes | White, blue-gray shadows, warm cream |
| Eastern screech owl | Small, ear tufts, yellow eyes, gray or rufous | Gray or burnt sienna-based |
Snowy owls are a great exercise in painting white. Use cool blue-gray shadows and warm cream highlights, and save pure white for the brightest feathers.
Lighting and Mood in an Owl Painting
Owls are mostly nocturnal, so many owl paintings are set at dusk or under moonlight. That choice changes your whole palette. Under moonlight, colors drop in saturation and shift cool: browns become gray-browns, and highlights take on a pale blue tint. Mix a little ultramarine into your feather colors and keep the brightest highlights on the side of the owl facing the moon.
For a dusk scene, use a warm sky (orange fading to violet) and a rim light along one edge of the owl. Paint the body mostly in shadow tones, then add a thin, warm, bright edge along the head, shoulder and wing facing the sunset. This backlit look is dramatic and hides a lot of feather detail in shadow, which makes it more forgiving than a fully lit daytime portrait.
Daylight scenes, on the other hand, show every marking clearly. They’re the best choice if your goal is a species-accurate portrait.
Simple Stylized Owl for Beginners
If a realistic owl feels like too much, try a stylized version:
- Paint an egg-shaped body in a solid color.
- Paint two large circles for eyes, each with a white ring, colored iris and black pupil.
- Add a small triangle for the beak.
- Paint the chest with rows of U-shaped feather scallops in a lighter color.
- Add simple wing shapes on the sides and two small feet on a branch.
This style suits kids’ rooms, cards and painted rocks, and it builds the same skills in feather layering.
Common Mistakes When Painting Owls
- Head too small. Owl heads are large and wide. A small head makes the owl look like a different bird.
- Missing the facial disk. Without the radiating feathers and rim, the face looks flat.
- Uneven eye placement. Eyes must be level and the same size in a front view, with matching catchlights.
- Scratchy, hard feathers. Owl feathers are soft. Use thinned paint and soft brushes for texture.
- Painting every feather. Suggest groups of feathers and add detail only where light hits.
- Beak too prominent. The beak is small and partly covered by feathers.
Fine feather lines and crisp facial rims are easier with fluid paint or ink. Our Daler-Rowney fluid acrylic paint review explains how fluid paint behaves in detail work.
FAQs
What colors do you need to paint an owl?
Titanium white, burnt umber, raw umber, burnt sienna, yellow ochre and ultramarine blue cover most owls. Add cadmium yellow and orange for the eyes of yellow-eyed species.
How do you paint owl feathers with acrylic?
Block in mid-tone browns, then paint small overlapping U-shaped strokes from the bottom up, adding darker markings and lighter edges. Use a worn fan brush with very little paint for soft chest texture.
How do you paint owl eyes?
Paint a bright iris, a large black pupil and a thin dark rim around the eye. Shade the top of the iris and add a crisp white catchlight in the same spot on both eyes.
Is an owl easy to paint for beginners?
A stylized owl is very beginner-friendly. A realistic owl is a good intermediate project because it involves eyes, feather texture and soft edges.
How long does an owl painting take?
A stylized owl takes about one hour. A realistic owl portrait with detailed feathers usually takes five to ten hours across several sessions.
What background works best for an owl painting?
A night sky with a moon, a dark forest or a soft blurred background all work well. Choose a value that contrasts with the owl so its silhouette reads clearly.
Final Thoughts
The owl’s face does most of the storytelling, so spend your best effort on the eyes and facial disk. Build feathers in soft, layered passes, and suggest texture rather than painting every barb.
Because owls rely on a wide range of browns, buffs and grays, the depth of your earth colors makes a real difference. Explore our comparison of acrylic paint brands for wildlife and nature painting to find a palette that handles these subtle mixes well.