Quick answer: To paint a flower for DIY wall art, choose a simple bloom with clear petal shapes, paint a background and let it dry, then sketch the flower’s center and petal outlines. Block in each petal with a mid-tone, add a darker value near the center and where petals overlap, and pull lighter strokes from the outer edges inward. Finish with the flower center, a few stems and leaves, and crisp highlights. Acrylics on a 12×12 to 16×20 inch canvas let you complete a display-ready piece in one afternoon.
Flowers are the most requested subject in home decor art for a reason. They fit nearly every style, from minimalist line drawings to lush, textured bouquets, and they can be scaled from a small kitchen canvas to an oversized living room statement. If you have never painted one, the challenge is not talent. It is having a repeatable method for petals, which is exactly what this guide gives you.
Below you will find a basic approach that works for most five-petal and layered flowers, specific notes for daisies, tulips, roses and poppies, plus ideas for turning a single bloom into a set.
Pick the Right Flower for Your Skill Level
Some flowers are easy because their petals are separate and flat. Others are hard because their petals overlap in layers and curl. Starting with the right bloom keeps the project enjoyable.
| Flower | Difficulty | Why | Good room fit |
|---|---|---|---|
| Daisy | Easy | Simple radiating petals, clear center | Kitchen, kids’ rooms, cottage style |
| Tulip | Easy | Cup shape with three to six visible petals | Entryways, Scandinavian decor |
| Poppy | Easy to moderate | Loose, crinkled petals forgive mistakes | Modern, boho |
| Cherry blossom | Moderate | Many small blooms on branches | Bedrooms, Asian-inspired decor |
| Rose | Moderate to hard | Spiraling overlapping petals | Traditional, romantic |
| Peony | Hard | Dense ruffled layers | Statement pieces, glam |
For a first attempt, a daisy or tulip gives a satisfying result with very little frustration.
DIY and Art Supplies You Need
A few well-chosen DIY and art supplies are better than a large mixed box. Here is a focused list:
- Stretched canvas or canvas panel (12×12, 16×20 or a set of three 10x10s)
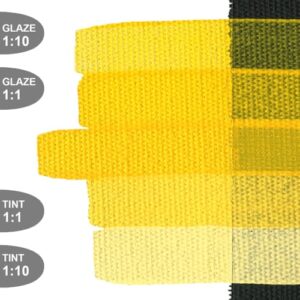
- Acrylic paints: titanium white, cadmium yellow medium, a warm red (cadmium red or pyrrole red), a cool pink (quinacridone magenta), ultramarine blue, sap green, burnt umber
- Brushes: 1 inch flat, size 8 filbert, size 4 round, small liner
- Palette, palette knife, water jar, paper towels
- Chalk or watercolor pencil for sketching
- Optional: texture paste, matte varnish, painter’s tape
A filbert brush is the most useful tool for petals because its rounded, flat tip creates a petal shape in a single press-and-lift stroke. Pigment strength also matters with flowers since you want clean, vivid color. Our comparison of the best paints for wall art and decor canvases explains how pigment load affects brightness.
How to Paint a Flower for Wall Art DIY: The Core Method
1. Paint the Background
Pick a background that supports the flower without competing with it. Soft neutrals, pale blush, muted sage and a light blue-gray all work. For dramatic pieces, a deep navy or black makes bright petals glow. Apply two coats and allow 30 minutes of drying.
For a little interest, blend two close colors loosely, or add a subtle texture with crisscross brushstrokes.
2. Sketch the Flower
Start with the center: a small circle or oval. Then draw petal outlines radiating from it. For a natural look, vary the petal sizes slightly and tilt the flower so the center is not perfectly round. A flower viewed from a slight angle has an oval center and shorter petals on the far side.
3. Block In the Petals
Mix a mid-tone of your petal color. With the filbert brush, fill each petal, stroking from the outer tip toward the center. This direction mimics how petals grow and leaves natural-looking streaks. Do not worry about detail yet.
4. Add Shadows
Mix a darker version of the petal color by adding a touch of its complement or a little burnt umber, rather than black. Paint this near the center of each petal and where one petal tucks behind another. Soften the transition by blending with a damp brush while the paint is still workable.
5. Add Light
Mix a lighter value with white and a hint of yellow (for warm flowers) or blue (for cool ones). Paint along the outer edges and upper surfaces of petals. Pulling a few thin lines from the edge toward the center suggests petal veins.
6. Paint the Center
Flower centers add texture contrast. For daisies and sunflowers, dab yellow ochre and burnt umber with the tip of a round brush, then add tiny highlights. For poppies, paint a dark center surrounded by fine black stamens. For roses, the center is a tight spiral of darker petals.
7. Stems and Leaves
Paint stems in one smooth stroke with the liner or a small round, slightly curved. Leaves are easy with a filbert: press down at the base and lift as you pull outward to create a pointed tip. Mix greens with a touch of blue for cool shadows and yellow for sunlit edges.
8. Final Details
Add a few crisp highlights on the most forward petals, deepen the darkest shadows, and if you like, paint a soft cast shadow on the background. Step back two or three meters and look at the painting from a distance; wall art is seen from across the room, so make sure the main shapes read clearly.
Notes for Specific Flowers
Daisy
Paint 12 to 20 slim white petals with single filbert strokes. Use pale gray-blue shadows near the center. A yellow center with burnt umber dots on its lower side looks rounded.
Tulip
Paint an egg or cup shape first, then divide it into overlapping petals with darker lines. Keep the top edge slightly pointed or ruffled. A long curved stem and one or two broad leaves complete it.
Rose
Start with a dark spiral in the center, then add C-shaped petals around it, each slightly larger and lighter. Outer petals curl outward at their edges; paint those curls with a light highlight.
Poppy
Use loose, crinkled petal shapes with jagged edges. Bold reds and oranges against a pale background are classic. Paint the dark center last with small dots around it.
For layered, ruffled blooms beyond the basic method, the techniques in our tutorial on painting pampas grass wall art show how to build soft texture that pairs well with floral pieces in a set.
Painting a Simple Bouquet or Vase Arrangement
Once a single bloom feels comfortable, a small arrangement is the natural next step. The extra challenge is composition, not technique.
- Use an odd number of flowers. Three or five blooms look more natural than two or four.
- Vary size and angle. Paint one large focal flower facing forward, a medium one turned to the side, and a small bud.
- Overlap. Let one flower partly hide another. Overlap is the simplest way to show depth.
- Paint back to front. Start with leaves and flowers that sit behind, then work forward so front petals overlap cleanly.
- Keep the vase simple. A plain cylinder or jar with one highlight stripe keeps attention on the flowers.
- Add filler. A few dots of baby’s breath or small leaf sprigs fill gaps and tie the arrangement together.
How Long Each Stage Takes
| Stage | Single bloom on 16×20 | Three-flower bouquet |
|---|---|---|
| Background and drying | 45 minutes | 45 minutes |
| Sketch | 10 minutes | 20 to 30 minutes |
| Petal block-in | 20 minutes | 45 minutes |
| Shadows and highlights | 30 to 45 minutes | 1 to 1.5 hours |
| Centers, stems, leaves and details | 30 minutes | 1 hour |
These are approximate. Thicker paint and humid rooms add drying time, and it is normal for a first attempt to take longer.
DIY Large Canvas Art Ideas for Beginners With Flowers
- Single oversized bloom: One flower filling a 24×36 inch canvas, cropped at the edges. Cropping makes it look modern and saves you from painting stems.
- Abstract floral: Loose blobs of color with a few defined petals and stems. Great for beginners who prefer expressive work.
- Wildflower field: Rows of tiny dots and dashes in many colors at the bottom of a canvas with a soft sky above.
- Floral triptych: Three canvases, each with one flower in the same palette.
- Textured flowers: Build petals with a palette knife and heavy body paint or modeling paste for a three-dimensional effect.
DIY Art Kits for Adults vs Building Your Own Kit
Floral paint-by-number and DIY art kits for adults are convenient and come with a printed outline. They are a reasonable way to try painting with no planning. The downside is that kits often include small pots of limited colors and basic brushes, which can make blending petals harder. Building your own small kit of seven colors and three or four brushes takes a little more effort up front but gives better color mixing and can be reused for many paintings.
Common Mistakes When Painting Flowers
- Every petal identical. Real petals vary in size, angle and curl.
- Shadows mixed with black. Black dulls flower colors. Use the complement or a deep earth tone instead.
- Too many details at once. Work from large shapes to small details.
- Flat center. Add a shadow on one side and a highlight on the other.
- Background painted around the flower afterward. This leaves halos. Paint the background first.
Matching Flower Art to Your Room
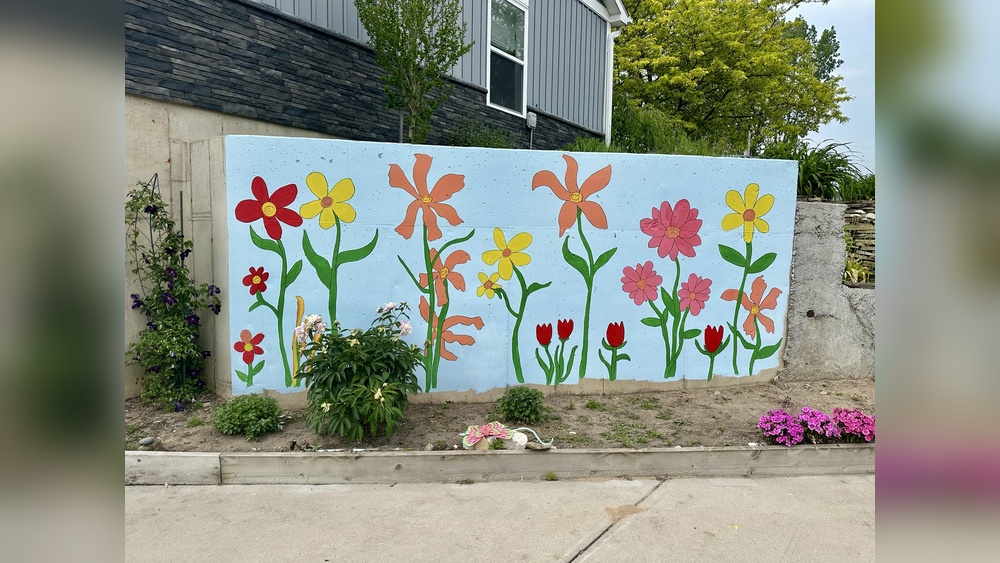
The same flower can feel very different depending on palette and style. For a calm bedroom, try soft blush or white blooms on a muted sage or greige background with matte varnish. In a kitchen or breakfast nook, bright yellows, oranges and greens on a cream background feel cheerful. Living rooms with neutral furniture can carry one bold, oversized bloom in a saturated red or deep magenta as a focal point. For minimalist spaces, a single stem with two leaves on a large white canvas often looks more intentional than a busy arrangement. Pull one accent color from a pillow, rug or throw so the painting feels connected to the room.
Finishing Your Flower Wall Art
Let the painting dry for at least 24 hours. Varnish protects against dust and fading and unifies the sheen. Matte varnish gives a soft, modern look; gloss deepens colors. Paint the canvas edges to match the background, or add a simple floating frame. Hang the piece with its center around eye level.
FAQs
What is the easiest flower to paint for beginners?
Daisies and tulips are usually the easiest because their petals are simple, separate shapes. Poppies are also forgiving since their loose, crinkled petals do not need precise edges.
What brush is best for painting flower petals?
A filbert brush. Its rounded tip creates natural petal shapes in a single stroke. A small round brush handles centers and stems, and a liner adds fine details.
What colors should I use for floral wall art?
A warm red, a cool pink, a yellow, a blue, a green, burnt umber and white let you mix most flower colors. Choose a background that contrasts in value with the petals.
How do you make painted flowers look realistic?
Use at least three values per petal (shadow, mid-tone and highlight), vary petal shapes and sizes, and paint petals overlapping each other. Soft edges in the background and crisp edges in the foreground add depth.
Are DIY art kits good for adults learning to paint flowers?
They can be a convenient starting point. For ongoing practice, a small set of quality acrylics and a few good brushes usually make blending easier and last longer than kit materials.
Can I paint flowers on wood for wall art?
Yes. Sand and prime the wood with gesso, then paint as you would on canvas. Wood planks and rounds suit farmhouse and rustic decor.
Final Thoughts
Once you can paint one petal with three values, you can paint almost any flower. Start with a daisy or tulip, move to poppies, and build up to roses and peonies. When you are ready to upgrade your supplies for brighter, cleaner color, browse our guide to top acrylic and craft paints for floral wall art.