
Painting your own pampas grass wall art is a rewarding project that brings modern, natural beauty into any room. Pampas grass, with its soft, feathery plumes, has become a favorite subject in home décor trends. But you don’t have to buy expensive prints or real dried plants to enjoy this look. By painting it yourself, you create a unique piece that fits your style and space perfectly. Even if you’re a beginner, you can achieve stunning results with a little guidance, some basic supplies, and a clear process.
This guide will walk you through everything you need to know to paint pampas grass wall art, from choosing materials and planning your artwork to the painting steps and adding the final touches. You’ll also find tips to avoid common mistakes and suggestions to make your art truly stand out.
By the end, you’ll feel confident to hang your own pampas grass masterpiece—or even gift it to someone special.
Why Paint Pampas Grass Wall Art?
Pampas grass is more than just a trendy plant. Its elegant, flowing shapes and subtle colors add calm and sophistication to any room. Unlike real pampas grass, a painted version doesn’t shed or fade, and you can customize it to match your space.
Painting pampas grass also lets you experiment with different backgrounds, colors, and arrangements.
Another benefit is the therapeutic process. Painting soft, repetitive shapes like grass plumes can be relaxing and help reduce stress. You don’t need advanced skills, and each piece is unique, so even small mistakes can add character.
Materials And Tools You’ll Need
Quality supplies make painting easier and help your art last. Here’s what you’ll need:
- Canvas or Paper: For a modern look, use stretched canvas (16”x20” is popular). Watercolor or mixed media paper also works.
- Acrylic Paints: Choose colors like beige, taupe, cream, white, light pink, and gold. These mimic the real pampas grass shades.
- Brushes: A mix of round, fan, and liner brushes works best. A fan brush is especially useful for creating feathery textures.
- Palette: For mixing colors.
- Water Cup: To rinse brushes.
- Paper Towels or Rags: For cleaning and blotting.
- Pencil and Eraser: For sketching the design.
- Painter’s Tape (optional): To mask edges for a clean border.
- Varnish or Fixative (optional): For sealing the finished painting.
Pro Tip: Investing in soft synthetic brushes helps you create the delicate, wispy effect of pampas grass without harsh lines.
Planning Your Composition
Before you touch paint to canvas, planning your layout makes the process smoother and the results more polished.
Choosing Your Pampas Grass Style
Think about the mood you want to set. Pampas grass can look minimalist with just a few plumes, or lush and wild with many overlapping stalks. Decide whether you want the grass to stand straight, curve gracefully, or lean to one side.
Background Choices
A background color can change the entire feel of your artwork. Here’s a simple comparison of popular options:
| Background | Effect | Best Room Type |
|---|---|---|
| White | Crisp, modern, bright | All rooms |
| Beige/Tan | Warm, calming | Bedroom, living room |
| Soft Pastel | Cheerful, playful | Nursery, creative spaces |
| Muted Blue/Gray | Cool, elegant | Office, hallway |
Sketching Your Design
Lightly sketch the main lines of your pampas grass on the canvas with a pencil. Start with the stems, then mark the general shape of each plume. Don’t worry about details yet—these will come with the brushwork.
Non-obvious insight: Sketching just a few lines (not the entire plume) keeps your painting loose and natural. Over-sketching makes the art look stiff.
Step-by-step Painting Process
Let’s break the process into clear, manageable steps.
1. Preparing Your Workspace
Choose a flat, well-lit area. Cover your surface with newspaper or a drop cloth. Set out all your supplies, and keep water and towels nearby.
2. Painting The Background
Use a wide brush to cover the entire canvas with your chosen background color. Acrylics dry fast, so work quickly and evenly. Let it dry completely before moving to the next step.
Tip: For extra depth, blend two similar colors (like beige and white) while the paint is still wet.
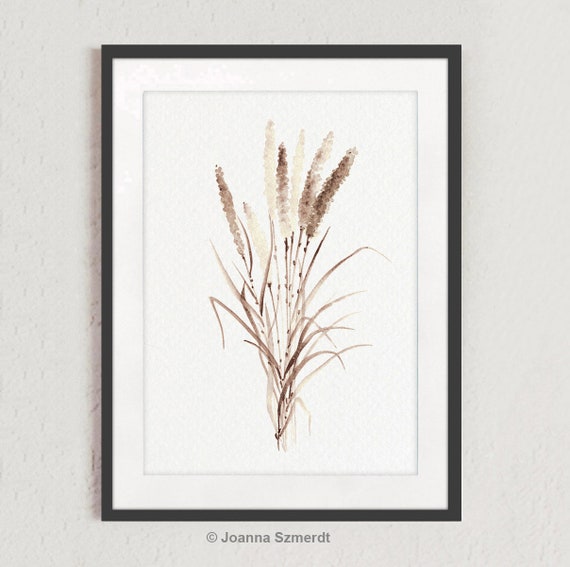
3. Painting The Stems
With a liner or round brush, mix a slightly darker shade of your background color. Paint long, thin lines from the bottom up—these are your stems. Vary the length and direction for a natural look. Some stems can cross over each other.
Non-obvious insight: Don’t make the stems perfectly straight. Real pampas grass bends and curves, so let your hand move naturally.
4. Creating The Pampas Plumes
This is where the magic happens.
- Load a fan brush with a light color (cream or pale beige).
- Hold the brush at a slight angle and use quick, upward strokes from the stem outward. Start narrow at the base and get wider at the top.
- Layer different shades, using lighter colors on top for highlights and darker ones underneath for depth.
- For extra detail, use a small round brush to add a few wispy strands and edges.
Repeat for each plume, overlapping them slightly for a fuller effect.
5. Adding Texture And Details
Let the first layer dry, then go back in with your fan brush and add more strokes. This builds the fluffy, feathery texture pampas grass is known for. Use a dry-brush technique (less paint, more brush) to gently “tickle” the surface and add soft highlights.
For finishing touches, add a hint of gold or light pink to a few strands. This subtle shimmer catches the light and adds dimension.
6. Refining And Correcting
Step back and view your art from a distance. Fix any areas that look too flat or even. Add more plumes or details as needed.
Common mistake: Overworking the paint can make the plumes look heavy. Keep your strokes light and airy.
7. Sealing And Framing
When fully dry, you can spray a matte varnish or fixative to protect your painting (especially if using paper). Consider framing your art in a simple wood or white frame for a polished look.
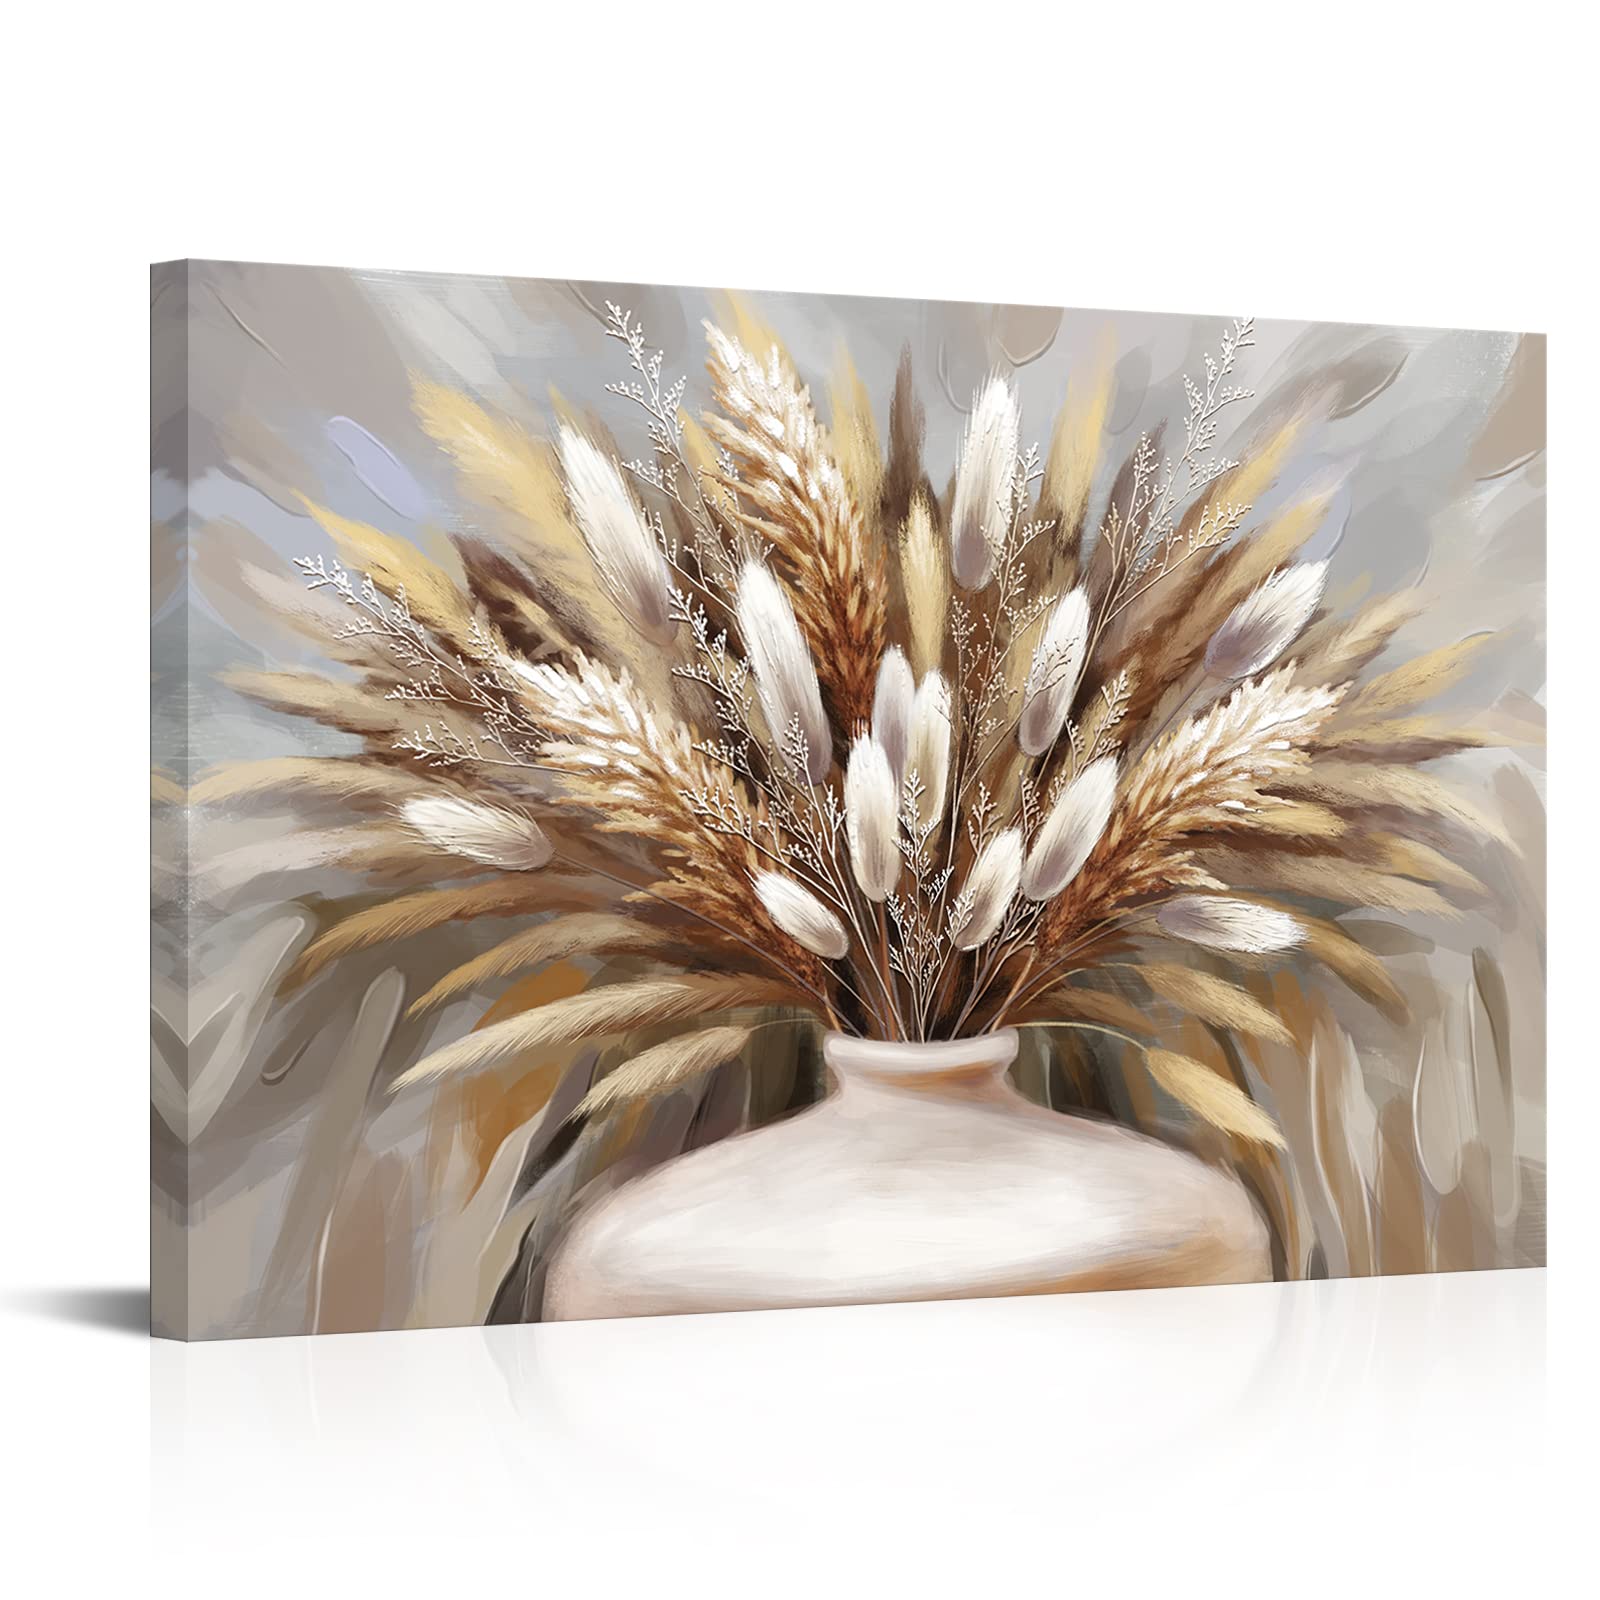
Color Palette Ideas And Combinations
Choosing the right colors brings your pampas grass art to life. Here’s a helpful palette comparison:
| Palette | Colors Used | Best For |
|---|---|---|
| Classic Neutrals | Beige, taupe, white, cream | Minimalist, modern homes |
| Soft Pastels | Pale pink, blush, ivory, gold | Bedrooms, nurseries |
| Earthy Tones | Olive, warm brown, sand, gray | Boho, rustic décor |
| Cool Elegance | Muted blue, silver, white, charcoal | Offices, formal spaces |
Pro Tip: Test your colors on a scrap piece of paper before painting your main canvas.
Common Mistakes And How To Avoid Them
Even simple projects have pitfalls. Here’s what to watch out for:
- Using Too Much Paint: Thick paint can cover up the feathery effect. Use less paint and build up in layers.
- Perfect Symmetry: Real pampas grass is irregular. Vary your plumes in size, shape, and position.
- Flat Colors: Mix small amounts of different shades for each stroke to add depth.
- Over-Detailing: Too many fine lines can make the grass look stiff. Let some areas stay soft and blended.
- Rushing: Allow layers to dry before adding more. This prevents muddy colors and smudging.
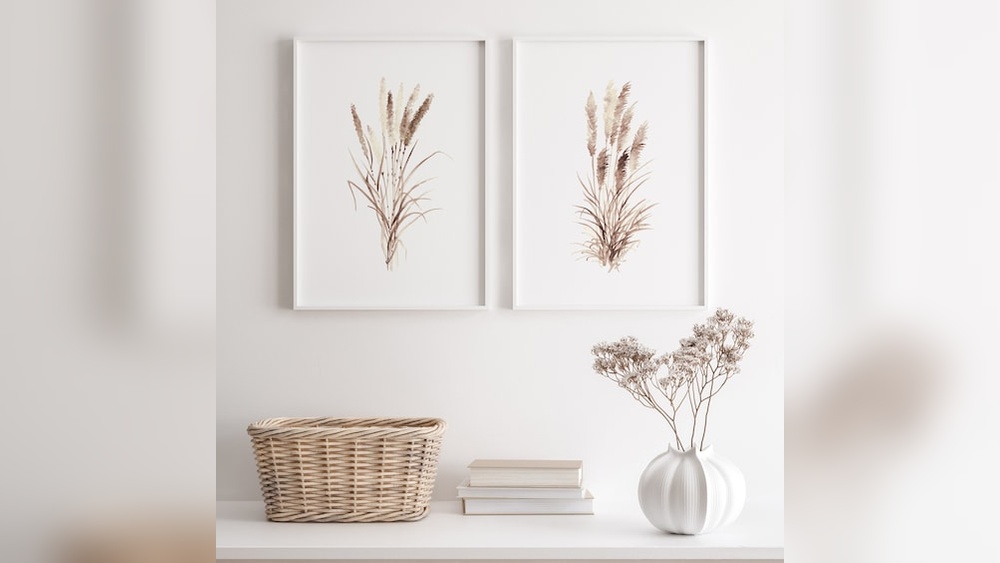
Credit: www.amazon.com
Advanced Techniques To Elevate Your Art
Ready to go beyond basics? Try these ideas:
- Add Metallic Accents: Use a metallic gold or bronze acrylic to highlight a few strands for a luxe effect.
- Mixed Media: Glue small pieces of fabric or string to the canvas before painting over them to create real texture.
- Layered Plumes: Paint some plumes in sharp focus with crisp lines, and others blurred in the background for a sense of depth.
- Oversized Canvases: Large, bold pampas art makes a dramatic statement in a living room or above a bed.
Displaying Your Pampas Grass Wall Art
Where and how you hang your finished piece matters. Here are popular ideas:
- Above the sofa or bed: Creates a soothing, nature-inspired focal point.
- Gallery wall: Pair with other neutral botanical prints or line art.
- Entryway: Welcomes guests with a touch of calm.
- Workspace: Adds a relaxing touch to your office.
Pro Tip: Hang your art at eye level (about 57-60 inches from the floor to the center of the piece).

Credit: www.amazon.com
Inspiration And Trends
Pampas grass art appears everywhere, from Instagram to high-end interior stores. Some artists add subtle backgrounds, like abstract geometric shapes or soft color washes. Others paint pampas grass in unexpected colors—think dusty blue or sage green—for a twist on tradition.
For more inspiration, check out artwork from top home décor brands or search for “pampas grass wall art” on Pinterest. You can see how different palettes, canvas sizes, and arrangements change the overall feel.
Quick Reference: Pampas Grass Painting Steps
Here’s a summarized process for easy recall:
- Prepare your workspace and supplies
- Paint and dry the background
- Sketch the stems and plumes
- Paint stems with a liner brush
- Build plumes with a fan brush in layers
- Add details and highlights
- Let dry, seal, and frame
Credit: www.etsy.com
Frequently Asked Questions
How Long Does It Take To Paint Pampas Grass Wall Art?
Most projects take about 2-4 hours, including drying time between layers. If you use a large canvas or add lots of detail, it may take longer.
Can I Use Watercolors Instead Of Acrylics?
Yes, but watercolors are less opaque and harder to layer. They work best on watercolor paper and create a softer, more delicate effect. Use less water to keep the colors rich.
What Size Canvas Is Best For Pampas Grass Wall Art?
Popular sizes are 16×20 inches or 18×24 inches for single pieces. For a statement, try an oversized canvas (24×36 inches or larger). Smaller canvases (8×10 inches) work well for grouped displays.
How Do I Make My Pampas Grass Look More Realistic?
Use a fan brush for soft, feathery strokes, layer different shades, and avoid rigid lines. Let some plumes blur into the background, and add highlights sparingly for a lifelike look.
Where Can I Find Examples Or Tutorials For Painting Pampas Grass?
Many artists share tutorials online. For high-quality examples, see this Architectural Digest feature on pampas grass décor.
Painting pampas grass wall art is both relaxing and rewarding. With practice and creativity, you can make a piece that adds warmth and elegance to any space. Experiment with colors, try new brush techniques, and enjoy the process—your walls will thank you!


