Reverse tie dye painting is a creative craft that turns traditional tie dye on its head. Instead of adding color, you remove it to reveal unique designs. This process uses bleach to take away dye from dark fabrics, leaving behind striking patterns in shades of orange, pink, or even white.
It’s a fun, hands-on project that does not require advanced art skills or expensive supplies. Whether you want to refresh an old black t-shirt or make a bold statement piece, reverse tie dye painting is an easy way to create something special.
Many people love this craft for its surprising results and endless possibilities. Each piece you make is one-of-a-kind. If you enjoy do-it-yourself fashion or want a relaxing group activity, reverse tie dye will give you both. Let’s dive into the essentials, from the materials you need, to step-by-step instructions, design ideas, and pro tips for perfect results.
What Is Reverse Tie Dye Painting?
Reverse tie dye painting is different from classic tie dye. Instead of using colored dyes on a white shirt, you use bleach (or a bleach pen) to remove color from a dark-colored fabric. The method creates bold, high-contrast designs that stand out, especially on black, navy, or deep purple clothing. You can use many of the same folding or tying techniques as regular tie dye. But here, the magic happens as the bleach lifts away the dye, revealing lighter areas that form your pattern.
A key advantage: you can control your design more precisely with reverse painting techniques. For example, painting with a brush or using stencils gives you sharp lines and detailed shapes. This makes it a great craft for people who want more than just random swirls.
Materials And Tools You’ll Need
Before you start, gather all the supplies. Most of them are easy to find at home or at craft stores. Here is a checklist of essentials:
- Dark-colored 100% cotton t-shirt or fabric (black works best)
- Bleach (regular household bleach)
- Spray bottle (for even coverage)
- Rubber gloves (to protect your hands)
- Plastic table cover or trash bags (to protect your work area)
- Rubber bands or string (for traditional tie dye effects)
- Small paintbrushes or foam brushes (for painting)
- Plastic squeeze bottles (optional, for more control)
- Stencils or painter’s tape (for sharp shapes)
- Bucket with water and vinegar (to stop the bleach process)
- Apron or old clothes (bleach will stain)
- Paper towels (for quick cleanups)
Recommended Fabrics
Cotton absorbs bleach well and gives the most vivid patterns. Polyester and other synthetics do not react strongly with bleach, so results are weak or uneven. For best results, use 100% cotton.
| Fabric Type | Reverse Tie Dye Result | Notes |
|---|---|---|
| 100% Cotton | Bright, clear patterns | Best choice |
| Polyester blends | Faded, patchy designs | Not recommended |
| Rayon, Linen | Good, but softer colors | Acceptable |
How To Do Reverse Tie Dye Painting: Step-by-step
This craft is simple, but following the steps carefully ensures success. Here is a practical guide:
1. Prepare Your Work Area
Bleach can damage surfaces and stain clothes. Set up your workspace in a well-ventilated area, like a patio or near an open window. Cover your table with plastic or a trash bag. Put on an old shirt and rubber gloves.
2. Choose And Prep Your Fabric
Pick a black or dark-colored 100% cotton t-shirt for the best effect. Wash it to remove any sizing or chemicals. Do not use fabric softener, as it can block the bleach.
3. Decide On Your Design
You can use classic tie dye folds, or try painting with brushes, stencils, or even freehand. Here are a few ideas:
- Spiral: Pinch the center of the shirt and twist, then secure with rubber bands.
- Stripes: Fold the shirt accordion-style and band it.
- Galaxy: Crumple the shirt randomly and spray bleach.
- Custom art: Lay the shirt flat and paint or stencil shapes.
4. Mix And Apply The Bleach
Bleach works fast. Mix 1 part bleach to 1 part water in a spray bottle or bowl. For painting, pour a small amount into a cup.
- For tie dye patterns: Spray or pour the bleach mixture over the tied shirt.
- For painting: Dip your brush into the bleach and paint directly onto the flat fabric. Use stencils for clean edges.
Apply the bleach slowly and watch the color change. The transformation can take 2–10 minutes depending on the fabric and the amount of bleach.
5. Rinse To Stop The Bleach Reaction
When you see the color is as light as you want (usually orange or off-white), remove any bands or tape. Rinse the shirt in cold water with a splash of vinegar. Vinegar helps neutralize the bleach and protect the fabric fibers.
6. Wash And Dry
Wash the shirt alone in cold water with a mild detergent. Dry it completely before wearing or adding more designs.
7. Optional: Add Color
If you want, you can add regular tie dye after bleaching. First, make sure the fabric is fully rinsed and dried. Then, apply colored dyes to the bleached areas for a layered effect.
Design Ideas And Techniques
Reverse tie dye painting is perfect for experimenting. Here are some techniques to try:
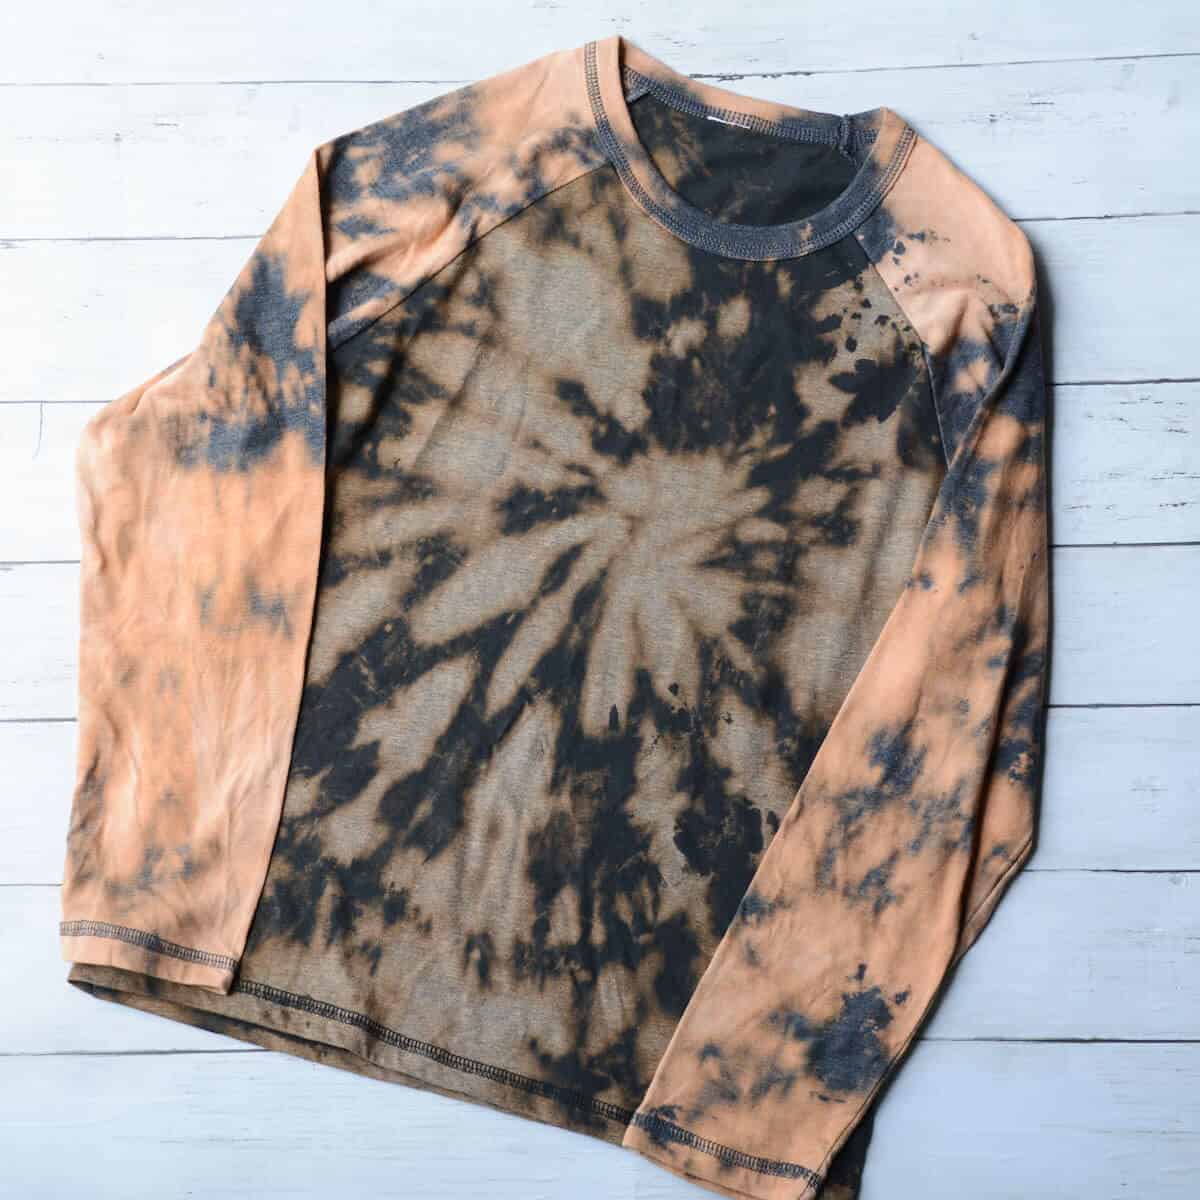
Spiral And Crumple Patterns
The classic spiral is easy: twist the shirt and band it. When you spray or pour bleach, the lines will turn a rusty orange. Crumple patterns give a “galaxy” effect, with random stars and clouds.
Freehand Painting
Use a bleach pen or a small brush to draw shapes, write words, or make abstract art. This method is great for kids or anyone who likes more control over the design.
Stencils And Tape
Stencils make it easy to add images or text. Secure the stencil on the shirt, then use a brush or sponge to dab bleach over it. Remove the stencil after a minute to reveal a sharp design. Painter’s tape can create stripes, chevrons, or geometric shapes.
Layered Effects
Try folding the shirt, applying bleach for a base pattern, and then painting extra details on top. You can use both spraying and brushing for more texture.
Credit: craftyartideas.com
Common Mistakes And How To Avoid Them
Reverse tie dye is forgiving, but a few mistakes can ruin your project. Here is how to avoid them:
- Over-bleaching: Bleach is strong. If left too long, it weakens fabric and can create holes. Check your shirt every minute.
- Uneven application: Spray or paint evenly. Too much bleach in one spot can damage the fabric.
- Wrong fabric: Synthetics don’t react well. Stick to cotton for best results.
- Not rinsing well: Always stop the bleach with a vinegar rinse, then wash well. Lingering bleach will keep working and may damage your shirt after wearing.
Safety Tips For Reverse Tie Dye
Bleach is a chemical and should be handled with care. Follow these safety tips:
- Wear gloves at all times to protect your skin.
- Work in a ventilated area to avoid breathing fumes.
- Avoid splashing. Bleach can damage eyes and stain surfaces.
- Don’t mix bleach with other cleaners. This can create dangerous gases.
- Keep bleach away from children and pets.
.png)
Credit: www.veetrends.com
How Reverse Tie Dye Compares To Traditional Tie Dye
You might wonder how reverse tie dye stacks up against the traditional method. Here’s a quick comparison:
| Feature | Reverse Tie Dye | Traditional Tie Dye |
|---|---|---|
| Main Process | Removes color (bleach) | Adds color (dye) |
| Best Fabric Color | Dark (black, navy) | White |
| Common Designs | High contrast, graphic | Swirly, colorful |
| Time Required | 30–60 minutes | Several hours or overnight |
| Skill Level | Beginner to advanced | Beginner to advanced |
Creative Project Examples
Reverse tie dye painting is not just for t-shirts. Here are other creative ideas:
- Tote bags for shopping or gifts
- Pillowcases or throw blankets
- Hoodies and sweatshirts
- Bandanas or scarves
- Tablecloths or napkins
Try making a matching set or giving custom gifts to friends. The process works on any dark cotton fabric, so you can be as creative as you want.

Credit: www.etsy.com
Troubleshooting: When Things Go Wrong
If your first attempt doesn’t look great, don’t worry. Here are solutions to common problems:
- Fabric turns yellow: Too much bleach or not rinsed well. Next time, use less bleach and rinse with vinegar sooner.
- Design is too light or too dark: Adjust the bleach mix (add more water for lighter, less for stronger effect).
- Blurry edges: Use less liquid or blot with a paper towel for sharp lines.
- Fabric is weak or torn: Bleach exposure was too long. Check progress every minute.
Sustainability And Eco-friendly Tips
Bleach is strong, but you can reduce your impact:
- Use old clothes or thrifted items to upcycle.
- Work with small amounts of bleach, and dispose of rinse water down the drain with plenty of water.
- Try hydrogen peroxide as an alternative for a gentler effect, but results may be lighter.
Why Reverse Tie Dye Painting Is So Popular
People love this craft because it’s easy, fast, and always surprising. Each shirt is different, and you don’t need to be an artist to make something beautiful. It’s also a great activity for groups, parties, or family nights. The process is affordable, and you can use items you already have at home.
One thing many beginners miss: the bleach reaction continues after you rinse, so always neutralize with vinegar and wash well. Another tip: combining tie dye and reverse tie dye in one project creates even more unique results.
If you want more inspiration or advanced techniques, many artists share their work on social media. For more detailed chemistry behind bleach and dye reactions, check out this Wikipedia page on tie dye.
Frequently Asked Questions
How Long Should I Leave Bleach On The Fabric?
Usually, 2 to 10 minutes is enough for the color to lighten. Check often to avoid damaging the fabric. Once you see the color you want, rinse right away.
Can I Use Reverse Tie Dye On Any Color Shirt?
Dark colors work best, especially black and navy. Light colors may not show much contrast. Bright colors like red or blue can give interesting orange or pink results.
Is Reverse Tie Dye Safe For Kids?
Yes, with adult supervision. Make sure kids wear gloves and work in a safe area. Do not let children handle bleach alone.
How Do I Make Designs With Sharp Edges?
Use stencils or painter’s tape to block out shapes. Apply bleach carefully with a brush or sponge. Remove the stencil quickly once the color changes.
Can I Do Reverse Tie Dye On Jeans Or Denim Jackets?
Yes, but results may be less predictable. Denim often contains polyester, which does not bleach evenly. Try a small test area first.
Reverse tie dye painting is a rewarding, creative craft for all ages. With just a few supplies, you can turn ordinary clothes into wearable art. Try out different methods, enjoy the process, and let your imagination lead the way!