Are you ready to bring the vibrant beauty of a peacock to life on your canvas? Painting a peacock with acrylics might seem challenging, but with the right steps, you can create a stunning piece full of color and detail.
In this guide, you’ll discover simple techniques to capture the rich blues, greens, and intricate feather patterns that make peacocks so mesmerizing. Whether you’re a beginner or looking to refine your skills, this tutorial will help you unlock your creativity and paint a peacock that truly stands out.
Let’s dive in and transform your painting into a dazzling work of art!
Materials And Tools
Starting a peacock painting with acrylics requires the right materials and tools. Choosing quality supplies helps create vibrant and detailed artwork. Prepare all essentials before you begin to enjoy a smooth painting process.
Essential Acrylic Paints
Select bright and rich colors for the peacock’s feathers. Use ultramarine blue, phthalo green, and cadmium yellow for vibrant hues. Add titanium white for mixing lighter shades. Include burnt sienna and black for details and shadows. Having these colors ensures your painting captures the peacock’s beauty.
Brush Types And Sizes
Use various brushes for different effects. Flat brushes help cover large areas quickly. Round brushes are perfect for fine lines and details. A fan brush can create feather textures easily. Choose small to medium sizes for control and precision. Clean brushes between colors to keep your painting neat.
Additional Supplies
Prepare a palette for mixing paints smoothly. Use a cup of water to rinse brushes often. Keep paper towels or rags nearby for drying brushes. Use a canvas or acrylic paper as your painting surface. Consider using a pencil to sketch the peacock lightly before painting.
Choosing A Reference
Choosing the right reference is key to painting a peacock with acrylics. It guides your work and inspires accuracy. A good reference helps capture the bird’s beauty and vibrant colors. It also shows important details like feather patterns and shapes. This makes your painting more realistic and lively.
Selecting The Perfect Peacock Image
Pick a clear, high-quality photo of a peacock. Choose one that shows the bird in a good pose. Look for images with good lighting. This helps you see colors and details better. Avoid blurry or dark pictures. A straight view or a side angle works well for beginners. Make sure the feathers are visible and not hidden.
Observing Colors And Details
Study the peacock’s colors carefully. Notice the blues, greens, and golds in the feathers. Look at the patterns on the tail and wings. See how light hits the feathers and creates shadows. Pay attention to the eye and beak shape too. These details make your painting come alive. Keep the reference close as you paint for easy checking.
Sketching The Peacock
Sketching the peacock sets the foundation for a beautiful acrylic painting. A good sketch helps to organize shapes and details. It guides your brush and colors later. Spend time here to simplify the complex form of the bird.
Start with light lines so you can adjust as you go. Use a pencil that erases easily. Keep the sketch simple and clear to follow during painting.
Basic Shapes And Proportions
Begin by drawing the basic shapes of the peacock’s body. Use an oval for the body and a circle for the head. Add a long curved line for the neck. This helps capture the bird’s graceful posture.
Sketch the tail with a large fan shape behind the body. Keep shapes loose and light. Focus on the size and position of each part. This keeps the proportions balanced and natural.
Outlining Key Features
Next, draw the important details over the basic shapes. Outline the beak with a small triangle on the head. Add a small circle for the eye and a curved line for the eyelid.
Sketch the feathers on the tail with gentle curves. Focus on the flow and direction of the feathers. Add simple lines for the legs and feet. This step adds character and life to your sketch.
Painting The Background
Painting the background sets the stage for your peacock artwork. It shapes the mood and highlights the bird’s vibrant colors. Choosing the right background colors and blending techniques will bring your painting to life. A well-crafted background adds depth and focus to the peacock’s beauty.
Color Choices For Depth
Select colors that contrast with the peacock’s bright feathers. Dark blues, greens, or even muted purples work well. These colors create a natural, rich environment. Avoid colors that are too bright or clash with the peacock. Use darker shades near the edges to frame the bird. This makes the peacock stand out more clearly.
Blending Techniques
Use soft brushes to blend acrylic colors smoothly. Start with a wet brush to mix colors directly on the canvas. Blend from dark to light tones to create a gradient effect. This technique adds a sense of depth and space. Keep strokes gentle and circular for smooth transitions. Avoid harsh lines that distract from the main subject.
Base Colors For Peacock
Choosing the right base colors sets the foundation for your peacock painting. Base colors create the main shapes and tones before adding details. They help establish the bird’s vibrant and lively appearance. Using acrylic paints, start with smooth, even layers for the best results.
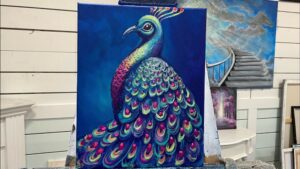
Applying Main Body Colors
Begin by painting the peacock’s main body with rich blues and greens. Use a medium brush to cover large areas smoothly. Mix a few shades of blue to add subtle depth. Paint the neck and chest with a bright turquoise or teal. Keep strokes gentle to avoid harsh lines. Let the paint dry before moving on.
Layering For Vibrancy
Apply additional layers of paint to make colors pop. Use lighter shades to highlight feathers and darker shades for shadows. Thin layers build up color without hiding details. Blend edges softly for a natural look. Layering creates the peacock’s characteristic shimmer and glow. Patience here improves the overall vibrancy of your painting.

Credit: skyepratt.com
Detailing The Feathers
Detailing the feathers is a vital part of painting a peacock with acrylics. Feathers bring life and realism to your artwork. They show the bird’s beauty and texture. Careful attention to feather detail helps your painting stand out. Each feather has unique shapes and colors. Capturing these details makes your peacock painting vibrant and engaging.
Creating Feather Texture
Start by using a fine brush for feather lines. Use short, light strokes to mimic feather strands. Layer strokes to build depth and texture. Avoid harsh lines; keep strokes soft and natural. Dry brushing adds a delicate feather effect. Experiment with brush pressure to vary texture. Texture gives feathers a realistic, tactile feel.
Adding Color Variations
Mix several shades of blue, green, and turquoise for feathers. Apply base colors first, then add lighter and darker tones. Blend colors smoothly to avoid harsh edges. Small dots and streaks create natural color shifts. Use a tiny brush to add spots and eye-like patterns. Variations in color make feathers look lively and rich.
Highlighting And Shadows
Use lighter colors to highlight feather tips and edges. Highlights add dimension and catch light realistically. Apply shadows with darker tones near feather bases. Shadows create depth and separation between feathers. Blend highlights and shadows softly for a natural look. Proper light and dark balance enhances the feather’s 3D effect.
Painting The Peacock’s Head
Painting the peacock’s head is a vital part of your acrylic artwork. This area holds the bird’s personality and charm. Focus on small details that bring the head to life. Use smooth brush strokes to create soft feathers around the face. Layer colors carefully for depth and texture. Let’s explore how to paint each key feature with clarity and precision.
Capturing Facial Features
Start with the basic shape of the head. Use a small round brush to outline the face gently. Choose shades of blue and green for the skin around the eyes. Add light strokes to show feather texture. Keep the edges soft to mimic real feathers. Use darker tones to create shadows under the eyes and around the neck. This contrast adds depth and form.
Adding Eye Details
Paint the eye as a small, dark circle. Use black or very dark brown paint for the pupil. Add a tiny white dot for the light reflection. This simple highlight makes the eye look alive. Surround the eye with lighter colors like turquoise or pale green. These colors enhance the bright, lively look of the peacock’s gaze. Blend the edges to avoid harsh lines.
Painting The Beak
Use a fine brush for the beak’s sharp details. Paint the beak in shades of gray or beige. Begin with a base color, then add darker strokes for texture. Shape the beak with a smooth, curved line. Highlight the top edge with a lighter color to show light hitting it. Keep the beak neat and clean for a realistic effect.

Credit: www.youtube.com
Enhancing With Highlights
Enhancing your acrylic peacock painting with highlights brings the artwork to life. Highlights create a sense of light and depth. They make feathers look shiny and vivid. This step adds realism and beauty to your painting.
Use highlights carefully to emphasize details. Too much can flatten the image. The right amount guides the viewer’s eye across your peacock’s form. Bright spots can mimic sunlight or reflections on the feathers. These small touches improve the overall look.
Using Light To Add Dimension
Light is key to making your peacock look three-dimensional. Choose a light source direction before adding highlights. Paint brighter colors where light hits feathers directly. Use white or pale shades mixed with base colors. This contrast shows curves and layers on the bird.
Apply highlights on the tips and edges of feathers. This technique makes them appear raised and textured. Add softer highlights on rounded areas like the neck and body. Shadows and highlights together create volume and depth.
Fine Brush Strokes
Fine brush strokes add delicate details to your peacock. Use a small, fine-tipped brush for precision. Lightly tap or drag the brush to form thin lines. These strokes mimic the thin barbs on feathers.
Focus on areas where feathers overlap or catch light. Add tiny white or light-colored lines on darker spots. This brings out intricate feather patterns. Fine strokes make your painting look more detailed and realistic.
Final Touches
After completing the main layers of your peacock painting, it is time for the final touches. This stage brings everything together and enhances the beauty of your artwork. Small details and careful refinements make your peacock stand out and look polished. Take your time to perfect the painting before sealing it.
Refining Edges
Use a fine brush to sharpen the edges of the feathers and body. Smooth out any rough or uneven lines gently. Clear edges help your peacock look crisp and detailed. Pay special attention to the eye and beak for sharpness. Lightly blend areas where colors meet for a natural look.
Adding Background Accents
Enhance the background by adding soft accents or subtle color variations. Use a dry brush to lightly stroke colors that complement the peacock. This adds depth without distracting from the main subject. Consider light green or blue shades to echo the peacock’s colors. These accents create a harmonious and balanced painting.
Sealing The Painting
Apply a clear acrylic varnish to protect your artwork. Choose a matte or glossy finish based on your preference. Use a clean brush and apply thin, even layers. Let each layer dry completely before adding the next. Sealing preserves colors and prevents dust buildup. Your peacock painting will stay vibrant for years.
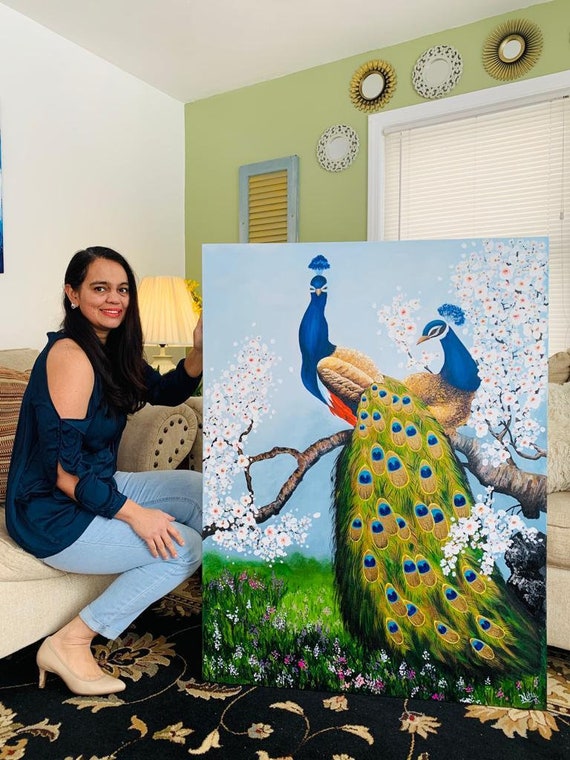
Credit: www.etsy.com
Frequently Asked Questions
How To Do Peacock Painting?
Start by sketching the peacock’s outline lightly. Paint the body using vibrant blues and greens. Add detailed feathers with bright colors. Highlight eyes and beak with fine brushes. Finish with shading and feather textures to create depth and realism.
What’s The Easiest Way To Draw A Peacock?
Start with a simple oval for the body and a small circle for the head. Add a curved neck and triangular beak. Sketch fan-shaped feathers using long, curved lines. Draw eye details with small circles. Use bright blues and greens to color your peacock for a vibrant look.
What Simple Shapes Make A Peacock?
Simple shapes that make a peacock include circles for the body and eyes, triangles for the beak, and fan-like arcs for the feathers.
What Colors To Color A Peacock?
Use vibrant blue, green, purple, and yellow to color a peacock. Add black for details and bright shades for feathers.
Conclusion
Painting a peacock with acrylics brings vibrant colors to life. Start with simple shapes and build details slowly. Use bright blues, greens, and purples to mimic real feathers. Take your time blending colors for smooth transitions. Practice each step to improve your skills.
Enjoy the process and express your creativity freely. Soon, you will have a beautiful peacock painting to share. Keep experimenting and have fun with acrylics!