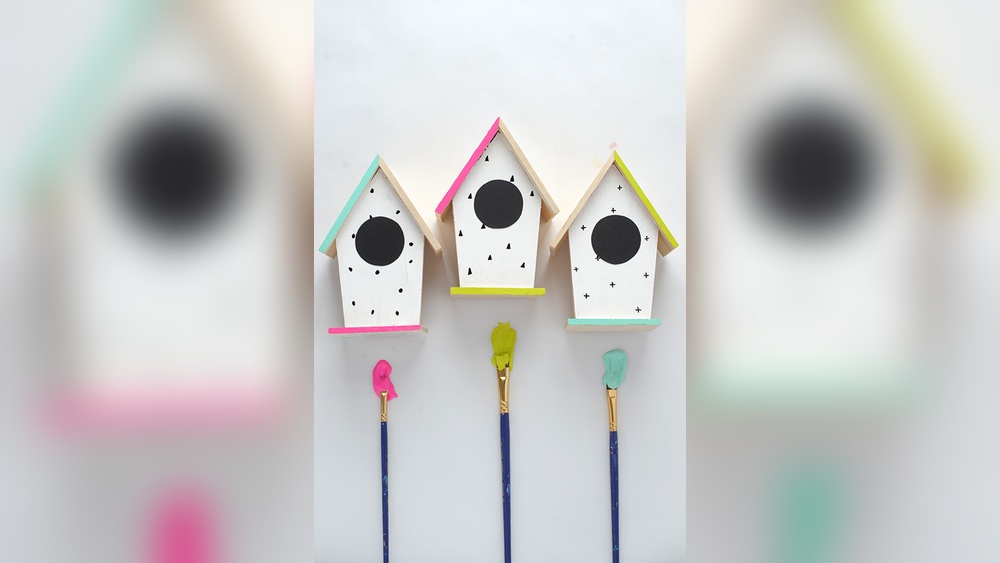
Learning how to paint DIY birdhouse ideas into something you can finish in a weekend is easier with a plan. This page treats the job as a two-day project: prepare and base coat on the first day, decorate and protect on the second.
Most guides describe finishes in general. Here the focus is on a realistic schedule, designs matched to your skill level, and rules that keep the finished house safe for birds. That makes it useful for first-timers, families and anyone painting an unfinished wooden birdhouse from a kit or craft store.
A note before you start: a birdhouse can be purely decorative or a working nesting box. Decorative houses can be painted freely. If birds may actually use yours, the interior and entrance hole stay bare, and colors stay on the lighter side.
How to Paint Diy Birdhouse Ideas: Decorative House or Real Nesting Box?
This decision changes every step that follows. A decorative birdhouse is a craft object. You can paint all of the outside in any color, add glitter or a clear glossy finish, and hang it under a porch. A nesting box is a home for wildlife, so function comes first.
For a nesting box, keep paint to the exterior only. Do not coat the inside, the floor or the entrance hole. Pick light or mid-tone colors so the box does not overheat in sun, and let it air out fully before hanging it. Hole size and mounting height depend on the species you hope to attract, so follow the plan or kit instructions rather than guessing.
- Decorative: any exterior color, sealed finish, hang under cover.
- Nesting: exterior only, light colors, air out, mount according to species guidance.
Supplies for a Weekend Birdhouse Paint Project
- Unfinished wooden birdhouse or kit, assembled and dry.
- Fine sandpaper and a dry cloth for dust.
- Exterior primer suitable for wood.
- Water-based exterior acrylic or latex paint.
- Small flat brush, a round brush and a liner brush.
- Painter’s tape for stripes and straight edges.
- Stencils or pencil for sketching designs.
- A clear exterior sealer, preferably water-based.
Water-based paints dry quickly, clean up with soap and water and have a milder smell. If you are unsure about differences, our short explainer on acrylic or latex paint shows how they relate. Whatever you choose, read the label for exterior use and any warnings.
Day One: Prepare the Wood and Lay the Base Colors
Step 1: Sand and wipe
Rough wood grabs paint unevenly and splinters. Sand lightly in the direction of the grain, paying attention to the roof edges, corners and perch area if there is one. Wipe the dust away with a dry or barely damp cloth and let it dry.
Step 2: Prime the outside
Primer seals the wood so the first coat of color does not soak in and look blotchy. Apply one thin coat to the exterior only. Skip the inside. Let it dry for as long as the can recommends.
Step 3: Paint the base coats
Decide where your main colors go before opening the paint. Roofs are often painted a darker accent, walls a lighter tone. Apply two thin coats rather than one thick coat, and let each dry before the next. Thick paint drips, hides wood detail and takes much longer to harden.
Step 4: Stop and let it cure overnight
It is tempting to keep going while the paint still looks dry. Painter’s tape and stencils can lift soft paint, so leaving it overnight is the single best protection for your design on day two.

Credit: www.amazon.com
Design Ideas Sorted by Skill Level
The best designs for a first project are the ones that look good even when a line wobbles. Pick from the list below based on how comfortable you are with a brush.
Beginner: Bold and Forgiving
- Two-tone house: contrasting roof and walls with a painted trim band.
- Stripes: use painter’s tape for clean vertical or horizontal bands.
- Polka dots: use the end of a pencil eraser or a round brush handle dipped in paint.
- Ombre roof: paint rows of shingles in gradually lighter shades of one color.
Intermediate: A Little Detail
- Stencil patterns: flowers, leaves or geometric shapes using a dabbing motion.
- Painted door and windows: a darker frame with a lighter fill makes a cottage look.
- House number or name: pencil first, then liner brush over it.
- Vines and leaves: simple green curves with dot flowers.
Advanced: Scenes and Texture
- Mini landscapes: sky blue, hills and a sun on the wall panel.
- Weathered look: paint a dark base, dry brush a light color, then sand the corners lightly.
- Mosaic patterns: small squares in a palette of four or five colors.
- Hand-lettered quote: a short phrase around the base.
Whatever you choose, keep bright, saturated colors for the roof and walls, and avoid covering the whole house in dark paint if it will hang in direct sun.
Matching Colors to Where the House Will Hang
Placement affects color. In shade, bright colors stay lively and can lift a dull corner. In full sun, lighter shades stay cooler and fade less quickly. Next to a green hedge, warm tones such as terracotta, butter yellow or soft red stand out. Against a wooden fence, blue and white read clearly.
A simple approach is to hold paint swatches or test cards against the spot. Check them in morning and afternoon light, since the same color can look different.
Day Two: Decorate, Seal and Air Out
Step 5: Sketch and tape
Lightly sketch the design in pencil and use painter’s tape for straight lines. Press the tape edge down firmly, and peel it off while the top coat is slightly damp but not wet to avoid tearing paint.
Step 6: Paint the decoration in layers
Work from large shapes to small details and from light colors to dark. Let each layer dry before adding the next, since wet paint smears under a brush. Dark outlines go last. If you make a mistake, wait until it dries and paint over it.
Step 7: Seal the outside
A thin coat of clear exterior sealer protects against rain and sun. Apply it in thin, even strokes, avoiding puddles in grooves. Two light coats are better than one heavy coat. Keep sealer off the interior and the entrance hole.
Step 8: Air it out
Leave the finished birdhouse in an open, ventilated space for several days so any odor disappears before it goes outside. Longer is better if the weather is humid, because paint cures more slowly in damp air.

Credit: poplollyco.com
Common Birdhouse Painting Problems and Fixes
- Paint peels: the wood was dusty or damp, or primer was skipped. Sand the area, prime and repaint.
- Drips and runs: too much paint on the brush. Let it dry, sand smooth and repaint thinly.
- Colors look blotchy: the first coat soaked in. Add another thin coat.
- Tape lifts paint: the base coat was not fully cured. Wait longer next time.
- Sticky finish: humid air or a thick coat slows drying. Give it more time in a dry room.
- Odor stays: keep airing it out before hanging it.
Hanging and Maintaining Your Painted Birdhouse
Choose a sheltered spot that is out of constant rain and the harshest sun, with a clear approach for birds. Mount the house securely so it does not swing. For decorative houses, hang them under a porch or eave.
Check the finish each season. Look for lifting paint, cracks or soft wood. A light sanding and a fresh thin coat of sealer on the roof and sides every year or two keeps most houses in good shape, though wet climates may need it more often. If the house is a working nesting box, clean it out at the end of the nesting season according to local wildlife guidance, and avoid painting while it is occupied.
Brush Handling Tips That Make the Design Cleaner
Load the brush lightly and wipe one side on the rim of the paint cup. Thin paint on a nearly dry brush gives straighter lines than a full brush. Rest your little finger on the wood to steady the hand, and turn the birdhouse rather than twisting your wrist. Use a flat brush for walls, a round brush for dots and petals, and the liner for outlines and lettering. Clean brushes between colors so that muddy tones do not creep into light areas.
Choosing a Finish: Matte, Satin or Gloss
Matte paint hides small flaws in the wood and looks natural in a garden. Satin is a good middle option that is easier to wipe clean. Gloss makes colors pop but shows every brush mark and can look harsh in the sun. For a working nesting box, matte or satin in a soft color is the usual choice. For a decorative house under cover, any finish is fine, so choose what suits your garden.
Planning a Theme or a Set of Birdhouses
If you want more than one house, a theme saves decisions. A cottage row might use different door colors on the same cream walls. A seasonal set could use spring pastels, summer brights, autumn rust tones and winter whites. A family project might give each person a side of the same house to decorate, with a shared color palette so it still looks unified. Make a small color chart before you start, and test it on a scrap of wood or an extra board.
A Simple Weekend Checklist
- Friday evening: gather supplies, assemble the house, sand and prime.
- Saturday morning: apply two thin base coats.
- Saturday evening: leave the paint to cure overnight.
- Sunday morning: tape, sketch and paint the design.
- Sunday afternoon: add a thin sealer coat.
- Following days: air the house out, then hang it.
If the weather is cool or damp, give each stage extra time. Paint that feels dry on the surface can still be soft underneath, and rushing is the most common reason a design smudges.
Why Drying Time Shapes the Whole Project
Most problems in a painted birdhouse come from impatience. Paint has three stages: wet, touch-dry and cured. Touch-dry means a fingertip does not leave a mark, but the film is still soft underneath. Cured means it has hardened enough to resist tape, handling and moisture. Cure time depends on the paint, thickness of the coat, temperature and humidity, so use the product label as your guide. Thin coats in a warm, airy room cure faster than thick coats in a cold garage.
Designing for Distance: What Shows From the Garden
A birdhouse is usually seen from several feet away. Fine pencil-width details disappear at that distance, while large shapes and contrasting colors carry. Make the roof and walls clearly different in tone, use bold outlines on door and windows, and keep patterns large. If the house hangs close to a seating area, small details are worth the effort. If it hangs at the back of the garden, simple blocks of color read better than intricate scenes.
Cleaning Up and Storing Leftover Paint
Rinse water-based paint from brushes with warm water and mild soap before it dries. Wipe the rim of each paint can, seal the lid tightly and store paint away from freezing temperatures. Leftover paint is handy for touch-ups later, so label the can with the color and the date. Dispose of any waste according to local rules rather than pouring it down a storm drain.
Budget and Time at a Glance
- Kit or unfinished house: the main cost, with prices varying widely.
- Primer, paint and sealer: small sample sizes are enough for one house.
- Brushes and tape: a basic set is fine.
- Time: around two evenings or one weekend, mostly waiting for coats to dry.
Starting small keeps cost down. A single quart of exterior paint can cover many birdhouses, and a sample pot is plenty for a trim color.
Painting a Birdhouse With Kids
Children enjoy a birdhouse project because they see the result quickly. Use washable, non-toxic water-based paint, cover the table, and let kids do the decoration step on day two while an adult handles sanding, primer and the sealer. Large flat brushes and sponge dabbers give children a lot of control. Keep designs simple, such as stripes, dots and handprint flowers, and let dry time become part of the fun by planning a snack break between layers.
Simple Rules for a Bird-Safe Finish
- Paint the outside only.
- Leave the entrance hole and interior bare.
- Use water-based, exterior-rated paint and sealer.
- Choose light or mid-tone colors for hot locations.
- Let the house air out for days before hanging it.
- Re-check the finish every season.

Credit: inmyownstyle.com
Frequently Asked Questions
How long does it take to paint a birdhouse?
Plan two days. Day one covers sanding, priming and base coats. Day two covers decoration, sealing and airing out. Waiting for each coat to dry is what takes the time.
Which parts of a birdhouse should I never paint?
Leave the inside and the entrance hole bare. Birds spend time in contact with those surfaces and paint odor lingers in enclosed spaces.
What colors are best for a birdhouse that will hang in sun?
Light and mid tones such as cream, soft gray, sage and sky blue reflect heat better than black or deep red.
Can I let kids paint a birdhouse?
Yes, with washable or water-based non-toxic paint, an adult handling the sealing, and a decorative focus.
Should the painted birdhouse be sealed?
A thin exterior-rated clear coat helps resist rain and sun, as long as it is fully cured before the house goes outside.
Conclusion: How to Paint Diy Birdhouse Ideas
A painted birdhouse is a small project that rewards planning. Decide whether it is decorative or a nesting box, give the paint a full day to cure, pick a design that suits your skill, and seal and air out the finished piece.
Follow the bird-safe rules and keep the finish maintained, and your birdhouse can look good in the garden for many seasons.