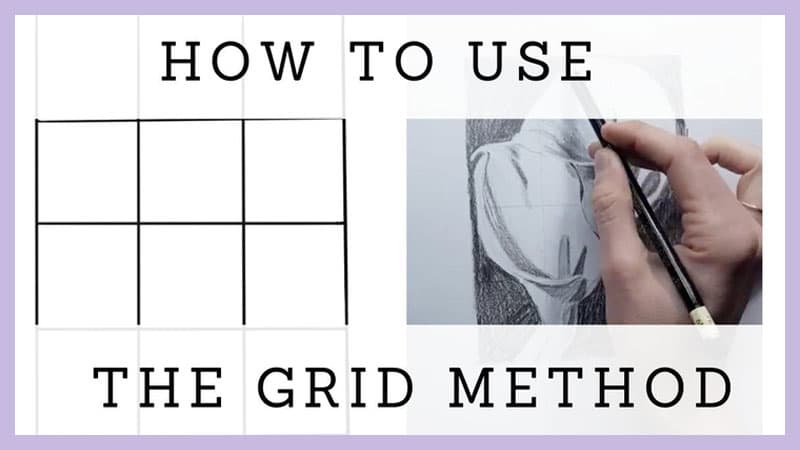
Gridding a canvas is one of those classic art techniques that helps turn a complex painting into a series of small, manageable steps. Many famous artists—from the Renaissance to today—have used grids to transfer images, create accurate proportions, or scale up a sketch.
If you want to paint something realistic or copy a photo onto a big canvas, gridding can save you time and frustration. But there’s more to it than just drawing lines. This guide will show you everything you need to know, from what tools to use to common mistakes and expert tips.
Whether you’re a beginner or want to improve your accuracy, you’ll find practical advice and clear steps here.
Why Use A Grid On Your Canvas?
A grid is not just for beginners. It’s a reliable method that artists use for many reasons:
- Accuracy: Grids break a picture into small squares, making it easier to focus on one part at a time. This helps avoid mistakes in proportions.
- Scaling Up or Down: If you have a small photo and want a large painting, a grid helps you transfer the image at the right size.
- Reducing Overwhelm: Large or detailed subjects can be intimidating. With a grid, you only need to focus on one square at a time.
- Fixing Common Problems: Grids can help with perspective, alignment, and composition.
One non-obvious benefit is that a grid allows you to spot errors early, before you start painting. If an eye or hand is out of place, you’ll notice it while drawing the grid lines—not after you’ve started with paint.
Supplies You’ll Need
Before you start, gather these basic materials:
- Canvas: Any size, but a pre-stretched, pre-primed canvas works best.
- Ruler or Yardstick: A clear or metal ruler (18–36 inches) is ideal.
- Pencil: Use a hard lead like 2H or HB for light, erasable lines.
- Eraser: Kneaded erasers work best, as they lift graphite without smudging.
- Reference Image: A photo or sketch you want to transfer.
- Paper and Tape: For gridding your reference image and taping it in place.
- Optional: A light touch of watercolor pencil (if you don’t want graphite lines).
If you plan to paint over the grid with thin paint (like watercolor or thin acrylic), consider using a water-soluble pencil. This will wash away as you paint.
How To Grid Your Reference Image
Start with your reference photo or drawing. This step is often skipped, but it’s important for accuracy.
- Print Your Image: Make sure it’s the same proportion as your canvas (for example, 4×6 inches for an 8×12 canvas).
- Decide Grid Size: For beginners, use 1-inch squares. For more detail, use smaller squares.
- Mark the Edges: Use your ruler to make tiny marks every inch (or chosen measurement) along all four edges.
- Draw Lines: Connect the marks across the image, both vertically and horizontally, to form a grid.
If your image is not the same shape as your canvas, you’ll need to crop it or adjust your grid spacing. This avoids stretching or squishing the final painting.
Drawing The Grid On Your Canvas
This step is where most people make mistakes. Here’s how to avoid them:
- Match the Proportion: Your grid on the canvas must match your reference. If your photo is 4×6 inches, and your canvas is 8×12 inches, you can use 1-inch squares on the photo and 2-inch squares on the canvas.
- Use a Hard Pencil: Draw lines lightly, so they erase easily and won’t show through the paint.
- Mark Edges First: Make small, even marks on all four sides of the canvas.
- Connect the Dots: Use a ruler to draw straight, light lines across the canvas.
- Double-Check Alignment: Count the number of squares. They must match the number on your reference image.
Here’s a quick comparison of pencil types for gridding:
| Pencil Type | Best For | Pros | Cons |
|---|---|---|---|
| 2H | Light, erasable grids | Doesn’t smudge, erases cleanly | Can be hard to see on textured canvas |
| HB | General use | Easy to find, visible enough | May show through thin paint |
| Watercolor pencil | Water-based paints | Washes away, leaves no mark | May dissolve if you use water early |
Credit: www.etsy.com
Transferring The Image Using The Grid
Now that you have grids on both your reference and your canvas, it’s time to transfer the image.
- Start with One Square: Look at the top-left square of your reference. Draw what you see into the matching square on your canvas.
- Focus on Shapes, Not Objects: Instead of thinking “I’m drawing an eye,” focus on lines and angles. This keeps proportions accurate.
- Work Square by Square: Move across the grid, drawing shapes and lines one square at a time.
- Check Frequently: Step back every few squares to see if the drawing looks right. Small mistakes can add up if you don’t check often.
- Erase as Needed: If you make a mistake, erase and redraw before you start painting.
Many beginners skip checking their work as they go. But if you notice something is off, it’s much easier to fix it now than after you start painting.
Adjusting For Different Canvas Sizes
Not all paintings use standard canvas sizes. Sometimes, your reference photo won’t match your canvas. Here’s how to adjust:
- Find the Ratio: Measure the width and height of both the photo and canvas. Divide each to get the ratio (for example, 8:10 or 16:20 is the same as 4:5).
- Crop or Add Borders: If the ratios don’t match, you can crop your photo or add “blank” space on your canvas.
- Change Square Size: If your reference has 8 squares across and your canvas is bigger, make each square larger (e.g., 2 inches instead of 1 inch).
- Double-Check with Math: Multiply the number of squares by your chosen size to make sure it matches the canvas edge.
Here’s a practical example:
| Reference Size | Canvas Size | Square Size on Reference | Square Size on Canvas |
|---|---|---|---|
| 5×7 in | 10×14 in | 1 in | 2 in |
| 8×10 in | 16×20 in | 2 in | 4 in |
| 4×6 in | 8×12 in | 1 in | 2 in |
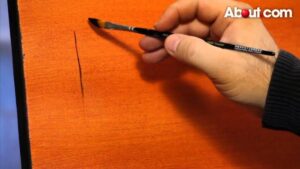
Erasing Or Hiding Grid Lines
Once your drawing is done, you need to deal with the grid lines. Here’s how:
- Erase Gently: Use a kneaded eraser to lift most grid lines, leaving just enough to guide your painting.
- Paint Over: If using opaque paint (like oil or heavy acrylic), grid lines will disappear as you paint.
- Water-Soluble Grids: If you used a watercolor pencil, lightly brush with water to dissolve the lines.
- Test First: Always test erasing on a corner before doing the whole canvas. Some pencil marks can “bite” into the canvas and stay visible.
A common mistake is pressing too hard with the pencil. This can make grooves that show through even after many layers of paint.
Tips For A Cleaner, More Accurate Grid
Here are some expert tips to make gridding easier and more accurate:
- Use a Clear Ruler: You can see the lines and edges better, so your grid stays straight.
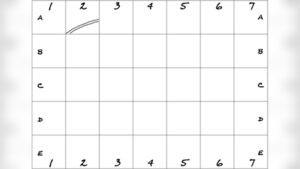
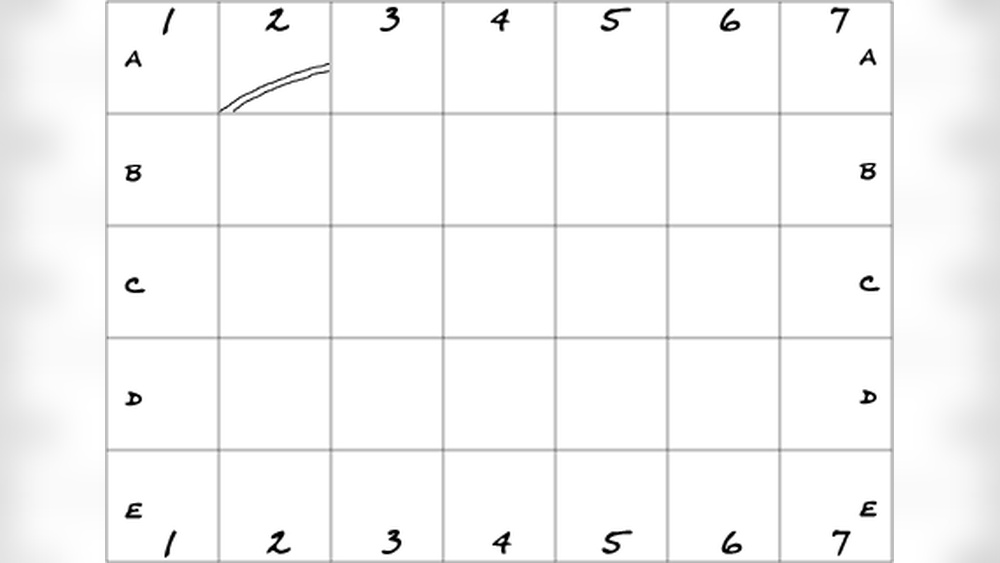
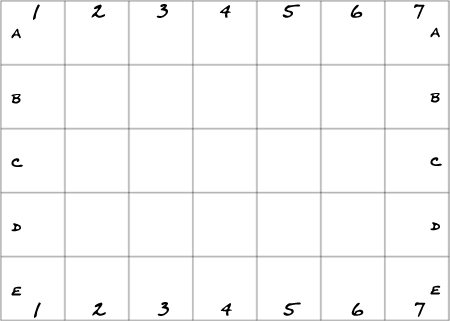
- Label Rows and Columns: Mark numbers or letters on your grid (A1, B1, etc.) So you don’t get lost.
- Work in Good Light: Dim light can make it hard to see grid lines, leading to mistakes.
- Check for Smudging: Rest your hand on a clean sheet of paper to avoid smudging pencil lines.
- Keep Reference Close: Tape your reference image right next to your canvas for easy comparison.
A non-obvious tip: For very large canvases, use colored thread taped lightly in place instead of drawing lines. This makes a grid without any marks to erase.
When To Use (and Not Use) A Grid
Gridding is not always necessary. Here’s when it helps most:
- Portraits: For accurate faces, a grid helps get eyes, nose, and mouth in the right spot.
- Large Paintings: When scaling up a small photo to a big canvas.
- Complex Scenes: Landscapes with lots of detail or perspective.
- Copying Old Masters: Many museum copies use grids for accuracy.
But for loose, expressive art or abstract painting, a grid can be distracting. Use your judgment—if you need precision, use a grid. If not, skip it.
Common Gridding Mistakes (and How To Avoid Them)
Even experienced artists can make mistakes with grids. Here are some to watch for:
- Mismatched Proportions: If your grid squares on the canvas don’t match the reference, the final image will look stretched or squashed.
- Dark Pencil Lines: These can show through layers of paint, especially with watercolor or thin acrylic.
- Skipping Steps: Don’t rush. Carefully mark and draw every line.
- Forgetting to Erase: Always erase as much of the grid as possible before you paint.
- Losing Your Place: Labeling helps you stay organized, especially on large projects.
If you notice your painting “doesn’t look right,” it’s often because of a grid mistake. Double-check before painting.
Credit: www.art-is-fun.com
Gridding Alternatives: When You Don’t Want Lines
Some artists prefer not to use a pencil grid. Here are two good alternatives:
- Projector: Project your image onto the canvas and trace the outline. Fast and accurate, but needs a dark room and a projector.
- Transfer Paper: Place special graphite or carbon paper under your reference, then trace to transfer the image.
These methods are good if you want zero grid marks, but they can be less helpful for learning to “see” shapes accurately.
Troubleshooting: What To Do If Your Grid Goes Wrong
If you realize halfway through that your grid is off, don’t panic. Here’s what you can do:
- Stop and Assess: Figure out where the mistake happened—wrong measurement, uneven squares, or a skipped line.
- Erase and Redraw: It’s better to spend 20 minutes fixing the grid than to finish an inaccurate painting.
- Use a Fresh Canvas: If the grid is too dark or messy, sometimes it’s best to start over.
- Check Every Line: Use your ruler and count the squares before transferring the image.
One overlooked trick: If you’re running out of time, you can grid only the most complex areas (like faces or hands) and freehand the rest.
Digital Tools For Gridding
Many artists now use phones or tablets to grid their images. Here’s how:
- Apps: There are free and paid apps that let you add a grid to any photo, adjust square size, and print or view on-screen.
- On-Screen Guides: Some painting programs (like Photoshop) have built-in grid overlays.
- Print with Grid: You can print your reference image with the grid already in place, making alignment easier.
Digital grids are fast, precise, and avoid the need for rulers and pencils. Just make sure your printed grid matches your canvas grid exactly.
For more about the history and use of gridding in art, check out the Wikipedia Grid Method page.
Frequently Asked Questions
What Size Should My Grid Squares Be?
Choose a size that matches your comfort and detail level. For most beginners, 1-inch squares are easy to manage. For larger canvases, use bigger squares (2–3 inches). Make sure the number of squares on your canvas matches your reference.
Can I Use Pen Instead Of Pencil For My Grid?
It’s best to use a hard pencil or watercolor pencil. Pen lines are difficult to erase and may bleed through paint, especially with thin layers. If you want invisible lines, try a light watercolor pencil.
How Do I Remove Grid Lines After Painting?
If you used a pencil, erase as much as possible before painting. Watercolor pencils will dissolve with water. If lines show through after painting, try adding another layer of paint or gently sanding the area (for acrylics and oils).
Is Gridding Considered Cheating In Art?
No. Gridding is a traditional tool used by many professional artists. It’s a method for accuracy, not a shortcut for skill. Over time, you may rely on grids less as your confidence and eye improve.
What If My Reference Image Is Not The Same Shape As My Canvas?
You have two main options: crop the image to match your canvas, or add borders to your painting. Never stretch the image to fit—this distorts the subject. Always match the proportions before gridding.
Gridding a canvas for painting is both a simple and powerful tool. With a bit of care, you can create accurate, beautiful paintings, and avoid the frustration of lost proportions or misplaced features. Whether you use pencil, thread, or digital tools, the grid method opens up a world of possibilities for artists at every level.
Credit: www.art-is-fun.com