
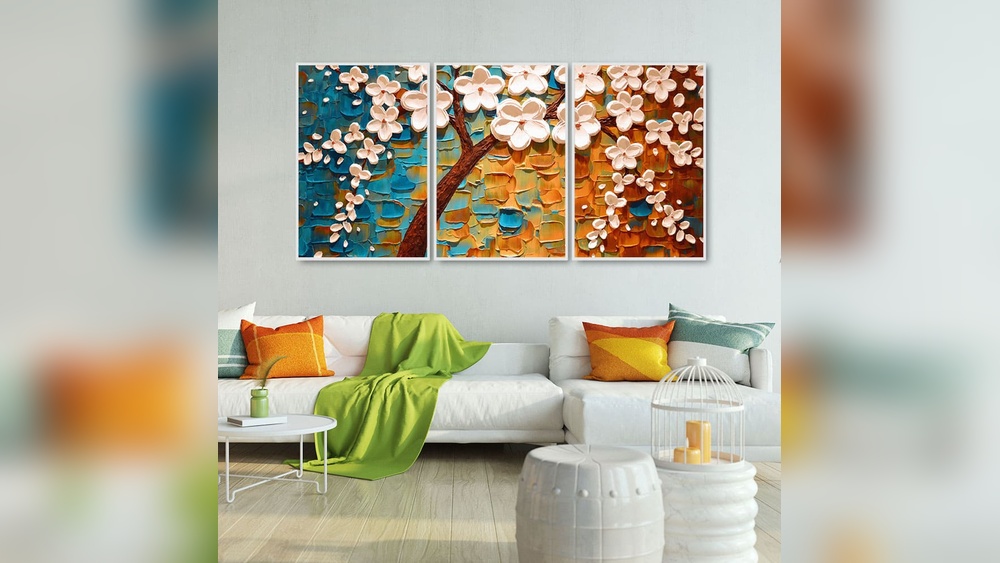
Quick answer: To paint a three-panel canvas set (a triptych), choose three canvases of matching depth, line them up side by side with a gap equal to how they will hang (usually 2 to 3 inches), and sketch one continuous composition across all three. Mix every color in batches large enough for all panels, paint the panels together rather than one at a time, and carry the image around the side edges so the set reads as one piece. Hang them level with equal spacing, centered as a single unit at about eye level.
A three-panel canvas set turns a single painting into a statement wall. Splitting an image across three canvases adds rhythm, fills wide spaces above sofas and beds, and makes even a simple subject feel considered. It also introduces a set of problems a single canvas does not have: colors that drift between panels, horizons that do not line up, and gaps that slice through important details.
This guide explains how to paint a three-panel canvas set from planning to hanging, with layout options, alignment tricks, color batching and the mistakes that most often break the illusion of a single image.
Choose Your Triptych Format
There are three main ways to approach a three-panel set:
| Format | What it looks like | Best for |
|---|---|---|
| Continuous image | One scene split across three canvases | Landscapes, seascapes, skylines, large abstracts |
| Related series | Three separate images sharing palette and style | Botanicals, birds, still lifes, seasonal themes |
| Central focus | Larger middle panel flanked by two narrower panels | Traditional triptychs, portraits, dramatic focal subjects |
Continuous images are the most popular for modern wall art. Related series are easier because small alignment errors do not matter. A central-focus layout borrows from historic altarpieces, where the center panel carried the main subject and the side panels supported it.
Picking the Canvases
All three canvases should match in depth, profile and surface texture, or the set will look mismatched on the wall. Buying a matched canvas set is the easiest way to guarantee this. If you are comparing multi-packs, our guide to the best canvas set for beginners covers sizes, depths and value packs that suit triptych projects.
Common size combinations:
- Three equal panels: 12 x 16, 16 x 20 or 18 x 24 inches each. Simple and balanced.
- Three tall panels: 12 x 36 or 16 x 48 inches each for dramatic vertical landscapes or abstract stripes.
- Large center, smaller sides: For example, 24 x 36 center with two 12 x 36 sides.
Gallery-wrapped stretched canvases (about 1.5 inches deep) suit continuous images because you can paint around the edges and hang them without frames.
What are canvas panels, and are they good for a three-panel set?
Canvas panels are flat boards with canvas glued to the surface. They are lightweight and inexpensive and come in sets, which makes them good for practicing a triptych composition at small scale. For a finished wall piece, stretched canvases usually look better because of their depth, though panels in matching frames can work well for smaller groupings. Canvas panels are good for studies and small sets; large canvas panels can warp slightly, so stretched canvas is a safer choice above about 16 x 20 inches.
Step 1: Plan the Composition
Start with a thumbnail sketch of the whole image, divided into three sections with the gaps marked. Ask yourself:
- Does each panel work alone? Ideally, each panel has something interesting in it, rather than one panel being empty sky.
- Do the gaps cut through anything important? Avoid splitting a face, a key flower, or a small focal object across a gap. Large shapes like hills or waves can cross gaps easily.
- Is the focal point placed well? Often in or near the center panel, or at a strong point off-center within it.
- Do lines continue logically? Horizons, branches and waves should flow from one panel to the next at the same height.
If you are working from a photo, crop it to the overall aspect ratio of the three panels plus gaps, print it, and draw the panel divisions and gaps on the print.
Step 2: Prime and Prepare All Three Panels Together
Treat all three canvases identically from the start. If you add extra gesso, coat all three. If you tone the canvas, tone all three with the same mix. Small differences in surface absorbency show up as slight color shifts.
Number the canvases on the back (1, 2, 3, or left, center, right) and mark the top edge so they never get rotated or swapped.
Step 3: Set Up the Panels Side by Side
Lay or stand the canvases next to each other with the actual gap you plan to use when hanging. A common gap is 2 to 3 inches. Use spacer blocks to keep the gap consistent, and tape the canvases to a large board or the floor so they cannot slide.
Some painters push the canvases tightly together while painting so brushstrokes flow across. Others keep the hanging gap so they can see how the image will read. A good compromise is to paint with canvases tight together, then check against the hanging gap often.
Step 4: Transfer the Sketch Across All Panels
Draw key lines across all three panels in one continuous motion where possible. A long ruler or a chalk line helps keep horizons level. For more control, draw a light grid across the reference photo and matching grid lines across the panels, then copy section by section.
Mark where major lines meet each canvas edge with a small pencil tick. When you paint each panel, you will know exactly where the horizon, a hill line or a wave crest must hit the edge so it lines up with the neighboring panel.
Step 5: Batch Mix Your Colors
Color drift is the most common problem with three-panel canvas sets. If you mix sky blue three times, you will almost certainly get three slightly different blues.
- Mix each major color in a batch large enough for all three panels plus extra.
- Store acrylic mixes in airtight containers or a stay-wet palette.
- Label each container with what it is used for.
- Paint the same color across all three panels in one session, not panel by panel.
For oil paint, the slower drying time makes batching easier; mixes stay workable on the palette for hours.
Step 6: Paint in Layers Across the Set
Work across all three panels at each stage instead of finishing one panel before starting the next.
- Background: Paint the sky or background across all three panels, keeping gradients continuous. If the sky lightens toward the horizon on panel one, it should do the same at the same height on panels two and three.
- Midground: Block in hills, water, large shapes or major color fields across all three.
- Foreground and details: Add the closest objects and focal details last.
- Step back: View the set from across the room after each stage. Problems with color matching and alignment are much easier to see from a distance.
Step 7: Paint the Edges
On a continuous triptych, the edges facing each other are visible from the side. Continue the image around each edge, matching what is on the adjacent face, or paint all edges a single solid color for a cleaner, modern look. Whichever you choose, be consistent across all twelve edges.
Step 8: Varnish and Hang
Varnish all three canvases with the same product at the same time, so the sheen matches. Different sheens on different panels are surprisingly noticeable under room lighting.
To hang:
- Cut paper templates for each canvas and tape them to the wall with your chosen gap.
- Center the whole group above furniture or on the wall, with the middle of the set at roughly 57 to 60 inches from the floor.
- Mark hardware positions on each template.
- Install hooks at exactly the same height using a level or laser level.
- Hang the center panel first, then the sides, checking gaps with a spacer block.
Three-Panel Ideas to Try
- Ocean horizon: A continuous seascape with waves flowing across all three panels.
- Abstract color field: Bold bands of color that cross panel boundaries.
- Tree across three panels: Trunk in the center, branches spreading into the side panels.
- Sunset gradient: Warm sky fading across the set with a simple silhouette landscape.
- Botanical series: Three different leaves or flowers on matching backgrounds.
- Mountain range: Overlapping layers of mountains receding into the distance.
- Seasons series: Three versions of the same tree in spring, summer and autumn.
How to Use Canvas Panels for Practice
Before committing to large stretched canvases, try your composition on three small canvas panels from a set, such as 5 x 7 or 8 x 10 inches. This is a cheap way to test color choices, how lines cross the gaps and whether each panel works on its own. Use the same gap ratio scaled down, so a 2-inch gap on large canvases might be about half an inch on small panels.
Fixing a Triptych That Does Not Line Up
Even with careful planning, a set can look slightly off once it is on the wall. Most problems are fixable without starting over.
A horizon is higher on one panel. Repaint the band just above and below the horizon on the outlier panel, nudging the line toward its neighbors. On sky-heavy compositions, a slightly soft or hazy horizon edge hides small mismatches better than a crisp one.
One panel looks warmer or cooler. Glaze a very thin, transparent layer of the opposite temperature over that panel. A whisper of blue glaze cools a panel that looks too warm, and a touch of yellow ochre or burnt sienna warms one that looks too cold.
A shape does not continue across a gap. Adjust the shape on whichever panel needs the smaller change, matching your pencil ticks on the edges. Then check from across the room, because a shift that looks large up close often disappears at viewing distance.
One panel feels empty. Add a secondary element that echoes the main subject, such as a smaller cloud, a distant bird or a repeated color accent, so the panel holds its own.
Common Mistakes
- Mismatched canvas depths. One thinner canvas stands out immediately on the wall.
- Mixing color per panel. Leads to visible shifts between panels.
- Finishing one panel at a time. Makes it nearly impossible to keep the image unified.
- Splitting a focal point across a gap. Faces, eyes and small key objects should sit fully within one panel.
- Uneven gaps when hanging. Even a half-inch difference is noticeable. Use spacer blocks.
- Different varnish sheens. Varnish all panels together.
FAQs
How far apart should three canvas panels be?
A gap of 2 to 3 inches between panels is common for medium-sized canvases. Larger canvases can use slightly wider gaps of 3 to 4 inches. Keep the gaps identical across the set.
Should I paint triptych panels separately or together?
Together. Set the canvases side by side and work across all three at each stage. This keeps colors, lines and gradients consistent.
What are canvas panels?
Canvas panels are flat, rigid boards covered with primed canvas. They are lighter and cheaper than stretched canvases and are great for practice, studies and small sets, though they lack the depth of stretched canvas.
Are canvas panels good for wall art?
For small pieces, yes, especially if framed. For larger wall art, stretched canvases usually look more substantial and hang more easily without frames.
What size canvas set is best for a three-panel painting?
It depends on the wall. Three 16 x 20 inch canvases with 2-inch gaps span about 52 inches, which suits a standard sofa. Above a king bed or large sofa, three 24 x 36 inch canvases may fit better.
How do I keep the horizon line straight across all three panels?
Set the canvases side by side, draw the horizon across all three with a long ruler or chalk line, and mark where it meets each edge. Check alignment again after each painting session.
Final Thoughts
A three-panel canvas set works when it reads as one piece. Match the canvases, plan where the gaps fall, batch your colors and paint across all three panels at once. Careful edges, a shared varnish and level hanging take care of the rest.
The right canvases make all of this easier. Compare matched multi-packs and sizes in our guide to the top canvas sets for beginners in 2026 before starting your first triptych.





3 Comments