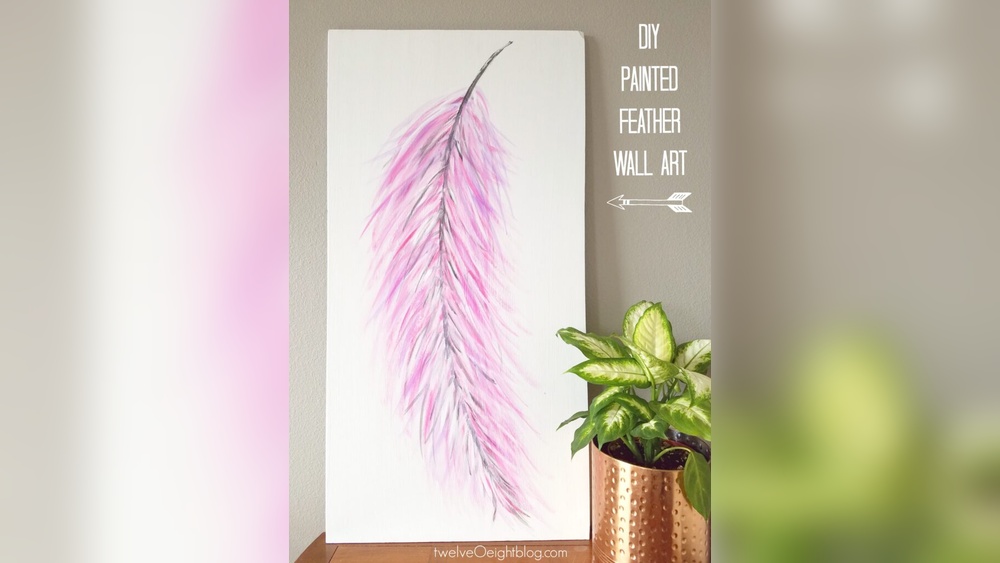
Painting a feather for wall art is a creative way to bring nature’s elegance into your home. Many people love feathers for their delicate shapes, gentle curves, and the sense of freedom they symbolize. But when you turn a simple feather into a piece of wall art, you add a unique, handmade touch to your living space.
You do not need to be a professional artist to paint a beautiful feather. With the right steps, some patience, and a little practice, anyone can create a stunning DIY feather painting.
This guide will walk you through every detail, from choosing the right feather and materials to painting techniques and how to display your finished artwork. Along the way, you will discover tips that beginners often overlook, learn how to avoid common mistakes, and see how simple adjustments can make your feather wall art stand out.
Why Paint A Feather For Wall Art?
Feather paintings are popular in modern and boho home styles because they have a light, airy feeling. Feathers are seen as symbols of hope, freedom, and spiritual growth in many cultures. When you paint a feather, you also practice skills like blending, shading, and fine detail work, which improve your overall art abilities. Besides, a handmade piece of art always draws attention and makes a space feel more personal.
Painting feathers is also an affordable DIY project. You can use canvas, paper, or even wood as your base. The supplies are easy to find, and you don’t need expensive tools. Whether you want a single large feather or a group of smaller ones, you can adjust the design to fit your wall and style.
Materials And Tools You Will Need
Before you start, gather all your supplies. Having everything ready will help you focus and avoid interruptions.
| Material | Purpose | Beginner Tip |
|---|---|---|
| Canvas or Watercolor Paper | Surface for painting | Choose a medium size (A4 or 12″x16″) for easy handling |
| Acrylic or Watercolor Paints | Main coloring medium | Acrylic is easier for beginners; dries fast |
| Brushes (Round and Fine Detail) | Applying paint and details | Use at least one thin brush for feather lines |
| Pencil and Eraser | Sketching outline | Soft pencils (2B) are easy to erase |
| Water Cup (for watercolors) | Cleaning brushes | Change water often to avoid muddy colors |
| Palette | Mixing paints | Use a white plate if you don’t have a palette |
| Paper Towels/Cloth | Wiping brushes | Keep handy to fix mistakes quickly |
| Masking Tape (optional) | Clean edges | Use to create borders on your painting |
| Reference Feather or Photo | Guide for shape and color | Print or place nearby for easy viewing |
Having a reference feather or a clear photo is a step many skip, but it helps you keep proportions and details accurate. If you want to add metallic touches, you can use metallic paint or even gold leaf for extra shine.

Credit: thecraftqueen.wordpress.com
Choosing The Right Feather Design
Not all feathers are the same. Picking the right feather style can make a big difference in how your art looks.
- Simple Feathers: These have a basic shape and are easier for beginners. Try painting a single peacock feather or a bird’s contour feather.
- Detailed Feathers: These include barbs, color gradients, and sometimes eye-like spots. They are good if you want a challenge.
- Abstract Feathers: Use bright, non-realistic colors and bold lines to create a modern look.
When choosing, consider the size of your wall and the style of your room. A single large feather can be dramatic, while several small feathers can add a playful touch. Try sketching a few options on paper before you paint.
Step-by-step Guide To Painting A Feather
Let’s break the process into clear steps. Even if you’re a beginner, following these will help you create a feather painting you’ll be proud to hang.
1. Prepare Your Workspace
Find a well-lit area. Lay down old newspapers or a plastic sheet to protect your table. Arrange your paints, brushes, paper towels, and water cup within easy reach. Good preparation helps you focus on painting, not cleaning up spills.
2. Sketch The Feather Outline
Use a soft pencil to lightly draw the feather shape. Start with a long, gentle curve for the shaft (the center line). Add the outline of the feather’s vanes (the soft, outer parts) on each side. Don’t worry about getting it perfect—feathers are naturally a little uneven.
Pro tip: Place your reference feather or photo beside you and look at it often. Beginners often forget to check their reference, which leads to off-balance shapes.
3. Block In Main Colors
With a medium round brush, start painting the base color of the feather. For acrylics, use a little water to thin the paint. For watercolors, wet the paper slightly first for a softer look. Paint in the direction the feather’s barbs would go—from the shaft outward.
Let this layer dry before adding details. Patience at this stage prevents muddy colors later.
4. Add Layers And Texture
Switch to a smaller brush. Mix a slightly darker or lighter shade and paint lines from the shaft outward, following the natural direction of the feather. These lines create the illusion of texture.
Let each layer dry before adding another. For more realism, add a few broken lines and tiny gaps in the feather to show where barbs separate.
5. Paint The Shaft And Details
Use a fine detail brush and a slightly darker color (like brown or gray) for the shaft. Add small lines and tiny dots where barbs meet the shaft. If your feather has an “eye” spot (like a peacock feather), paint this last, using bright colors and letting each color dry before adding the next.
6. Highlight And Shadow
Add a touch of white or very light color along one edge of the feather for highlights. This makes the feather look three-dimensional. Add a little shadow underneath the shaft or along one side for depth.
Many beginners skip highlights and shadows, but these small steps make your feather pop off the canvas.
7. Final Touches And Cleaning Up Edges
If you used masking tape for borders, peel it off slowly once the paint is dry. Use your smallest brush to clean up any lines or add extra details. Step back and look at your painting from a distance. This helps you spot areas that need adjusting.

Credit: www.amazon.com
Creative Variations To Try
Once you have painted a basic feather, you can experiment with different styles.
- Metallic Feathers: Add gold, silver, or copper paint to tips or along the shaft for an elegant look.
- Multiple Feathers: Paint two or three overlapping feathers. Use contrasting colors for more interest.
- Abstract Colors: Try painting in blues, purples, or even rainbow shades for a modern twist.
- Patterned Backgrounds: Create a soft watercolor wash or a solid color background before painting your feather.
You can also use stencils to add geometric shapes or dots around your feather, giving it a more artistic, finished look.
How To Frame And Display Your Feather Art
A good display can make even a simple painting look professional. Here are a few options:
| Display Method | Best For | Why It Works |
|---|---|---|
| Classic Frame | Paper or canvas art | Protects art and makes it look finished |
| Floating Frame | Modern, minimalist rooms | Shows off art edges; adds depth |
| Clip or Binder Frame | Temporary displays | Easy to swap out art pieces |
| Canvas Wrap | Thicker canvases | No frame needed; clean look |
Hang your art at eye level for best effect. If displaying a group of feathers, keep the spacing even and try arranging them in a gentle arc or vertical line for movement.
Common Mistakes To Avoid
Even experienced DIYers can make errors. Here are some pitfalls and how to avoid them:
- Using too much water: This makes colors run and edges blurry. For acrylics, only use a little water. For watercolors, control water with a clean brush.
- Skipping layers: Rushing through the painting leads to flat, lifeless feathers. Let each layer dry before adding the next.
- Ignoring reference images: Real feathers have subtle curves and lines. Always check your reference as you paint.
- Forgetting highlights and shadows: These small touches add depth and realism.
- Not sealing the painting: For a long-lasting finish, spray with a clear acrylic sealer once dry, especially if you use mixed media.
How To Care For Your Feather Wall Art
To keep your DIY feather art looking fresh:
- Dust regularly with a soft, dry cloth.
- Keep out of direct sunlight to prevent fading.
- If using paper, frame under glass to avoid moisture.
- For canvas, check for loose paint or cracks once a year and seal if needed.
Non-obvious Tips For A Stunning Feather Painting
- Test colors on scrap paper before applying to your art. Feathers often have subtle color changes that are easier to practice first.
- Vary brush pressure as you paint outward from the shaft. Lighter pressure creates fine lines, making the feather look real.
- Try negative painting: Paint the background around the feather, leaving the feather shape white. Then fill in details. This helps beginners get clean edges.
Most people miss these details, but they make a big difference in the final look.
Inspiration And Advanced Ideas
If you want to push your skills, try these advanced techniques:
- Paint a feather with water droplets for a realistic effect.
- Use mixed media: Add colored pencils or ink for extra detail.
- Paint feathers in a circle to create a dreamcatcher effect.
- Layer transparent glazes for deeper colors.
For more inspiration, art communities like DeviantArt feature thousands of creative feather paintings.
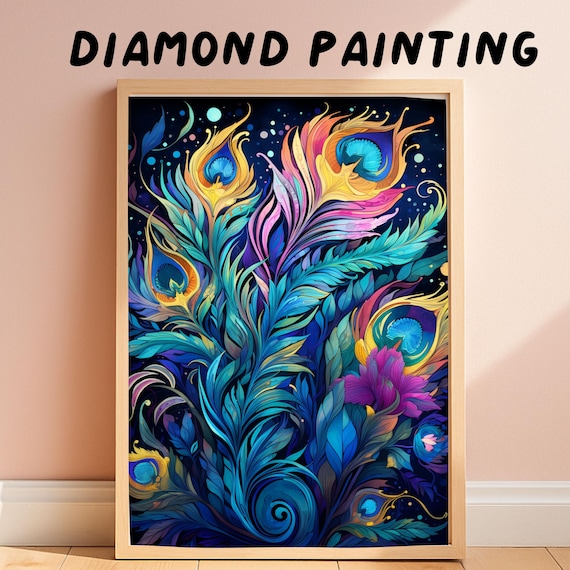
Credit: www.etsy.com
Frequently Asked Questions
What Type Of Paint Is Best For Feather Wall Art?
Both acrylic and watercolor paints work well. Acrylics are easier for beginners because they dry quickly and are more forgiving if you make a mistake. Watercolors give a soft, airy look but require more control.
How Do I Make My Feather Look Realistic?
Focus on layering colors, adding fine lines for texture, and using reference photos. Don’t forget highlights and shadows. Look closely at real feathers—they often have subtle color changes and tiny gaps.
Can I Paint Feathers On Surfaces Other Than Canvas Or Paper?
Yes, you can paint on wood, fabric, or even walls. Just make sure to prep the surface (like priming wood) and use the right type of paint. For fabric, use fabric paint or add textile medium to acrylics.
How Do I Fix Mistakes In My Feather Painting?
For acrylics, wait until dry and paint over the mistake with the background color. For watercolors, blot gently with a damp brush or paper towel while the paint is wet. For big errors, let dry and start a new layer.
Do I Need To Seal My Feather Wall Art?
Sealing is recommended, especially for acrylic paintings. Use a clear acrylic spray or brush-on varnish. For watercolors, frame under glass to protect from moisture and dust.
Painting a feather for wall art is both relaxing and rewarding. With patience and attention to detail, you’ll create a piece that brings beauty and personality to your home. Try different styles, don’t be afraid to experiment, and enjoy the creative journey.