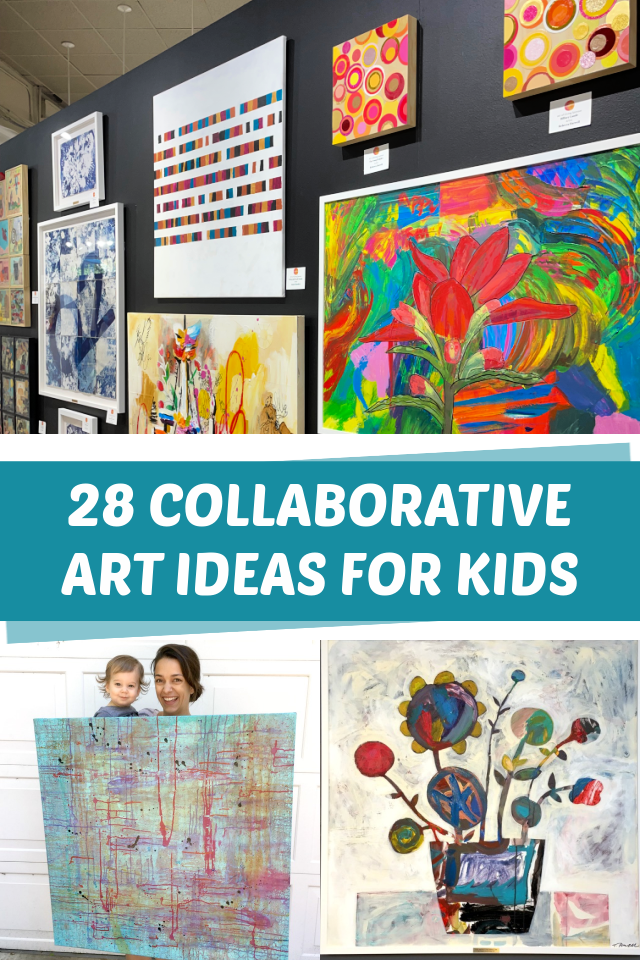
Quick answer: The best collaborative painting projects split one image into parts that each person can own: a grid mural where everyone paints one square, puzzle-piece canvases that join together, a round-robin painting passed every 10 minutes, or a shared handprint tree. Agree on a limited color palette and a simple theme before starting, assign clear sections, and plan one final “unifying” step, such as a shared outline color or background, so the finished piece looks cohesive.
A painting made by many hands has a different kind of value. It records a class, a family reunion, a team or a neighborhood in a way a solo piece cannot. The challenge is getting ten or thirty people with different skills to produce something that looks intentional instead of chaotic.
The answer is structure. Below are collaborative painting projects that build structure into the design, along with planning tips, a step-by-step grid mural guide, and fixes for the problems that usually come up. If you are organizing for children, our list of the best paint projects and art kits for kids covers kid-friendly supplies that make group work easier.
Why Collaborative Painting Works
Group painting lowers the pressure on any single person. No one is responsible for the whole canvas, so beginners feel free to try things. It also creates natural conversation: people compare colors, borrow techniques and react to each other’s sections.
For teachers and group leaders, collaborative projects teach planning, compromise and shared decision-making alongside art skills. For families and teams, the finished piece becomes a keepsake that hangs on the wall long after the event.
Collaborative Painting Project Ideas
| Project | Group size | Best for | Time |
|---|---|---|---|
| Grid mural | 9–50+ | Classrooms, offices, events | 1–2 hours |
| Puzzle-piece canvases | 4–30 | Teams, families, schools | 1–2 hours |
| Round-robin painting | 3–8 per canvas | Friends, art clubs, parties | 45–90 min |
| Handprint or fingerprint tree | 5–100+ | Weddings, kids, reunions | Ongoing during event |
| Exquisite corpse painting | 3–4 per piece | Art groups, teens, adults | 45–60 min |
| Concentric circle mandala | 4–20 | Classrooms, wellness groups | 1–2 hours |
| Shared color-field abstract | 2–10 | Couples, teams, beginners | 45–60 min |
| Community mural on boards | 10–100+ | Schools, neighborhoods, events | Several sessions |
Grid mural
Choose a simple image, divide it into a grid, and give each person one square to enlarge onto their own canvas or panel. When reassembled, the squares form the full picture. Each piece is abstract on its own, which makes it surprisingly beginner-friendly.
Puzzle-piece canvases
Cut a large board or several canvases into jigsaw shapes, or simply line up identical canvases. Each person paints their piece with a shared theme or a continuous background line, then everything is assembled.
Round-robin painting
Each person starts a canvas, then passes it to the next person after a set time, often 10 minutes. Everyone adds to every painting. The results are unpredictable and fun, and the conversation is half the point.
Handprint or fingerprint tree
Paint a bare tree trunk and branches in advance. Guests add a fingerprint or handprint “leaf” and sign their name. This works especially well at weddings, baby showers, retirements and school farewells.
Exquisite corpse painting
Based on the surrealist drawing game, a canvas is folded or covered so each person sees only a sliver of the previous section. One person paints a head, the next a body, the next legs, without seeing the rest. The reveal is usually hilarious.
Concentric circle mandala
Draw rings on a large circular board. Each person or small group decorates one ring with repeating patterns. The radial symmetry keeps it unified even when styles differ.
Shared color-field abstract
Two to ten people paint one canvas together with a limited palette, taking turns adding large shapes, lines and textures. It works well for teams and couples who want something modern for a shared space.
Collaborative Painting Ideas by Group Type
Classrooms
- Grid mural of a famous painting, linking art history to the project
- “Our community” mural where each student paints a building or person
- Seasonal tree that changes through the year with new leaves
- Ocean scene where each student paints one sea creature on a shared background
Families and reunions
- Family tree with fingerprint leaves and names
- Puzzle canvases where each household paints one piece
- Vacation memory map with each person painting a favorite place
Offices and team building
- Company values mural with each team painting one value
- Abstract panels in brand colors for the office wall
- Round-robin painting session as a warm-up for brainstorming
Kids’ parties and camps
- Big paper mural on the floor with a theme like “under the sea” or “outer space”
- Handprint rainbow
- Rock painting garden where each child paints a rock to place in a shared display
For children’s group sessions, keep each task to one clear action, such as “paint your square blue” or “add three fish,” and demonstrate it first. Short, concrete steps hold attention far better than open-ended instructions.
Step-by-Step: How to Run a Grid Mural
- Choose an image. Bold, simple images with strong shapes and colors work best: a sunflower, a landscape, a famous painting with clear areas of color, or a logo.
- Decide the grid. Count participants and pick a grid that matches, such as 4×5 for 20 people. Extra squares can go to faster painters.
- Print and cut. Print the image, draw the grid on it, number each square on the back, and cut it into pieces.
- Prepare surfaces. Give everyone the same size canvas, panel or heavy paper, such as 8×8 inches. Mark the number on the back.
- Set the palette. Provide the same paint colors to everyone, ideally pre-mixed for key colors so neighboring squares match.
- Transfer and paint. Each person enlarges their square onto their surface. Encourage them to focus on shapes and colors, not on what the object is.
- Check edges. Ask neighbors to compare where their edges meet so lines continue across squares.
- Assemble. Lay all pieces out by number, step back, and make small touch-ups where colors do not line up.
- Display. Mount on a board, hang in a grid, or attach with removable strips.
Planning Tips for Cohesive Results
- Limit the palette. Four to six colors plus white keeps the piece unified. This is the single biggest factor in a cohesive result.
- Set a theme. “Things that make us happy” or “our city” gives direction without dictating details.
- Create a unifying element. A shared background color, a continuous horizon line or a common outline color ties different styles together.
- Assign roles. Background painters, detail painters and an edge checker help larger groups stay organized.
- Do a quick demo. Show techniques before people start, especially for kids.
- Plan for drying. Acrylic dries quickly, but have a hair dryer or a second activity ready during drying breaks.
Before large projects, a shared mood board helps everyone agree on colors and style. Our guide on creating a mood board for painting projects walks through how to set one up.
Supplies for Group Painting Projects
- Paint: acrylic for durability and fast drying, or washable tempera for young children. Buy larger bottles and pour into shared cups.
- Surfaces: matching canvases, panels, plywood boards for murals, or rolls of heavy paper.
- Brushes: a range of flats and rounds per station. Foam brushes are inexpensive for backgrounds.
- Palettes: paper plates or muffin tins.
- Water containers and paper towels at every station.
- Drop cloths, aprons and wipes.
- Painter’s tape and pencils for marking sections.
Watercolor Painting Ideas and Tips for Groups
Watercolor can work for collaborative projects, but it behaves differently from acrylic. Because it is transparent and cannot easily be covered, mistakes are harder to fix, and colors bleed into wet neighboring areas.
- Use separate sheets. Have each person paint on their own sheet, then mount them together, rather than sharing one sheet.
- Choose loose subjects. Florals, skies, abstract washes and leaves suit group watercolor.
- Set a shared palette. Two or three colors, like ultramarine, rose and yellow, create harmony.
- Try a watercolor quilt. Each person paints a square with a shared theme, then squares are arranged like a patchwork.
- Use 140 lb paper so sheets do not buckle badly.
Common Problems and How to Fix Them
| Problem | Fix |
|---|---|
| Sections look mismatched | Add a unifying outline or glaze over the whole piece, or repaint edges to connect |
| One person dominates | Assign clear sections and time limits |
| Some people finish early | Give them background or border tasks, or a bonus square |
| Colors don’t match between squares | Pre-mix key colors in shared containers |
| Kids lose interest | Keep sessions under 45 minutes and break tasks into steps |
| Paint dries on shared palettes | Put out small amounts and refill often; mist acrylic with water |
Adapting Projects for Mixed Ages and Abilities
Collaborative painting often brings together people with very different skills: toddlers and grandparents, artists and first-timers, people with limited mobility. A few adjustments help everyone contribute meaningfully.
- Offer task tiers. Background washes and color blocking suit beginners and young children; outlines, highlights and details suit confident painters.
- Use adaptive tools. Foam brushes, sponges, stamps and chunky-handled brushes are easier to grip than fine artist brushes.
- Raise or lower surfaces. Mount murals on a wall at a range of heights, or lay paper on a table for seated painters.
- Pair people up. Partnering a confident painter with a nervous one builds both skill and conversation.
- Celebrate every mark. The value of a group piece is participation. Avoid “fixing” other people’s sections unless they ask.
Timing a Group Session
Pacing matters as much as design. A typical 90-minute session might look like this: 10 minutes to introduce the project and demonstrate, 30 minutes for backgrounds, a 10-minute drying break (good for snacks or looking at each other’s work), 30 minutes for main shapes and details, and 10 minutes to assemble and photograph the result.
For multi-session murals, end each session at a natural stopping point, such as all backgrounds complete, and take a photo so the group can see progress next time. Keeping a visible plan or printed reference on the wall helps everyone remember the end goal.
Displaying and Preserving Group Paintings
- Varnish acrylics once dry, especially for murals in high-traffic areas.
- Label the work with the group name, date and participants on the back or on a nearby plaque.
- Photograph it for participants to keep.
- Consider rotation. In schools and offices, move pieces between rooms to share them.
Finally, share the result with everyone who took part. A printed photo for each participant, a post in a class newsletter, or a short unveiling at the end of an event gives people a sense of ownership and makes them more eager to join the next project.
FAQs
What is a collaborative painting project?
It is a painting made by two or more people working on the same image or connected pieces. Common examples include grid murals, puzzle canvases, round-robin paintings and fingerprint trees.
How do you make a group painting look cohesive?
Use a limited shared palette, a clear theme, assigned sections and a unifying element such as a consistent background or outline color.
What are good collaborative painting ideas for kids?
Handprint rainbows, under-the-sea floor murals, rock painting gardens, and grid murals of simple images work well. Keep sessions short and use washable paint for young children.
What paint is best for collaborative projects?
Acrylic is best for durable results and fast drying. Washable tempera is better for young children. Watercolor works if each person paints on a separate sheet.
How long does a collaborative painting take?
Most single-session projects take 45 minutes to two hours. Large community murals may take several sessions over days or weeks.
What are watercolor painting ideas and tips for group projects?
Try a watercolor quilt of individual squares, use a two- or three-color shared palette, choose loose subjects like florals and skies, and paint on separate sheets that are mounted together later.
Next Step
Successful collaborative painting projects are built on structure: a clear design that divides the work, a shared palette, a theme and a final unifying touch. Whether it is a classroom grid mural or a wedding fingerprint tree, that planning turns many individual efforts into one cohesive piece.
If you are planning group art with children, compare supplies and ready-made options in our top paint projects and art kits for kids, which covers kits suited to classrooms and family activities.