Use a tablet, pick software, master layers, values, and paint every day.
If you want to learn how to digital paint, you are in the right place. I have taught artists and teams how to digital paint for years, across apps and styles. This guide shows you how to digital paint step by step, with clear tips, real examples, and a plan you can follow today.
Set up your tools the smart way
A smooth setup removes friction. You can focus on art, not menus. Here is what you need and why it matters.
- Hardware A drawing tablet or pen display is best. Pressure and tilt help control line weight and texture. Choose a size that fits your desk and arm movement. Calibrate pen pressure in the driver.
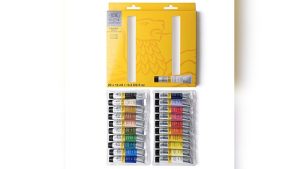
- Software Any pro app works. Photoshop, Procreate, Clip Studio Paint, Krita, and Corel Painter are common. Test brushes and lag. Turn on a neutral canvas background to judge color better.
- Color and screen A cheap display can shift hues. Use sRGB for web work. Do a simple calibration. Keep your room light steady to reduce eye strain.
- File setup Start with 3000–5000 px on the long side for studies. Use 300 dpi for print. Name layers and save versions often.
Personal note I keep a small tablet for travel and a larger pen display for studio work. That split keeps me fast and consistent across jobs. It also helps me show students how to digital paint with different budgets.

Learn the building blocks: canvas, layers, brushes, blend modes
Know your tools like a pilot knows the cockpit. It will save you hours later. These features power most workflows.
- Canvas Use a mid-gray background. It helps you see light and dark. Keep a simple grid if you draw buildings or scenes.
- Layers Use separate layers for sketch, flats, shadows, and effects. Group them. Lock transparency when shading flats to avoid color spill.
- Brushes Start with a hard round, a soft round, and one textured brush. Limit choice at first. Control beats variety when you learn how to digital paint.
- Pressure and tilt Set a curve that gives you control at low pressure. Test light strokes and bold strokes. Adjust until it feels natural.
- Blend modes Multiply for shadows, Screen or Add for light, Overlay for color shifts. Use them sparingly. Paint most colors by hand for better control.
- Selections and masks Lasso and shape tools help with clean edges. Layer masks let you erase without risk. They are key when you refine forms.
I teach students to make a custom brush set with five tools at most. When learning how to digital paint, fewer choices make faster progress.
A simple step-by-step workflow from blank canvas to final art
This is a clear path you can repeat. It works for portraits, props, and scenes. Tweak it as your style grows.
- Step 1: Thumbnails Make 6–12 small value sketches. Focus on big shapes and lighting. Pick the best read at a glance.
- Step 2: Clean sketch Build a clear line drawing on a new layer. Use simple shapes. Keep lines light so paint can lead.
- Step 3: Value block-in On a layer below, fill big shapes with flat mid-values. Turn your image to grayscale often. Values carry the read.
- Step 4: Color block-in Clip a color layer to each shape. Start with simple, local colors. Avoid saturation spikes early.
- Step 5: Lighting and shadows Add form shadows first, then cast shadows. Think of the light as a sun in your scene. Ask where it hits and where it fades.
- Step 6: Edge control Sharpen focal points. Soften low-focus areas. Hard edges attract the eye. Soft edges suggest depth.
- Step 7: Texture and detail Add small texture with a light hand. Repeat patterns and materials that match your subject. Zoom out every few minutes.
- Step 8: Color tuning Use Hue/Sat and Curves gently. Check the read at 25% zoom. If it works small, it will work large.
- Step 9: Polish Clean halos, fix tangents, and balance contrast. Add a rim light if it fits the story. Stop before you overwork it.
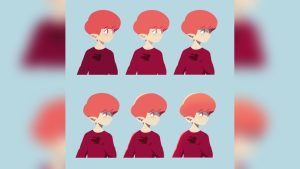
Tip When students ask how to digital paint portraits that feel alive, we slow down at Step 5 and Step 6. Light and edges do the heavy lifting.
Color, light, and edges: make your painting breathe
Color is mood. Light is story. Edges guide the eye. Treat them like a trio.
- Values first A strong value design makes color easy. Squint to check your pattern of light, mid, and dark.
- Simple light Start with one main light and one bounce. Add fill later. Imagine a sphere to test your light logic.
- Color temperature Warm light often makes cool shadows, and the reverse. Keep a few accent colors for pop.
- Edges control focus Hard edges near the face or focal point. Soft edges in background or lost-and-found areas.
- Atmosphere Lower contrast with distance. Add soft haze for depth in scenes. Use large brushes for this pass.
When I learned how to digital paint landscapes, I overused saturated greens. The fix was simple. I cooled the shadows and warmed only the sunlit grass. The scene felt fresh at once.
Brush control and texture: from flat to tactile
Good brushwork shows intent. It can feel like oil, ink, or airbrush. Start clean, then add grit.
- Start with big brushes Block shapes with large brushes. Do not noodle early. Big-to-small saves time.
- Controlled strokes Use the whole arm for long lines. Use the wrist for small curves. Vary pressure for life in each mark.
- Texture with purpose Use texture to suggest material wood, metal, skin, cloth. Keep it subtle in low-focus areas.
- Smudge and mix Sparing use helps blend planes. Overuse makes mud. Better to paint a bridge tone than to smudge.
- Custom brushes Make one texture brush per material you paint often. Label them well.
If you ask how to digital paint fabric, I suggest two passes. First, paint the fold forms with clear light logic. Then, add a gentle weave texture that follows the fold curves.
Speed, layers, and file management for pros
Fast workflow frees you to think about story and design. Keep files clean and light.
- Lean layers Merge layers once decisions are final. Too many layers slow you down and confuse edits.
- Actions and shortcuts Map keys for invert, flip canvas, lasso, brush size, and eyedropper. Use them every minute.
- Version control Save v1, v2, v3 at major steps. You can roll back without fear.
- Export right For web, export sRGB PNG or JPEG around 2000–3000 px wide. For print, use 300 dpi TIFF with embedded profile.
- Backup Keep cloud sync and an external drive. Art loss kills momentum.
Teams often ask me how to digital paint with handoff in mind. The answer is simple labels, grouped layers, and a readme layer with notes.
Common mistakes and how to fix them
Everyone makes these. Fixes are simple once you know them.
- Muddy colors Cause too much smudge or mixed complements. Fix paint with cleaner, separate strokes. Keep a palette swatch layer.
- Weak values Cause too much mid-tone. Fix design a clear light and dark pattern. Use a value check layer.
- Over-detail Cause fear of big shapes. Fix zoom out and set a timer for large passes. Add small detail last.
- Flat light Cause no clear source. Fix pick a light direction and stick to it. Check cast shadows.
- Stiff edges Cause all edges same. Fix vary edge softness by plane and focus.
When students learn how to digital paint metal, they often blur edges. Metal needs sharp, high-contrast edges and strong reflections. Keep edges crisp where light turns fast.
A 30-day practice plan that works
Practice with intent. Small daily wins beat rare marathons.
- Days 1–7 Values only Ten 20-minute studies of spheres, cubes, and simple props. No color. Focus on light logic.
- Days 8–14 Color basics Ten studies with two lights warm key, cool fill. Paint fruit or toys. Keep it small.
- Days 15–21 Materials Paint wood, metal, skin, glass, cloth. Two studies per day. Note edge types.
- Days 22–27 Scenes Two small environments from photo refs. One from memory. Push depth and atmosphere.
- Days 28–30 Personal piece One full piece using the full workflow. Get a peer review. Apply notes and export.
If you stick to this plan, you will feel how to digital paint in your hands, not only in your head. Keep a log, and track time per step.
Real-world applications and portfolio tips
Your work must show skill and taste. Aim for clarity first, then style.
- Pick a niche Characters, props, environments, or product art. Show focus in your top pieces.
- Solve problems Show before-and-after paint-overs. Art directors love to see your thinking.
- Process pages Add thumbnails, value passes, and layer screenshots. It proves you know how to digital paint with intent.
- Consistency Use the same export size and color space across your portfolio. It looks pro.
- Feedback Join critique groups. Ask for notes on read, edges, and light. Act on them fast.
When studios ask how to digital paint for a tight deadline, I show a limited brush set, a clear light plan, and strict layer naming. It wins trust.
Frequently Asked Questions of how to digital paint Informational 70 26 1.55 Sitelinks
What is the fastest way to learn how to digital paint?
Start with values and simple forms. Limit brushes, study light, and complete small daily studies.
Do I need an expensive tablet to learn how to digital paint?
No. A budget tablet with pressure is enough. Skill and practice matter far more than hardware.
Which software is best for beginners who want to know how to digital paint?
Procreate and Krita are friendly and powerful. Photoshop and Clip Studio Paint offer deep tools for growth.
How do I pick colors when learning how to digital paint?
Decide the light first, then pick local colors. Use warm vs cool shifts and keep saturation under control.
How can I avoid muddy colors as I learn how to digital paint?
Place strokes cleanly and avoid over-smudging. Keep a palette swatch layer and repaint transitions with fresh color.
How often should I flip my canvas while practicing how to digital paint?
Flip every few minutes. It reveals drawing errors and balance issues fast.
What resolution should I use if I want to print what I digital paint?
Use 300 dpi at final print size. Export as TIFF or high-quality PNG with an embedded color profile.
Conclusion
You now have a clear path for how to digital paint with confidence. Start with values, set a clean workflow, and build from big shapes to fine edges. Practice small, finish often, and keep your tools simple.
Open your app today and paint one 30-minute study. Then repeat it tomorrow. If this guide helped, subscribe for more step-by-step lessons, ask a question in the comments, or share your latest piece for feedback.