Are you ready to bring your comic ideas to life with vibrant colors and dynamic styles? Learning how to do digital comic style painting opens up a whole new world of creativity right at your fingertips.
Whether you’re a beginner or looking to sharpen your skills, this guide will show you simple steps to transform your sketches into stunning digital artwork. You’ll discover easy techniques to add depth, texture, and bold colors that make your characters and scenes pop.
Keep reading to unlock the secrets behind digital comic painting and watch your art stand out like never before!
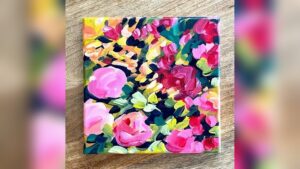
Credit: astropad.com
Choosing Your Tools
Choosing the right tools is essential for digital comic style painting. The tools shape your workflow and influence the final look of your art. Picking the correct hardware and software helps you work faster and more comfortably. You also need the right brushes and textures for authentic comic effects. Creating a neat workspace boosts your focus and efficiency.
Digital Tablets And Software
A quality digital tablet improves precision and control in your work. Tablets like Wacom or Huion offer pressure sensitivity and smooth drawing experience. These features mimic traditional drawing tools well. Select software designed for comic art, such as Clip Studio Paint or Adobe Photoshop. These programs have specific tools for line art, coloring, and shading. They support layers and custom brushes, which are vital for comic painting.
Brushes And Textures
Brushes define your line work and coloring style. Use brushes that imitate ink pens for clean outlines. Soft brushes help with smooth shading and gradients. Textures add depth and a traditional feel to your digital art. You can find comic-style texture packs online or create your own. Experiment with different brushes and textures to find what fits your style best.
Setting Up Your Workspace
Organize your workspace for comfort and efficiency. Position your tablet and monitor to reduce strain on your neck and eyes. Keep your tools within easy reach to avoid distractions. Adjust lighting to prevent glare and shadows on your screen. A clean and quiet workspace helps maintain focus during long painting sessions.
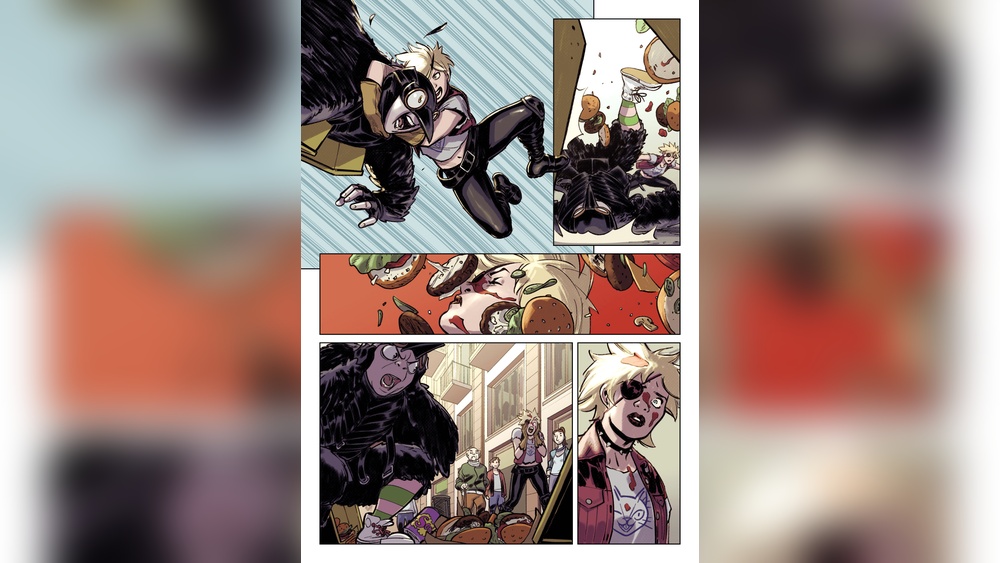
Credit: www.creativebloq.com
Sketching The Comic Layout
Sketching the comic layout is the first step in digital comic style painting. It sets the stage for your story and visuals. A clear layout helps guide the reader through the panels smoothly. Start with simple lines and shapes to organize your ideas. This phase focuses on structure rather than details.
Planning your panels and composition early ensures the story flows well. Sketching loosely allows room for changes. Keep your sketches light and flexible. Avoid spending too much time on perfect lines now.
Planning Panels And Composition
Divide your page into panels to show different scenes or actions. Each panel should have a clear purpose. Think about how the panels will lead the reader’s eye. Use different panel sizes and shapes to create visual interest. Balance busy and simple panels for good pacing. Leave space for dialogue and captions.
Drawing Basic Shapes
Start by drawing basic shapes to block out characters and objects. Use circles, squares, and rectangles for heads, bodies, and props. These shapes help keep proportions consistent. Place shapes roughly where they belong in each panel. This step builds the framework before adding details.
Refining Character Poses
Once the basic shapes are in place, work on character poses. Show movement and emotion through body language. Adjust angles and gestures to fit the story moment. Keep poses clear and easy to read. Focus on flow and balance to make characters feel alive.
Inking Your Sketch
Inking your sketch is a key step in digital comic style painting. It transforms rough lines into clean, clear artwork. This process adds depth and style to your drawing. Good inking sets the foundation for coloring and final touches. It requires patience and the right tools. Let’s explore how to ink effectively and make your comic art shine.
Selecting Inking Brushes
Choose brushes that mimic real ink pens. Look for smooth, pressure-sensitive brushes. These help create natural strokes. Experiment with different brushes to find your style. Many digital art programs offer inking brush sets. Use brushes that respond to pen pressure. This control adds variety to your lines. Avoid brushes that feel too soft or too hard. The right brush gives clean, crisp lines every time.
Line Weight And Style
Vary line weight to add interest and depth. Thicker lines can show shadows or important parts. Thinner lines work well for details and light areas. Use line weight to guide the viewer’s eye. Change pressure on your pen to adjust line thickness. Consistent style makes the comic look professional. Keep line style simple and clear for readability. Avoid overly complex or messy lines.
Cleaning Up Lines
After inking, clean up any stray marks. Use the eraser tool to remove unwanted lines. Zoom in to check for small errors. Smooth out jagged edges for a polished look. Clean lines help the final colors stand out. Take your time to tidy the artwork. A neat line art layer makes coloring easier. Save your work often to avoid losing progress.
Applying Base Colors
Applying base colors is the first crucial step in digital comic style painting. It sets the tone and mood for your artwork. Base colors give your comic characters and scenes a solid foundation. This stage helps define the overall look without focusing on details. Proper application makes later shading and highlighting easier and more effective.
Choosing A Color Palette
Select a color palette that fits your comic’s mood and theme. Use a limited range of colors to keep the style clean and consistent. Pick colors that contrast well to make elements stand out. Avoid overly bright or dull colors that clash or blend too much. Consider the emotional impact of colors to support the story.
Flatting Techniques
Flatting means filling in areas with solid base colors. Use a hard brush or fill tool for clean edges. Keep colors inside the line art to maintain clarity. Work on one section at a time for better control. Flatting creates clear separation between parts of the artwork. It prepares the piece for shading and effects later.
Using Layers Effectively
Use multiple layers to organize your colors. Place base colors on separate layers below line art. Name layers clearly for easy editing. Lock or group layers to avoid accidental changes. Using layers allows quick fixes without disturbing other parts. Layers also help add effects like shadows and highlights smoothly.
Adding Shadows And Highlights
Adding shadows and highlights is key to making your digital comic painting look lively. Shadows create contrast, while highlights bring focus. Together, they give your art a three-dimensional feel. This step helps your characters and scenes pop off the page.
Light Source Considerations
Identify where your light source is. This decides where shadows and highlights fall. Consistency in lighting makes your painting believable. Think about the strength and color of the light too. A strong light creates sharp shadows. Soft light results in gentle shading.
Layer Modes For Shading
Use different layer modes to add shadows and highlights easily. Multiply mode darkens areas for shadows without hiding details. Screen or Overlay modes brighten spots for highlights smoothly. Experiment with opacity to control intensity. Layer modes save time and keep your work clean.
Creating Depth And Volume
Apply shadows under objects and around curves to add depth. Highlights on raised or round parts show volume. Blend edges softly for a natural look. Use midtones between shadows and highlights for balance. This technique makes your comic characters feel solid and real.
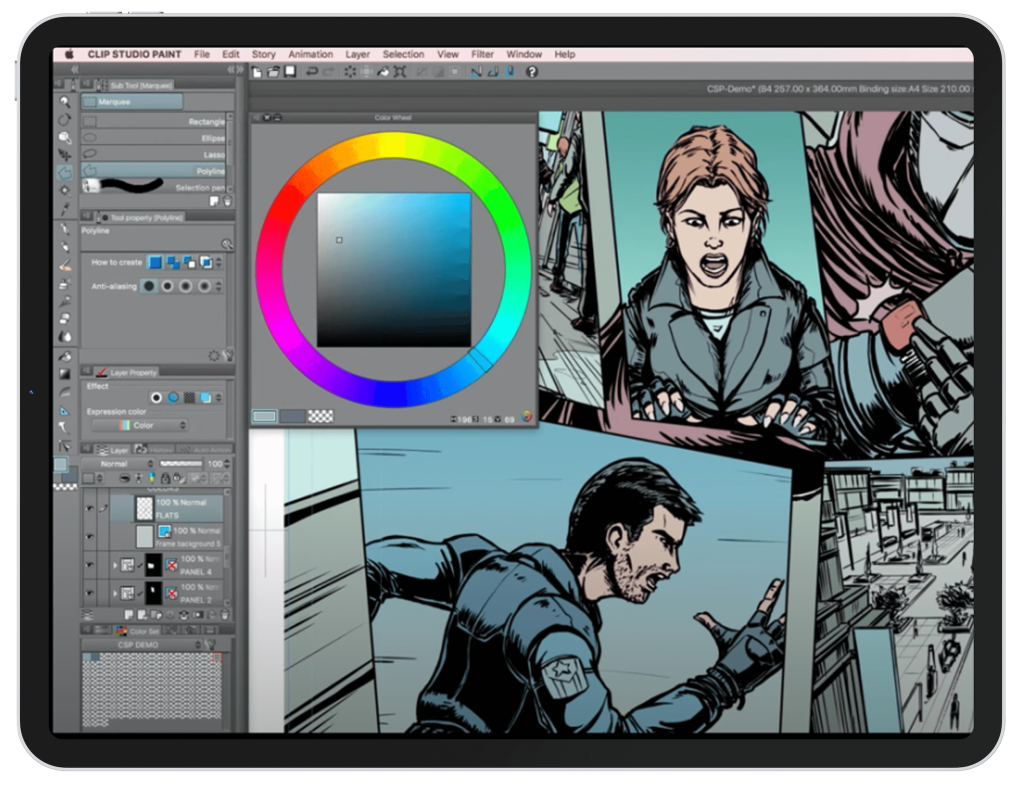
Credit: www.clipstudio.net
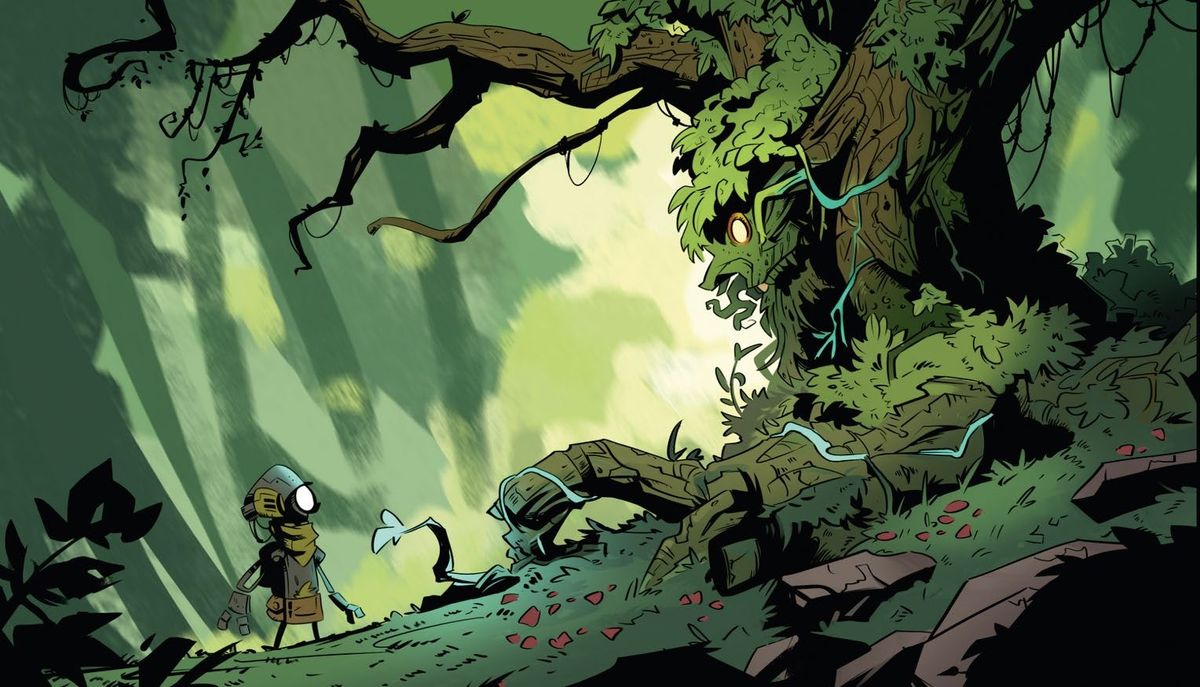
Incorporating Textures And Effects
Incorporating textures and effects adds depth and life to digital comic paintings. Textures create a tactile feel that mimics traditional art surfaces. Effects help highlight key moments and enhance visual storytelling. Both elements work together to make your art more engaging and dynamic.
Using Custom Brushes
Custom brushes offer unique textures tailored to comic art. They simulate natural tools like pencils, inks, and paints. Using these brushes adds variety and interest to your strokes. You can create rough edges, grainy shadows, or smooth blends easily. Experiment with brush settings to find styles that fit your comic’s mood.
Adding Patterns And Details
Patterns bring rhythm and complexity to backgrounds and clothing. Small details like fabric weaves or wall textures enhance realism. Use layers to add patterns without overwhelming the main figures. Subtle details keep the viewer’s eye moving through the scene. Focus on repeating shapes or textures that match your story’s environment.
Special Effects For Impact
Special effects highlight action and emotion in comic panels. Use glows, blurs, and lighting effects to create energy. Speed lines and halftone dots give a classic comic feel. Effects can guide the reader’s focus to important parts. Apply them sparingly to maintain clarity and style balance.
Lettering And Speech Bubbles
Lettering and speech bubbles are essential in digital comic style painting. They give life to characters’ voices and guide readers through the story. Well-crafted lettering adds personality and tone to the dialogue.
Speech bubbles help separate text from the artwork. They clarify who is speaking and show emotions. Proper design and placement improve the comic’s flow and readability.
Choosing Fonts And Styles
Select fonts that match your comic’s mood. Bold fonts work well for action scenes. Rounded, softer fonts suit friendly or lighthearted dialogue. Avoid overly decorative fonts that are hard to read.
Use different styles to show tone. Italics can express thoughts or whispers. All caps often indicate shouting or strong emphasis. Keep font size consistent but adjust for dramatic effect.
Designing Speech Bubbles
Create speech bubbles that fit your art style. Classic oval shapes are simple and clear. Jagged edges work for shouting or anger. Thought bubbles use cloud-like shapes to show internal dialogue.
Keep bubble borders thick enough to stand out. Use white or light colors inside for contrast. Avoid overly complex shapes that distract from the text. Make sure the tail points clearly to the speaker.
Placing Text For Readability
Position speech bubbles close to the speaker’s mouth. This helps readers identify who is talking quickly. Leave enough space around text so it doesn’t feel cramped.
Align text left or center inside bubbles. Avoid justified text, which can cause uneven spacing. Break long sentences into shorter lines to ease reading. Check that text size is large enough on all devices.
Final Touches And Exporting
Final touches and exporting are essential steps in digital comic style painting. These steps ensure your artwork looks polished and is ready for sharing or printing. Proper finishing can make a big difference in how your comic is received.
Pay close attention to details. Small adjustments improve the overall look. Exporting your file with the right settings keeps your work crisp and clear.
Color Correction And Adjustment
Color correction helps balance the hues and tones in your painting. Adjust brightness and contrast to enhance visibility. Use tools like curves or levels to refine colors. Make sure skin tones and backgrounds look natural. Avoid overly saturated or dull colors. Subtle changes create a more appealing image.
Checking Resolution And Format
Check your artwork’s resolution before exporting. A resolution of 300 dpi is best for print. For web use, 72 dpi is enough to keep files small. Choose the right file format based on use. PNG works well for web images with transparency. TIFF or PSD formats are preferred for print to keep quality high. Always keep a master file with layers intact.
Preparing For Print Or Web
Prepare your comic for its final destination. For print, convert colors to CMYK mode. This change matches printer colors better than RGB. Add bleed and crop marks if your printer requires them. For web, optimize image size to load quickly. Save a copy in sRGB color space for accurate screen display. Double-check file names and folders for easy access.
Frequently Asked Questions
What Do Comic Artists Use To Draw Digitally?
Comic artists draw digitally using graphic tablets like Wacom or Huion, paired with software such as Clip Studio Paint or Adobe Photoshop. These tools offer precision, pressure sensitivity, and customizable brushes for detailed comic art creation.
How To Make A Digital Painting Look Like A Real Painting?
Use limited color palettes and layer colors slowly to mimic traditional paint glazing. Add texture and subtle color shifts in shadows and highlights. Avoid overly smooth brushes, and zoom out often to assess the overall composition for a natural look.
How To Make A Comic Style Image?
Start by sketching your design digitally or on paper. Use bold outlines and flat colors for a comic look. Add shading with cross-hatching or halftone patterns. Use digital tools like Clip Studio Paint or Canva to enhance and customize your comic style image.
What Is The 180 Rule In Comics?
The 180 rule in comics maintains spatial orientation by keeping the viewpoint within a 180-degree arc. It ensures clear, consistent scene flow and reader understanding.
Conclusion
Digital comic style painting combines creativity and technique effectively. Start with simple sketches, then add clear lines and bold colors. Use layers to separate parts and make changes easily. Experiment with shading to add depth and life to your art.
Practice regularly to improve your skills steadily. Enjoy the process and share your unique comic art with others. Keep learning new tools and tips to enhance your digital paintings. Your comic style will grow stronger with each drawing. Stay patient and have fun creating vibrant digital comics.