
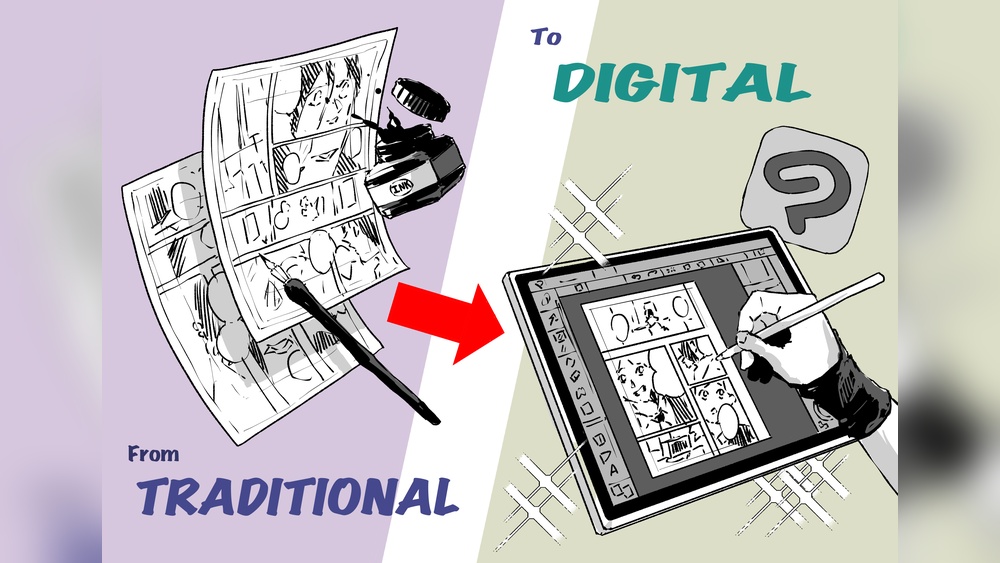
Quick answer: To do digital manga art in Clip Studio Paint, create a comic-preset canvas at 600 DPI (or 300+ DPI for color), divide the page with the Frame Border tool, sketch on a low-opacity layer, ink with a G-pen or Maru-pen on a vector layer, fill flats using “Refer other layers,” then add screentones or cel shading, speed lines and text with the built-in tools. Clip Studio’s manga-specific features, like tone layers and frame folders, make the workflow much faster than general painting apps.
Clip Studio Paint was built with comics and manga in mind, and it shows. It has page templates, panel tools, perspective rulers, screentone layers and speech balloons, all in one place. If you want to learn how to do digital manga art in Clip Studio, this guide walks through the full process from blank page to finished, tone-shaded manga, with settings that work for both black-and-white and color pages.
The first decision, and one that is surprisingly easy to get wrong, is your canvas size and resolution. We cover the essentials below, and our dedicated guide to the best canvas size for digital art in Clip Studio Paint goes deeper on dimensions for print, web and webtoon formats.
Step 1: Set Up Your Manga Canvas
Best canvas settings for Clip Studio desktop and tablet
Go to File, then New. At the top of the dialog, choose the Comic preset (EX and Pro differ in multi-page features, but both have the comic presets).
| Setting | Black-and-white manga | Color manga or illustrations |
|---|---|---|
| Resolution | 600 DPI | 350 DPI (300 minimum) |
| Basic expression color | Monochrome | Color |
| Bleed | Typically about 3 mm (check with printer) | Same |
| Size | Match the target book format, e.g., B5 or a US trade size | Same |
| Web-only | Work at print resolution anyway, export smaller | Same |
Why 600 DPI for black and white? Monochrome art uses pure black pixels without gray antialiasing on the final output. Higher resolution keeps lines and tone dots sharp. Color pages use antialiasing, so 300 to 350 DPI usually suffices.
The comic preset adds guide lines for the trim, bleed and “safe area” (inner frame). Keep text and important art inside the safe area so it is not cut off when trimmed.
Step 2: Plan the Page With Thumbnails
Before drawing panels, sketch the whole page at tiny size. Manga storytelling depends on page flow: readers move right to left in traditional Japanese format and left to right in many Western adaptations. Decide which direction you will use and stick with it.
- Vary panel sizes. Big panels for emotional or action beats, small panels for quick moments.
- Plan where speech balloons go first, so you leave space for them in the art.
- Use page turns for reveals. The first panel of a left-hand page (in right-to-left reading) is a natural place for surprise.
Step 3: Create Panels With the Frame Border Tool
- Select the Frame Border tool, then the Rectangle Frame subtool.
- Drag to create the first frame. This creates a Frame Border folder with a mask.
- Use the Divide Frame Folder subtool to slice the frame into panels. Hold Shift for straight cuts.
- Adjust gutter widths in the Tool Property palette. Common gutters are a bit wider horizontally than vertically.
- Use the Object tool to drag panel borders and corners for dynamic, angled panels.
Each panel becomes its own folder. Layers inside it are clipped to the panel shape, so art does not spill into gutters unless you want it to.
Step 4: Sketch and Use Rulers
Create a raster layer inside a panel folder and sketch loosely in a light blue color. Reduce opacity to around 20 to 30 percent when you ink. Clip Studio’s layer palette also lets you set a layer as a “draft layer,” which is excluded from fills and exports.
Perspective rulers
Layer, then Ruler/Frame, then Create Perspective Ruler. Choose one-, two- or three-point perspective. Lines you draw snap to vanishing points, which is a huge help for backgrounds like classrooms, streets and buildings. Toggle snapping on and off from the command bar.
3D models for poses
Clip Studio includes posable 3D figures in the Material palette. Drag one onto the canvas, adjust the pose and camera angle, and sketch over it. Treat the model as a reference: manga anatomy is usually stylized, so adjust proportions by eye.
Step 5: Inking Manga Line Art
Inking is where manga gets its crisp, energetic look.
Choose a pen
- G-pen: Strong pressure response, bold-to-thin lines. A classic choice for character outlines.
- Maru-pen: Finer, more delicate lines for faces, hair and details.
- Turnip pen / Real G-pen: Variants with slightly different tapers.
Use vector layers
Create a Vector Layer for inking. Vector lines can be resized without blurring, and the Vector Eraser has an option to erase “up to intersection,” which removes overlapping line ends in one tap. This alone saves hours on manga pages.
Stabilization
Set Stabilization in the Tool Property palette. Values around 10 to 20 are a common starting range; adjust to taste. The Post Correction option smooths lines after you lift the pen.
Line weight tips
- Thicker lines for outer contours and foreground objects.
- Thinner lines for interior details, hair strands and distant backgrounds.
- Taper line ends by using pressure, or enable start/end tapering in the brush settings.
- Use speed lines (Figure tool, then Stream Line or Focus Line) for motion and emphasis.
Step 6: Flats and Black Fills
For black-and-white manga, flats define areas for tones and solid blacks. For color, they hold base colors.
- Create a new raster layer under the inks.
- Select the Fill tool, Refer Other Layers subtool.
- In Tool Property, set Area Scaling to about 1 to 2 pixels to close small gaps and avoid white halos.
- Fill each area. Use “Close Gap” settings for lines that do not fully connect.
- Fill hair, dark clothing and deep shadows with solid black for strong contrast.
Step 7: Screentones
Screentones are dot or line patterns that create gray values in black-and-white print. Clip Studio handles them natively.
- Make a selection with the Magic Wand (referring to the ink layer) or Lasso.
- A selection launcher appears. Click New Tone or open the Material palette and drag a tone onto the selection.
- Adjust frequency (lines per inch) and density in Layer Property. A frequency around 60 lines per inch is common, but check what looks good at your print size.
- Use gradient tones for skies, shading and dramatic lighting.
- Erase with a soft eraser or a transparent color to “scrape” highlights out of tone.
Keep the tone frequency consistent across a page or chapter. Mixing very different frequencies can look messy and cause moiré patterns when printed.
Step 8: Color Manga (Optional)
For color pages, covers or webtoons, replace tone with color shading.
- Clip a Multiply layer above the flats for shadows. Pick a single tinted shadow color, like a soft lavender, for consistency.
- Add a second Multiply layer for darker occlusion shadows.
- Add highlights on an Add (Glow) or Screen layer.
- Use Clip Studio’s Gradient Map (Layer, New Correction Layer) to unify the palette at low opacity.
Clip Studio Paint Portrait Tips for Manga Faces
Faces are the emotional anchor of manga. A few practical tips:
- Construct first. Sketch the head as a circle with a jaw shape, add a center line and an eye line, then place features.
- Eyes carry expression. Ink the upper lash line heavier than the lower. Fill the iris with a gradient tone or soft color shading and add one or two crisp highlights.
- Simplify noses and mouths. A small line or shadow is often enough in manga style.
- Hair in clumps. Draw locks as grouped shapes, then add a few fine strands. Use a tapered pen for strand ends.
- Use symmetry ruler carefully. The Symmetry ruler helps with front-facing faces, but turn it off for three-quarter views.
- Flip the canvas. View, then Rotate/Invert, then Flip Horizontal reveals asymmetry you have stopped noticing.
Drawing Manga Backgrounds Efficiently
Backgrounds are where many manga artists lose the most time. Clip Studio offers several shortcuts that keep pages consistent without redrawing every desk and window.
- Establishing shots: Draw one detailed background when a scene starts, then use simplified versions or close-ups for following panels. Readers fill in the rest.
- 3D materials: Clip Studio’s 3D objects and some downloadable 3D backgrounds can be posed and converted to line art with the LT conversion feature in EX. Clean up the result by hand so it matches your ink style.
- Reusable materials: Save a finished room, street or prop as a material in the Material palette. Drag it into future pages and adjust the angle or crop.
- Line weight for depth: Ink backgrounds with thinner lines than characters, and use lighter tones, so figures stay in front.
- Abstract backgrounds: Emotional moments often use patterns, gradient tones, sparkles or focus lines instead of a literal setting. Clip Studio includes many of these as materials.
A balanced approach is to spend real effort on a few key backgrounds per chapter and let the rest stay simple. Consistency matters more than detail in every panel.
Step 9: Balloons, Text and Effects
- Use the Text tool to type dialogue. Vertical text is available for Japanese-style lettering.
- Use the Balloon tool to draw ellipse or custom balloons, and Balloon Tail to attach them to speakers.
- Add sound effects with hand-drawn lettering on a separate layer for impact.
- Use Focus Lines for dramatic emphasis and Stream Lines for motion.
Step 10: Export
File, then Export (single layer) or Export multiple pages in EX. For print, export at full resolution with bleed and ask the printer about format. For black-and-white pages, choose monochrome 2-tone output so tones print as crisp dots. For web, export a resized PNG or JPEG.
Recommended Layer Structure
| Layer | Type | Purpose |
|---|---|---|
| Text and balloons | Text/Balloon | Dialogue on top |
| Effects | Raster | Speed lines, sound effects |
| Inks | Vector | Line art |
| Tones / shading | Tone or clipped Multiply | Gray values or shadows |
| Flats | Raster | Solid fills and blacks |
| Background | Raster/Vector | Scenery |
| Sketch | Draft raster | Hidden at export |
Hardware: The Best Drawing Tablet for Clip Studio Paint
Clip Studio works with any pressure-sensitive device it supports, including screenless pen tablets, pen displays, iPads with Apple Pencil and some Android tablets with styluses. Screenless tablets are an affordable entry point; pen displays let you draw directly on the image. For manga inking, a stable pressure response and a comfortable active area matter more than brand. Calibrate your pressure curve in File, then Pen Pressure Settings, for the most control over line weight.
Common Mistakes
- Working at low resolution. Tones and fine lines blur. Use 600 DPI for monochrome.
- Inking on raster layers. You lose vector resizing and the intersection eraser.
- Ignoring the safe area. Text near the trim can get cut off.
- Too many tone types. Stick to a few frequencies and patterns per chapter.
- Inconsistent light direction. Choose a light source per scene.
- Overcrowded panels. Leave room for balloons and breathing space.
FAQs
What resolution should I use for manga in Clip Studio Paint?
600 DPI is common for black-and-white pages, and 300 to 350 DPI for color pages and illustrations.
Is Clip Studio Paint PRO enough for manga?
PRO handles single pages well, including panels, tones and balloons. EX adds multi-page project management, which helps for longer works.
Which pen is best for manga inking in Clip Studio?
The G-pen is a common choice for bold outlines and the Maru-pen for fine details. Both respond well to pressure.
How do I add screentones in Clip Studio Paint?
Make a selection, then use New Tone from the selection launcher or drag a tone from the Material palette onto the selection. Adjust frequency and density in Layer Property.
What is the best canvas size for digital art in Clip Studio?
It depends on output. Use a comic preset matching your print format for manga pages, or a large pixel canvas for web. Our Clip Studio canvas size guide covers specific dimensions.
Can I make manga in Clip Studio on an iPad?
Yes. The iPad version includes the same core manga tools, with a touch-optimized interface.
Final Thoughts
Digital manga in Clip Studio Paint follows a clear path: set up the right canvas, plan with thumbnails, cut panels, sketch, ink on vector layers, fill flats, add tones or color, then letter and export. Each built-in feature exists to speed up comic production, so learning them pays off quickly. Before your next page, double-check your page settings against our breakdown of ideal Clip Studio canvas dimensions for print and web.




One Comment