Imagine bringing the magic of snowy winter days right into your home, no matter the season. With your own homemade snow paint, you can transform simple craft projects into frosty masterpieces that look and feel like real snow.
Whether you’re crafting with kids or adding a unique touch to holiday decorations, learning how to make snow paint is easier than you think—and it saves you money too! Ready to discover the simple ingredients and fun techniques that will help you create fluffy, puffy snow paint?
Keep reading to unlock easy recipes and tips that will make your crafts truly sparkle.

Credit: www.youtube.com
Materials Needed
Gathering the right materials is the first step to making snow paint for crafts. This ensures your paint has the perfect texture and color. Prepare everything before you start to keep your crafting smooth and fun.
Basic Ingredients
- White glue – acts as the paint’s base and helps it stick.
- Shaving cream – gives the paint a fluffy, snow-like texture.
- White paint or acrylic paint – adds color and opacity to the snow paint.
- Water – thins the mixture if it becomes too thick.
Optional Add-ins
- Glitter – adds sparkle, making the snow paint shimmer like real snow.
- Food coloring – lets you create colored snow paint for creative effects.
- Essential oils – provide a fresh scent for sensory crafting experiences.
- Salt or baking soda – adds texture to make the paint feel more like snow.
Tools And Surfaces
- Mixing bowls – to combine and stir ingredients easily.
- Spoons or spatulas – for mixing and applying the paint.
- Paintbrushes or sponges – help create different patterns and effects.
- Paper, cardboard, or canvas – perfect surfaces for your snow paint crafts.
- Protective coverings – to keep your workspace clean from spills.
Simple Snow Paint Recipes
Creating snow paint at home is easy and fun for all ages. This craft project uses simple ingredients found in most households. These recipes give you a fluffy, textured paint that looks just like snow. Use them for decorating cards, winter scenes, or holiday crafts. Each recipe offers a unique texture and finish, so try them all to see which you like best.
Shaving Cream And Glue Mixture
Combine equal parts of shaving cream and white glue in a bowl. Stir gently until smooth and fluffy. This mixture feels light and puffy, perfect for painting snowy landscapes. Use a brush or sponge to apply it to paper. It dries with a soft, raised texture that looks like real snow. This recipe is safe and easy for kids to use.
Baking Soda And Mod Podge Blend
Mix three tablespoons of baking soda with one cup of Mod Podge. Stir well until thick and creamy. This paint creates a gritty, snow-like texture when dry. It works great on wood, paper, or canvas for winter crafts. Apply with a brush and let it dry fully. The baking soda adds sparkle and a natural snowy feel.
Cornstarch Spray Snow
Combine one tablespoon of cornstarch with one cup of water in a spray bottle. Shake well to mix. Spray lightly over crafts for a fine, frosty snow effect. This recipe is great for adding a soft snowy layer on windows or holiday decorations. It dries clear and feels powdery, like fresh snow. Perfect for quick, easy snow effects.
Adding Sparkle And Texture
Adding sparkle and texture to snow paint makes your crafts come alive. It turns simple paint into a magical, snowy masterpiece. Small touches can bring a unique look and feel to your project. Sparkle catches the light, while texture adds depth. Both create interest and make your craft stand out.
Using Glitter
Glitter is a simple way to add sparkle to snow paint. Mix fine white or silver glitter into your paint. This makes the paint shimmer and glow. Sprinkle glitter on top of wet paint for extra shine. Choose glitter that is safe for kids and easy to clean up. It adds a festive, frosty effect to your craft.
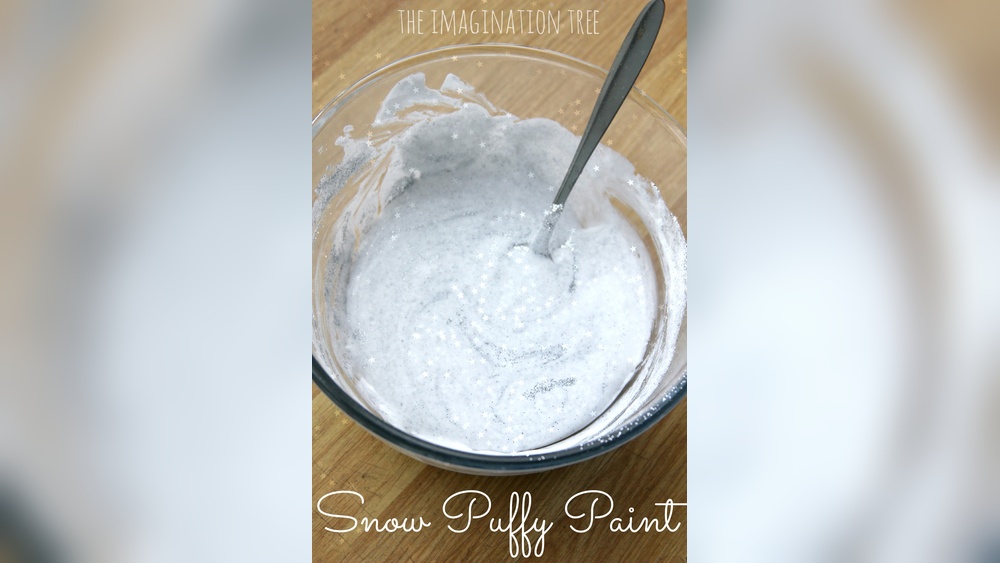
Creating Puffy Effects
To create texture, use a puffy snow paint recipe. Combine shaving cream and glue for a thick, fluffy mix. Paint thick layers to get a raised, 3D effect. This paint dries soft and puffy like real snow. You can shape it with a brush or spoon. Puffy paint adds a fun, tactile element to your craft.
Credit: onelittleproject.com
Painting Techniques
Painting with snow paint offers fun ways to create textured, wintry crafts. Different techniques bring out unique effects. Choose methods that fit your project and skill level. Experiment to find your favorite style.
Using Brushes And Sponges
Brushes let you add fine details with snow paint. Use soft bristle brushes for smooth strokes. Thin brushes work well for small areas. Sponges create a fluffy, uneven texture. Dab sponges gently for a snowy effect. Both tools help control the paint’s thickness and shape.
Applying With Spoons Or Fingers
Spoons help scoop and spread thick snow paint. Use the back of a spoon to make soft mounds. This adds a 3D look to your craft. Finger painting feels playful and tactile. Use fingertips to press and shape paint. This method is great for kids and adds natural texture.
Layering For Dimension
Build layers of snow paint for depth. Start with a thin base layer and let it dry. Add thicker layers on top for raised areas. Layering creates shadows and highlights. It makes your craft look more real and interesting. Patience helps achieve the best results.
Color Mixing Tips
Mixing colors for snow paint can bring your crafts to life. The right shades show depth and texture. Simple color tweaks create natural-looking snow effects. Learn how to adjust colors for shadows and warmth.
Creating Snow Shadows
Shadows add depth to snow scenes. Use a mix of ultramarine blue and titanium white for soft shadows. Adding a tiny bit of burnt sienna dulls the color. This makes shadows look more natural and less bright.
Try mixing small amounts of colors first. Adjust the mix to match the light in your craft. Shadows are rarely pure blue or gray. Mixing colors gives a realistic look to your snow paint.
Adding Warmth Or Coolness
Snow is not always cold blue. Sometimes it reflects warm light from the sun or nearby objects. To add warmth, mix a little yellow or red with white paint. Keep the color soft and light.
For cool snow, use blue or purple shades with white. This gives a chilly, fresh feeling. Experiment with small changes in color. Notice how warm or cool tones change the mood of your craft.
Drying And Storage Tips
Proper drying and storage are key for making snow paint crafts last. Knowing the right drying time keeps your artwork neat. Storing leftover paint correctly saves materials for future projects. These tips help maintain the paint’s texture and color.
Optimal Drying Times
Snow paint usually dries in one to two hours. Thicker layers may need more time to dry fully. Avoid touching the paint too soon to prevent smudges. Place your craft in a dry, cool spot. Good airflow helps the paint dry evenly and faster.
Storing Leftover Paint
Store leftover snow paint in an airtight container. Keep it in a cool, dry place away from sunlight. Stir the paint well before reuse to restore its texture. Avoid freezing the paint as it may spoil. Proper storage keeps the paint usable for several days.
Project Ideas With Snow Paint
Snow paint adds magic to simple crafts. Its fluffy, textured look brightens winter projects. Using snow paint inspires creativity in kids and adults. It brings a snowy feel to art and decorations. Try these fun ideas to enjoy snow paint’s charm.
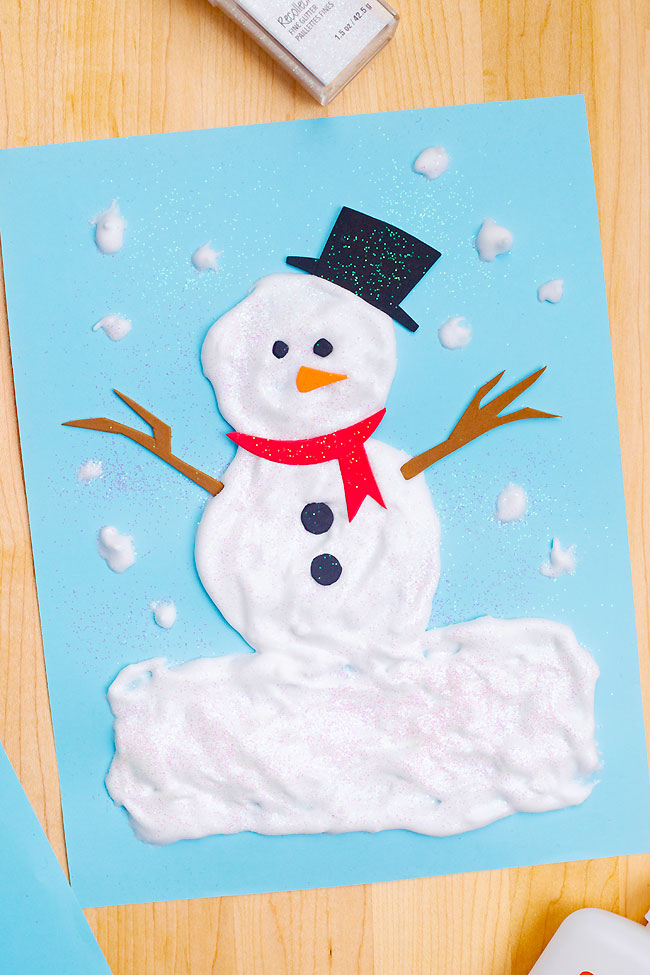
Winter Cards And Decorations
Create beautiful winter cards with snow paint. Use it to make snowflakes and snowy hills. Paint on cardstock for a soft, puffy effect. Glue glitter for extra sparkle. Snow paint also works great on ornaments. Decorate pine cones or wooden shapes. These handmade decorations add a cozy touch to any room.
Snowy Landscape Art
Make winter scenes with snow paint on paper or canvas. Paint snowy trees, mountains, and frozen lakes. Use blue and white paint for backgrounds. Add snow paint on top for a 3D snow effect. This craft lets you explore layering and texture. Each artwork looks like a real winter day.
Sensory Craft Activities
Snow paint is perfect for sensory play. Kids love its soft, foamy texture. Let children spread the paint with fingers or brushes. Mix in scents like peppermint for a festive smell. This activity helps develop fine motor skills. It also encourages exploration through touch and sight. Sensory crafts with snow paint are fun and calming.

Credit: www.growingajeweledrose.com
Frequently Asked Questions
How To Make Fake Snow Paint For Crafts?
Mix equal parts shaving cream and white glue to create fake snow paint. Apply with brushes or sponges. Let dry overnight for a puffy, snow-like texture. Add glitter for sparkle. Use immediately for best results.
How To Make Snow Color With Paint?
Mix equal parts white glue and shaving cream to create thick, puffy snow paint. Add glitter for sparkle. Apply with a brush or sponge and let dry overnight.
What Colors To Mix For Snow?
Mix ultramarine blue and titanium white for snow’s base color. Add burnt sienna or alizarin crimson to adjust warmth and shadow.
How Do You Make Sparkly Snow Puffy Paint?
Mix equal parts shaving cream and white glue. Stir in iridescent glitter for sparkle. Apply and let dry overnight for puffy snow paint.
Conclusion
Making snow paint for crafts is fun and simple to do at home. Use basic ingredients like shaving cream and glue to create a fluffy texture. This paint adds a cool, snowy effect to your art projects. Try different tools like brushes or sponges for unique results.
Kids and adults both enjoy crafting with this easy snow paint. Keep experimenting to find new ways to bring winter scenes to life. Enjoy the creative process and share your snowy masterpieces with others.