
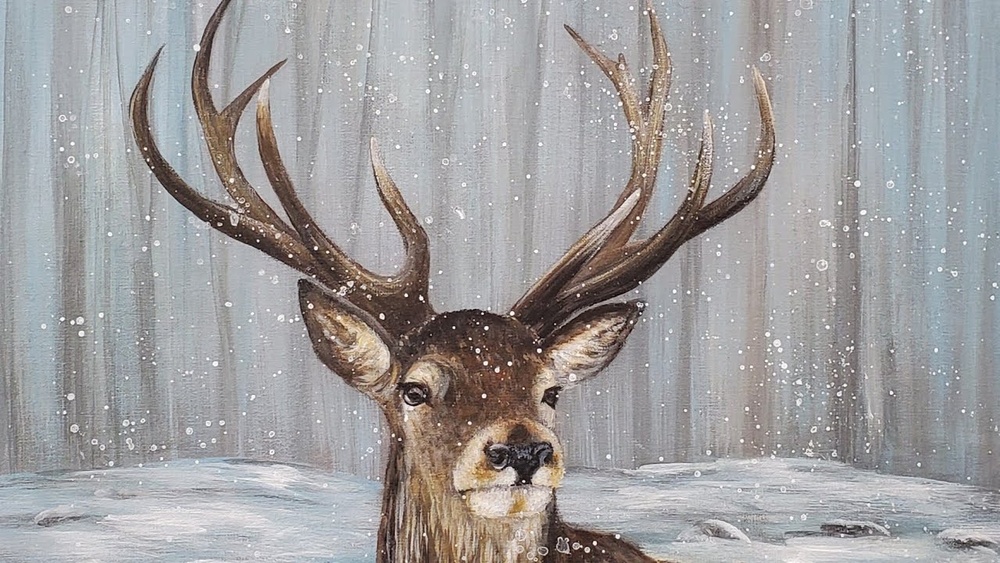
Quick answer: To paint a deer with acrylic paint, sketch the body as a barrel-shaped torso on four long, slender legs, with a wedge-shaped head on a thick neck. Paint the background first, then block in the coat with a mid-brown, add shadows under the belly and neck, and build lighter tan and white areas on the throat, belly and tail. Finish with the dark eye, nose and ear details, and add antlers last for a buck.
Deer are a classic subject for woodland and winter scenes, and they show up in everything from realistic wildlife art to simple holiday cards. They look graceful, but that grace depends on getting a few proportions right. Legs too thick or a neck too short, and the animal reads as a goat or a dog.
This guide breaks down how to paint a deer with acrylic paint in clear stages. It covers deer anatomy in simple terms, color mixes for different coat seasons, how to paint antlers so they look three-dimensional, and three background options you can pair with your deer.
Decide What Kind of Deer Painting You Want
Before you pick up a brush, decide on style and subject. Each choice changes how you approach the painting.
| Option | What it involves | Difficulty |
|---|---|---|
| Silhouette at sunset | Dark deer shape against a gradient sky | Easy |
| Stylized or folk-art deer | Flat colors, decorative patterns, simplified anatomy | Easy to moderate |
| Doe or fawn in a meadow | Realistic coat, no antlers, soft background | Moderate |
| Buck in a winter forest | Realistic coat, antlers, snow and trees | Moderate to advanced |
| Close-up deer portrait | Head and neck only, detailed fur and eyes | Advanced |
If this is your first animal painting, a silhouette or a doe in profile is a good start. Profiles make proportions easier to judge because you can see the full length of the body and legs.
Materials
- Surface: 12×16 or 11×14 inch canvas, or a primed panel. A horizontal format suits a standing deer.
- Paints: Titanium white, burnt umber, burnt sienna, raw sienna, yellow ochre, ultramarine blue, cadmium yellow light, cadmium red medium, and a ready-made black or mixed black.
- Brushes: 1-inch flat for background, #10 and #6 filberts for the body, #2 round for features, #0 liner for fine hairs and antler tips, and a fan brush for grasses or trees.
- Other: Palette, water, paper towels, pencil or chalk, and a reference photo.
Earth pigments like burnt umber and raw sienna are the backbone of a deer painting, and they vary noticeably between brands in warmth and opacity. Our comparison of the best acrylic paint for wildlife and landscape work covers which lines offer strong, clean earth tones.
Deer Anatomy Made Simple
You can build a believable white-tailed or mule deer from a few basic shapes.
Body
The torso is a barrel shape, deeper at the chest and slightly narrower toward the hips. In a standing profile, the body length (chest to rump) is roughly equal to the height from the ground to the top of the shoulder. The back is fairly straight with a slight rise at the shoulders and hips.
Legs
Deer legs are long and very thin below the knee and hock. A common error is painting them uniformly thick. The upper legs are muscular and blend into the body; below the joint they become slim, ending in small dark hooves. Front legs are straight in profile. Back legs have a pronounced backward-angled joint (the hock) about halfway down, which looks like a backward knee.
Neck and Head
The neck rises at an angle from the chest and is thicker than many people expect, especially in bucks during autumn. The head is a long wedge, wide at the eyes and tapering to the muzzle. Eyes sit on the sides of the head, about one-third of the way from the top of the head to the nose. The ears are large ovals, set behind and above the eyes, and often angled outward.
Tail
White-tailed deer have a brown tail with white underneath, often raised as an alarm signal. Mule deer have a narrow white tail with a black tip. Check your reference to match the species.
Coat Colors by Season
Deer coats change through the year, so match your colors to your scene.
- Summer coat: Reddish brown. Mix burnt sienna, raw sienna and a touch of cadmium red. Shadows in burnt umber with a little ultramarine.
- Winter coat: Grayish brown. Mix burnt umber, white and a touch of ultramarine. Highlights in raw sienna and white.
- Fawn: Warm reddish brown with white spots along the back and sides. Paint the coat first, then dot the spots with off-white once dry.
- White areas: Throat patch, belly, inner legs and around the eyes and nose. Use warm off-white, shaded with pale blue-gray.
How to Paint a Deer With Acrylic Paint Step by Step
Step 1: Sketch the Deer and Horizon
Mark a horizon line, then sketch the deer using the shapes above. Start with the barrel body, add the neck line and head wedge, then place the legs. Check that the hooves sit on a believable ground plane and that the far legs appear slightly higher on the canvas than the near legs. Lightly mark the white throat patch and belly line.
Step 2: Paint the Background
Paint the background before the deer so you can overlap edges. Keep it a step less detailed than the animal. For a forest, paint distant trees in cool, light blue-greens and closer trees darker. For a meadow, paint a soft sky and loose bands of grass color. Let the paint go just inside the deer outline.
Step 3: Block In the Body
Use a filbert to paint the whole deer in a flat midtone coat color, except for the white areas. Paint in the direction of the body’s form: curved strokes around the barrel, vertical strokes down the legs. Let it dry.
Step 4: Add Shadows
Decide where your light comes from. Paint shadows with the darker coat mix: under the belly, the back of the neck on the shadow side, the inner side of the far legs, behind the shoulder, and on the rump below the hip. Soften the edge of each shadow by dry brushing a little midtone back over it.
Step 5: Light Areas and Highlights
Lay in the white throat patch, belly and inner legs with warm off-white, then shade their lower edges with blue-gray. Add highlights of lighter tan along the top of the back, the shoulder and the top of the neck where light hits. Short strokes help suggest the short, dense coat.
Step 6: Face Details
Paint the eye as a large dark almond shape with a small highlight. Add a pale ring around the eye. Paint the nose dark and slightly shiny, with a white band just behind it on the muzzle. Shade the inside of the ears with a soft gray-brown and add pale, long hairs along the inner edge. A thin dark line along the mouth finishes the face.
Step 7: Legs and Hooves
Refine the legs, keeping the lower parts thin. Add a dark line down the back of each lower leg to help the leg read as a rounded shape. Paint the hooves near-black with a small highlight. Add a cast shadow on the ground under and behind the deer so it stands rather than floats.
How to Paint Deer Antlers
Antlers are where many deer paintings go wrong, often looking like flat sticks glued on. They are cylinders that taper and curve, and they need light and shadow like any other form.
- Draw the main beam. On a white-tailed buck, each main beam rises from the skull, sweeps back and then curves forward. Points (tines) grow upward from the main beam.
- Base color. Mix raw sienna, burnt umber and white for a light brown-gray. Paint each beam and tine.
- Shadows. Add a darker line along the underside or shadow side of each beam and tine.
- Highlights. Run a thin, pale line along the top edge. Tips are usually lighter, almost ivory.
- Overlap. Where one antler crosses in front of the other, make the near antler slightly lighter and sharper.
Keep the antler base thicker where it joins the skull, with a slightly rough, darker ring called the burr.
Painting a Fawn: Spots, Proportions and Softness
A fawn is not just a small deer. Its proportions are different, and painting it with adult proportions makes it look like a miniature adult rather than a baby.
- Legs: Fawn legs look very long compared with the body, and the joints appear knobby. Exaggerate this slightly.
- Head: Larger relative to the body, with a shorter muzzle and bigger ears and eyes.
- Body: Shorter and rounder than an adult’s barrel.
The white spots are the signature detail. They run in loose rows along both sides of the spine and scatter more randomly down the flanks. Paint them after the coat is dry, using a small round brush and an off-white mix with a touch of yellow ochre so they do not look stark. Vary the size slightly and make spots on the shadow side a little grayer. Spots should follow the curve of the body: rounder on the flat top of the back, more oval where the side curves away from you. That small change in shape is what makes the body look three-dimensional instead of flat.
Keep edges softer overall on a fawn than on an adult. A slightly damp brush dragged lightly over spot edges helps them sit into the coat.
Three Background Ideas for Your Deer
Winter Forest
Use a pale, cool sky, gray-blue distant trees and darker trunks closer in. Paint snow with blue shadows and a few warm highlights. A deer in a winter coat fits naturally.
Golden Meadow at Dawn
Warm yellow and peach sky, low mist painted with thin white glazes, and tall grasses in ochre and green. Rim-light the deer with a thin line of pale yellow along the back.
Autumn Woods
Mix oranges, reds and yellows for foliage, using a sponge or stiff brush for texture. Keep the deer slightly darker than the leaves so it stands out.
Troubleshooting Your Deer Painting
| Issue | Why it happens | How to fix it |
|---|---|---|
| Deer looks like a dog or goat | Legs too short or thick; head too round | Lengthen and thin the lower legs; extend the muzzle |
| Body looks flat | No shadow under the belly | Add a dark shadow along the underside, softened upward |
| Antlers look pasted on | No light or shadow | Add shadow underneath and highlight on top of each tine |
| Deer floats above ground | No cast shadow | Paint a shadow under the hooves and body |
| Coat looks muddy | Overmixed browns or too much black | Mix fresh with burnt sienna to warm, ultramarine to cool |
Skill-Building Ideas
- Paint just the head of a deer three times with different lighting before attempting a full scene.
- Do a 15-minute value study in black and white to check your shadows.
- Try a group composition: a doe with a fawn, using size and overlap to create depth.
- Paint a deer silhouette on a glazed sunset as a quick confidence builder.
For soft, glowing dawn backgrounds, fluid acrylics that glaze smoothly can help; our fluid acrylic paint review explains how thinner-bodied paint handles washes and glazes.
FAQs
What colors do you need to paint a deer?
Burnt umber, burnt sienna, raw sienna, yellow ochre, ultramarine blue and titanium white cover almost all deer coats. Add a red for summer coats and a black for hooves and noses.
How do you paint a simple deer for beginners?
Start with a deer silhouette against a sunset sky. Paint a gradient background, let it dry, then fill in a dark deer shape. This teaches shape and proportion without worrying about fur.
How do you paint deer fur in acrylic?
Deer fur is short and dense, so use small, short strokes that follow the form, building from dark to light. Save longer strokes for the throat, ears and tail.
What is the hardest part of painting a deer?
The legs and antlers usually cause the most trouble. Legs need to be long and thin below the joints, and antlers need light and shadow to look rounded.
How do I make my deer look realistic?
Use a good reference, check proportions carefully, paint shadows that describe the body’s form, and add a cast shadow on the ground. Small details like the eye highlight and white muzzle band also help.
How long should I wait between layers?
Thin acrylic layers are usually dry to the touch in 10 to 20 minutes. Thick layers take longer. Wait until a layer is dry before glazing or dry brushing over it.
Final Thoughts
A convincing deer comes down to long, thin legs, a solid barrel body, and antlers that have form. Paint the background first, build the coat from dark to light, and always ground the animal with a shadow. Once you are comfortable, experiment with different seasons and lighting. If your browns keep looking dull, it may be the paint rather than your mixing, and our roundup of acrylic brands with rich earth pigments can help you choose a better set.




