Do you want to create a beautiful portrait of your dog using acrylic paint but don’t know where to start? Painting your furry friend can be fun and rewarding, even if you’re a beginner.
In this guide, you’ll learn simple steps to capture your dog’s unique personality and bring it to life on canvas. By the end, you’ll feel confident picking up your brush and creating a painting you’ll be proud to display. Keep reading, and let’s turn your love for your dog into a stunning work of art!

Credit: studiowildlife.com
Materials Needed
Before painting your dog with acrylic paint, gather the right materials. Good supplies make painting easier and more fun. Choose items that suit your skill level and project size. Prepare everything to avoid interruptions during your creative process.
Choosing The Right Acrylic Paints
Select acrylic paints designed for artists. These paints have bright colors and good coverage. Choose colors that match your dog’s fur and eyes. Buy small tubes first to test colors. Look for non-toxic paints, safe for your health.
Selecting Brushes And Tools
Use different brush sizes for details and large areas. Small round brushes work well for fine lines and fur. Flat brushes cover bigger spaces quickly. Have a palette for mixing colors. Keep a cup of water and paper towels nearby.
Preparing Your Workspace
Set up a clean, well-lit area. Use a table with enough space for your supplies. Cover the surface with newspaper or a plastic sheet. Keep your paint, brushes, and water close. Good lighting helps you see colors clearly.
Setting Up Your Canvas
Setting up your canvas is the first step to paint a dog with acrylic paints. A good setup helps your painting last longer and look better. Preparing the canvas correctly makes it easier to apply paint smoothly. This part focuses on choosing the right canvas size and priming the surface.
Choosing The Canvas Size
Pick a canvas size that fits your painting space. Small canvases are easy to handle and quick to paint. Large canvases give more room for details and expression. Consider where you will display the painting. Also, think about your skill level and time available. A medium size is often best for beginners. It balances detail and ease of use.
Priming The Surface
Priming prepares the canvas to hold acrylic paint well. Use a white or clear acrylic gesso for priming. Apply an even coat over the entire canvas. Let it dry completely before starting your painting. Priming stops paint from soaking into the fabric. It makes colors brighter and prevents cracking. You can add a second coat for a smoother finish.
Sketching The Dog
Sketching the dog is the first step in painting with acrylics. It helps create a clear guide for your painting. A good sketch captures the dog’s shape and personality. This makes painting easier and more accurate.
Start with light pencil strokes. These can be changed or erased as you refine your drawing. The goal is to build a strong base before adding color.
Basic Shapes And Proportions
Break the dog’s body into simple shapes. Use circles, ovals, and rectangles for the head, body, and legs. This helps keep the sketch balanced and correct.
Measure the size of the head compared to the body. Check the length of the legs and the tail. Keep these proportions right to make the dog look natural.
Focus on the dog’s posture. Is it sitting, standing, or running? Sketch these positions with basic shapes before adding details.
Adding Details
Once the basic shapes are in place, start adding details. Draw the eyes, nose, and mouth carefully. These features give life to your sketch.
Sketch the ears and fur direction. These details add texture and character. Use soft, short lines for fur to keep it natural.
Don’t press too hard with your pencil. Keep lines light to avoid dark marks. This helps when you paint over the sketch later.

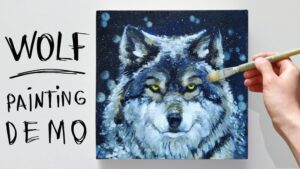
Credit: www.youtube.com
Mixing Colors
Mixing colors is a key step in painting a dog with acrylic paint. It helps capture the unique tones of your pet’s fur. Understanding how to create base colors and subtle shades makes your painting look real. This part will guide you through simple color mixing techniques.
Creating Base Colors
Start by choosing the main colors of your dog’s coat. Use primary colors like red, blue, and yellow. Mix these with white or black to get lighter or darker tones. For example, blend brown by mixing red, yellow, and a little blue. Adjust the mix until the color matches your dog’s fur.
Make enough base color to cover large areas. Use a palette to keep colors clean and separate. This step sets the foundation for your painting.
Mixing Shades For Fur
Fur has many shades, not just one flat color. Mix your base color with small amounts of white, black, or other colors. This creates highlights and shadows. Use lighter shades for areas hit by light. Darker shades show the shadowed parts of the fur.
Blend these shades smoothly to mimic the soft look of fur. Keep testing colors on a scrap paper. This helps you find the perfect tone before applying it to your painting.
Painting The Base Layer
Painting the base layer is the first step to create a strong foundation. This layer sets the stage for all details later. It defines the dog’s shape and basic colors. A good base helps the final painting look balanced and clear.
Use broad strokes and simple shapes. Keep your brushwork loose. Avoid small details at this stage. Focus on covering the canvas evenly. This part is about building form and depth.
Blocking In Large Areas
Start by painting the biggest parts of the dog. Use a medium brush for better control. Cover areas like the body, head, and large fur patches. Choose colors that match your dog’s main tones. Don’t worry about exact edges now. Just fill the space with flat colors. This step helps you see the dog’s general shape.
Establishing Light And Shadow
Next, add shadows and light spots to the base layer. Look at your dog’s photo or real pet. Notice where light hits and where shadows fall. Use darker colors for shadowed parts. Use lighter colors for highlights. Paint these areas softly. This technique gives your dog volume. It creates a three-dimensional look early on.

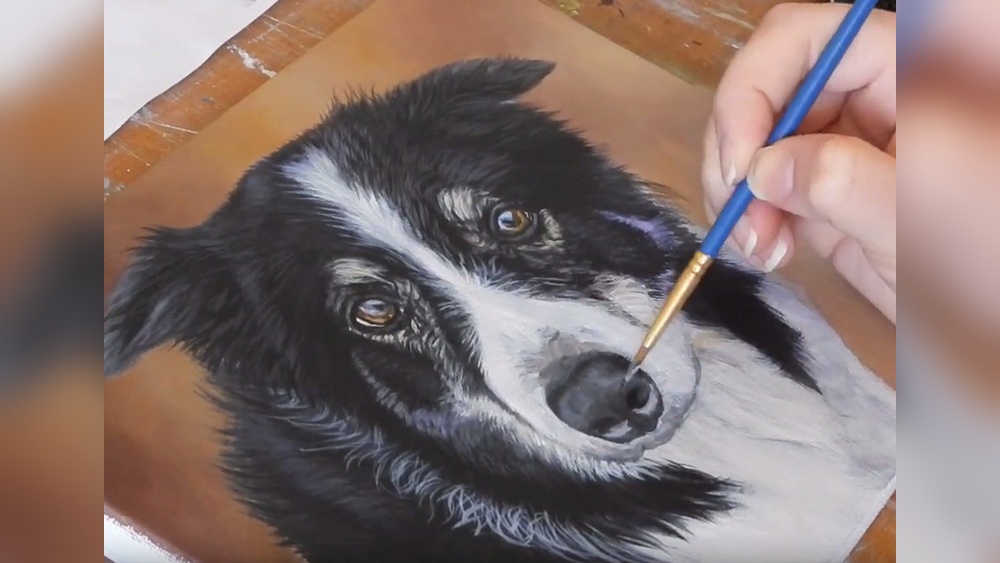
Credit: www.youtube.com
Adding Texture And Details
Adding texture and details brings your dog painting to life. It makes the artwork feel real and full of character. Small touches create depth and interest. Focus on the fur, eyes, and nose to capture your dog’s unique features. These details give your painting personality.
Painting Fur Strands
Use a fine brush to paint individual fur strands. Start with a base layer of color for the fur. Then, add lighter and darker strokes to show the fur’s direction. Short, quick strokes work best for a natural look. Vary the brush pressure to create thick and thin lines. Layering different shades adds depth and texture.
Highlighting Eyes And Nose
Eyes and nose are focal points in a dog painting. Use bright white or light colors to add highlights on the eyes. This makes them look shiny and alive. Paint small reflections to give a glassy effect. For the nose, add tiny dots and lines to show texture. Use dark shades with subtle highlights for a wet look. These details make the face expressive and realistic.
Final Touches
The final touches bring your acrylic dog painting to life. This step gives the painting a polished, complete look. Small changes make a big difference in how your artwork feels. Pay close attention to details and balance. This helps your dog painting look realistic and vibrant.
Enhancing Depth And Contrast
Use darker shades to deepen shadows around the dog’s fur and features. This adds volume and makes the painting pop. Lighten areas where the light hits the dog’s face and body. This creates a natural, three-dimensional look. Blend softly between light and dark to avoid harsh lines. Check the eyes and nose for bright highlights. These small touches grab attention and bring emotion to your painting.
Correcting Mistakes
Look closely for any paint outside the lines or uneven colors. Use a small brush and matching colors to fix these spots. If a color is too strong, gently blend it with a damp brush. Acrylic dries fast, so corrections must be quick. Avoid overworking the paint, or it may lose texture. Sometimes, adding a thin glaze can smooth out mistakes without repainting. Take breaks to see your painting with fresh eyes. This helps spot errors you missed before.
Sealing Your Artwork
Sealing your acrylic painting of a dog protects it from dust, dirt, and fading. This step keeps your artwork looking fresh and vibrant for years. It also adds a nice shine or matte finish, depending on your choice. Proper sealing enhances the colors and details of your painting. Let’s explore how to choose the right varnish and apply it correctly.
Choosing A Varnish
Select a varnish that matches your desired finish: glossy, satin, or matte. Glossy varnish gives a shiny look that brightens colors. Satin offers a soft sheen without much shine. Matte varnish provides a flat finish with no shine, for a natural look. Use a varnish made for acrylic paintings to ensure good protection. Check if the varnish is water-based or solvent-based. Water-based varnishes are easier to clean and less toxic.
Applying The Finish
Make sure your painting is completely dry before sealing. Work in a dust-free area to avoid particles sticking to the varnish. Use a clean, soft brush or spray to apply the varnish. Apply thin, even coats to avoid drips and bubbles. Let the first coat dry fully before applying a second. Two or three coats provide the best protection. Allow the final coat to dry for at least 24 hours before handling your painting.
Frequently Asked Questions
How Do I Start Painting A Dog With Acrylics?
Begin with a light pencil sketch of your dog on canvas. Then, block in basic colors using broad brush strokes. This sets the foundation for details and depth.
What Brush Types Work Best For Dog Portraits?
Use a mix of flat, round, and detail brushes. Flat brushes cover large areas, round brushes add texture, and fine brushes capture details like fur and eyes.
How Can I Create Realistic Dog Fur Textures?
Layer different shades of paint using short, directional strokes. Vary brush pressure and colors to mimic the fur’s natural flow and depth.
Should I Use A Reference Photo For Painting Dogs?
Yes, a clear reference photo helps capture accurate proportions and details. It ensures your painting looks lifelike and true to your dog’s features.
Conclusion
Painting a dog with acrylics is fun and rewarding. Start with simple shapes and build details slowly. Choose colors that match your dog’s fur. Keep your brush strokes light and steady. Practice helps you improve every time. Enjoy the process and be patient with yourself.
Soon, you will create a lovely dog portrait. Painting lets you capture your pet’s unique look. Give it a try and see your skills grow. Art is about expressing what you love. Keep painting, and have fun!