Have you ever wanted to capture the magic of a hot air balloon floating gently across a bright sky? Painting one with acrylics is easier than you might think, and it’s a fantastic way to bring vibrant colors and joyful energy into your artwork.
Whether you’re a beginner or looking to sharpen your skills, this guide will walk you through simple, clear steps to create your own stunning hot air balloon painting. Ready to turn your canvas into a colorful sky adventure? Let’s dive in and make your acrylic painting truly soar!
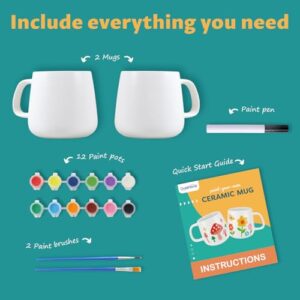
Materials Needed
Gathering the right materials is the first step to painting a hot air balloon with acrylics. Having quality supplies makes the process easier and more enjoyable. This section covers essential items needed for your painting project.
Choosing Acrylic Paints
Select acrylic paints with vibrant colors. Look for a set that includes primary colors and a few extra shades. High-quality paints offer better coverage and brighter results. Choose paints labeled as artist-grade for richer pigments. Avoid cheap paints that may fade or crack over time.
Brushes And Tools
Use brushes with synthetic bristles for acrylic paint. Include small round brushes for details and larger flat brushes for background areas. A palette knife helps mix colors smoothly. Keep a cup of water nearby to clean brushes. Paper towels or rags are useful for wiping excess paint.
Canvas And Surface Preparation
Pick a pre-stretched canvas or acrylic paper as your painting surface. Make sure it is clean and dry before starting. Apply a thin layer of gesso if the surface is unprimed. This step improves paint adhesion and protects the canvas. Allow the gesso to dry completely before painting.

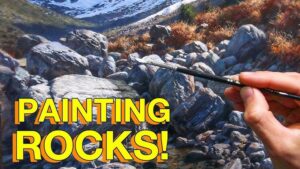
Credit: theartsherpa.com
Sketching The Balloon
Sketching the balloon is the first step to a beautiful acrylic painting. It sets the stage for the colors and details that follow. Taking time to sketch carefully helps avoid mistakes later. Use light pencil strokes to keep your sketch easy to adjust.
Basic Shapes And Outlines
Start by drawing the main shape of the balloon. Use an oval or circle to show the balloon’s body. Draw a small rectangle or trapezoid under the oval for the basket. Connect the basket to the balloon with two or more thin lines. These lines represent the ropes or cables.
Keep your lines soft and simple. Focus on the overall form before adding small parts. Check the size and position of each shape. Make sure they look balanced and natural.
Adding Details To The Balloon
Next, add the balloon’s panels or segments. Draw curved lines from the top center to the bottom edge of the oval. These lines create the balloon’s fabric sections. You can make the sections equal or vary their size for interest.
Sketch the burner details inside the basket if you want. Add small squares or circles for buttons and knobs. Lightly mark any patterns or designs you plan to paint later. These details bring the balloon to life.
Remember, your sketch is a guide. It does not need to be perfect. Keep the shapes clear but simple. You will add color and texture in the painting stage.
Painting The Background
Creating the background sets the mood for your hot air balloon painting. A well-painted sky adds depth and life to the artwork. It gives a sense of space and atmosphere. Focus on smooth color transitions and natural tones for the sky. This part of the painting invites viewers to imagine the balloon floating in the air.
Start with broad strokes and simple shapes. Avoid detailed work at this stage. The background should support, not overshadow, the hot air balloon itself.
Selecting Sky Colors
Choose colors that reflect the time of day you want to show. Soft blues work well for a clear daytime sky. Warm oranges and pinks fit a sunrise or sunset scene. Use a mix of light and dark shades to add interest. Avoid using only one flat color. Adding subtle variations makes the sky look natural and alive.
Consider the weather too. Light grays and whites can suggest clouds or mist. Bright, clear colors create a cheerful mood. Pick colors that complement the balloon’s colors for harmony.
Blending Techniques For Smooth Sky
Blending helps create a smooth, seamless sky. Use a clean, dry brush to softly mix colors on the canvas. Work quickly while the paint is still wet. Start with the lightest color at the horizon. Gradually add darker tones as you move upward. This gradient effect mimics how the sky looks in real life.
Try small circular or horizontal strokes to blend edges. Avoid hard lines between colors. If needed, use a damp sponge or soft cloth to soften transitions. Patience and gentle strokes are key to a smooth background.
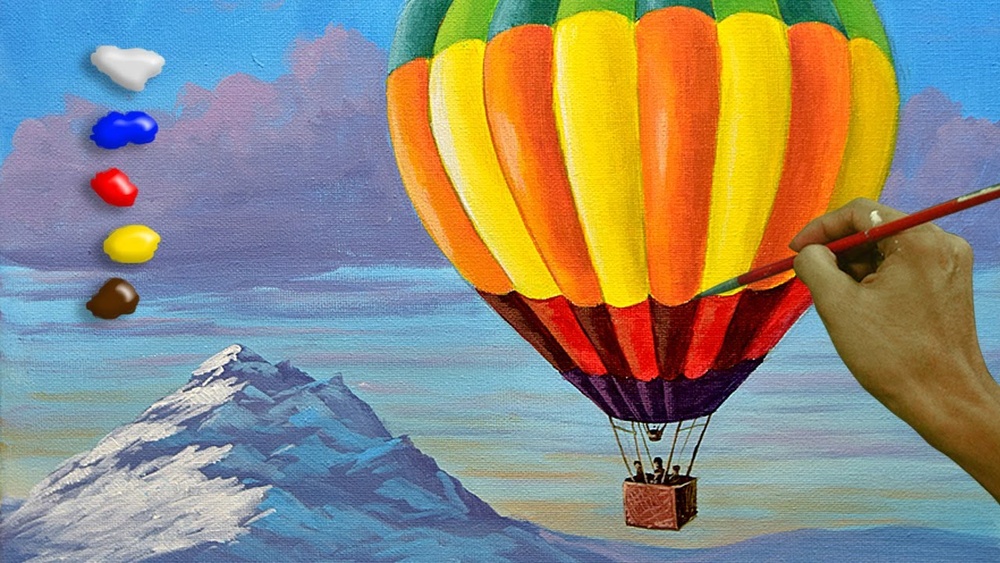
Coloring The Balloon
Coloring the hot air balloon brings your painting to life. The colors show its shape and mood. Use bright and soft colors to create depth and interest. Paint carefully to keep the balloon smooth and round. Start with simple color layers before adding details.
Take your time. Watch how colors blend and change. This part sets the tone for the whole artwork. Let’s explore how to build colors step by step.
Layering Base Colors
Begin with a light base color for the balloon’s main surface. Use a large brush for smooth, even coverage. Let the paint dry before adding more layers. Add a second layer to deepen the color and hide brush marks.
Mix colors on your palette to get soft shades. Use gentle strokes to blend colors at the edges. This adds roundness and volume to the balloon. Avoid thick paint in the first layers for better control.
Adding Patterns And Highlights
After the base, add stripes, checks, or dots for a lively design. Use a smaller brush for crisp lines and clear shapes. Choose contrasting colors to make patterns pop.
Next, add highlights on the balloon’s curves. Use a lighter color and a thin brush. Paint where light hits the balloon to create shine and dimension. Add shadows with a darker tone on the opposite side.
These details make the balloon look round and bright. Paint slowly and step back to check your work. Adjust colors and shapes to balance the design.
Creating Depth And Shadows
Creating depth and shadows is key to making your hot air balloon painting look real. Shadows add a sense of volume and space. They help your balloon appear round and three-dimensional. Use darker tones carefully to show where light cannot reach. This makes your painting more interesting and alive.
Shading The Balloon Sections
Start by dividing the balloon into separate sections. Each section can have its own light and shadow. Choose a light source direction for your painting. Paint the side facing the light with bright colors. Use darker shades on the opposite side. Blend the colors gently to avoid harsh lines. This technique shapes the balloon and gives it a round look. Adding small highlights on the brightest areas enhances the effect.
Shadowing The Basket And Strings
The basket and strings also need shadows to look real. Paint the basket with mid-tone colors first. Add darker shades on the side away from the light. Use thin brush strokes for the basket texture. For the strings, paint thin shadows where they overlap the balloon or basket. This shows their position in space. Shadows under the basket help it feel like it is hanging. These details bring your painting to life and make it believable.

Credit: us.amazon.com
Detailing And Textures
Adding fine details and textures brings your hot air balloon painting to life. These elements create depth and interest in your artwork. Focusing on ribbons, accessories, and atmospheric effects enhances realism. Use small brushes and layering techniques to build complexity. Each stroke should add character without overwhelming the main subject.
Painting Balloon Ribbons And Accessories
Begin with thin, controlled brush strokes for ribbons. Choose colors that contrast well with the balloon’s body. Paint ribbons flowing naturally to show movement. Use lighter shades along edges for highlights. Shadows add volume and make ribbons appear three-dimensional.
Accessories like baskets and ropes need careful attention. Use a fine brush to capture details. Add texture by layering paint in short strokes. Vary the pressure on your brush for different effects. This approach gives a realistic touch to small objects.
Adding Cloud And Atmospheric Effects
Clouds and sky set the mood of your painting. Use soft, circular motions to blend white and blue hues. Create light, fluffy clouds by dabbing gently with a dry brush. Blend edges softly to avoid harsh lines.
Atmospheric effects like sunlight or shadows enhance depth. Apply thin washes of color to suggest distance. Use cooler colors for far clouds, warmer tones for those near. This contrast makes your scene more dynamic and believable.
Finishing Touches
Finishing touches bring your hot air balloon acrylic painting to life. These final steps make your artwork clean, bright, and lasting. Careful work now enhances every detail and protects your effort for years.
Correcting Mistakes
Check your painting for any small errors or spots that need fixing. Use a fine brush and matching paint to gently cover mistakes. Let the paint dry before adding more layers. Lightly sanding rough spots can smooth the surface for a cleaner look. Take your time to make corrections carefully to keep the colors vibrant.
Sealing And Protecting The Painting
Apply a clear acrylic sealer to protect your painting from dust and fading. Choose a matte or glossy finish based on your style. Spray sealers offer even coverage without disturbing the paint. Hold the can about 12 inches away and spray in thin, light coats. Allow each coat to dry fully before applying the next. Proper sealing preserves your hot air balloon’s bright colors and details.
Tips For Beginners
Starting your acrylic hot air balloon painting can feel exciting and a bit tricky. Simple tips help you paint smoothly and enjoy the process. These beginner-friendly ideas will guide you to better results and fewer mistakes.
Follow these easy steps to create bright, clean, and beautiful artwork.
Mixing Acrylics With Water Or Mediums
Thin your acrylic paint with water to make it flow easily. Use only a small amount of water. Too much water can weaken the paint’s color and adhesion. Acrylic mediums work better to keep paint strong and shiny. They help you blend colors smoothly and dry slowly. Try mixing paint with a medium for softer edges and richer tones.
Maintaining Clean Brushes
Clean brushes often while you paint to avoid muddy colors. Rinse your brush in water between colors. Use a cloth or paper towel to remove extra paint. Dirty brushes can spoil your hot air balloon’s bright colors. Keep brushes soft by washing them with mild soap after painting. This keeps them ready for your next artwork.
Avoiding Common Painting Errors
Do not press hard with your brush; light strokes work best. Avoid painting thick layers all at once. Let each layer dry before adding another. This prevents colors from mixing in unwanted ways. Plan your colors before you start. This helps avoid mistakes and saves time. Paint the balloon’s shapes clearly to keep your design neat and lively.

Credit: www.youtube.com
Frequently Asked Questions
How To Draw A Beautiful Hot Air Balloon?
Start by sketching a large oval for the balloon’s envelope. Add vertical panels and a small basket below. Use bright colors and shading for depth. Finish with details like ropes and patterns to enhance beauty.
Should I Mix Water With My Acrylic Paints Or Just Paint?
Mix a small amount of water with acrylic paints to thin them for smoother application. Avoid adding too much water to prevent color fading and poor adhesion. Use water sparingly to maintain paint’s vibrancy and durability. This helps achieve desired consistency and better brush control.
What Kind Of Paint Sticks To Balloons?
Acrylic paint sticks well to balloons, especially with a thin clear lacquer spray applied first. This prevents smudging and enhances adhesion.
What Does Adding Rubbing Alcohol To Acrylic Paint Do?
Adding rubbing alcohol to acrylic paint creates unique textures and effects by breaking the paint’s surface tension. It helps produce interesting patterns and enhances fluidity.
Conclusion
Painting a hot air balloon with acrylics can be fun and relaxing. Use simple shapes and bright colors to bring your balloon to life. Take your time blending shades for a smooth look. Remember, practice helps improve your skills. Enjoy the process and express your creativity freely.
Keep experimenting with different techniques and colors. Soon, you will create beautiful hot air balloon paintings with ease.