

Quick answer: To paint a mural, start with a scaled design and a measured wall, then clean, repair and prime the surface. Transfer the design using a grid, projector or pounce pattern, block in large areas of flat color first, and work from background to foreground and from top to bottom. Add details and outlines last, then protect the finished mural with a clear coat, especially outdoors. Exterior acrylic latex or dedicated mural paints are the usual choice for durability.
A mural turns a blank wall into a landmark. It can brighten a child’s bedroom, give a café personality or make a fence or garage wall the most talked-about spot on the block. Murals feel daunting because of their size, but the process breaks into manageable stages that any patient beginner can follow. This guide explains how to paint a mural step by step, from planning and surface prep to transferring the design, painting and sealing.
It covers both indoor and outdoor murals, with notes on paint choices, tools and how to keep a large design accurate.
Plan the Mural Before Touching the Wall
Most mural problems start with poor planning. Before buying paint, work through these questions:
- Location: Indoor or outdoor? Sun exposure, moisture and foot traffic affect paint choice.
- Surface: Drywall, plaster, brick, concrete block, stucco, wood or metal? Each needs different prep.
- Permission: For rentals, shared walls or public-facing exteriors, get written permission. Some cities require permits for exterior murals.
- Size and viewing distance: A mural seen from across a street needs bold shapes and high contrast. One in a hallway can have finer detail.
- Style: Flat graphic shapes are far quicker and easier than realistic, blended imagery.
Supplies
| Item | Indoor mural | Outdoor mural |
|---|---|---|
| Primer | Interior acrylic primer | Exterior primer or masonry primer for brick, block and stucco |
| Paint | Interior acrylic latex or artist acrylics | Exterior acrylic latex or mural-grade acrylic |
| Brushes | Flats (1 to 3 inch), rounds, liners | Same, plus larger brushes for rough surfaces |
| Rollers | Mini rollers and 9 inch rollers | Thicker nap rollers for textured surfaces |
| Transfer tools | Projector, chalk, grid string, pounce wheel | Chalk, chalk line, grid, projector at night |
| Sealer | Optional clear acrylic varnish | UV-resistant mural clear coat or anti-graffiti coating |
| Access | Step ladder | Extension ladder or scaffolding |
For outdoor work, paint chemistry has a big influence on how long colors stay bright. Our guide to the best paint for outdoor murals compares exterior latex, mural acrylics and protective coatings for different climates.
Is Liquitex Good for Murals?
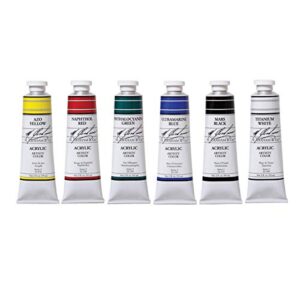
Many painters ask whether artist acrylic brands such as Liquitex suit mural work. Artist acrylics, including heavy body and soft body lines from brands like Liquitex, generally offer high pigment load and good lightfastness ratings on many colors, which makes them appealing for detailed areas and strong color accents. The trade-offs are cost and quantity: artist tubes and jars are expensive for covering large walls.
A common approach is to use exterior or interior house paint for large background areas and artist acrylics for details and highlights. If you use artist acrylics outdoors, check each color’s lightfastness rating, prepare the wall correctly and apply a UV-protective clear coat. Some manufacturers make mural-specific lines designed for exterior use, which can be worth comparing.
How to Paint a Mural Step by Step
Step 1: Measure and Design
Measure the wall’s width and height, noting windows, outlets, vents and doors. Create your design at a scale that matches the wall’s proportions, for example 1 inch equals 1 foot. Work out colors and keep a numbered color key. Designs with clear shapes and limited colors are easier to paint and maintain.
Test colors before committing. Paint swatches on the actual wall or on primed boards held against it, and look at them at the times of day the mural will be seen most. Outdoor light, in particular, can make colors appear lighter and less saturated than they do indoors.
Step 2: Prepare the Wall
- Clean: Wash indoor walls with a mild detergent. Pressure wash or scrub exterior walls to remove dirt, chalking paint and mildew. Let everything dry fully.
- Repair: Fill holes and cracks, scrape loose paint and sand rough spots.
- Prime: Apply a primer appropriate to the surface. Masonry needs a masonry primer; glossy painted surfaces need a bonding primer. Priming helps adhesion and gives a uniform base so colors look consistent.
- Base coat (optional): Roll the dominant background color over the whole wall.
Step 3: Transfer the Design
Choose a method suited to your design and wall.
- Grid method: Draw a grid over your design and a matching, scaled grid on the wall with chalk or a chalk line. Copy what is in each square. Accurate and requires no equipment.
- Projector: Project the design onto the wall in a darkened room or at night and trace with chalk or a pencil. Fast and accurate, but keep the projector square to the wall to avoid distortion.
- Pounce pattern: Print the design at full scale, perforate the lines with a pounce wheel, tape it to the wall and dab chalk through the holes. Good for repeating elements.
- Doodle grid: Spray or draw random squiggles on the wall and on a photo of the wall, draw your design over the photo digitally, then use the squiggles as landmarks to draw it on the wall. Popular with street artists.
Step 4: Block In Large Areas
Fill the largest color areas first with rollers and large brushes. Work from the top down so drips land on unpainted areas, and from background to foreground. Do not worry about perfect edges yet. Two coats may be needed for even coverage, especially with light colors over dark.
Step 5: Paint Mid-Size Shapes
Move to medium shapes and secondary colors. Cut in edges with an angled brush. Keep a damp rag nearby to wipe mistakes quickly.
Step 6: Add Details and Shading
Use smaller brushes for details, shading and highlights. On large murals, detail should be concentrated in focal areas viewers see up close. Blending is harder on walls because paint dries quickly; many muralists use layered flat tones (cel shading) instead of smooth gradients.
Step 7: Outline (Optional)
Clean outlines in a dark color tidy up edges and make the design readable from a distance. Use a liner brush or a quality paint marker for smaller indoor murals.
Step 8: Step Back and Correct
Look at the mural from the main viewing distance. Fix proportions, color balance and any missed spots. Photos help; viewing the mural small on a phone reveals problems quickly.
Step 9: Seal the Mural
Once fully dry, according to the paint label, apply a clear coat. Outdoors, a UV-resistant clear coat helps slow fading, and an anti-graffiti coating makes cleaning easier in public spaces. Indoors, a clear matte or satin varnish protects against scuffs.
How to Paint a Night Sky Mural
Night sky murals are popular in bedrooms, nurseries and ceilings. Here is a quick method:
- Roll a base of deep navy or blue-black across the wall.
- While wet, blend in patches of dark violet, teal and indigo with a large brush or sponge to suggest a nebula or the Milky Way.
- Let it dry, then add soft clouds of lighter blue and violet with a dry sponge.
- Spatter stars by loading a stiff brush with white paint and flicking the bristles with your thumb. Mask surrounding areas first.
- Paint a few larger stars with a small round brush, adding cross-shaped glints to the brightest.
- Add a moon with a circle template, shading it with grays and adding a soft glow around it.
- Optional: paint a silhouette of trees or a skyline along the bottom in black.
On a ceiling, work in small sections and take frequent breaks, since painting overhead is tiring. Glow-in-the-dark paint can be dotted over a few stars for a nighttime effect, but test it first because many glow paints look slightly greenish or chalky in daylight.
Choosing a Mural Style for Your Skill Level
| Style | What it involves | Best for |
|---|---|---|
| Flat graphic | Solid color shapes with crisp edges | First murals, kids’ rooms, businesses |
| Cel-shaded | Flat shapes with two or three stepped tones for shading | Characters, animals, bold outdoor work |
| Pattern or repeat | A motif repeated with stencils | Long walls, hallways, fences |
| Painterly | Loose brushwork, blended color | Experienced painters, indoor feature walls |
| Photorealistic | Detailed rendering and smooth gradients | Advanced artists with time and spray equipment |
If you are new to large-scale painting, a flat graphic or cel-shaded design gives the biggest visual impact for the least risk.
Mural Painting Tips for Beginners
- Simplify the design. Bold shapes and limited colors look stronger and take less time.
- Mix enough paint. Mix and label large batches of custom colors for touch-ups later.
- Keep a wet edge. Painting large areas in sections can show lap marks; work methodically.
- Watch the weather outdoors. Avoid painting in direct sun, rain, high humidity or low temperatures.
- Take breaks. Fresh eyes catch mistakes.
- Photograph progress. Helpful for adjustments and future touch-ups.
Common Mural Mistakes
| Mistake | Effect | How to avoid it |
|---|---|---|
| Skipping primer | Peeling, uneven color | Prime with a product suited to the surface |
| Too much detail | Takes forever; unreadable at a distance | Design for the viewing distance |
| Distorted transfer | Proportions look off | Keep projectors square; check grid measurements |
| Interior paint outdoors | Fading and peeling | Use exterior-rated paint |
| No clear coat outdoors | Faster fading, graffiti is hard to remove | Apply a UV-resistant or anti-graffiti clear coat |
| Running out of custom colors | Mismatched touch-ups | Mix extra and store in sealed containers |
How Long Does a Mural Take?
Time varies widely. A simple 8×10 foot interior mural with flat shapes might take a weekend or two for a beginner. A detailed exterior mural on a large wall can take a professional team days or weeks. Prep and design often account for a large share of the total time.
Estimating Paint Quantities
Calculate the wall area (width times height) and multiply by the share of the design each color covers. A gallon of wall paint commonly covers somewhere around 250 to 400 square feet per coat on smooth, primed surfaces, while rough brick, block and stucco can absorb noticeably more. Background colors are usually bought by the gallon; small accent colors can come from quarts, sample pots or artist jars. Add 10 to 20 percent extra for touch-ups and keep it labeled with the mural’s location.
Maintaining a Mural
Inspect outdoor murals yearly for peeling, fading and graffiti. Clean gently with mild soap and water. Touch up chips with saved paint. Depending on sun exposure and coatings, some muralists reapply clear coats every few years to extend color life.
FAQs
What paint is best for painting a mural?
For large areas, quality acrylic latex house paint is common, using exterior-grade products outdoors. Artist or mural-grade acrylics are often used for details and vivid colors. Always prime first.
Is Liquitex good for murals?
Artist acrylics such as Liquitex are often used for murals because of their pigment strength and lightfastness on many colors. They are expensive for large areas, so many muralists use them for detail work and use house paint for backgrounds. Check lightfastness ratings and seal outdoor work.
How do you transfer a design to a wall for a mural?
Common methods include the grid method, a projector, pounce patterns and the doodle grid technique. The grid method requires no equipment, while projectors are fastest for complex designs.
Do you need to prime a wall before painting a mural?
Yes, in most cases. Primer improves adhesion, seals porous surfaces and gives colors a consistent base. Use masonry primer for brick, block and stucco.
How do you paint a night sky mural?
Roll a deep navy base, blend in violet and teal while wet, add soft cloudy layers with a sponge, and spatter white stars with a stiff brush. Paint larger stars and a moon by hand for focal points.
How do you protect an outdoor mural?
Use exterior-rated paint, prime properly, and apply a UV-resistant clear coat once the paint is dry. Anti-graffiti coatings make cleaning easier in public locations.
Final Thoughts
A mural is a big project, but it becomes manageable when you plan carefully, prep the wall properly and paint from large shapes to small details. Simple designs with bold colors are often the most striking. If your mural will face sun and weather, read our comparison of weather-resistant paints for exterior murals before choosing materials.


One Comment