Ready to bring the stunning beauty of a peacock to life on your canvas? Painting a peacock with acrylics might sound challenging, but with the right guidance, you can create a vibrant masterpiece that dazzles with every brushstroke.
In this guide, you’ll discover simple techniques and easy steps to capture the rich colors and elegant feathers of this majestic bird. Whether you’re a beginner or looking to sharpen your acrylic skills, this tutorial will help you unlock your artistic potential and paint a peacock that truly stands out.
Keep reading, and watch your creativity take flight!
Materials Needed
Gathering the right materials is the first step to painting a beautiful peacock with acrylics. The quality and type of supplies affect your final artwork. Choose colors, brushes, and surfaces carefully. Prepare your workspace for smooth painting sessions.
Acrylic Paints Selection
Pick vibrant acrylic paints for bright, eye-catching colors. Include shades of blue, green, purple, and yellow. Add black and white to mix shadows and highlights. Use good-quality paints for smooth blending and strong pigment.
Brush Types
Use a variety of brushes for different effects. Flat brushes cover large areas quickly. Round brushes help with details and fine lines. Fan brushes create soft textures for feathers. Keep brushes clean to maintain shape and performance.
Canvas And Palette
Choose a canvas size that fits your space and skill level. A stretched canvas or canvas board works well for acrylics. Use a palette to mix colors easily. A plastic or glass palette is simple to clean and reuse.
Additional Supplies
Have water containers to rinse brushes between colors. Keep paper towels or rags nearby for drying brushes. Use a palette knife for mixing thick paint layers. Consider an easel to hold your canvas steady while painting.
Setting Up Your Workspace
Setting up your workspace is the first step to a smooth painting process. A well-prepared area helps you focus on creating your peacock artwork. It reduces distractions and keeps your tools close. This makes painting more enjoyable and efficient.
Pay attention to light, material placement, and canvas readiness. These factors affect your painting results. Let’s explore how to set up your space properly.
Choosing The Right Lighting
Good lighting shows true colors and details. Natural light is best for painting. Set your workspace near a window with plenty of daylight. Avoid direct sunlight to stop glare or shadows.
If natural light is limited, use a daylight LED lamp. Position it above or beside your canvas. This gives even light and reduces eye strain. Proper lighting helps you see every brushstroke clearly.
Organizing Materials
Keep your paints, brushes, water cup, and palette within reach. Use small containers or trays to separate colors and tools. This prevents spills and saves time searching.
Arrange brushes by size and type for quick access. Place your acrylic paints in order of use or color family. A clean and tidy workspace keeps your focus on painting the peacock.
Preparing The Canvas
Start with a clean, dry canvas. Wipe the surface gently to remove dust. Apply a layer of gesso if the canvas feels rough or uneven.
Gesso creates a smooth, absorbent surface for acrylic paint. Let it dry completely before painting. Position the canvas at a comfortable angle to avoid neck or back pain. Proper preparation ensures your peacock painting looks vibrant and neat.
Sketching The Peacock
Sketching the peacock lays the foundation for a stunning acrylic painting. Start with a clear plan to capture its unique form. A well-drawn sketch guides your brush and helps maintain correct proportions. This step makes the painting process smoother and more enjoyable. Focus on the basic shapes first, then add details gradually. The sketch does not need to be perfect. It serves as a roadmap for your artwork.
Basic Shapes And Proportions
Begin by drawing simple shapes to represent the peacock’s body parts. Use an oval for the body and a circle for the head. Sketch a long, curved line for the neck. Add a large fan shape for the tail feathers. Keep shapes light and loose for easy adjustments. Check the size relationships between parts to keep proportions accurate. This step helps you avoid mistakes later.
Outlining Key Features
Next, outline the peacock’s main features over the basic shapes. Draw the beak as a small triangle at the head’s front. Add an eye using a small circle with a curved line for the eyelid. Sketch the legs with thin lines beneath the body. Mark the feather details lightly on the tail fan. Focus on where each feature sits on the body. This outline starts to bring the peacock to life.
Refining The Sketch
Now refine your sketch by adding curves and smoothing lines. Erase unnecessary shapes and adjust details for accuracy. Define the feathers’ edges with gentle, flowing lines. Make the neck slender and elegant. Add texture hints to the tail feathers for realism. Keep your pencil strokes soft to avoid heavy marks. This refined sketch will guide your painting with confidence.

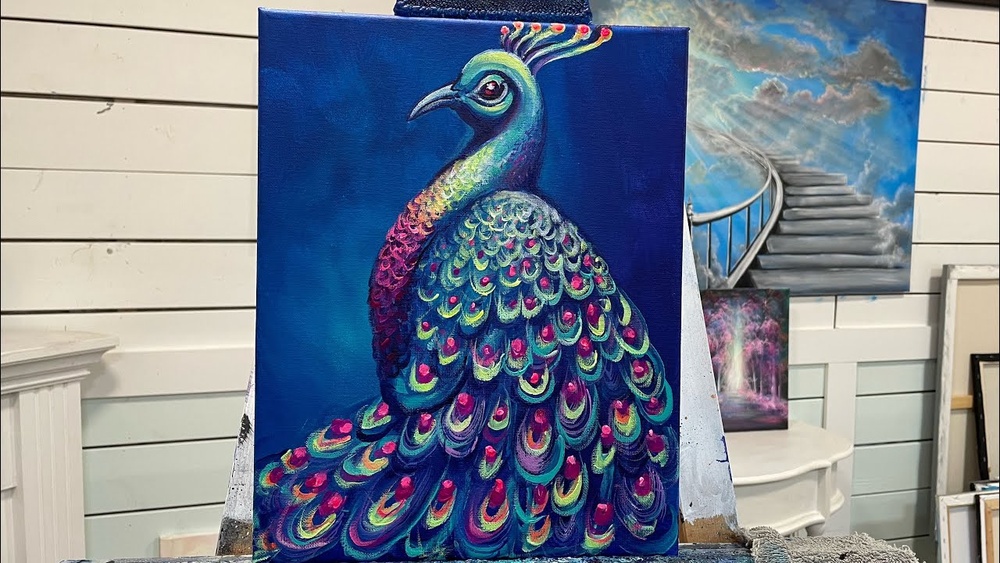
Credit: skyepratt.com
Painting The Background
Painting the background sets the mood for your peacock artwork. It helps your peacock stand out and adds harmony to the scene. A well-chosen background supports the bird’s colors and shapes. It also gives depth and interest to the painting. Follow these steps to create an appealing background with acrylics.
Choosing Background Colors
Pick colors that contrast with the peacock’s bright feathers. Soft blues, greens, or muted earth tones work well. Avoid colors that compete with the peacock’s vibrant hues. Darker shades can make the bird pop. Lighter colors create a calm, airy feel. Think about the setting you want to show. A natural environment might use green and brown. A more artistic look might use blues or purples.
Applying Base Layers
Start by covering the entire background with a smooth base layer. Use a large brush for quick, even strokes. Thin the paint slightly with water for better flow. Apply one or two coats for full coverage. Let each layer dry before adding the next. This base helps later layers blend well. It also protects your canvas and keeps colors bright.
Adding Texture And Depth
Add texture to make the background lively and interesting. Use a dry brush or sponge to dab paint softly. Try mixing different shades of your base colors. Layer these shades to create light and shadow. This gives the background a three-dimensional feel. Avoid heavy texture near the peacock to keep it clear. Use softer textures further away to draw the eye to the bird.
Painting The Peacock’s Body
Painting the peacock’s body sets the foundation for a vibrant and lifelike artwork. This part of the painting captures the bird’s elegance and rich colors. Focus on smooth transitions and realistic details to make the body stand out. Use acrylics to build layers that bring depth and texture to the peacock’s form.
Base Colors And Blending
Start with the base colors on the peacock’s body. Use deep blues and bright greens to reflect its natural hues. Apply the paint in thin layers for even coverage. Blend the colors softly to avoid harsh lines. Use a clean, dry brush to merge colors gently. This creates a smooth, natural look that mimics feathers.
Adding Shadows And Highlights
Add shadows to give the body depth and shape. Use darker shades of blue and green under the wings and along the sides. Apply highlights on raised areas like the chest and back with lighter tones. Small touches of white or pale blue work well for highlights. This contrast makes the body appear three-dimensional and lively.
Detailing The Head And Beak
The head and beak need fine details to bring personality to the peacock. Use a small brush for precise lines. Paint the eye clearly, adding a tiny white dot for reflection. Shape the beak with a mix of grey and brown shades. Add small strokes to show texture. These details complete the body and give the peacock character.
Creating The Feathers
Creating the feathers of a peacock is a key step in making your acrylic painting come alive. The feathers show the bird’s beauty and grace. Focus on color, pattern, and texture to capture their charm. Use bright colors and detailed strokes to bring out the feathers’ unique look.
Layering Colors For Vibrancy
Start with a base layer of light colors on each feather. Use blues, greens, and yellows to match the peacock’s natural hues. Let the paint dry before adding more layers. Add darker shades on top to create depth. Layering colors makes the feathers look bright and lively. Use thin brush strokes to blend colors smoothly.
Painting Feather Patterns
Peacock feathers have eye-like patterns called “eyes.” Paint these by first making oval shapes. Fill the ovals with blue or green. Add a small circle inside with a contrasting color, like gold or purple. Use fine brushes to paint the lines and edges. Repeat the pattern on several feathers for a realistic effect.
Adding Texture And Dimension
Texture brings the feathers to life. Use a dry brush or a fan brush to add fine lines on the feathers. This shows the feather strands. Apply thicker paint near the feather base to create volume. Lightly dab white or lighter colors on the edges for shine. These small details give your painting a 3D feel.
Detailing The Eye
Detailing the eye of a peacock brings life to your acrylic painting. The eye is small but very important. It draws the viewer’s attention and adds character. Painting it carefully creates depth and realism. Let’s explore how to detail the eye with simple steps.
Painting The Iris And Pupil
Start by painting a small circle for the iris. Use deep blues or greens to mimic the peacock’s natural colors. Then add a smaller black circle inside for the pupil. Keep the edges clean and sharp. Use a fine brush for precision. This contrast makes the eye stand out clearly.
Highlighting For Realism
Add tiny white dots or lines on the pupil to create a light reflection. This highlight makes the eye look wet and alive. Blend the edges softly to avoid harsh lines. Highlights give the eye a natural shine and catch light beautifully. It makes your painting more engaging.
Enhancing Surrounding Feathers
Paint small, delicate feathers around the eye to frame it well. Use shades of blue, green, and gold for a rich effect. Layer the feathers with short, thin brush strokes. These details emphasize the eye and add texture. Surrounding feathers bring harmony to the focal point of the eye.
Final Touches
Final touches bring your peacock painting to life. This stage enhances details and adds depth. It turns a simple image into a vibrant artwork. Careful attention here improves the overall look. Take your time and work gently.
Outlining And Defining
Use a fine brush to outline the peacock’s feathers and body. Choose a darker shade to create contrast. This helps separate different parts of the bird. Clear lines make the shapes stand out well. Avoid thick lines; keep them smooth and light. Outlining adds sharpness and guides the viewer’s eye.
Adding Glows And Reflections
Add small highlights to feathers and eyes with white or light colors. These glows create a shiny, wet look. They simulate light reflecting on the peacock’s feathers. Use a tiny brush or even a toothpick for precision. Place highlights where light would naturally hit. This step gives your painting more realism and shine.
Correcting Mistakes
Check your painting for any unwanted spots or color overlaps. Use a damp brush or a small amount of paint to fix errors. Gently remove or cover mistakes without damaging nearby areas. Take breaks to spot errors with fresh eyes. Fixing mistakes now makes the final piece cleaner and more polished.
Sealing And Preserving
Sealing and preserving your acrylic peacock painting protects it from dust, sunlight, and damage. This step keeps colors bright and prevents cracking or fading over time. Proper sealing also adds a professional finish to your artwork.
Choosing A Varnish
Select a varnish that suits your painting style and environment. Gloss varnish enhances colors and shine. Matte varnish reduces glare for a soft look. Satin varnish offers a balance between gloss and matte. Use an acrylic varnish designed for paintings. Avoid spray varnishes if you want full control and less mess.
Applying The Sealant
Ensure your painting is completely dry before sealing. Use a clean, wide brush for smooth application. Apply thin, even coats to avoid drips or uneven texture. Let the first coat dry fully, then apply a second coat if needed. Work in a dust-free area to keep the surface clean. Allow the varnish to cure for several days before handling.
Caring For Your Painting
Keep your sealed painting away from direct sunlight to prevent fading. Dust it gently with a soft, dry cloth. Avoid using water or cleaning chemicals on the surface. Store or hang the painting in a stable environment with moderate humidity. Regular care helps maintain your peacock’s vibrant colors for years.

Credit: www.youtube.com
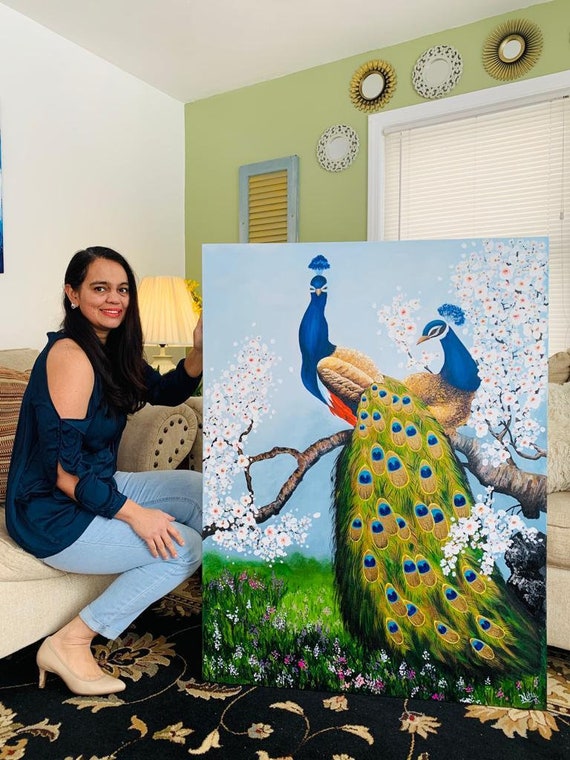
Credit: www.etsy.com
Frequently Asked Questions
How To Do Peacock Painting?
Start by sketching the peacock’s outline lightly. Paint the body with blues and greens. Add colorful feathers using layered brush strokes. Highlight details like eyes and beak with fine lines. Finish by blending shades for depth and vibrancy.
What’s The Easiest Way To Draw A Peacock?
Start by sketching a simple oval for the body and a circle for the head. Add a small triangle for the beak. Draw a fan shape for the tail feathers with eye-like patterns. Use bright blues, greens, and purples to color the peacock vividly.
What Simple Shapes Make A Peacock?
A peacock can be made using simple shapes like circles for the body, ovals for feathers, and triangles for the beak.
What Colors To Color A Peacock?
Use vibrant blues, greens, purples, and yellows to color a peacock. Add black for details and bright accents for a lively look.
Conclusion
Painting a peacock with acrylics brings joy and creativity. Practice each step patiently and enjoy the process. Use bright colors to make your peacock stand out. Remember to layer your paint for depth and texture. Keep your brush strokes smooth and confident.
Each painting improves your skill and style. Soon, you will create stunning peacock art with ease. Embrace mistakes as part of learning and keep painting!