Painting drapery and folds in oil is one of the most rewarding challenges for artists. From the old masters to modern painters, capturing the beauty and realism of fabric helps bring life and drama to a painting. But for many, painting cloth is intimidating.
The shifting shadows, changing lights, and complex shapes can make even experienced artists hesitate. Still, with a clear process and a few expert tips, anyone can learn to paint convincing drapery in oil.
This guide will walk you through every step, from setting up your subject to the final touches. You will learn how to see and simplify folds, choose the right colors, and build a sense of volume. Along the way, you’ll discover insights that most beginners miss, helping you avoid common mistakes and develop your own style.
Understanding Drapery And Folds
Before you start painting, it’s important to understand what makes drapery look real. Drapery refers to any cloth, like clothes, curtains, or sheets, as it falls and folds. The way fabric moves depends on its weight, the light source, and what’s underneath.
Look at how light creates shapes on fabric. There are always bright highlights, soft midtones, and deep shadows. The core shadow is the darkest part, usually found where the fabric turns away from the light. The highlight is where the light hits directly. Between these extremes are many subtle changes.
Different fabrics behave differently. For example, silk has sharp, bright highlights, while wool or linen has softer changes. Studying real fabric, or even photos, will help you see these differences.
Setting Up Your Drapery Subject
A good setup is the first step to successful painting. Take time to arrange your fabric so you get interesting folds and clear lighting.
- Choose Your Fabric: Pick a piece of cloth that has some weight, like cotton or linen. Very thin or very shiny fabrics can be harder for beginners.
- Arrange the Cloth: Drape the fabric over an object, chair, or table. Let it fall naturally. You can use pins or tape to hold certain folds.
- Lighting: Use a single, strong light source from one side. This creates clear shadows and highlights, which are easier to paint.
- Background: Place a plain background behind the drapery. This stops distractions and makes the folds easier to see.
Take a photo of your setup or do a quick sketch. This gives you a reference if the fabric moves later.
Materials And Tools For Painting Drapery
The right tools will make your painting process smoother. Here’s what you’ll need:
- Oil paints: A basic palette with white, black, yellow ochre, burnt sienna, ultramarine blue, and alizarin crimson is enough to start.
- Brushes: Use a mix of round and flat brushes. Flats are great for big shapes, rounds for details.
- Canvas or panel: Any size works, but 12×16 inches is a good starting point.
- Palette: For mixing your colors.
- Mediums: Linseed oil or a fast-drying medium can help make smoother blends.
- Rags and palette knife: For cleaning and mixing.
- Easel and good lighting: So you can see the colors and values clearly.
Planning Your Painting: Composition And Value
Before applying paint, decide how you want your drapery to look in the final artwork. A strong composition will help guide the viewer’s eye.
Simplifying The Folds
Start by looking for the biggest shapes. Don’t focus on every wrinkle or detail at first. Squint your eyes and try to see just three values:
- The brightest lights
- The deepest shadows
- The middle tones
This will help you map out the main structure. Draw the outlines lightly on your canvas with a pencil or thin paint. Mark where the major folds and shadows are.
Value Study
A value study is a small, simple version of your painting done in black, white, and grey. It helps you see if your composition works before you add color. Many artists skip this step, but it saves time and improves the final result.
Mixing Colors For Drapery
Getting the colors right is important for realism. Cloth is rarely pure white or black, even if it looks that way.
Understanding Local Color
Local color is the main color of the fabric under neutral light. But in a painting, you must adjust it based on lighting and surroundings.
- Lights: Add a bit of warm color (like yellow ochre) to your white for sunlit areas.
- Shadows: Mix in ultramarine blue or burnt sienna for cooler, richer shadows.
- Reflected light: Sometimes shadows are brightened by nearby surfaces. Look for hints of color bounced into the folds.
Here’s a simple color mixing comparison for common fabric colors:
| Fabric Color | Light Area Mix | Shadow Area Mix |
|---|---|---|
| White | Titanium White + Touch Yellow Ochre | Ultramarine Blue + Burnt Sienna + White |
| Red | Cadmium Red + White | Alizarin Crimson + Ultramarine Blue |
| Blue | Ultramarine Blue + White | Ultramarine Blue + Burnt Umber |
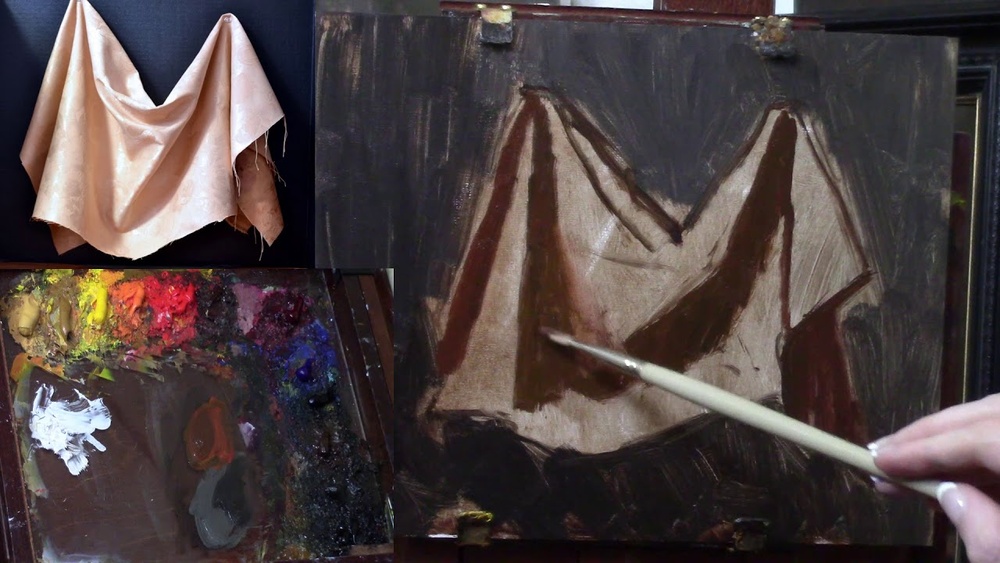
Blocking In The Main Shapes
Now you’re ready to paint. The first layer is called the block-in. This is where you cover the canvas with the main colors and values, without worrying about detail.
- Start with the shadow areas. Use a thin wash of paint mixed with medium.
- Next, paint the midtones. Block in the main color of the fabric.
- Finally, add the lightest areas. Save the brightest highlights for later.
Keep your paint thin at this stage. This lets you adjust shapes easily.

Credit: www.artkarolina.com
Building Form: Adding Volume And Depth
To make drapery look three-dimensional, you need to show how it turns in space. This happens in the second layer.
- Add more paint and start blending the edges between light and shadow.
- Soften the transitions in round, rolling folds.
- Keep some edges sharp for crisp folds and others soft for gentle curves.
Pay attention to the core shadow — the darkest part inside a fold. Adding a touch of reflected light along the edge of the shadow will make the fabric pop.
Here’s a quick reference to the anatomy of a fold:
| Part of Fold | Description | Painting Tip |
|---|---|---|
| Highlight | Brightest spot, faces the light | Use thick, opaque paint |
| Halftone | Transition between light and shadow | Blend smoothly, use softer brush |
| Core Shadow | Deepest shadow inside the fold | Use cool, dark colors, keep edge soft |
| Reflected Light | Light bounced from surroundings | Add warmth or color, keep it subtle |
Refining Details And Textures
Once the main forms are established, start refining. Look for sharp creases, tiny wrinkles, or changes in the fabric’s surface.
- Use smaller brushes for details.
- Add subtle color changes within the same fold.
- Look for lost and found edges: Some edges should disappear, others should be sharp.
- Use a dry brush or a palette knife to create rough textures if needed.
Remember, less is often more. Too many details can make the painting look busy. Focus on the most important folds.
Common Mistakes And How To Avoid Them
Even experienced artists make mistakes with drapery. Here are a few to watch out for:
- Ignoring the big shapes: Getting lost in tiny wrinkles before the main forms are right.
- Overusing white: Pure white looks flat and chalky. Always mix a bit of color into your lights.
- Flattening shadows: Shadows need variation and sometimes hints of color, not just black or grey.
- All edges sharp: Real cloth has both soft and hard edges. Use both for realism.
- Copying photos blindly: Photos can lose subtle color and edge details. Always compare with real fabric if possible.
Practical Tips For Painting Realistic Drapery
- Work from life: If possible, paint from real fabric. This helps you see color and depth better than photos.
- Take breaks: Step back often to see the whole painting. This prevents overworking details.
- Use a mirror: Looking at your painting in a mirror reveals mistakes in shape and proportion.
- Keep a limited palette: Fewer colors make the painting more harmonious and easier to control.
- Practice with simple studies: Paint single folds or small drapery studies before tackling a full scene.
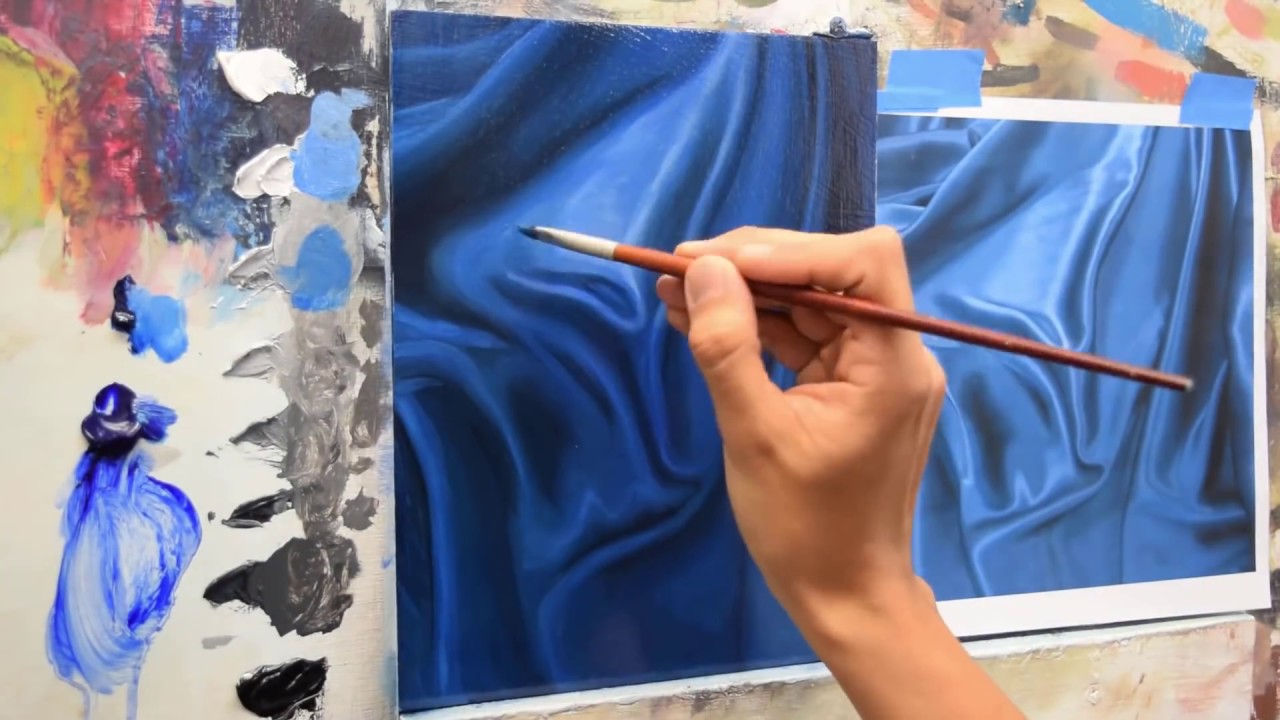
Credit: www.youtube.com
Advanced Techniques: Glazing And Scumbling
As you gain experience, try advanced oil painting techniques to enhance your drapery.
- Glazing: Apply a thin, transparent layer of color over dry paint. This deepens shadows or changes the fabric’s color without covering details.
- Scumbling: Scrub a light, opaque color over a dry, dark area. This adds texture or soft highlights.
Both techniques require patience and practice, but they add depth and richness to your painting.
Comparing Drapery Styles: Old Masters Vs. Modern
Different artists approach drapery in unique ways. Here’s a comparison of two famous styles:
| Style | Key Features | Examples |
|---|---|---|
| Old Masters (e.g., Rembrandt) | Strong contrast, warm shadows, detailed highlights | Classic portraits, biblical scenes |
| Modern Realism | Softer transitions, cooler shadows, simplified shapes | Still lifes, contemporary figures |
Studying different styles can help you find your own approach.
Credit: www.artkarolina.com
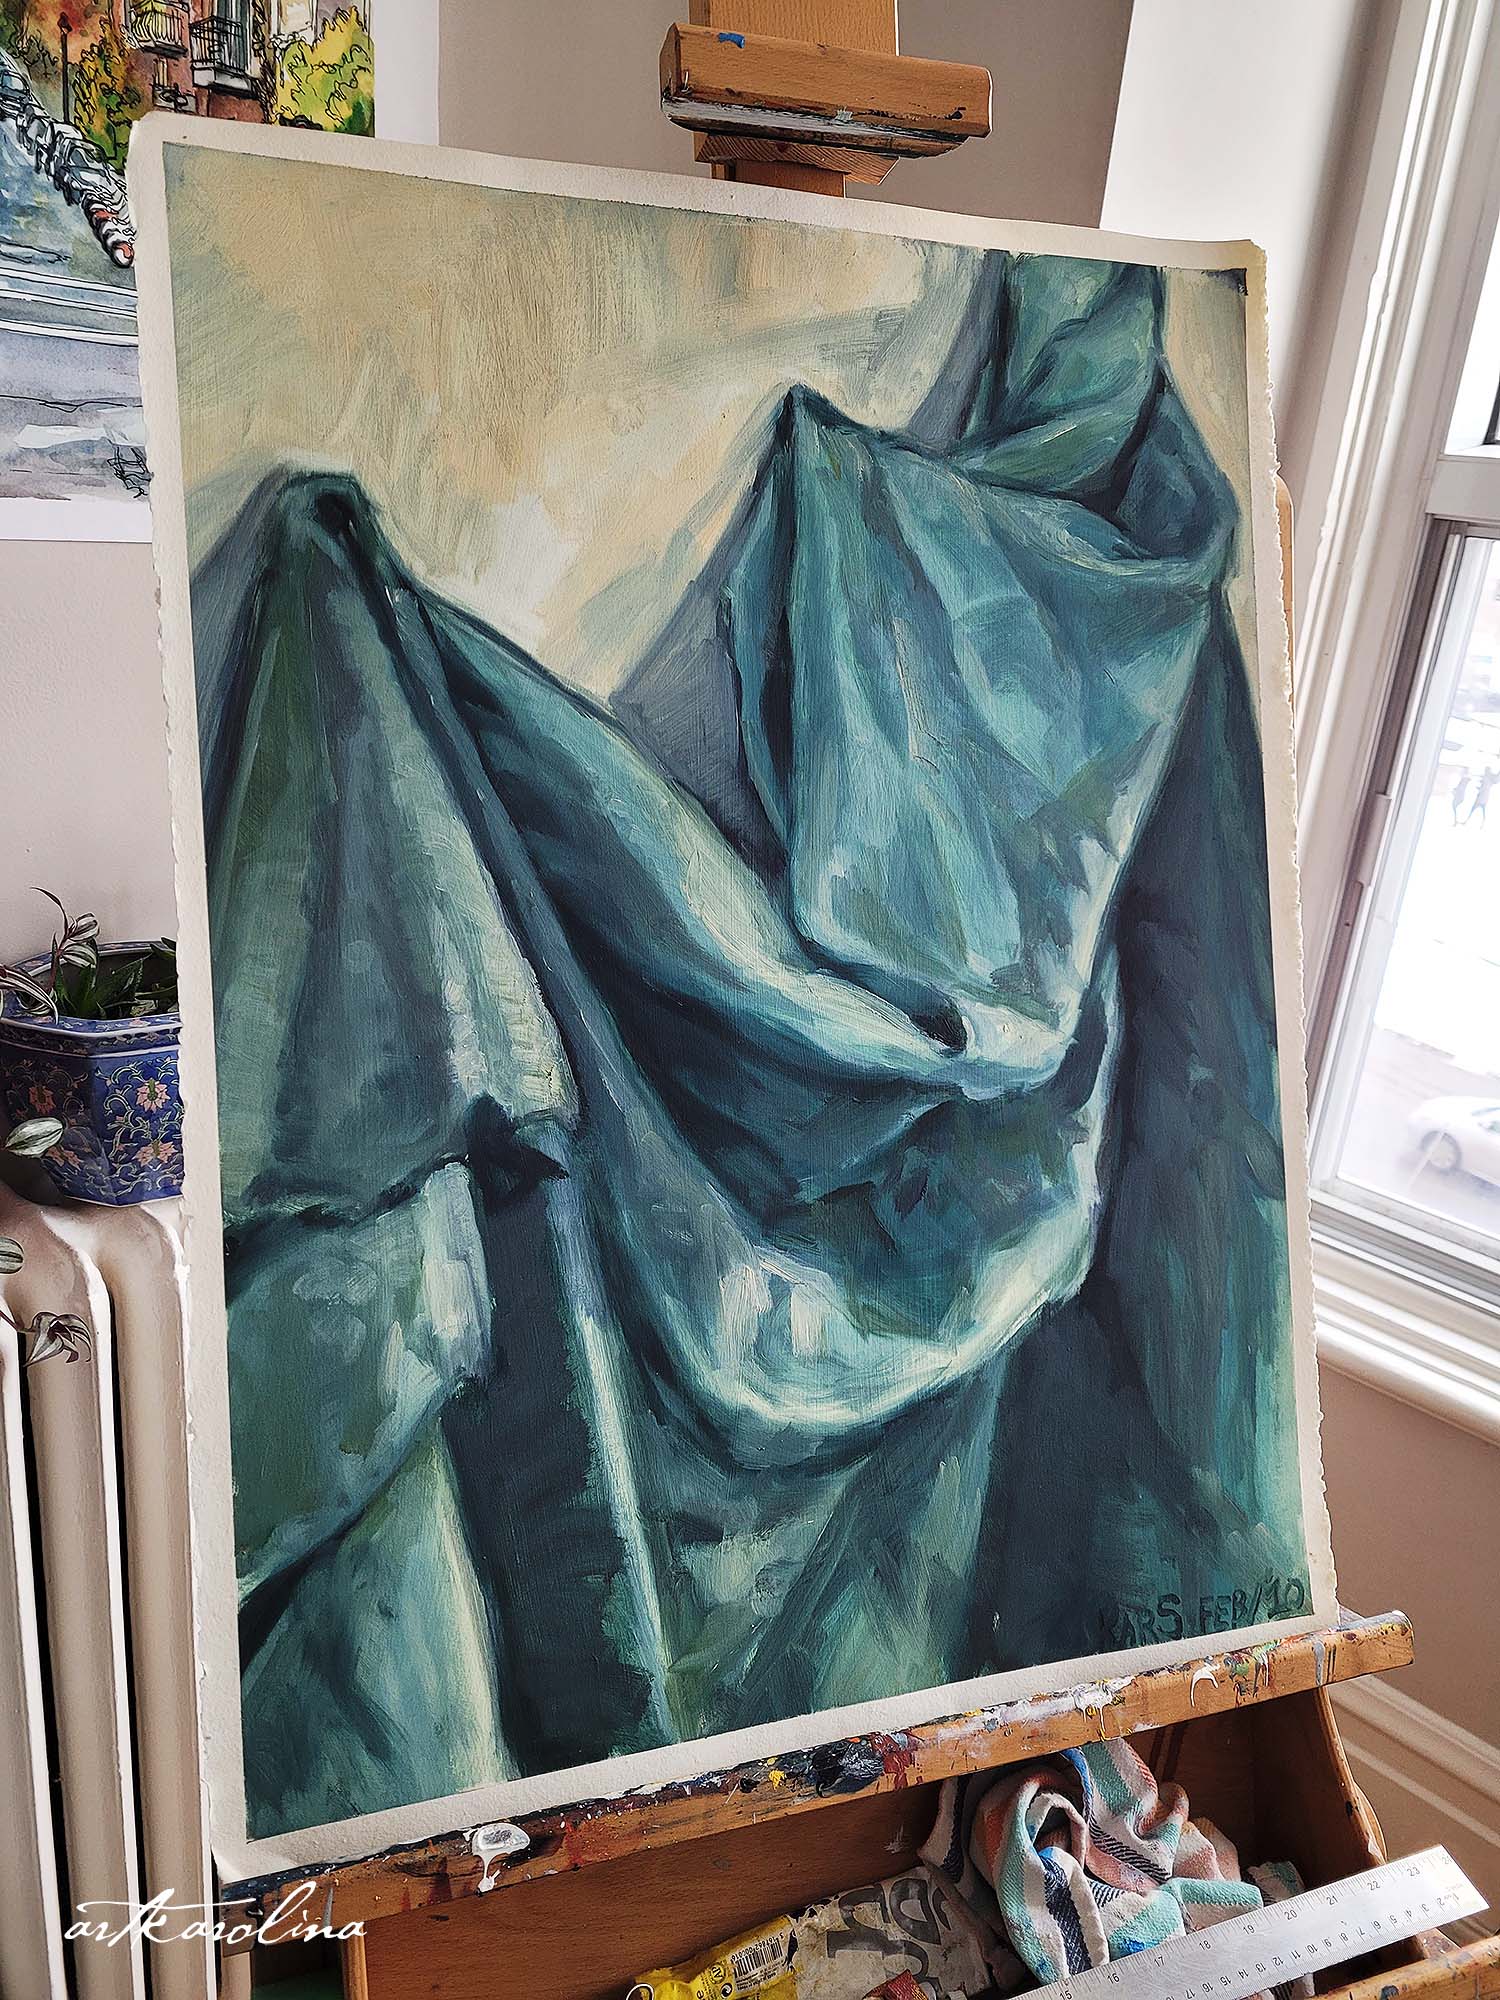
When To Stop: Finishing Your Painting
Knowing when a painting is finished can be hard. Here are a few signs:
- The main folds read clearly from a distance.
- Highlights and shadows feel balanced.
- Extra details do not add new information.
- The painting matches your original vision.
If you’re unsure, set the painting aside for a day. Fresh eyes will help you decide if it needs more work or is ready to sign.
Frequently Asked Questions
How Do I Choose The Right Colors For Shadows In Drapery?
Look at the color of the fabric and the light source. Shadows are usually cooler (more blue or violet) than the lit areas. Mix a bit of ultramarine blue or burnt sienna into your base color for natural shadow tones.
Why Do My Painted Folds Look Flat?
Flat folds are often caused by using only two values—light and dark. Try adding halftones between the two, and use reflected light to separate the shadow from the core shadow. Also, pay attention to edge softness for more depth.
Should I Paint Drapery From Photos Or Real Life?
Painting from real life is best for learning, as you see more color and depth. If you use photos, adjust for lost color and detail, and compare with real fabric when possible. For tips on working from life, see resources like the Tate Museum.
How Long Does It Take To Paint Realistic Drapery In Oil?
A small study might take 2–4 hours. A complex piece with fine details can take several days, especially if you let layers dry between sessions. Take your time and focus on accuracy over speed.
What Are The Best Fabrics To Practice Painting Drapery?
Start with cotton or linen—they have clear folds and are not too shiny. Avoid silk or velvet at first, as they are more challenging. Once comfortable, try different materials for variety.
Painting drapery and folds in oil is a journey of observation and technique. Each fabric, fold, and shadow tells a story. With practice and patience, you’ll find that what once seemed complex becomes a source of joy and creativity in your art.