Have you ever wanted to capture the soft, mysterious beauty of fog in your acrylic paintings but didn’t know where to start? Painting fog can seem tricky because of its delicate, translucent nature.
But with the right tips and techniques, you can easily bring that misty atmosphere to life on your canvas. You’ll discover simple steps to create realistic fog effects that add depth and mood to your artwork. Keep reading, and you’ll soon master the art of painting fog with acrylics like a pro.
Choosing The Right Acrylic Paints
Choosing the right acrylic paints is key to painting realistic fog. The right colors and paint types create soft, misty effects. This section helps you pick paints that blend well and capture fog’s subtle look.
Selecting Colors For Fog
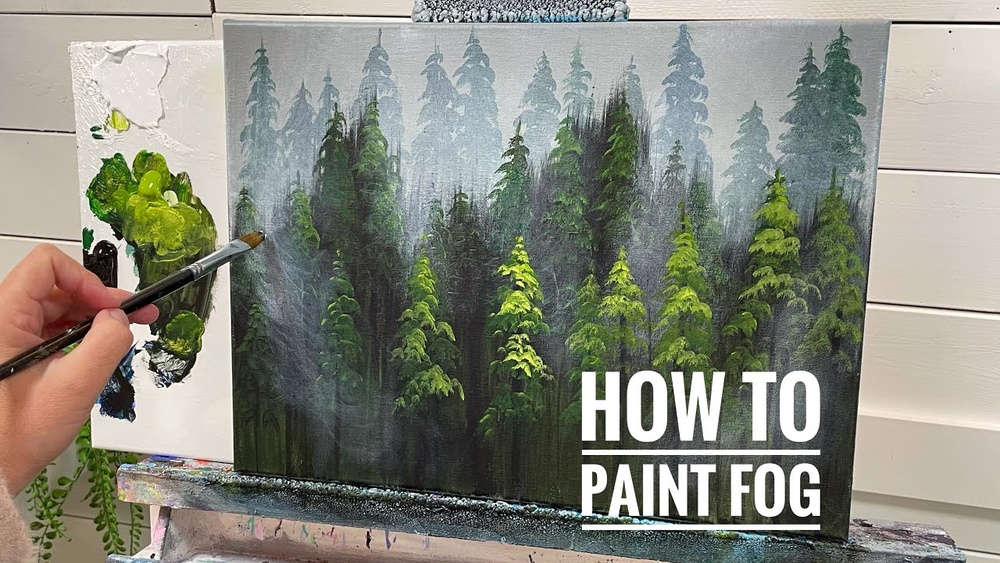
Fog usually appears in soft grays, whites, and light blues. Use muted colors to show fog’s light and shadow. Avoid bright or dark colors that look unnatural. Mix white with a bit of blue or gray for a cold fog effect. Add small amounts of warm tones for morning or evening fog. These color choices give your painting depth and realism.
Using Transparent And Opaque Paints
Use transparent paints for soft, see-through fog areas. They help create layers and a misty feel. Opaque paints work well for thicker fog parts. They hide details and make fog look dense. Combine both types to get a natural look. Thin your paints with water or acrylic medium for smooth blending. This mix of transparency adds dimension to your fog painting.
Credit: urartstudio.com
Essential Tools For Painting Fog
Painting fog with acrylics needs the right tools. These tools help create soft, misty effects. They make blending and layering easier. Choosing the correct brushes and tools can change your fog painting completely.
Brush Types And Uses
Soft bristle brushes work best for fog. They spread paint smoothly without harsh lines. Fan brushes help create gentle, wispy strokes. Round brushes are good for detailed fog edges. Flat brushes cover larger areas quickly. Use them to lay down base layers of fog. Clean your brushes often to keep the fog soft.
Palette Knives And Sponges
Palette knives add texture to fog paintings. Use the knife to scrape or spread paint lightly. This creates a foggy, uneven look. Sponges help blend colors smoothly. Dab the sponge gently to soften edges. They also help build layers of mist. Try different sponge shapes for varied effects.
Preparing Your Canvas
Preparing your canvas is the first step in painting fog with acrylics. It sets the foundation for a soft, misty effect. A well-prepared canvas helps the paint blend smoothly. It also prevents paint from soaking into the surface too fast. This section covers important tips for priming and creating a misty background.
Priming Techniques
Start by applying a thin layer of gesso to your canvas. Gesso seals the surface and gives paint something to hold on to. Use a flat brush for an even coat. Let it dry completely before painting. For fog effects, consider applying two thin layers of gesso. Lightly sand between layers to keep the surface smooth. This helps your paint glide easily and blend better.
Creating A Misty Background
Choose soft, light colors like pale blues, grays, or whites. Mix a little water with acrylic paint for a thin wash. Apply this wash in broad, gentle strokes across the canvas. Work quickly to keep edges soft and blurry. Use a dry brush to soften any hard lines. This technique creates the illusion of fog in the background. Build layers gradually for a natural, misty look.
Layering Techniques For Fog
Layering is a key technique for painting realistic fog with acrylics. It helps create the soft, misty look that makes fog appear natural. You build the fog step by step, adding thin layers of paint. Each layer changes the depth and light of the fog. This method makes the fog look like it floats in the air. The layers also help blend the fog smoothly with the background.
Building Depth With Thin Layers
Start with very thin paint layers using a lot of water or medium. Thin layers let light pass through, making the fog look see-through. Paint these layers lightly over your background. Wait for each layer to dry before adding the next one. Each new layer adds more depth and texture to the fog. Keep the colors soft and pale to keep the misty effect. Thin layers let you control the fog’s density and shape easily.
Blending For Soft Edges
Soft edges make fog appear natural and smooth. Use a dry brush or a sponge to blend the edges of each layer. Blend while the paint is still damp for best results. This removes hard lines and creates a gentle transition. Avoid sharp contrasts between fog and background. Smooth blending gives the fog a floating, light feel. Work slowly, blending small areas at a time for control. Soft edges are key to realistic fog painting.
Creating Misty Effects
Painting fog with acrylics requires soft, gentle techniques. Misty effects bring a calm and dreamy look to your work. They create depth and soften the edges of objects. This makes the scene feel more real and natural.
Using the right tools and methods helps to achieve this look. Light layers and subtle blending are key. These techniques allow the fog to appear transparent and smooth.
Dry Brushing Methods
Dry brushing is a simple way to add soft fog. Use a dry brush with little paint. Lightly drag it over the canvas surface. This creates a thin, uneven layer of paint.
Work slowly and build up layers. Each layer adds more texture and softness. This method works best on rough or textured surfaces. It helps to mimic the natural scatter of fog.
Using Glazes And Washes
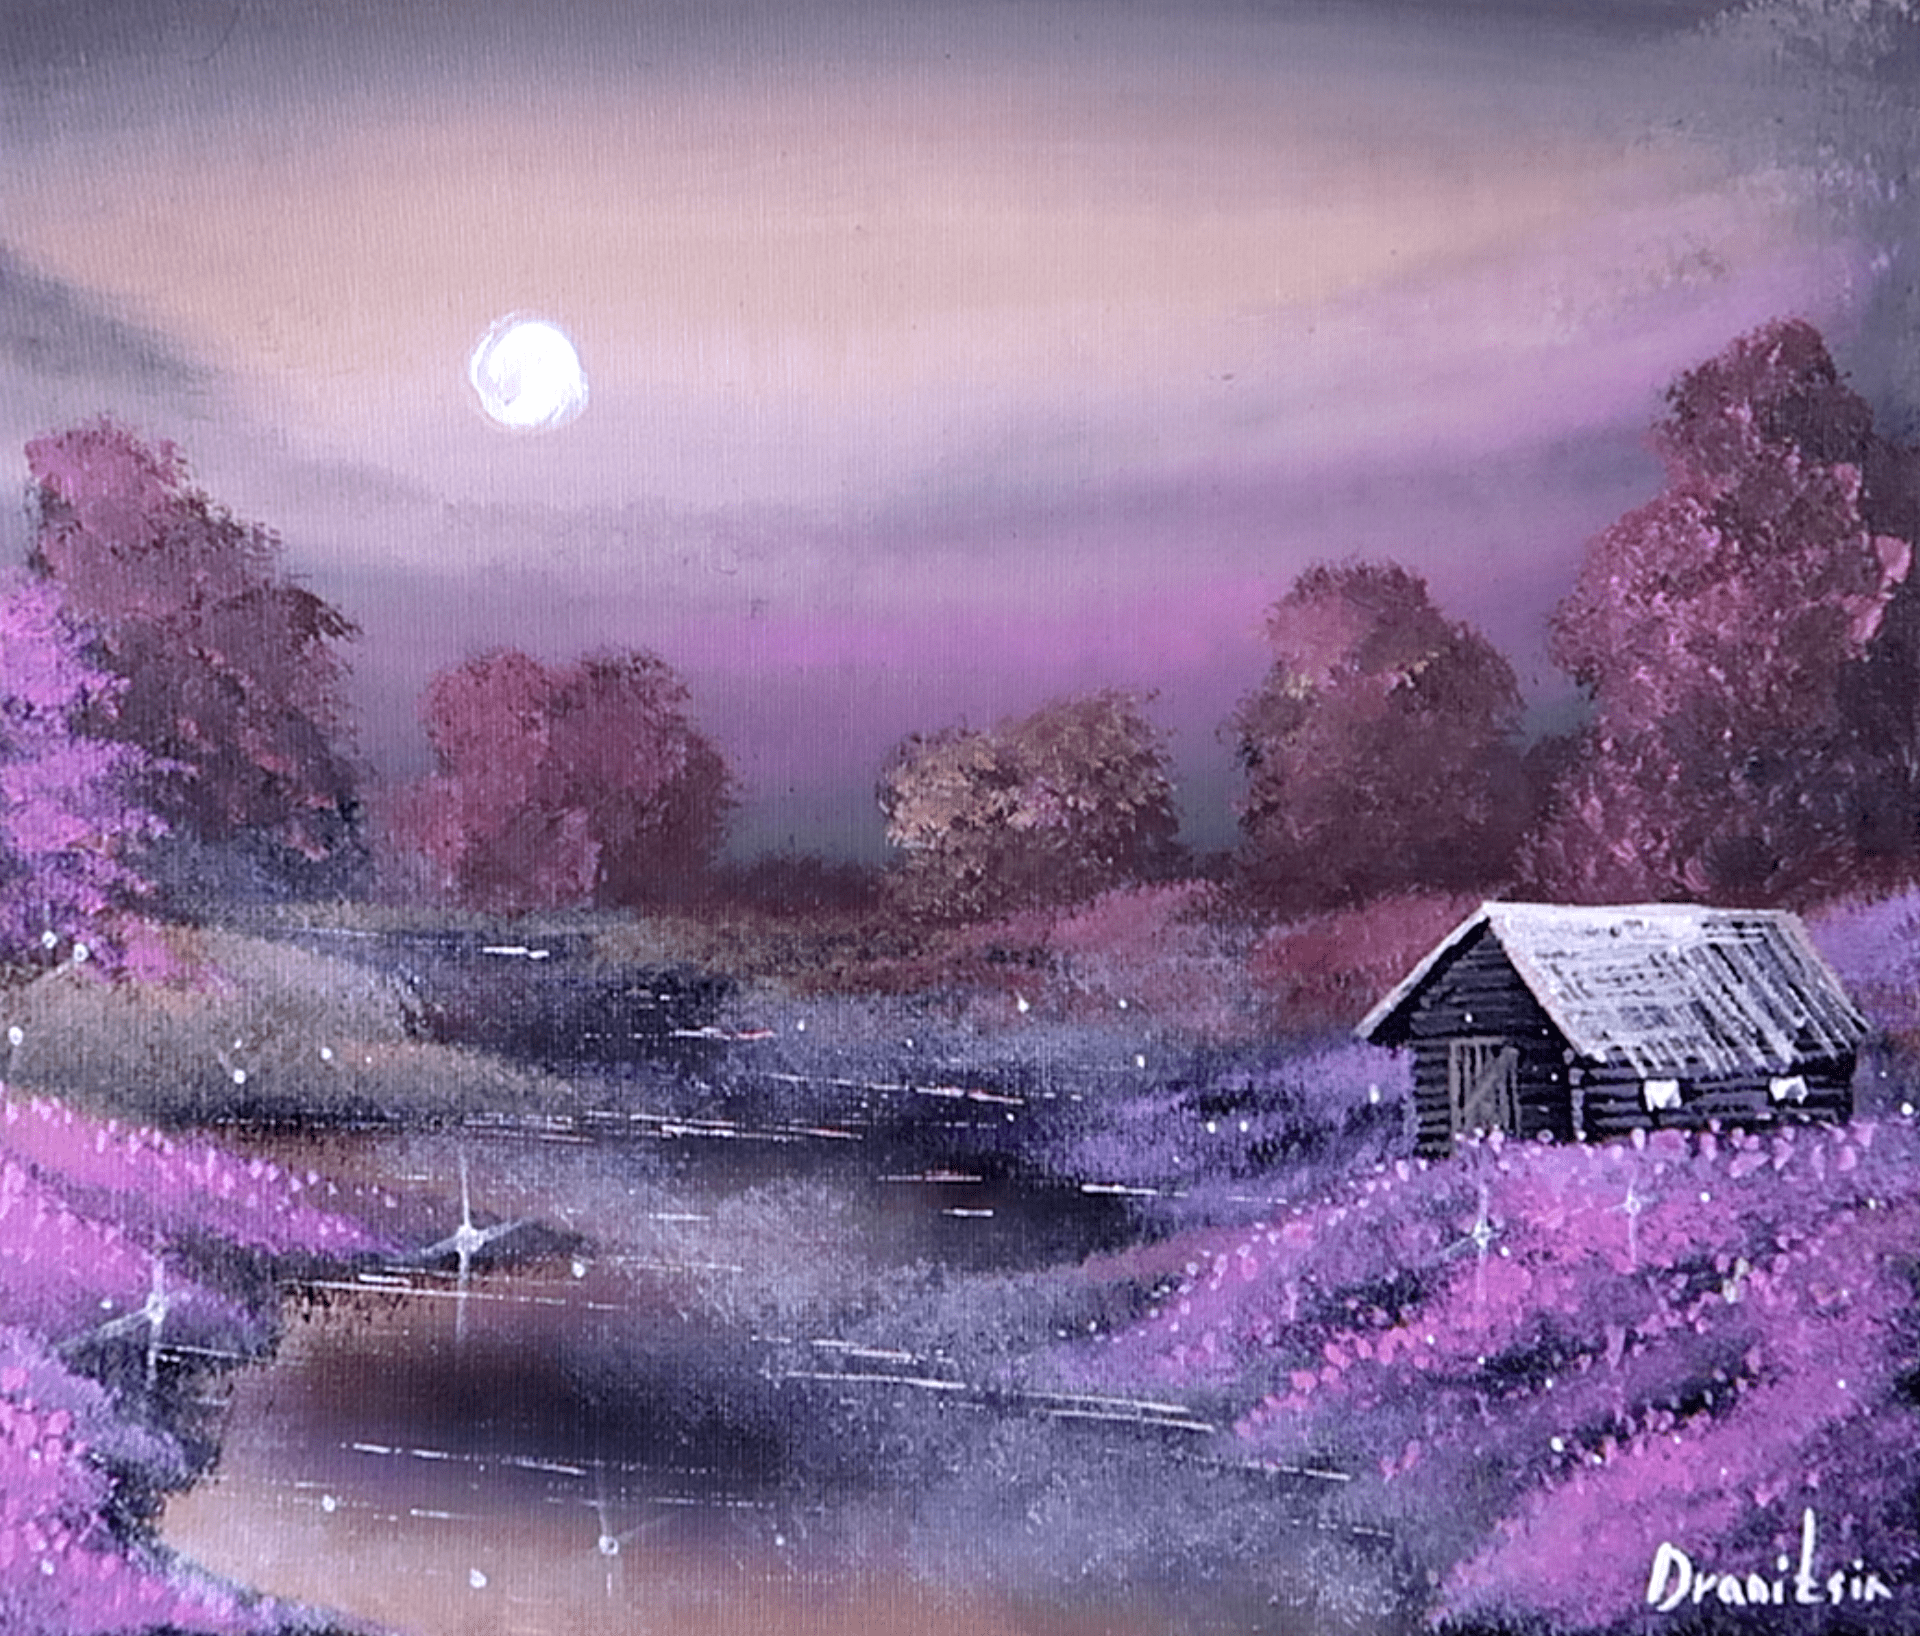
Glazes are thin layers of transparent paint. They help to soften colors and create a misty feel. Mix your paint with water or medium to make a glaze. Apply it gently over your painting.
Washes are similar but more watery. Use a large brush to spread the wash evenly. Let each layer dry before adding another. This builds depth and lightness in the fog.
Credit: urartstudio.com
Adding Highlights And Shadows
Adding highlights and shadows is key to painting realistic fog with acrylics. These elements give fog depth and make it look soft yet three-dimensional. Highlights show where light touches the mist. Shadows create areas where fog is thicker or blocked by objects.
Both highlights and shadows work together. They help the fog blend naturally into the scene. Without them, fog can look flat or fake. Careful use of light and dark tones brings life to your painting.
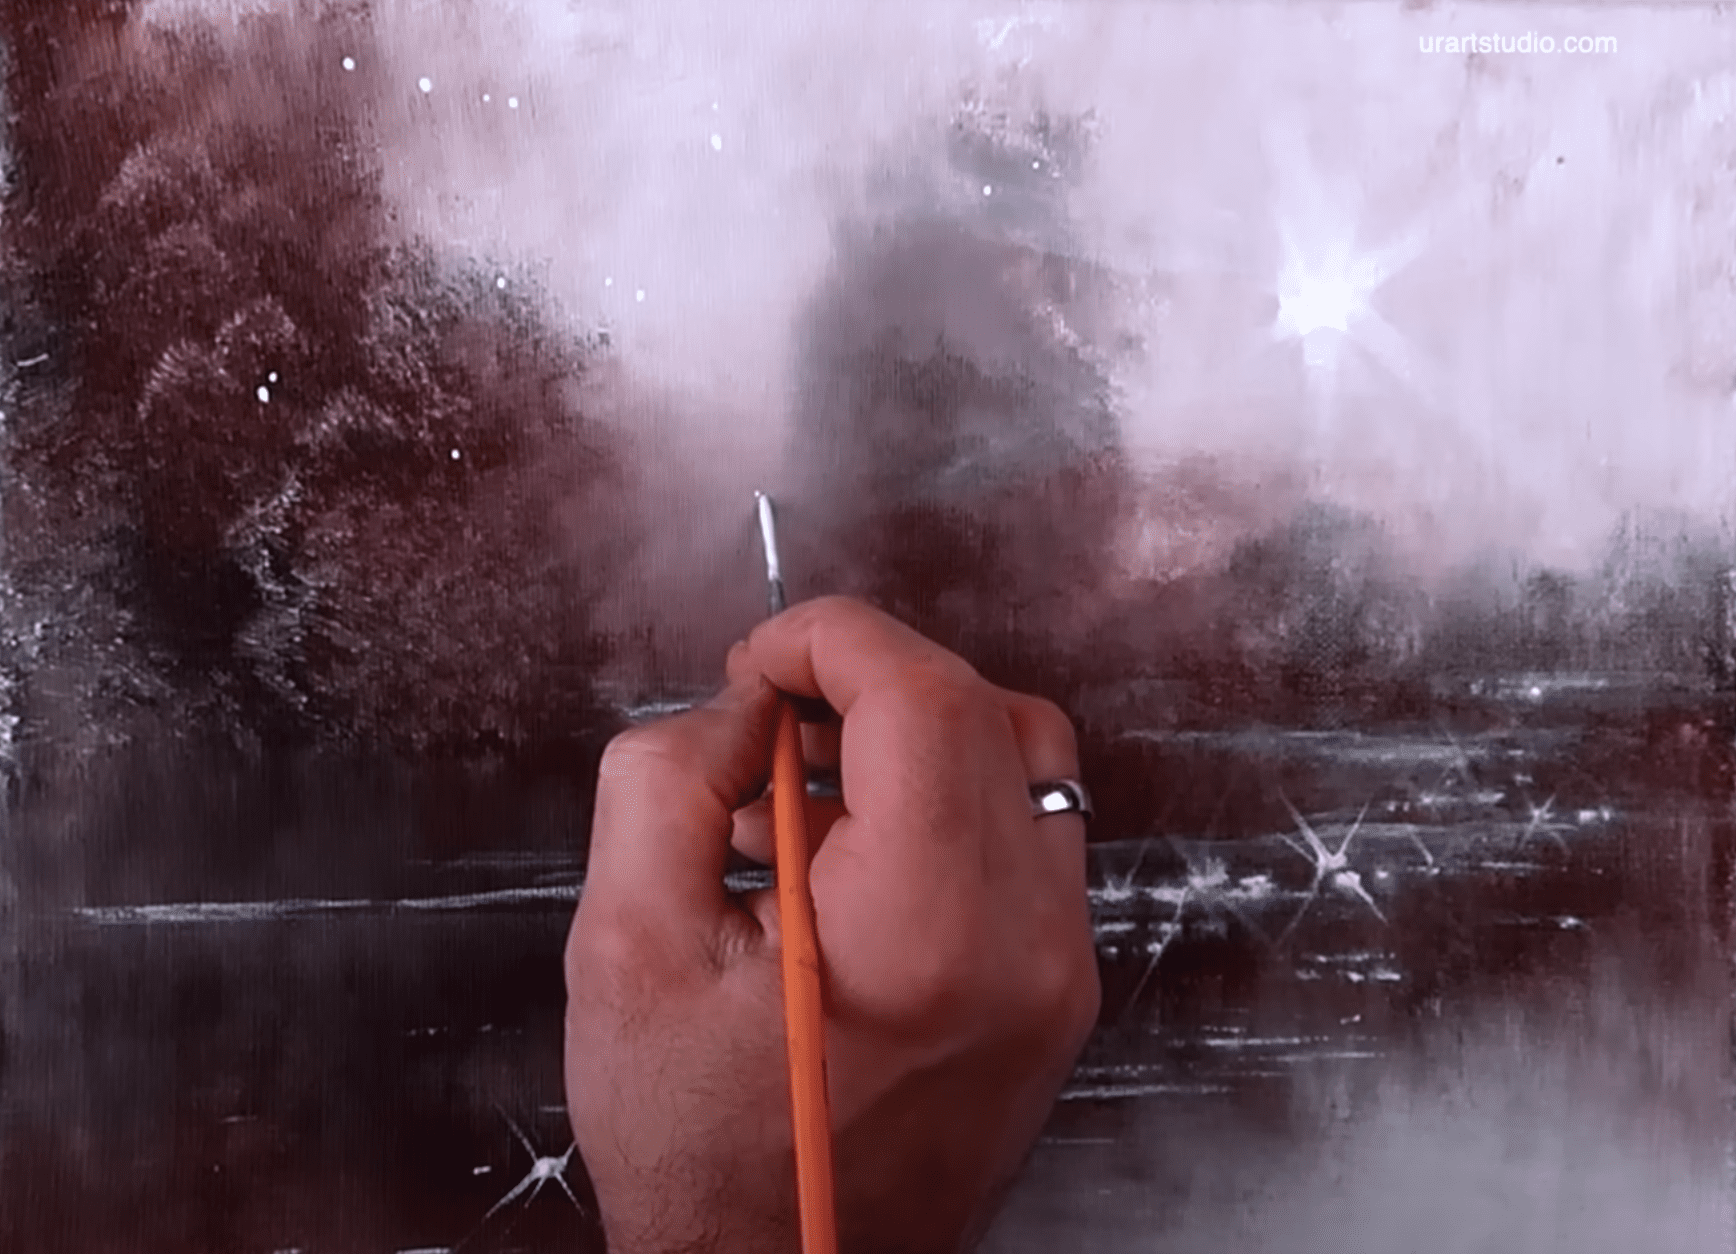
Enhancing Light Diffusion
Light spreads through fog in a soft, scattered way. To show this, use pale, gentle highlights. Apply thin layers of white or very light gray. Blend edges smoothly to mimic light fading in the mist.
Use a dry brush or sponge to soften highlight edges. This creates a glow effect. Avoid harsh lines. Keep the light areas subtle but noticeable.
Balancing Contrast In Fog
Contrast means the difference between light and dark areas. In fog, this difference should be low but clear enough to shape forms. Add soft shadows with muted grays or blues. These show where fog is dense or behind objects.
Keep shadows soft and blended. Too much contrast makes fog look sharp and artificial. Balance shadows and highlights carefully to keep the fog smooth and natural.
Common Mistakes To Avoid
Painting fog with acrylics can be tricky. Many beginners make similar mistakes that spoil the effect. Avoiding these common errors will improve your fog paintings. Focus on subtlety and softness to capture the misty look well.
Overworking The Paint
One common mistake is overworking the paint. Acrylic dries fast, so blending too much can create muddy colors. This ruins the light, airy feel fog needs. Use a light touch and stop while the paint is still wet. Let some areas stay soft and blurred. Overblending removes the delicate layers that make fog look real.
Ignoring Color Temperature
Color temperature affects how fog feels in your painting. Warm colors suggest sunlight, while cool colors hint at shade or night. Ignoring this can make your fog look flat or unnatural. Use cooler tones for early morning fog. Add subtle warm tones where light hits the mist. This contrast adds depth and realism to your scene.

Credit: www.youtube.com
Finishing Touches
Finishing touches bring your fog painting to life. They protect your work and enhance its look. Small steps here make a big difference. Focus on sealing your art and displaying it well. Both help your acrylic fog painting last and impress.
Sealing Your Artwork
Sealing your fog painting protects it from dust and damage. Use a clear acrylic varnish made for paintings. Choose a spray or brush-on type. Apply thin, even coats to avoid streaks. Let each coat dry fully before adding the next. This step keeps colors fresh and bright for years. It also adds a subtle shine or matte finish. Sealing is a simple way to preserve your hard work.
Displaying Fog Paintings
Display your fog painting in a place with soft light. Avoid direct sunlight to prevent fading. Use a clean frame or mount to keep it safe. A simple frame helps the misty effect stand out. Hang at eye level for the best view. Consider a spot away from moisture and heat. Proper display keeps your fog art beautiful and inviting. It makes your painting a quiet, calming focus in any room.
Frequently Asked Questions
How Do I Create A Fog Effect With Acrylic Paint?
Use thin layers of white or gray paint diluted with water. Apply gently with a dry brush or sponge in circular motions. Gradually build up layers for a soft, misty appearance that mimics natural fog.
What Brushes Work Best For Painting Fog With Acrylics?
Soft, round brushes and sponges work best for fog effects. They help blend colors smoothly and create soft edges. Avoid stiff brushes to maintain the fog’s delicate, airy look.
Can I Use Acrylic Glazing Medium For Fog Painting?
Yes, acrylic glazing medium helps create translucent layers. Mix it with paint to build fog’s depth and softness. This technique enhances the realistic, misty appearance of fog in your artwork.
How To Blend Colors To Paint Realistic Fog?
Blend whites, grays, and blues softly with a damp brush. Use gentle strokes and avoid harsh lines. This technique creates smooth transitions, giving fog a natural, diffused look.
Conclusion
Painting fog with acrylics can be simple and fun. Use soft brushes and light colors for a smooth look. Blend your paint gently to create a misty effect. Practice layering thin paint to add depth. Don’t rush; let each layer dry well.
Keep your strokes loose and natural. With patience, your fog will look soft and real. Try different techniques to find what works best. Enjoy the process and watch your painting come alive. Keep experimenting and improving every time you paint.