Painting portraits in digital art can be fun and rewarding. This guide will show you how to start. Follow these steps, and you will create beautiful digital portraits.
Step 1: Gather Your Tools
First, you need the right tools. Here is what you will need:
- A computer or tablet
- A digital drawing software
- A stylus or drawing tablet
- Reference photos
Choose a drawing software that you like. Some popular choices are Photoshop, Procreate, and Clip Studio Paint.
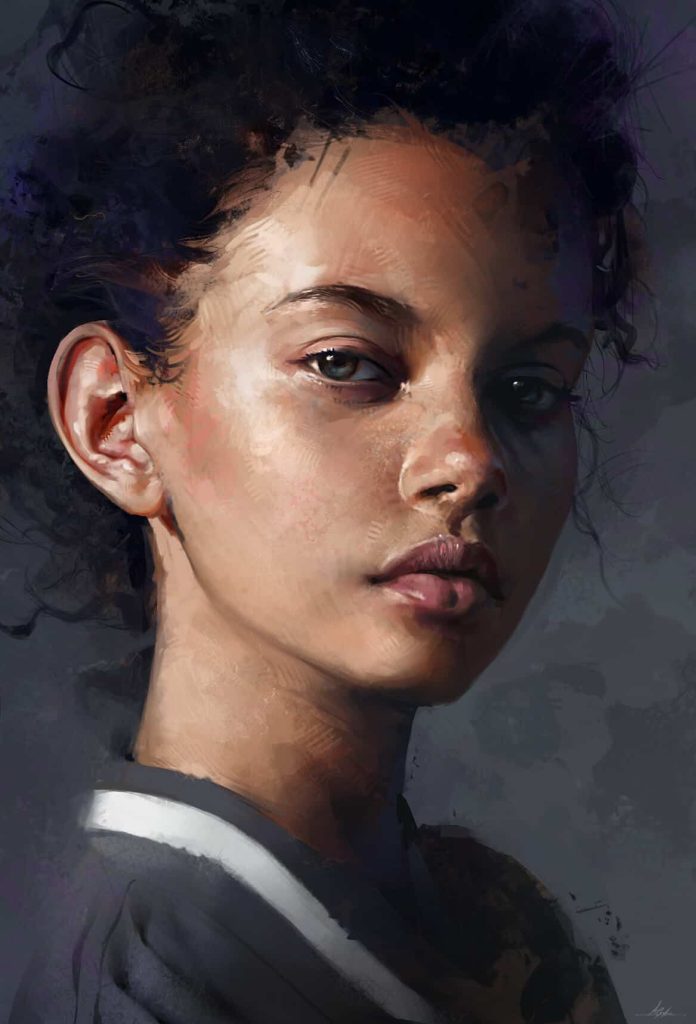
Credit: proedu.com
Step 2: Set Up Your Workspace
Next, set up your digital workspace. Open your drawing software and create a new canvas. A canvas size of 3000×4000 pixels is a good start.
Make sure to set the resolution to 300 DPI. This will ensure your portrait looks good when printed.
Step 3: Sketch the Outline
Now, start sketching the outline of your portrait. Use a light color for the sketch. This will make it easier to adjust later.
Start with basic shapes. Draw circles for the head and eyes. Use lines to mark the nose, mouth, and ears. Keep the sketch simple and loose.
Step 4: Refine the Sketch
Once you have the basic shapes, refine your sketch. Add more details to the face. Make sure the proportions are correct.
Look at your reference photos. They will help you get the details right. Don’t worry if it is not perfect yet. You can always adjust it later.
Step 5: Add Base Colors
Now, add base colors to your portrait. Create a new layer under your sketch. Use a soft brush to fill in the base colors.
Choose colors that match your reference photo. Don’t worry about shading or details yet. Just focus on getting the right colors.
Step 6: Add Shadows and Highlights
Next, add shadows and highlights. This will give your portrait depth and dimension. Create a new layer above your base colors.
Use a soft brush to add shadows. Focus on areas where light does not hit. Use a lighter color to add highlights. Focus on areas where light hits the most.
Blend the shadows and highlights with the base colors. Use a smudge tool or a soft brush for blending.
Step 7: Add Details
Now, add more details to your portrait. Focus on the eyes, nose, and mouth. Use a smaller brush for details.
Add eyelashes, eyebrows, and hair strands. Look at your reference photo for guidance. Take your time and be patient.
Step 8: Final Adjustments
Finally, make any last adjustments. Zoom out and look at your portrait as a whole. Fix any mistakes you see.
Adjust the colors and shading if needed. Add any final touches to make your portrait perfect.
Tips for Success
Here are some tips to help you succeed:
- Practice regularly. The more you practice, the better you will get.
- Use reference photos. They will help you get the details right.
- Take breaks. This will help you see mistakes you might miss.
- Experiment with different brushes and techniques.
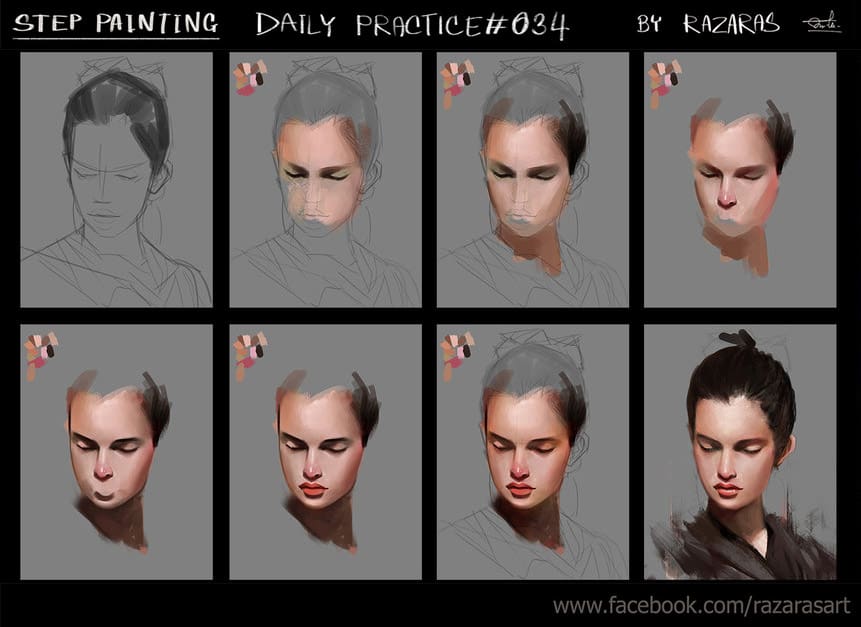
Credit: paintable.cc
Frequently Asked Questions
What Tools Are Best For Digital Portraits?
Use a high-resolution tablet, stylus, and software like Photoshop or Procreate for best results.
How Do You Start A Digital Portrait?
Begin with a rough sketch to outline the main features and proportions of the face.
What Are Basic Steps In Digital Portrait?
Sketch, add base colors, then build up details and shading to create depth and realism.
How Do You Choose Colors?
Select a color palette that matches the skin tones and lighting conditions of your subject.
Conclusion
Painting portraits in digital art takes time and practice. Follow these steps, and you will create beautiful portraits. Remember to be patient and have fun. Happy painting!