
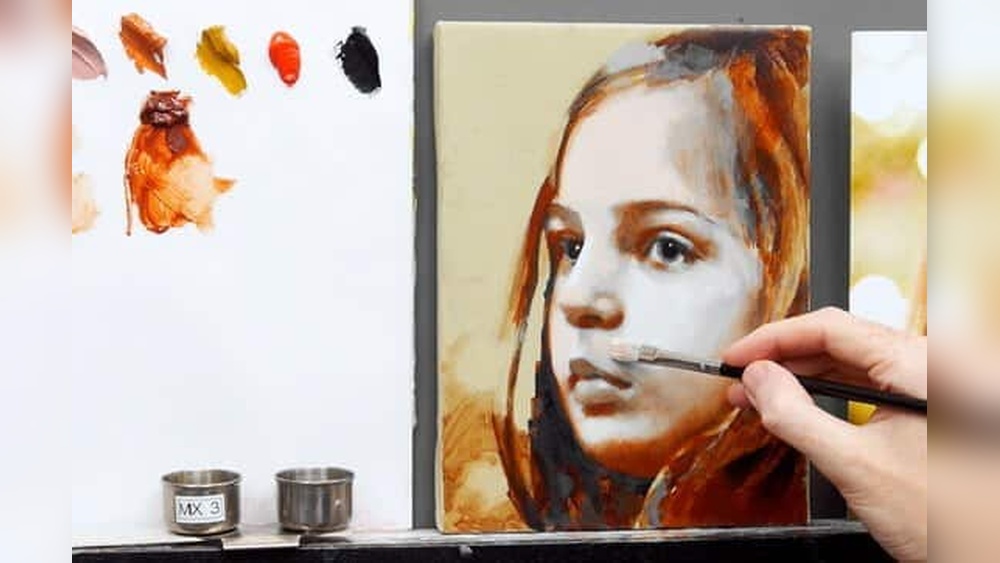
Quick answer: The oil painting glazing technique means brushing a thin, transparent layer of paint thinned with a glazing medium over a fully dry underlayer, so light passes through the glaze, bounces off the layer below, and creates deep, luminous color. Start with a value underpainting, use transparent pigments, mix roughly one part paint to one or two parts medium, keep each glaze slightly “fatter” than the last, and let every layer dry to the touch before adding the next.
Glazing is how the old masters got skin that seems to glow from within and shadows that look deep rather than dead. It is also one of the most misunderstood techniques in oil painting, partly because it rewards patience in a medium that already dries slowly. This guide breaks the oil painting glazing technique into clear stages: why it works optically, which pigments and mediums to use, exact mixing ratios, a step-by-step glazing sequence, drying times, and the mistakes that turn glazes muddy or cracked.
What Glazing Is and Why It Works
When you mix two colors on a palette, you get a single blended color. When you glaze, you stack them optically instead. A transparent layer of, say, crimson over a dry layer of yellow lets light travel through the crimson, reflect off the yellow, and travel back through the crimson to your eye. The result is a warm orange-red with a depth that a premixed orange cannot match, because the light is interacting with two separate layers.
This is why glazed passages look richer and more luminous, especially in shadows and saturated areas. It also explains the main rule of glazing: the underlayer does a lot of the work. A glaze modifies what is beneath it; it does not cover it. That is also why the paint itself matters so much: a strongly pigmented, genuinely transparent tube color glazes far better than a chalky one, which is the focus of our roundup of top-performing oil colors for glazing.
When Glazing Is (and Isn’t) the Right Choice
Glazing excels at a few specific jobs: deepening shadows without deadening them, building luminous skin tones, intensifying the color of fabrics and fruit, and unifying a painting with a single warm or cool overall layer. It also lets you correct color temperature late in a painting without repainting whole passages.
It is less suited to fast, expressive alla prima work, where everything is painted wet-into-wet in one session, or to thick impasto styles that rely on opaque paint and visible texture. Many painters use both approaches, painting directly for most of the picture and glazing selected areas once it has dried.
Glazing vs Scumbling vs Velatura
| Technique | Paint character | Effect | Typical use |
|---|---|---|---|
| Glazing | Transparent, thin, darker or more saturated than underlayer | Deepens, warms, cools, or intensifies | Shadows, rich fabrics, skies, unifying color |
| Scumbling | Opaque or semi-opaque, lighter color dragged thinly | Softens, hazes, lightens | Atmosphere, mist, distant hills, highlights on skin |
| Velatura | Semi-transparent, lighter tint (often with a touch of white) | Veils and cools; adds subtle opalescence | Flesh tones, softening transitions |
Most glazed paintings combine all three. You glaze to deepen and saturate, scumble to soften, and use velatura to unify.
Choosing Pigments for Glazing
Transparency is the single most important property of a glazing color. Opaque pigments like cadmiums, cerulean, and titanium white cover the layer below instead of tinting it, which defeats the purpose. Most paint makers mark transparency on the tube or color chart with a symbol, often an empty square for transparent and a filled square for opaque.
| Color family | Common transparent pigments | Notes |
|---|---|---|
| Reds and magentas | Quinacridone red/rose, alizarin crimson (or permanent alternatives), perylene | Excellent for flesh, flowers, warm shadows |
| Yellows | Indian yellow (modern hues), transparent yellow oxide, some azo yellows | Warms and enriches greens and skin |
| Blues | Ultramarine, phthalo blue, Prussian blue | Phthalo and Prussian are very strong; use sparingly |
| Greens | Phthalo green, viridian | Useful for cool shadows and foliage |
| Earths | Transparent red oxide, transparent yellow oxide, burnt sienna, burnt umber (semi) | Classic for warm glazes over grisaille |
| Darks | Ultramarine plus burnt umber, perylene black | Mixed darks glaze more richly than opaque black |
Not every brand formulates these pigments the same way; a pigment’s transparency can vary with grind and filler content. Our guide to the best oil paints for glazing compares paint lines with an eye to transparency and pigment load.
Glazing Medium for Oil: Options and Ratios
A glazing medium thins the paint so it spreads in a transparent film while keeping enough binder to stay flexible and adhere well. Thinning with solvent alone produces a weak, underbound film that can look dull and be fragile.
| Medium type | Drying speed | Character | Considerations |
|---|---|---|---|
| Alkyd-based glazing medium | Fast, often touch-dry in about 24 hours | Smooth, glossy, levels well | Popular for glazing because it speeds up layer building |
| Linseed or stand oil with solvent | Slow, several days | Traditional, flexible, enamel-like with stand oil | Stand oil levels brush marks; too much oil can wrinkle or yellow |
| Solvent-free gel mediums | Varies | Buttery, holds brushstrokes | Good for studios avoiding solvents |
| Resin-oil mediums | Moderate | Glossy, jewel-like | Natural resins can yellow and affect removability of later varnish |
Starting ratios: for a first glaze, try about 1 part paint to 1 part medium. For a more delicate veil, go to 1 part paint to 2–3 parts medium. If you mix your own traditional medium, a simple starting point is roughly equal parts linseed or stand oil and odorless mineral spirits, increasing the oil proportion slightly in later layers. Keep notes so you can repeat what works.
Fat Over Lean: The Rule That Prevents Cracking
“Fat” means more oil; “lean” means less oil (often more solvent). Each layer of an oil painting should be slightly more flexible than the one below. If a lean, brittle layer sits on top of a fat, flexible one, it can crack as the layers dry and move at different rates.
For glazing this means:
- Keep the underpainting lean, thinned mainly with solvent or a small amount of medium.
- Add slightly more medium (or a slightly oilier medium) in each successive glaze.
- Avoid adding pure solvent to late glazes.
Glazing Techniques for Beginners: Step by Step
Materials
- Primed panel or canvas; smooth surfaces show glazes best
- Transparent oil colors plus white and an earth color for the underpainting
- Glazing medium
- Soft synthetic or sable-type brushes in several sizes, plus a soft wide blending brush
- Lint-free rags
- Odorless mineral spirits for cleaning, with ventilation
Step 1: Make a Value Underpainting
Paint the entire composition in one color, focusing only on lights and darks. Classic options are a gray grisaille (black and white), a green-gray verdaccio (traditional for flesh), or a warm brown “brunaille” using burnt umber or raw umber. Push the values slightly lighter than you want the final painting, since glazes will darken them.
Step 2: Let the Underpainting Dry Completely
The underlayer must be dry to the touch, not just tacky. With lean paint and an alkyd medium this may take a day or two; slower paint can take several days. Glazing over wet paint lifts and muddies it.
Step 3: Mix Your First Glaze
On a clean palette, combine a small amount of transparent pigment with medium at about 1:1. Test it on a scrap or the edge of the canvas. The underpainting should show through clearly.
Step 4: Apply Thinly
Brush the glaze on in a thin, even film. Many painters apply slightly more than needed and then remove excess with a soft brush or a lint-free rag, which also lets you lift glaze from highlights. The film should look like tinted glass, not paint.
Step 5: Soften and Adjust
Use a clean, dry, soft brush to feather edges and remove brush marks. A light touch with a rag can pull the glaze back from areas that should stay light.
Step 6: Dry Between Layers
Let each glaze dry to the touch before the next. Expect roughly 24 hours with alkyd mediums and several days with slower oil mediums, depending on pigment, thickness, temperature, and humidity.
Step 7: Build Color Gradually
Add successive glazes to deepen color and shift temperature. For example, a warm transparent red oxide glaze over a grisaille creates base flesh; a thin rose glaze adds life to cheeks; a cool blue-gray velatura softens shadows on the jaw.
Step 8: Add Final Opaque Accents
Finish with a few opaque, slightly thicker highlights in the lightest areas. The contrast between thin, glowing glazes and thick highlights gives a painting dimension.
Glazing Techniques in Oil Painting: Practical Exercises
- Glaze chart: paint a row of stripes in several opaque colors, let dry, then glaze across them at right angles with each transparent color. It shows exactly how each glaze modifies each base.
- Single-object study: paint an apple or egg in grisaille, then glaze it to full color in three to five layers.
- Shadow deepening: take a finished painting with flat shadows and glaze a mixed transparent dark over them to see how much depth appears.
Glazing in Other Media: Watercolor and Acrylics
The principle carries across mediums. The glazing technique in watercolor simply means layering transparent washes over dry washes; because watercolor is transparent by nature, every layer is a glaze. Glazing with acrylics works the same way using acrylic glazing medium, and dries in minutes rather than days, which speeds up the process but makes soft blending harder. Oil remains the most forgiving for long, soft, luminous glazes because of its working time.
Common Glazing Mistakes
| Mistake | Result | Fix |
|---|---|---|
| Glazing over wet or tacky paint | Lifting, muddy color | Wait until fully touch-dry |
| Using opaque pigments | Chalky, flat layers | Check the transparency symbols on tubes |
| Thinning only with solvent | Dull, weak film that may flake | Use a proper glazing medium |
| Glazes too thick | Wrinkling, slow drying, yellowing | Apply thinly and wipe back excess |
| Too many layers of the same hue | Overly dark, heavy color | Plan values lighter in the underpainting; use fewer, purposeful glazes |
| Ignoring fat over lean | Cracking over time | Increase oil content slightly with each layer |
| Dust settling on wet glazes | Gritty surface | Dry paintings face-in or under a cover |
Glazing Tips by Skill Level
Beginners
- Start with one glaze color over a brown underpainting.
- Use an alkyd medium so you are not waiting a week between layers.
- Paint small, 8 x 10 inches or less, to keep sessions manageable.
Intermediate
- Try a verdaccio underpainting for portraits and glaze warm flesh tones over it.
- Combine glazing and scumbling in the same painting.
- Experiment with stand oil for a smoother, enamel-like finish.
Advanced
- Plan your palette around transparent-opaque contrast.
- Use selective glazing to push focal areas forward and let edges recede.
- Layer complementary glazes for chromatic darks instead of using black.
FAQs
What is the best oil glazing medium?
Alkyd-based glazing mediums are popular because they dry quickly and level smoothly, while linseed or stand oil mediums give a traditional, slower, flexible film. The best choice depends on how quickly you want to layer and whether you prefer to avoid solvents.
How long should a glaze dry before adding another layer?
Wait until it is dry to the touch, usually about 24 hours with alkyd mediums and several days with slower oil mediums. Thicker layers, cool rooms, and slow-drying pigments take longer.
Can you glaze with opaque colors?
Opaque colors cover rather than tint the layer below, so they are not ideal for classic glazing. Thinned opaque colors are better suited to scumbling or velatura effects.
What is the ratio of paint to medium for glazing?
A good starting point is about 1 part paint to 1 part medium, moving to 1:2 or 1:3 for very delicate veils. Test on a scrap and adjust until the underlayer shows through clearly.
Do I need an underpainting for glazing?
An underpainting is strongly recommended because glazes rely on the layer below for value and light. A simple monochrome grisaille, verdaccio, or brown underpainting works well.
Is glazing technique in watercolor the same as in oil?
The principle is the same: transparent layers over dry layers. In watercolor every wash is transparent, so layering itself is glazing, while in oil you need transparent pigments and a glazing medium.
Final Thoughts
Glazing is less about a secret recipe and more about sequence: a clear value underpainting, transparent pigments, a proper medium, thin layers, and patience between them. Master that order and your colors gain a depth that direct painting rarely achieves. Since transparency starts in the tube, take a look at our reviewed list of oil colors that perform well for transparent layering before your next glazed painting.




