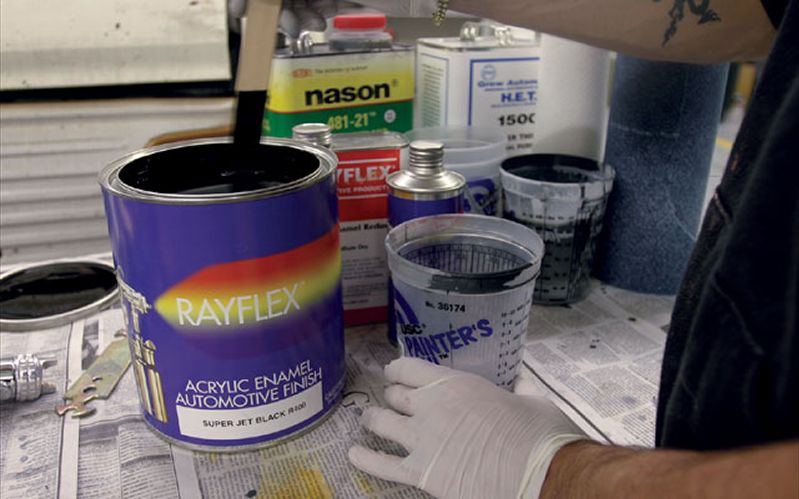
Painting with acrylic enamel involves using a fast-drying, durable paint suitable for various surfaces. This paint provides a glossy finish and resists wear.
Acrylic enamel is a popular choice for both amateur and professional painters. It dries quickly, allowing projects to move forward without long waiting times. The paint bonds well to surfaces like metal, wood, and plastic, making it versatile. Its durable nature ensures that the finished product resists chipping, fading, and general wear and tear.
The glossy finish enhances the appearance of the painted object, giving it a polished and professional look. Whether for automotive projects, household items, or art, acrylic enamel offers a reliable solution for achieving a lasting, attractive finish.
The Lure Of Acrylic Enamel
The allure of Acrylic Enamel captivates artists worldwide. This medium offers unmatched versatility and a modern touch. Its vibrant colors and durability make it a favorite among contemporary artists. Dive into the fascinating world of acrylic enamel and discover why it has become so popular.
Versatility In Art
Acrylic enamel is known for its versatility in art. You can use it on various surfaces like canvas, wood, and metal. It dries quickly, allowing artists to work faster and layer without long waits. This quick-drying property is especially useful for detailed projects.
- Works on multiple surfaces
- Dries quickly
- Allows for easy layering
Artists can achieve different effects with acrylic enamel. Whether creating a smooth finish or a textured look, the possibilities are endless. This flexibility makes it a go-to choice for many art projects.
A Modern Medium For Contemporary Artists
Modern artists embrace acrylic enamel for its vibrant colors and lasting finish. It allows for bold expressions and intricate details. The paint’s durability ensures that artworks remain vibrant for years.
| Benefit | Description |
|---|---|
| Vibrant Colors | Ensures striking and bold art pieces |
| Durability | Long-lasting and resistant to fading |
| Flexibility | Suitable for various art styles and techniques |
Contemporary artists use acrylic enamel to push boundaries. They create unique, captivating pieces that resonate with viewers. The medium’s adaptability allows for continuous innovation in the art world.
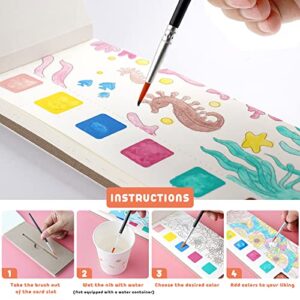
Essential Supplies For Acrylic Enamel Artwork
Creating stunning acrylic enamel artwork requires the right supplies.
Having the correct tools will make your painting process smoother and more enjoyable.
This section will guide you through the essential supplies for acrylic enamel artwork.
Choosing The Right Brushes
Selecting the proper brushes is crucial for acrylic enamel painting.
Different brushes create various effects.
Here are some important types:
- Flat Brushes: Ideal for bold strokes and filling wide spaces.
- Round Brushes: Great for detailed work and fine lines.
- Filbert Brushes: Perfect for blending and creating soft edges.
- Fan Brushes: Useful for textures and special effects.
Selecting Quality Acrylic Enamel Paints
High-quality acrylic enamel paints provide vibrant colors and long-lasting results.
Consider these factors when selecting paints:
- Viscosity: Thicker paints offer better coverage and texture.
- Pigmentation: Highly pigmented paints ensure rich, vivid colors.
- Drying Time: Choose paints that match your working speed.
- Finish: Glossy or matte finishes affect the final appearance.
Using a variety of colors can make your artwork more dynamic.
Consider buying a set of primary colors. Mix them to create any shade you need.
| Brush Type | Use |
|---|---|
| Flat Brush | Bold strokes, wide spaces |
| Round Brush | Detailed work, fine lines |
| Filbert Brush | Blending, soft edges |
| Fan Brush | Textures, special effects |
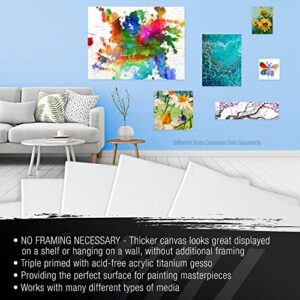
Preparing Your Canvas
Getting your canvas ready is a crucial step in painting with acrylic enamel. A well-prepared canvas ensures a smoother application and better adhesion of the paint. Let’s dive into the essential steps to prepare your canvas.
Surface Preparation Techniques
Proper surface preparation is vital for a successful painting. Follow these steps to ensure your canvas is ready:
- Clean the Canvas: Use a soft cloth to remove dust and dirt.
- Sand the Surface: Lightly sand the canvas to create a smooth texture.
- Remove Residue: Wipe the canvas with a damp cloth to remove sanding dust.
These steps help create an even surface, allowing the paint to adhere better. Make sure to take your time and do each step thoroughly.
Priming For Perfection
Priming your canvas is the next crucial step. It helps the paint stick better and makes colors more vibrant. Follow these steps to prime your canvas:
- Choose the Right Primer: Use a high-quality acrylic gesso primer.
- Apply the Primer: Use a wide brush to apply a thin, even layer.
- Let It Dry: Allow the primer to dry completely before adding another layer.
- Add Additional Layers: Apply two to three layers for the best results.
A well-primed canvas makes a big difference in your painting. It provides a smooth surface and enhances the durability of your artwork.
Credit: www.autotrainingcentre.com
Mastering Acrylic Enamel Techniques
Acrylic enamel is a versatile medium, ideal for both beginners and experts. Mastering its techniques can elevate your artwork to new heights. This section dives into crucial methods like blending colors and layering for depth and texture. Let’s explore how to become an acrylic enamel pro.
Blending Colors Like A Pro
Blending colors is essential for creating realistic and vibrant artworks. Start by selecting your primary colors. Mix small amounts on a palette using a palette knife. Apply the colors side by side on your canvas. Use a soft brush to gently blend the edges. Work quickly; acrylic enamel dries fast.
Use a misting spray bottle to keep the paint moist. This allows for smoother blending. Practice different blending techniques, such as circular motions or linear strokes. Experiment with color combinations to find your unique style.
Layering For Depth And Texture
Layering adds depth and texture to your paintings. Begin with a base coat of acrylic enamel. Let it dry completely before adding new layers. Use thin layers to build up the painting gradually.
Create texture by using different tools. Try a palette knife, sponge, or even a toothbrush. Apply the paint in various ways to achieve unique textures. For example, dabbing with a sponge creates a soft, cloud-like effect. Scraping with a palette knife adds sharp, defined lines.
| Tool | Effect |
|---|---|
| Palette Knife | Sharp lines, rough texture |
| Sponge | Soft, cloud-like texture |
| Toothbrush | Fine splatters, rough texture |
Use a combination of these tools to create dynamic artworks. Let each layer dry fully before applying the next. This ensures that the layers do not mix, maintaining the integrity of each texture.
With practice, you’ll master these techniques and create stunning acrylic enamel paintings. Remember, patience and experimentation are key.
Creative Applications
Acrylic enamel opens a world of creative possibilities. It is versatile and vibrant. Artists love using it in unique ways. Let’s explore some exciting applications.
Innovative Uses In Mixed Media
Mixed media art combines various materials. Acrylic enamel is perfect for this. It can be layered over paper, fabric, and wood. Artists can create textured backgrounds. They can also highlight specific elements with bold colors.
Here are some ideas for using acrylic enamel in mixed media:
- Layering with stencils for intricate patterns.
- Combining with collage elements for added depth.
- Using with metallic foils for a shiny effect.
Acrylic Enamel In Abstract Art
Abstract art often uses bold colors and shapes. Acrylic enamel is ideal for this. Its quick-drying nature helps in creating sharp lines. Artists can experiment with pouring techniques and drip effects.
Here are steps for using acrylic enamel in abstract art:
- Choose a color palette.
- Prepare the canvas with a base layer.
- Apply acrylic enamel using brushes or palette knives.
- Experiment with splashing or dripping techniques.
Abstract art allows freedom of expression. Acrylic enamel enhances this with its vibrant hues.
Color Theory In Acrylic Enamel Painting
Understanding color theory is crucial in acrylic enamel painting. It helps you choose colors that work well together. This results in visually appealing artwork. Let’s dive into the basics of color theory.
Understanding The Color Wheel
The color wheel is a circular diagram of colors. It shows the relationships between primary, secondary, and tertiary colors.
| Color Type | Colors |
|---|---|
| Primary Colors | Red, Blue, Yellow |
| Secondary Colors | Green, Orange, Purple |
| Tertiary Colors | Red-Orange, Yellow-Green, Blue-Violet |
Primary colors are the base colors. Secondary colors are made by mixing two primary colors. Tertiary colors are a mix of primary and secondary colors.
Creating Harmony And Contrast
Color harmony ensures your painting looks balanced and pleasing. Contrasting colors make your artwork stand out.
- Analogous Colors: Colors next to each other on the color wheel. Example: Blue, Blue-Green, Green.
- Complementary Colors: Colors opposite each other on the color wheel. Example: Red and Green.
- Triadic Colors: Three colors evenly spaced on the color wheel. Example: Red, Yellow, Blue.
Use analogous colors for a calm, harmonious look. Use complementary colors for vibrant contrast. Triadic colors offer balanced yet dynamic compositions.
Experiment with different color combinations. This helps you understand their effects in acrylic enamel painting.
Finishing Touches
The final steps in painting with acrylic enamel are crucial. These finishing touches enhance and protect your artwork. They ensure your piece stands out and lasts longer. Let’s explore the essential aspects of finishing your acrylic enamel paintings.
Sealing Your Artwork
Sealing your artwork is vital. It protects the paint and enhances colors. Use a clear acrylic sealer for best results. Choose between a glossy or matte finish based on your preference.
- Spray sealers provide an even coat.
- Brush-on sealers offer more control.
Ensure the painting is completely dry before sealing. Apply multiple thin layers for better protection. Allow each layer to dry thoroughly. This process prevents smudging and preserves the artwork.
Framing And Displaying
Framing your artwork adds a professional touch. It also protects the edges and corners. Choose a frame that complements your painting. Consider the style and color of both the frame and the artwork.
| Frame Type | Best For |
|---|---|
| Wooden Frame | Traditional and classic paintings |
| Metal Frame | Modern and contemporary artworks |
Displaying your painting correctly is important. Hang it at eye level for the best view. Avoid direct sunlight to prevent fading. Use proper hanging hardware to ensure stability.
- Picture hooks are reliable and easy to use.
- Wire hangers allow for easy adjustments.
These steps ensure your acrylic enamel painting looks its best. They also help in preserving its beauty for years to come.

Credit: www.amazon.com
Care And Maintenance Of Acrylic Enamel Art
Acrylic enamel art is vibrant and durable. With proper care, it lasts a lifetime. This section explains how to keep your acrylic enamel paintings in top shape.
Cleaning Tips
Regular cleaning keeps your art looking fresh. Use a soft, dry cloth for dusting. Microfiber cloths work best. Avoid using water or cleaning solutions. These can damage the paint.
For stubborn dirt, use a slightly damp cloth. Make sure it is barely wet. Gently wipe the surface. Never scrub. This could scratch the painting. Always handle your art with clean hands.
Long-term Preservation
Proper storage is key to preserving your acrylic enamel art. Keep your paintings in a cool, dry place. Avoid direct sunlight. UV rays can fade colors over time.
Maintain a stable environment. Fluctuating temperatures and humidity can cause the paint to crack. Use a dehumidifier if needed. Store paintings upright. This prevents warping and damage.
Consider using a protective varnish. It adds a layer of security. Varnish protects against dust, dirt, and UV rays. Apply it after the paint has fully cured.
Here is a quick guide to preserving your acrylic enamel art:
| Task | Frequency |
|---|---|
| Dust with soft cloth | Weekly |
| Check for dirt or grime | Monthly |
| Apply protective varnish | Every 1-2 years |
Follow these tips and your art will stay beautiful for years.
Credit: www.autotrainingcentre.com
Frequently Asked Questions
How To Paint With Acrylic Enamel?
To paint with acrylic enamel, clean the surface thoroughly. Apply a primer. Use smooth, even strokes with a quality brush. Allow each coat to dry before applying the next. Seal with a clear coat for durability.
How Long Should You Wait Between Coats With Acrylic Enamel?
Wait 15-20 minutes between coats of acrylic enamel. Ensure the surface is dry to touch before applying the next coat.
Do You Need Primer With Acrylic Enamel Paint?
Yes, using a primer with acrylic enamel paint is recommended. It ensures better adhesion and a smoother finish.
Can You Paint Acrylic Over Enamel Without Sanding?
No, you shouldn’t paint acrylic over enamel without sanding. Sanding ensures proper adhesion and a smooth finish.
What Is Acrylic Enamel Paint?
Acrylic enamel paint is a water-based paint known for durability and a glossy finish.
How Long Does Acrylic Enamel Last?
Acrylic enamel can last up to 10 years with proper care and maintenance.
Can You Use Acrylic Enamel On Wood?
Yes, acrylic enamel can be used on wood surfaces after proper preparation.
Is Acrylic Enamel Paint Waterproof?
Yes, acrylic enamel paint is waterproof once fully cured.
Conclusion
Mastering acrylic enamel painting can transform your artistic journey. This versatile medium offers vibrant colors and durability. With the right techniques, your artwork will stand out. Experiment, practice, and enjoy the process. Embrace acrylic enamel to elevate your creative expressions.
Ready to start painting? Dive in and let your creativity flow!