
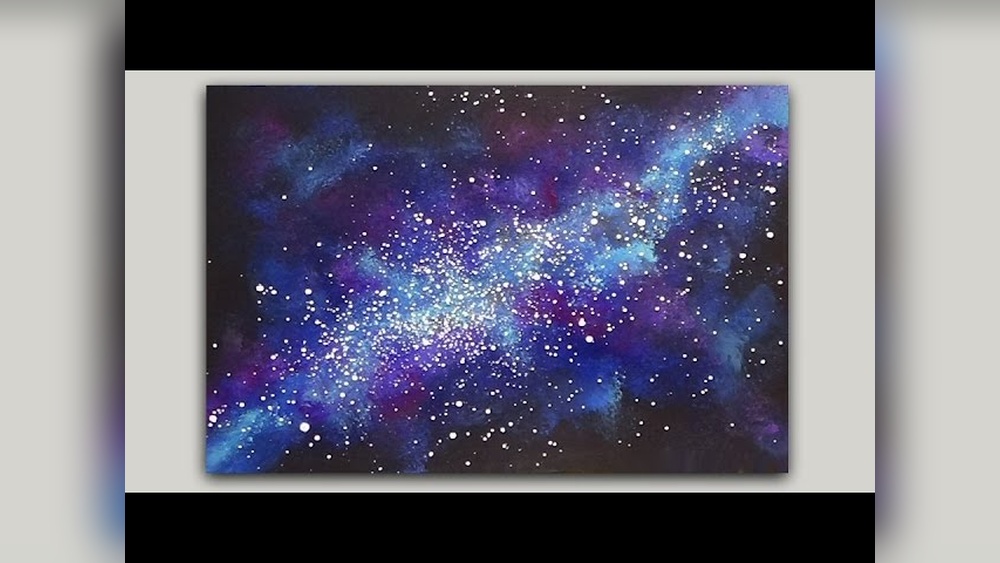
Galaxy paintings look complicated, but they are mostly soft blending, a few layers of glow and a confident splatter. There is no perspective to get wrong and no “correct” shape a nebula must take, which is why space is one of the most rewarding subjects for newer painters. This space galaxy painting tutorial walks through a full acrylic galaxy step by step, then offers variations and ideas once the basic method clicks.
Quick answer: To paint a galaxy, cover the canvas in black or very dark blue, then sponge or dry-brush soft clouds of purple, magenta, blue and teal in a diagonal band, building from dark to light. Add a thin white glow through the brightest center, splatter white stars with a toothbrush, and finish with a few larger hand-painted stars with cross-shaped glints. In acrylic, the whole painting can be done in about an hour.
Why Galaxy Paintings Work for Beginners
A galaxy is forgiving. Nebulae are irregular by nature, so uneven blending looks intentional. The dark background hides small mistakes, and white stars on black always produce strong contrast. At the same time, painting space teaches real skills: soft-edge blending, building value from dark to light, glazing and controlled splatter.
If you enjoy this format, our collection of step-by-step painting tutorials covers other subjects using the same layering logic.
Materials for a Galaxy Painting
| Item | Recommendation | Why |
|---|---|---|
| Surface | Canvas or canvas panel, 8 x 10 to 16 x 20 inches | Large enough for a sweeping band |
| Paint | Acrylic: black, white, phthalo or ultramarine blue, dioxazine purple, magenta or quinacridone pink, a teal or turquoise | Covers the classic galaxy palette |
| Brushes | 1-inch flat, old stiff round, small detail round | Background, dry-brush clouds, stars |
| Sponge | Makeup sponge or natural sea sponge | Soft, cloudy texture |
| Toothbrush | Old, clean toothbrush | Fine star splatter |
| Extras | Paper towels, water jar, palette, newspaper for splatter | Control and cleanup |
Phthalo blue and dioxazine purple are strong, intense pigments, so a little goes a long way. They are excellent for galaxies because they stay vivid when mixed with white.
Step-by-Step Space Galaxy Painting Tutorial
Step 1: Paint the dark background
Cover the entire canvas with black, or a mix of black and a little blue for a deeper space color. Use the flat brush and two coats if needed for solid coverage. Let it dry fully, about 15–20 minutes. Dry is important: wet black will mix into your nebula colors and gray them out.
Step 2: Plan the galaxy band
Imagine a soft diagonal band running from one corner to the opposite corner. Diagonals feel more dynamic than horizontal lines. You can mark it with a few light chalk dots if that helps.
Step 3: Lay in the darkest colors
Dab a small amount of dark purple onto a damp sponge, blot it on a paper towel, then lightly press it along the band. Keep the edges uneven and cloudy. Add patches of dark blue along the edges of the purple.
Step 4: Build the mid-tones
Mix magenta with a little white and sponge it into the center of the band, overlapping the purple. Add teal or turquoise to one or two areas of the blue. Overlap colors where they meet so the transitions look natural. Use a light touch: the goal is a haze, not solid paint.
Step 5: Create the glow
Mix white with a tiny amount of pink or blue. Using an almost-dry sponge or brush, apply it to the very center of the band in a thin streak. Concentrate the brightest value in a smaller area than the color beneath it, which makes it read as glowing light.
Step 6: Soften and refine
If any edges look harsh, sponge a little black back over them to push them into the background. Glazing a thin, watery layer of purple or blue over parts of the band adds depth.
Step 7: Splatter the stars
Cover anything you want to protect, then thin white paint with water to a milky consistency. Dip the toothbrush, hold it a few inches above the canvas and pull your thumb across the bristles. Concentrate more stars near the bright band and fewer at the edges. Test on paper first: too-thick paint gives blobs, too-thin paint gives faint drips.
Step 8: Add feature stars
With a small round brush, paint four to eight larger dots. For a few of the brightest, add a thin cross of light, a vertical and horizontal line through the dot, with a smaller diagonal cross if you like. Keep these few and far between.
Step 9: Optional extras
Add a planet, a silhouette of trees or mountains along the bottom, or a figure looking up. A silhouette grounds the composition and gives the sky scale.
Galaxy Color Palettes to Try
| Palette | Colors | Mood |
|---|---|---|
| Classic nebula | Purple, magenta, blue, white | Dreamy, vibrant |
| Cool cosmos | Phthalo blue, teal, violet, white | Calm, icy |
| Fiery nebula | Red, orange, magenta, gold | Dramatic, warm |
| Aurora galaxy | Green, teal, violet | Northern lights feel |
| Monochrome | Black, white, one blue | Minimal, elegant |
Space Galaxy Painting Ideas Beyond the Basic Band
- Galaxy over mountains: A Milky Way band arching above dark mountain silhouettes.
- Planet with rings: A sphere shaded from light to dark with an elliptical ring that passes in front of and behind it.
- Moon and galaxy: A detailed moon with craters dabbed in grays against a nebula background.
- Galaxy silhouette: Paint a galaxy, then mask a shape (a whale, a tree, a person, a cat) in black for a striking silhouette.
- Galaxy in a jar or circle: Paint the galaxy inside a circular shape or a jar outline on a plain background.
- Spiral galaxy: A bright core with curved arms swirling outward, dotted with tiny stars.
- Black hole: A black circle ringed with a thin bright orange-white glow and swirling light around it.
- Pour-painting cosmos: Acrylic pour medium with dark blues, purples and white, then splatter stars once dry.
- Galaxy shoes, rocks or phone cases: The same sponge method works on other surfaces with appropriate paint and a sealer.
- Watercolor galaxy: Wet the paper, drop in purples and blues, let them bloom, then add salt for star-like texture and splatter white gouache.
Galaxy Painting With Kids
For children, swap acrylic for washable tempera on black construction paper. Let them sponge colors freely, then do the star splatter outdoors or inside a cardboard box to contain the spray. Glow-in-the-dark paint dotted on as stars is a fun finishing touch that keeps kids interested long after the painting dries.
How to Paint a Simple Planet
- Trace a circle with a cup or lid.
- Fill it with a mid-tone color.
- Decide where the light comes from. Blend a lighter tint on that side and a darker shade on the opposite side.
- Add a thin dark crescent along the shadow edge to strengthen the round form.
- Paint soft horizontal bands for a gas giant or dabbed craters for a rocky planet.
- Add a faint glow around the lit edge with a dry brush and a little white.
What Real Nebulae Can Teach Your Painting
Looking at astronomy photographs, which are widely published by space agencies, helps galaxy paintings feel more convincing. A few patterns show up often:
- Dark dust lanes cut through bright areas, creating contrast and structure.
- Brightness falls off gradually from the core, rather than ending at a hard edge.
- Star density varies, with clusters in some areas and sparse patches in others.
- Colors sit in zones, rather than being evenly mixed everywhere.
Keep in mind that many published space images use processed or false color, so you have full creative freedom with palette. The structure is what borrows realism.
Acrylic, Oil or Watercolor for Galaxies?
Acrylic is the quickest: layers dry in minutes, so the whole piece is done in one session. Oil stays wet for hours, which makes very smooth blends easy, though splattering stars is best done once the nebula has firmed up; if you want to try oil, our oil painting tutorial for beginners explains layering and drying times. Watercolor gives beautiful natural blooms but requires planning for the dark background, usually with heavy layers of indigo or a dark mix.
Troubleshooting Your Galaxy
The colors look gray or chalky
The background was still wet, or too much white was mixed in. Let black dry fully and use white only for the brightest highlights. A transparent glaze of pure color can restore saturation.
It looks like a stripe, not a galaxy
The edges are too even. Break them up with irregular sponge dabs, push some areas back with black, and vary the band’s width.
Stars are blobs
The paint was too thick or the brush overloaded. Thin the paint, tap off excess, and test on scrap paper.
The galaxy looks flat
Not enough value range. Make sure you have deep darks at the edges and a small, bright core.
Too many feature stars
Big stars compete with each other. Paint over a few with black and keep the brightest ones rare.
Mini Tutorial: Milky Way Over a Pine Forest
This variation combines the galaxy method with a simple silhouette landscape, and it is one of the most popular space paintings for wall art.
- Sky gradient. Instead of flat black, blend a deep navy at the top into a slightly lighter blue-violet near the bottom third. A faint teal or warm glow just above the horizon suggests distant city or twilight light.
- Milky Way band. Sponge a soft, angled band of violet, pink and pale blue rising from the horizon. Keep it narrower and subtler than a full nebula painting so it reads as our own galaxy seen from Earth.
- Dust lanes. Dab a little dark navy into the center of the band in irregular streaks. Those darker lanes are what make a Milky Way look real.
- Stars. Splatter fine stars, heavier along the band, then add a few brighter ones by hand.
- Treeline. With black and a small round brush, paint a ground line along the bottom, then pine trees as vertical lines with short downward strokes getting wider toward the base. Vary heights and spacing.
- Optional figure or tent. A tiny glowing tent or a person with a flashlight adds a story and a sense of scale.
Scaling Up: Galaxy Paintings on Large Canvases
On canvases 24 inches or larger, acrylic can dry before you finish blending. Work in sections, keep a spray bottle handy to mist the area you are blending, or add a slow-drying medium to extend open time. Use a larger sponge or a big, soft brush to keep the nebula from looking fussy, and make the bright core larger in proportion so it reads from across the room. Larger star splatters can be made with a stiff brush tapped against a palette knife.
Finishing and Protecting the Painting
Once fully dry, a gloss varnish deepens dark backgrounds and makes colors look richer, while a satin finish reduces glare under room lights. Apply varnish in thin, even coats with a soft wide brush, and paint the canvas edges black for a clean, frameless look.
FAQs
What colors do you need to paint a galaxy?
Black, white, a blue, a purple and a pink or magenta are enough. Teal or turquoise adds variety.
Can beginners paint a galaxy?
Yes. Galaxy paintings are among the most beginner-friendly subjects because blending does not need to be precise and the dark background hides mistakes.
How do you make stars in a galaxy painting?
Thin white paint, dip an old toothbrush and flick the bristles with your thumb. Add a few larger stars with a small brush.
Should I use a sponge or brush for galaxy clouds?
A sponge gives soft, cloudy texture quickly. A dry, stiff brush works too and offers more control over shape.
How long does a galaxy painting take?
In acrylic, about one to one and a half hours, including drying time for the background.
Why does my galaxy look muddy?
Usually because colors were blended over wet black, or complementary colors like yellow and purple were mixed directly. Let the background dry and keep color families together.
Final Thoughts
Once you have painted one galaxy, try changing just one thing at a time: a new palette, a silhouette, a planet or a different medium. Each variation builds on the same blending and splatter skills. For more guided projects that move from simple to advanced, explore our full library of tutorials for mastering painting techniques.




