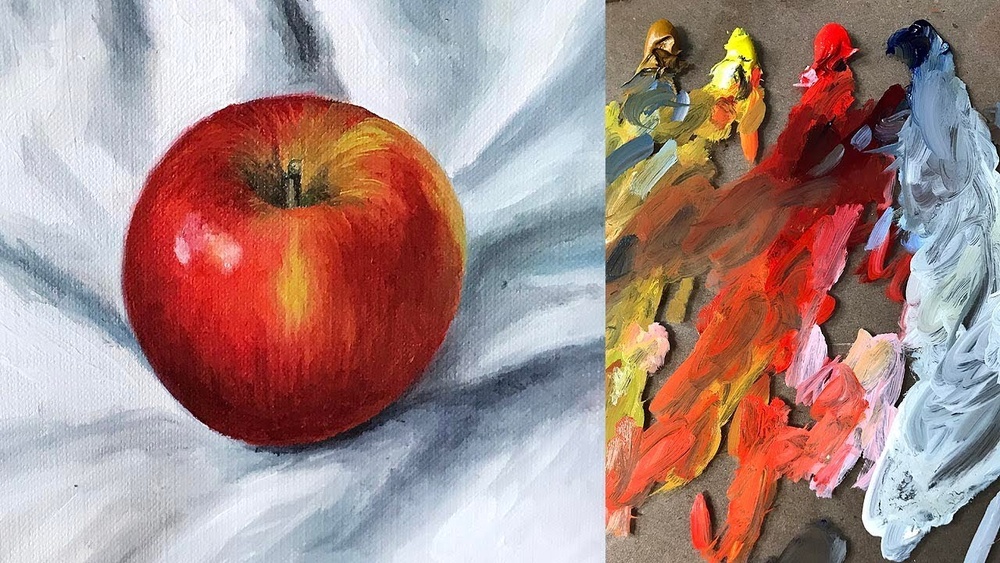
Painting an apple in oil is more than copying its shape and color. It’s a classic subject for beginners and experienced artists alike, because it teaches you how to create form, texture, and light. An apple’s simple look hides many details: its shine, subtle color changes, and the way it sits in space. If you want to learn how to paint an apple in oil, this guide will walk you through each step, from choosing the right materials to finishing touches. Along the way, you’ll get practical tips, see common mistakes beginners make, and learn how to make your apple look real—not flat or cartoonish.
Choosing Your Materials
Before you start painting, gather the right materials. Oil painting needs specific tools for best results.
- Oil paints: Choose basic colors—red, yellow, blue, white, and a few earth tones like burnt sienna and ochre. For apples, you’ll need a good red (such as cadmium red), a yellow (like lemon yellow), and a green (such as sap green). You can mix other shades as needed.
- Brushes: Use soft, synthetic or sable brushes in various sizes. A small round brush is great for detail, while a flat brush helps with broader strokes.
- Canvas or canvas board: A small canvas (8×10 inches) works well for apple studies.
- Mediums: Linseed oil thins paint and speeds drying. You might use odorless mineral spirits for cleaning.
- Palette and palette knife: A glass or wooden palette is best. A palette knife is useful for mixing colors.
- Easel: Keeps your painting at a comfortable angle.
- Paper towels or rags: For cleaning and wiping brushes.
- Reference apple: Use a real apple as your model. Take photos if you need to keep the light consistent.
A common mistake is using cheap paints or brushes. These can make blending harder and reduce color quality. Invest in good materials—even for a simple apple study.
Preparing Your Workspace
Oil paint can be messy. Set up a clean, well-lit area. Natural light is best, but a bright lamp works too. Place your apple on a simple surface—a white plate or cloth avoids distractions. Make sure you have space for your canvas, palette, and brushes.
Try to keep your workspace organized. Many beginners struggle to mix clean colors because their palette gets messy quickly. Wipe your palette often and keep brushes separated by color.
Sketching The Apple
Start with a light sketch. This step is important—it helps place your apple correctly and avoids big mistakes later.
- Use a pencil or thin brush with diluted paint to lightly mark the apple’s shape on the canvas.
- Focus on the outline first. Apples are not perfect circles. Observe the slight bumps and dips.
- Add the stem and any leaf if your apple has one.
- Mark the shadow area where the apple touches the surface.
Keep the sketch simple. Don’t add too much detail at this stage. Some artists use a grid to help with proportions, but for a single apple, freehand is usually enough.
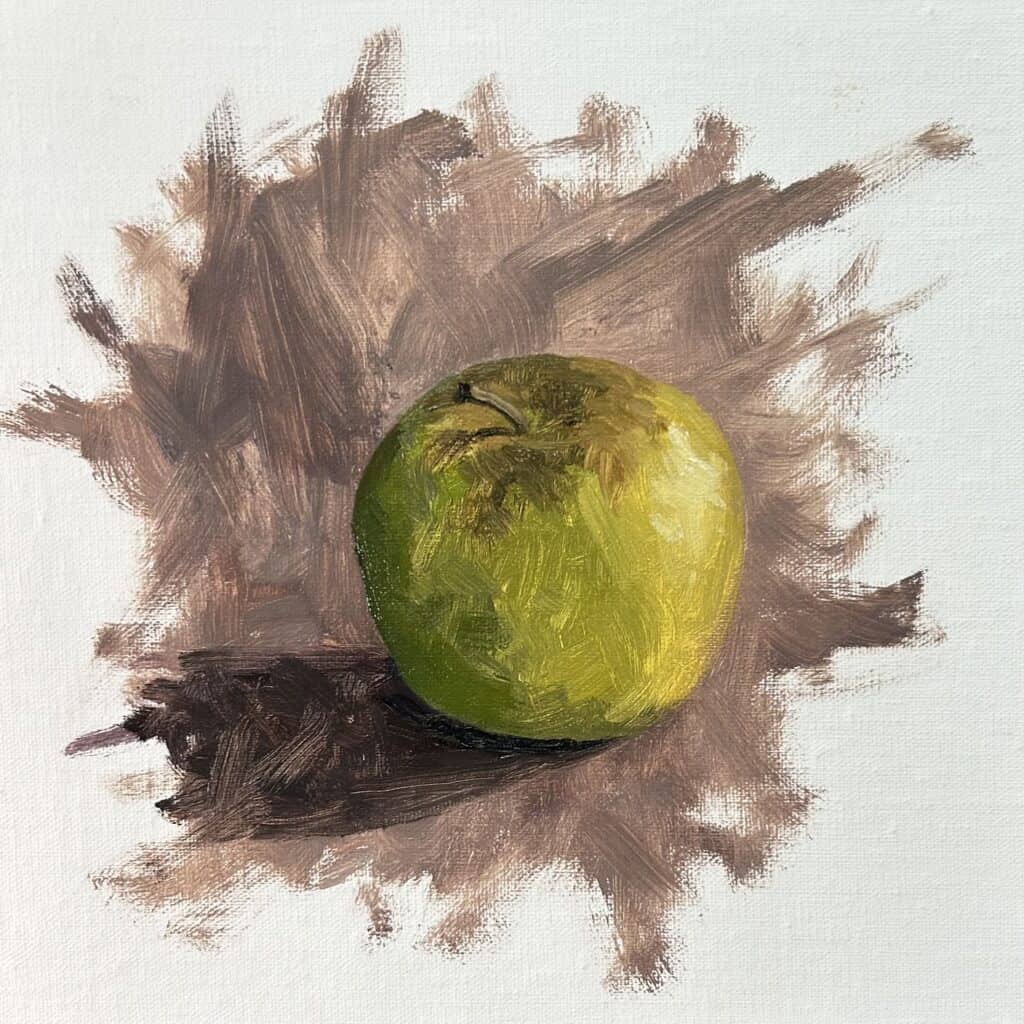
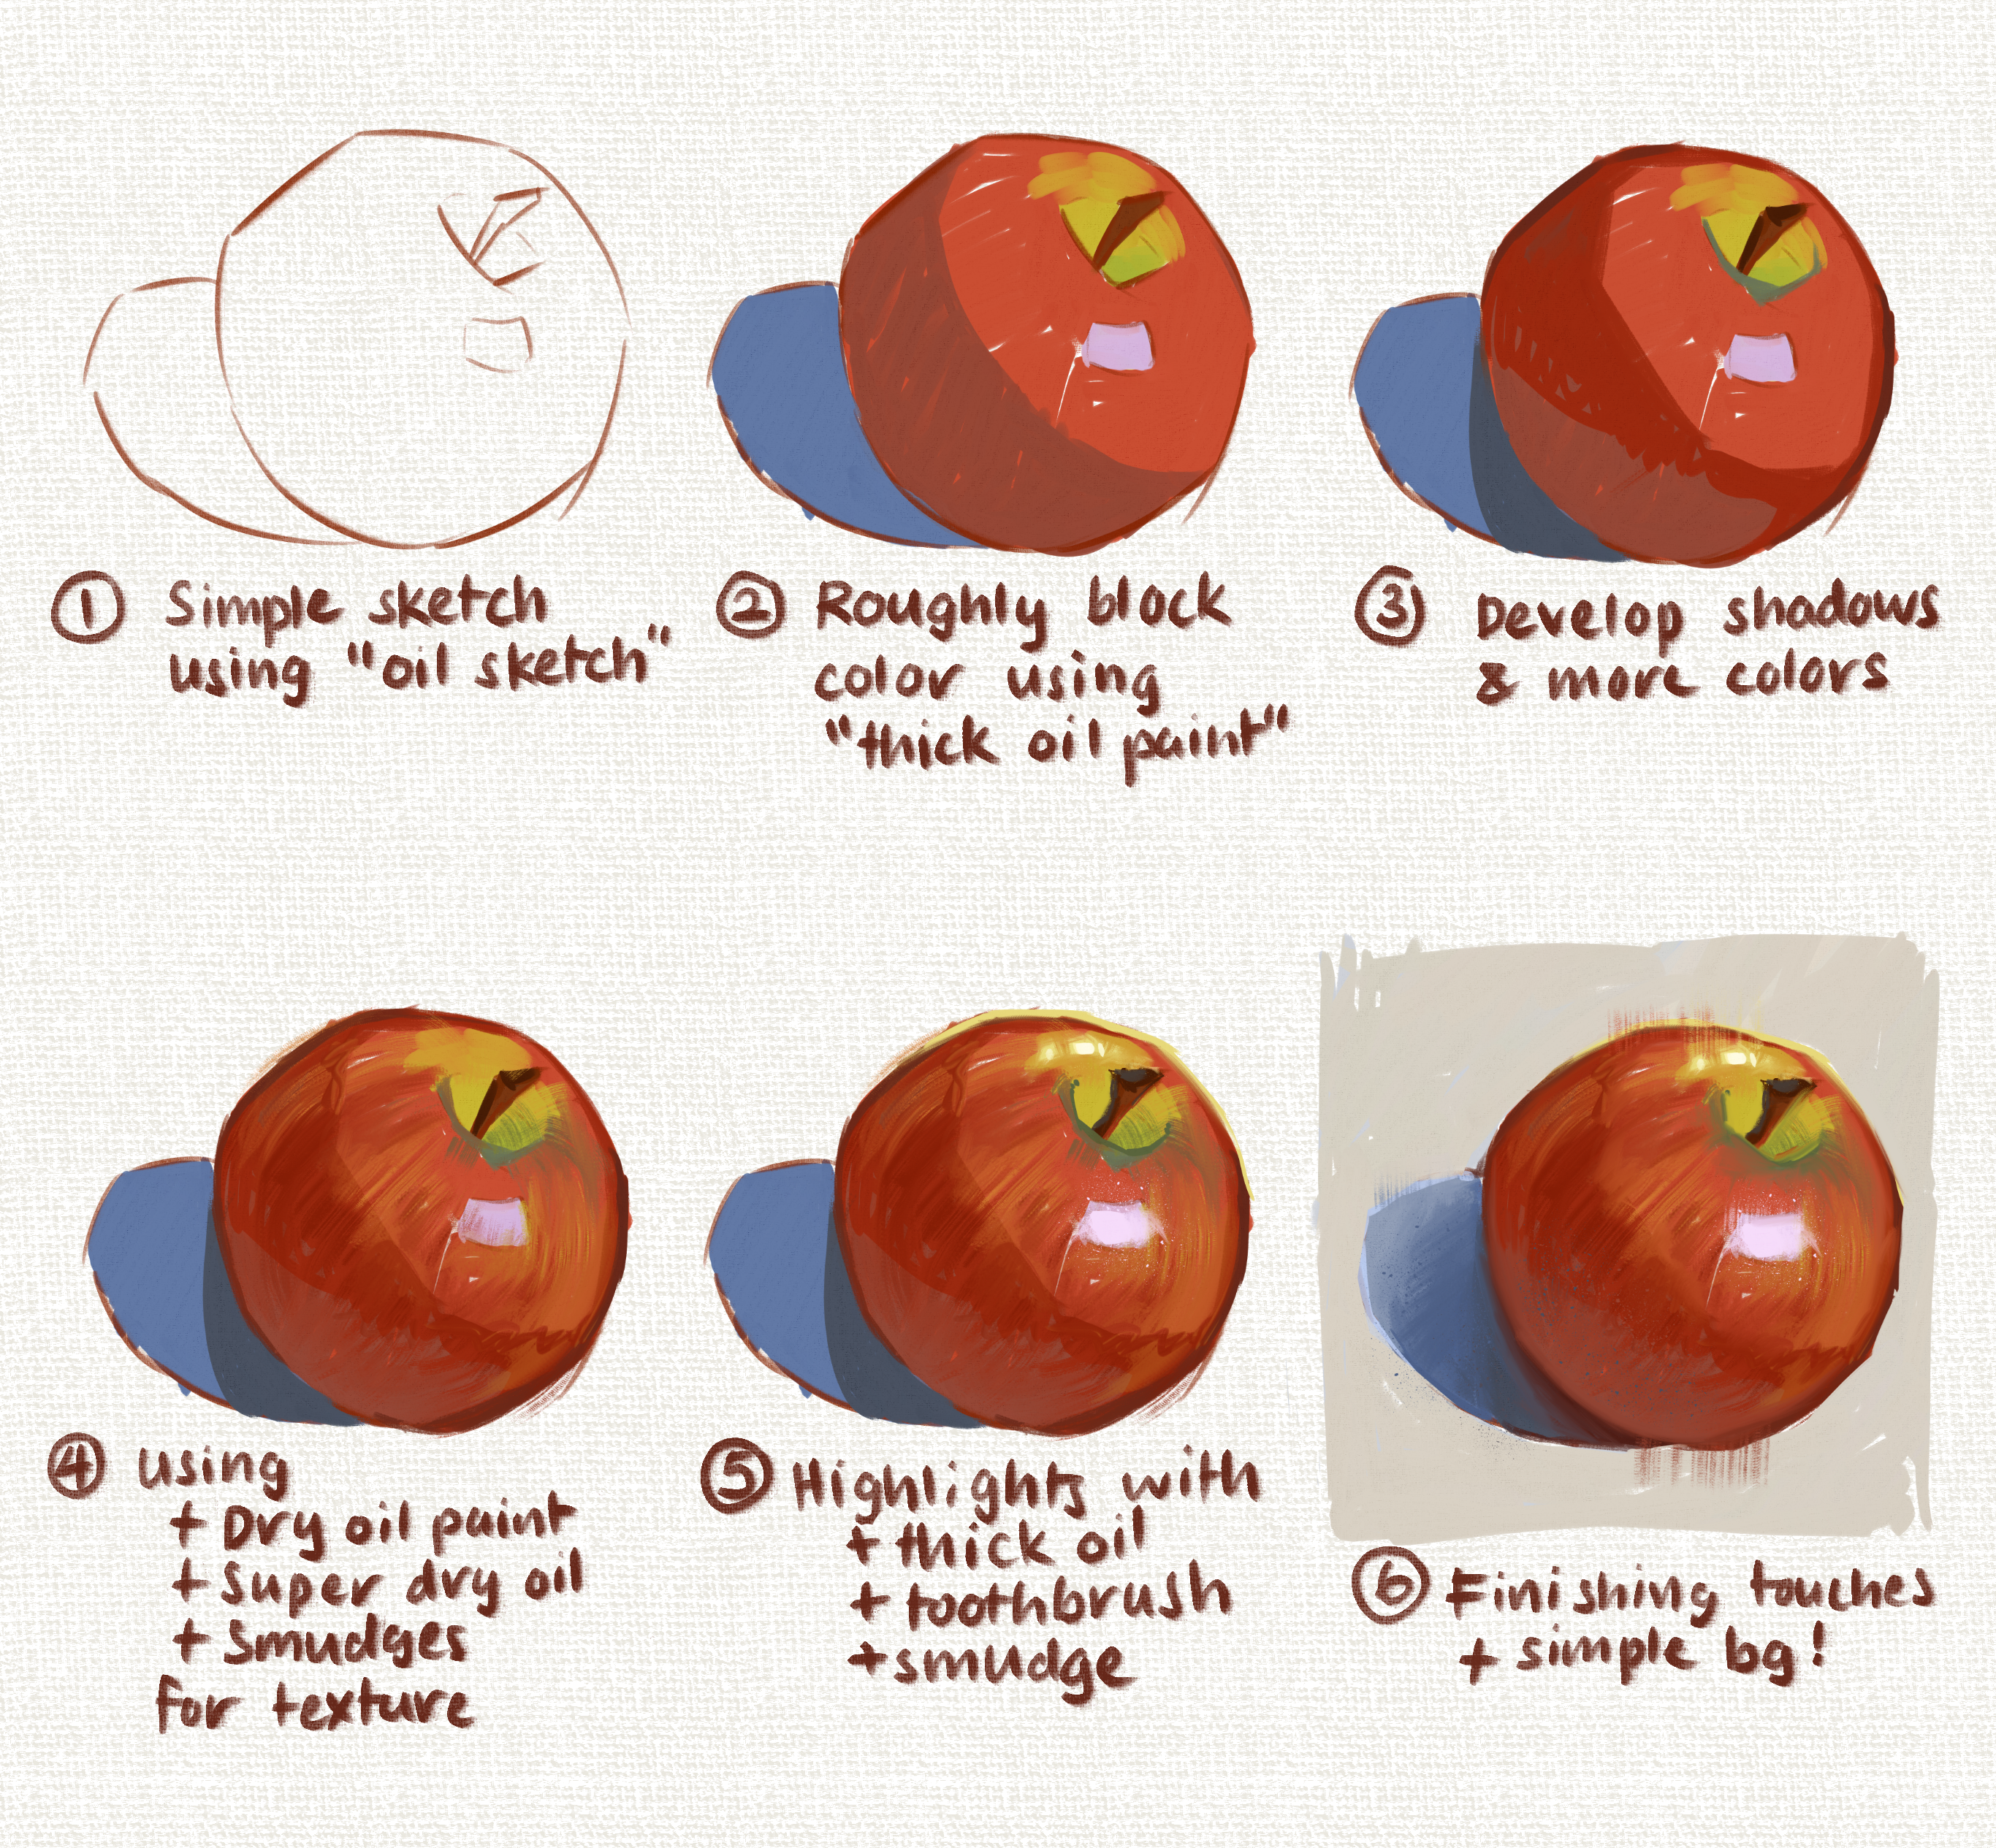
Blocking In Colors
Now, start painting. This stage is called “blocking in”—you lay down basic colors and shapes.
- Mix a mid-tone color for the apple. For a red apple, use a mix of cadmium red and a touch of yellow or blue to adjust the tone.
- Fill in the apple’s main body with this color, using a medium brush.
- Paint the background with a neutral tone. This helps the apple stand out.
- Add the shadow under the apple with a mix of burnt sienna and ultramarine blue.
- Leave areas for highlights unpainted or lightly covered.
Don’t worry about details yet. The purpose here is to cover the canvas and set up the main color relationships.
Building Up Layers And Form
Oil paint dries slowly, so you can work in layers. After blocking in, add more paint to build depth.
Adding Color Variation
Real apples have many colors—reds, yellows, greens, and even blueish shadows.
- Use a smaller brush to add different reds, yellows, and greens.
- Observe your apple closely. Where is it darker? Where does it change color?
- Blend the edges between colors gently. Oil paint is good for smooth transitions.
Creating Volume
To make your apple look round, use light and shadow.
- Add lighter paint on the side facing the light. For highlights, mix white with a touch of yellow.
- Deepen the shadow areas with darker, cooler colors—try mixing red with blue or green.
- Gradually blend from light to dark. Avoid sharp lines unless there’s a hard shadow.
One mistake beginners make is using pure white for highlights. Real apples rarely have pure white spots. Instead, highlights are often soft and colored by the apple’s skin.
Painting The Stem And Surface Details
The stem is small but important.
- Mix brown and green for the stem. Use a tiny brush for detail.
- Add a bit of highlight to the stem if it catches light.
If your apple has a leaf, paint it with green and yellow. Show veins and folds by adding darker and lighter shades.
Look for small marks, dots, or color variations on your apple’s skin. Adding these details makes your painting more realistic.
Understanding Light And Shadow
Light is what gives an apple its shape in a painting. Study where the light hits and where the shadow falls.
- Direct light creates a bright spot—this is the highlight.
- The shadow under the apple is usually cool and dark.
- The area between light and shadow is called the core shadow. It’s often warmer than the deepest shadow.
Here is a quick comparison of how light affects an apple’s appearance in oil painting:
| Light Type | Highlight | Shadow | Color Shift |
|---|---|---|---|
| Natural sunlight | Warm, soft | Cool, blueish | Reds appear brighter |
| Indoor lamp | White, sharp | Neutral grey | Colors muted |
| Diffuse daylight | Soft, broad | Gentle, less contrast | Subtle transitions |
Knowing how light works helps you decide which colors to use and where to place highlights and shadows.

Credit: www.youtube.com
Mixing Colors For Realism
Mixing oil colors is both science and art. If you want your apple to look real, you need to match its colors closely.
- Always start with the basic color—red, green, yellow.
- Adjust the tone by adding small amounts of blue or yellow.
- For shadows, mix complementary colors. For example, red and green make a rich, deep shadow.
- Highlights are rarely pure white; mix a touch of yellow or red.
Here’s a comparison of typical apple color mixes:
| Apple Type | Main Color Mix | Shadow Mix | Highlight Mix |
|---|---|---|---|
| Red Delicious | Cadmium red + Alizarin crimson | Red + blue + green | White + yellow |
| Granny Smith | Sap green + lemon yellow | Green + ultramarine blue | White + green |
| Golden Delicious | Yellow ochre + lemon yellow | Yellow + burnt sienna | White + yellow |
Beginners often miss subtle color shifts. For example, the shadow on a red apple isn’t just darker red—it may have hints of purple or blue.
Achieving Texture And Shine
An apple’s surface is smooth and shiny. To show this in oil paint:
- Use a soft brush to blend colors smoothly.
- Add a small, well-placed highlight to show shine.
- Create texture by using thicker paint in some areas (impasto).
- For deep shine, glaze a thin layer of transparent color over dried paint.
Many artists use glazing to create realistic shine. A glaze is a thin, transparent layer of paint mixed with medium. Once your first layer dries, you can add glazes to increase depth and luminosity.
Credit: samuelearp.com
Final Details And Corrections
After the main painting is dry, check for missing details.
- Sharpen edges where needed, especially around the stem.
- Adjust highlights and shadows if they look too flat.
- Add small dots or color marks for realism.
- Clean up the background if it distracts from the apple.
One non-obvious tip: Look at your painting in a mirror. This helps spot mistakes in shape or color you might miss otherwise.
Another insight: Take a photo of your painting and compare it to your reference apple. Differences are easier to see on screen.
Common Mistakes And How To Avoid Them
Even experienced painters make mistakes. Here are a few to watch out for:
- Using only one color: Apples have many hues. Mix and layer colors for depth.
- Ignoring the light source: Decide where your light comes from and be consistent.
- Hard edges everywhere: Real apples have soft transitions. Blend carefully.
- Flat highlights: Highlights should follow the curve of the apple.
- Dirty brushes or palette: Clean regularly to avoid muddy colors.
- Overworking the paint: Oil can get sticky. Let layers dry before adding more.
Avoiding these errors will help your apple look realistic and lively.
Credit: tips.clip-studio.com
Practical Tips For Success
- Paint from life if possible. Photos flatten colors and light.
- Work in short sessions. Oil painting is slow; patience pays off.
- Step back often. View your painting from a distance to see the whole picture.
- Use a limited palette. Too many colors can make mixing harder.
- Keep your brushstrokes varied. Use different brush sizes and shapes for detail and blending.
Here’s a quick comparison between painting from life and from a photo:
| Source | Color Accuracy | Light Quality | Depth Perception |
|---|---|---|---|
| Live apple | High | Natural, dynamic | Strong |
| Photo | Medium | Flat, static | Weak |
If you want more guidance, check out Oil Painting on Wikipedia for history and advanced techniques.
Frequently Asked Questions
What Colors Should I Use To Paint A Red Apple?
For a red apple, start with cadmium red, alizarin crimson, and lemon yellow. Use white for highlights and a touch of blue or green for shadows. Adjust by mixing these colors to match your apple’s unique shade.
How Do I Make The Apple Look Shiny?
To show shine, add a small highlight where the light hits. Use white mixed with yellow for a natural look. Blend the highlight into the surrounding color. For deep shine, use a glaze of transparent paint after the first layer dries.
Can I Use Student-grade Oil Paints?
Student-grade paints are okay for practice, but they often lack strong pigment. This can make your apple look dull. Artist-grade paints have richer color and blend better. If you want your painting to last and look vibrant, invest in quality materials.
Should I Let The Paint Dry Between Layers?
Yes. Oil paint dries slowly, so waiting between layers helps avoid muddy colors. Thin layers dry faster than thick ones. If you want to use glazing or add fine detail, let the base layer dry first.
What Brush Types Are Best For Painting An Apple?
Use round brushes for detail and flat brushes for broader strokes. Soft synthetic or sable brushes work well for blending. Have several sizes ready—small for the stem and highlights, medium for the apple’s body, and large for background.
Painting an apple in oil is a rewarding study. It’s a simple subject but offers endless lessons in color, form, and technique. With patience and careful observation, your apple will glow with life and realism. Take your time, experiment with layers and color, and enjoy the process.
Every painting teaches something new—so grab your materials and start creating.