
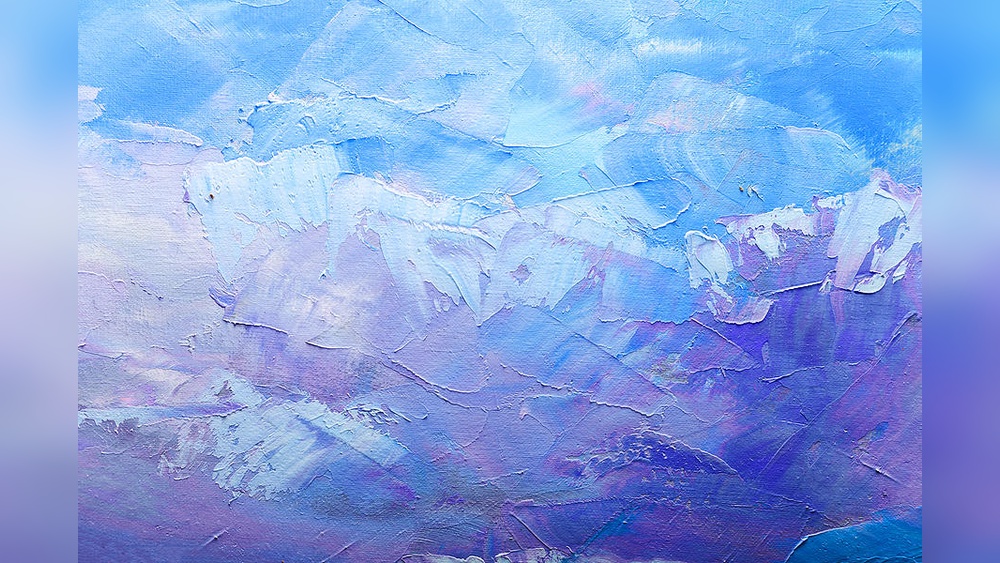
Quick answer: To paint a textured background on canvas, build physical texture first with modeling paste, heavy gel medium or thick gesso applied with a palette knife, sponge, comb or crumpled tissue, and let it dry completely (often 24 hours or more for thick layers). Then add color in layers: a transparent glaze that settles into the low spots, followed by dry-brushed lighter color that catches only the raised ridges. This two-step approach, texture then color, gives depth without muddying the surface.
A textured background adds something flat paint cannot: real shadows. Raised ridges catch light, recesses hold darker color, and the surface changes as you walk past it. It is the foundation for a lot of contemporary abstract work and an easy way to give a simple subject more presence.
This guide explains how to paint a textured background on canvas from start to finish. It covers which texture materials to use, ten ways to apply them, how to color the texture so it looks rich instead of lumpy, and how to avoid cracking.
Two Kinds of Texture
It helps to separate two ideas before you start:
- Physical texture: The surface is actually raised. You can feel it with your fingers. This comes from pastes, gels, gesso or collage materials.
- Visual texture: The surface is flat, but brushwork, sponging or patterning makes it look textured. This comes from painting technique alone.
The richest textured backgrounds usually combine both: physical texture underneath, and color techniques on top that emphasize it.
Your choice of paint also shapes the approach. Acrylic is the most forgiving partner for heavy texture because it stays flexible and bonds well to acrylic pastes and gels. Oil can go over fully cured acrylic texture, and gouache can work in thin layers on a rigid base. If you are leaning toward gouache, check which surfaces hold gouache well before you start building relief, since the base affects adhesion and cracking.
Texture Materials Compared
| Material | Texture it creates | Drying time (thick layer) | Notes |
|---|---|---|---|
| Light modeling paste | Lightweight, matte, holds peaks | Several hours to overnight | Good for large canvases because it adds little weight |
| Regular modeling paste | Dense, hard, sandable | Overnight or longer | Can crack if applied very thick on flexible canvas |
| Heavy gel medium | Glossy or matte, holds knife marks, transparent | Overnight | Can be mixed with paint for colored texture |
| Thick gesso | Subtle brush ridges | Hours | Easiest, cheapest texture base |
| Fiber or pumice gels | Gritty, stone-like surfaces | Overnight | Interesting for abstract and landscape work |
| Tissue paper with medium | Wrinkled, organic folds | An hour or two | Very lightweight, flexible |
| Sand or grit in medium | Gritty, earthy | Overnight | Mix into gel medium, not loose onto paint |
Drying times vary with thickness, humidity and the specific product, so treat these as rough guides and always check the label.
Tools for Applying Texture
- Palette knives in two or three shapes (a trowel shape and a small diamond)
- Plastic scrapers or old gift cards
- Sponges (natural sea sponge for organic marks, kitchen sponge for regular patterns)
- Combs, forks, notched trowels
- Stiff old brushes
- Bubble wrap, lace, mesh, stencils
- Crumpled plastic wrap or tissue paper
How to Paint a Textured Background on Canvas: Step by Step
Step 1: Prepare the canvas
Choose a sturdy surface. Thick texture adds weight and stiffness, and flexible canvas can flex under it, which may cause cracks. A gallery-depth stretched canvas with tight fabric or a rigid canvas panel is a safer base for heavy texture. If the canvas is loose, tighten it with the corner keys first.
Apply one coat of gesso if the canvas is unprimed, and let it dry.
Step 2: Plan where texture goes
Texture works best when it supports the composition. Decide whether you want an all-over texture, a texture concentrated in one area, or texture that follows a direction (diagonal sweeps, horizontal bands, a circular swirl). Leave smoother areas where you plan to paint a focal subject, since detail is hard to paint over heavy ridges.
Step 3: Apply the texture medium
Scoop medium onto the canvas with a palette knife and spread it using any of the techniques in the next section. Work quickly; most pastes begin to skin over within 15 to 30 minutes.
For an even, overall texture, apply a layer about 1/16 to 1/8 inch thick. For sculptural areas, build higher in several thinner layers, letting each dry, rather than in one very thick application. Thick single layers are more likely to crack as they dry.
Step 4: Let it dry completely
This step is easy to rush. The surface may feel dry in an hour while the inside is still soft. Painting over partially dry paste can cause cracking or a gummy surface. For thick texture, waiting overnight or 24 hours is a common minimum.
Step 5: Seal with gesso or a base color (optional)
A thin coat of gesso or a mid-tone acrylic over the dry texture unifies the surface and gives you an even starting point. This is especially useful if you combined different materials that absorb paint differently.
Step 6: Glaze into the recesses
Mix a transparent color (burnt umber, phthalo blue, quinacridone magenta or a dark mix) with glazing medium. Brush it over the texture, pushing it into every crevice, then wipe the surface lightly with a damp rag or paper towel. The glaze stays in the low areas and lifts off the high points, instantly showing the shape of the texture.
Step 7: Dry-brush the highlights
Load a stiff flat brush with a lighter, opaque color, wipe most of it off on a paper towel, then drag the brush lightly across the surface. The paint catches only on raised ridges. This creates a strong contrast between peaks and valleys and makes texture pop.
Step 8: Add more layers and adjust
Repeat glazing and dry-brushing with additional colors. Warm glazes with cool highlights, or the reverse, add vibrancy. Metallic paint dry-brushed over the top is a popular finishing touch for abstract work.
Step 9: Seal
Once everything is fully dry, apply a varnish to protect the surface. Textured backgrounds trap dust in their crevices, and varnish makes them easier to clean with a soft brush.
10 Texture Techniques to Try
- Knife swipes: Spread paste with the flat of a palette knife, then lift sharply for peaks, or drag in short overlapping strokes for a plaster look.
- Combed lines: Drag a comb or fork through wet paste for parallel lines, waves or crosshatching.
- Sponge stippling: Press and lift a sea sponge into wet paste for organic, coral-like texture.
- Stencil relief: Lay a stencil and spread paste over it with a knife. Lift straight up for raised patterns.
- Tissue paper crinkle: Brush matte medium on the canvas, lay crumpled tissue paper on it, and brush more medium over the top, pressing gently to form wrinkles.
- Plastic wrap press: Press crumpled plastic wrap into wet paste or heavy paint and peel it away.
- Bubble wrap dots: Press bubble wrap into wet paste for a regular dotted relief.
- Sgraffito: Scratch lines into wet paste with the end of a brush or a skewer.
- Impasto brushwork: Apply heavy body paint or paint mixed with gel thickly with a stiff brush to leave visible ridges.
- Grit and sand: Stir fine sand into gel medium and spread it for a gritty, stone-like surface.
How to Paint Textured Abstract Art on Canvas
Textured backgrounds often become the painting itself in abstract work. A simple approach:
- Pick a palette of three colors plus a neutral (for example, deep teal, ochre, rust and off-white).
- Apply texture in loose, directional shapes, leaving some smooth areas for contrast.
- Once dry, glaze the darkest color across the whole surface and wipe back.
- Dry-brush the mid colors in sections, letting them overlap.
- Finish with the lightest color dry-brushed on the highest peaks, and perhaps a small metallic accent.
- Step back and add a few deliberate marks (a line, a scrape, a block of color) to give the composition a focal point.
The contrast between rough and smooth areas is often what makes textured abstract pieces look intentional rather than random.
Texture Under a Subject: Florals, Landscapes, Portraits
Textured backgrounds also work behind representational subjects. Keep the texture lower and finer behind areas where detail matters, and stronger toward the edges. For a dark, moody look, glaze the textured background very dark; our guide on painting a dark background on canvas covers rich dark mixes that pair well with texture.
Can You Use Gouache Over Texture?
Gouache is a water-based, matte, opaque paint that rewets when water touches it. It can be used on textured backgrounds, but there are limitations:
- Gouache is less flexible than acrylic. Thick gouache over heavy, flexible texture is more likely to crack.
- Gouache sits better on absorbent, slightly toothy surfaces than on slick acrylic gels.
- Rewetting means glazing and dry-brushing need a lighter touch.
A practical approach is to build texture with acrylic gesso or matte paste on a rigid panel, let it dry fully, and use gouache in thin layers on top. Surfaces designed with gouache in mind help; our comparison of the best canvas for gouache painting covers boards and panels that handle matte media well.
Preventing Cracks and Other Problems
| Problem | Likely cause | Fix or prevention |
|---|---|---|
| Cracking | Very thick single layer, flexible canvas, fast drying | Build in thinner layers, use rigid panels, choose flexible gels over hard pastes |
| Texture looks flat after painting | Opaque paint applied evenly over everything | Glaze into recesses and dry-brush highlights for contrast |
| Muddy color | Too many colors mixed wet on the surface | Let layers dry between colors; limit palette |
| Canvas sagging | Heavy texture on loose canvas | Tighten keys before texturing, or use a panel |
| Dusty crevices | Rough unsealed surface | Varnish and dust with a soft, wide brush |
| Paste peeling | Applied over slick or oily surface | Apply over primed, clean canvas; avoid applying over oil paint |
Tips by Skill Level
Beginner
- Start with thick gesso and a palette knife on a small 8 x 10 inch panel.
- Use only one glaze color and one dry-brush color.
Intermediate
- Combine two techniques, such as knife swipes and stencil relief.
- Add color to the paste itself by mixing in acrylic, then glaze a contrasting color over it.
Advanced
- Layer textures over several days, each one partially covering the last.
- Experiment with fiber, pumice and crackle mediums.
- Plan textures that echo the composition, such as directional ridges that lead the eye toward the focal point.
FAQs
What can I use to make texture on canvas?
Modeling paste, heavy gel medium, thick gesso, tissue paper with medium, and sand mixed into gel are common choices. Apply them with palette knives, sponges, combs or stencils.
How long should texture paste dry before painting?
Thin layers may be ready in a few hours, but thick layers often need overnight or 24 hours. The surface can feel dry before the inside has cured, so wait longer if in doubt.
Why is my textured canvas cracking?
Cracks usually come from applying paste too thickly in one layer, using a hard paste on flexible canvas, or drying too fast in heat. Build in thinner layers and use rigid panels for heavy texture.
How do you paint textured abstract art on canvas?
Build texture in loose, directional shapes, let it dry, glaze a dark transparent color into the recesses, then dry-brush lighter colors over the ridges. Leave some smooth areas for contrast and add a few deliberate marks for focus.
Can I make textured backgrounds without modeling paste?
Yes. Thick gesso, heavy body acrylic applied with a knife, tissue paper glued with medium, or homemade mixes of gel medium and sand all create texture.
Does gouache work on textured canvas?
It can, in thin layers over a fully dried, rigid textured base. Gouache is less flexible than acrylic, so thick applications over heavy texture may crack.
Final Thoughts
Painting a textured background on canvas is a two-stage process: build the relief first, then color it so the relief shows. Glaze into the low points, dry-brush the high points, and give every layer time to dry. Rigid surfaces and thinner texture layers keep the finished piece stable.
If you plan to work in matte, opaque gouache over your texture, the surface choice matters even more. Explore our picks for canvases and panels that suit gouache to find a base that keeps your textured work crack-free.





2 Comments