
Painting a candle flame in oil is a fascinating challenge for artists. The flame is a small detail, but it can make a painting come alive. Many beginners find it hard to capture the soft glow, the subtle colors, and the play of light around a candle.
However, with the right approach, anyone can learn how to paint a realistic flame. This guide will show you step by step, from preparing your canvas to adding the final highlights, so you can create a beautiful, glowing candle flame in oil paint.
Understanding Candle Flames
Before you pick up your brush, it’s important to study what you want to paint. A candle flame is more than just yellow paint. It has layers, colors, and movement.
A typical candle flame has three main parts:
- Inner core – Bluish or white, where the wax vaporizes.
- Middle section – Bright yellow and orange, the hottest and brightest area.
- Outer glow – A faint, soft halo that blends into the air.
The flame also casts light on the candle and objects nearby. Look closely at a real candle. Notice how the flame is not a solid shape; it has soft edges and changes as you watch. This observation is key for painting a convincing flame.
Materials And Tools
Choosing the right materials makes painting easier and gives better results. For a realistic flame, you need oil paints with good transparency and smooth blending ability.
| Material | Purpose |
|---|---|
| Oil paints (basic colors: white, yellow, orange, blue, brown) | Color mixing for realistic flame and candle |
| Canvas or primed board | Painting surface |
| Small round and liner brushes | Detail work for the flame |
| Soft blending brushes | Creating smooth transitions |
| Palette and palette knife | Mixing colors |
| Medium (like linseed oil) | Improving paint flow and blending |
| Rags or paper towels | Cleaning and adjusting paint |
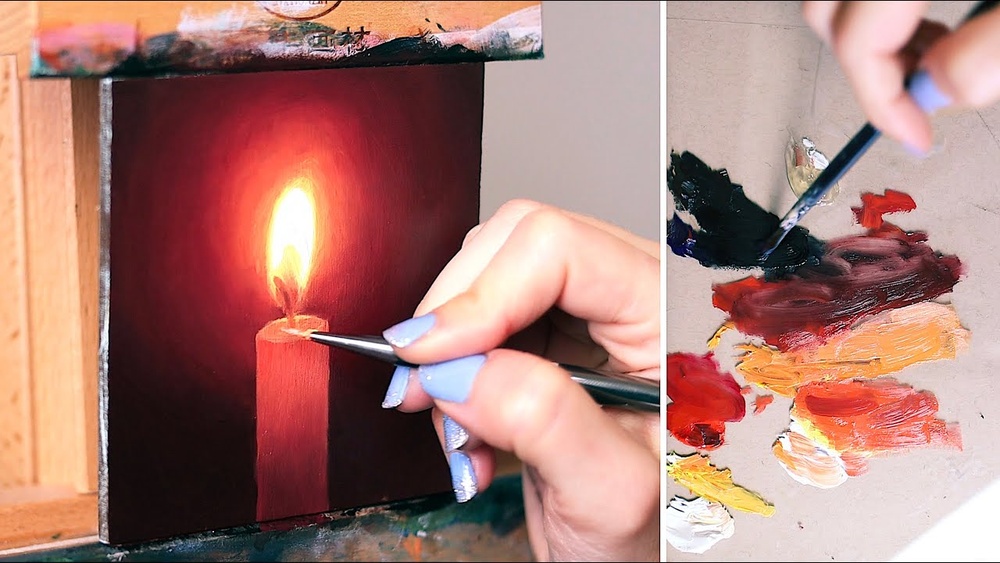
Pro tip: Use quality artist-grade paints. Cheaper paints can look dull and make blending difficult.

Credit: www.youtube.com
Preparing Your Canvas
Start with a clean, primed canvas or board. If you’re painting a candle in a dark room, tone your canvas with a thin layer of burnt umber or gray. This helps the flame’s light stand out later. Let this layer dry or wipe it to a thin stain before starting the drawing.
Sketch the candle and flame lightly with a pencil or diluted paint. Keep shapes simple—just an oval for the flame and a cylinder for the candle. Place the flame at the right height and center above the wick.
Planning The Composition And Lighting
A good painting needs a clear focal point. In this case, the flame should draw the viewer’s attention.
Think about:
- The background (dark backgrounds make flames glow brighter)
- Where the highlights and shadows fall
- How the flame lights up the candle and nearby objects
Try setting up a real candle and taking reference photos. Pay attention to how colors shift from yellow to blue, and how the light reflects off the wax. Even small details, like a tiny blue edge at the base of the flame, add realism.
Mixing Colors For The Flame
Color mixing is one of the most important steps. Beginners often use only yellow, but a real flame has many colors.
Here are the main mixes:
- White + a touch of blue for the inner core
- Cadmium yellow + white for the brightest yellow section
- Yellow + a bit of cadmium red for the orange area
- Ultramarine blue + a little brown for the soft blue at the base
Test your mixes on scrap paper before painting. Use more white for highlights and keep your colors clean. Muddy colors will make the flame look dull.
Insight: Many artists forget to use blue and white in the flame. These colors are essential for the hottest, brightest parts.
Painting The Candle Flame Step By Step
1. Blocking In The Background
Begin by painting the background. Use dark, muted colors to make the flame stand out. Blend the background smoothly so there are no harsh lines near the flame area.
2. Painting The Candle Body
Block in the shape of the candle with warm, neutral tones. Use ochre, white, and a touch of gray. Paint the shadowed side cooler and the lit side warmer to show the effect of the flame’s light.
3. Laying Down The Flame Base
With a small brush, paint the core of the flame using a mix of white and blue. Keep this area small and bright. Next, add a layer of bright yellow around the core, forming the main body of the flame.
Blend the edge softly outward.
4. Adding Orange And Blue Details
Mix a touch of red with yellow for a soft orange and paint it around the yellow section, fading outwards. At the very base, add a hint of blue, blending it upwards.
5. Creating The Outer Glow
With a clean, soft brush, gently blend the outer edge of the flame into the background. Use a transparent mix of yellow and white, and apply it thinly. The edge should look soft, not sharp.
6. Painting The Wick
Use a small liner brush and a dark brown or black color to paint the wick. Add a tiny white highlight where the flame meets the wick. This makes the flame look as if it’s really burning.
7. Final Highlights And Adjustments
For the brightest spot, use pure white and apply it sparingly at the center of the flame. If the flame looks too hard-edged, gently blend it with a dry brush.
Pro tip: Less is more with highlights. Too much white can flatten the flame.
Capturing The Glow Effect
One of the secrets to a realistic candle flame is the glow. This is the soft, luminous area around the flame that makes it look like it’s really shining.
Here’s how to achieve it:
- Use a clean, soft brush
- Mix a thin glaze of white, yellow, and a touch of medium
- Gently brush this glaze around the flame, blending into the background
Repeat if needed, building up the glow slowly. If you overdo it, use a clean brush to soften the edges.
Common mistake: Beginners often make the glow too bright or too wide. In reality, the glow is subtle and fades quickly into darkness.
Painting Candlelight On Nearby Objects
The flame doesn’t exist alone—it lights up parts of the candle and anything close by. Paint these effects for a more convincing scene.
- Add soft highlights on the candle’s edge facing the flame
- Use warmer colors for areas lit by the flame, cooler tones in shadow
- Show a hint of light on objects (like a table or wall) close to the flame
This light is soft and fades quickly, so blend the edges well.
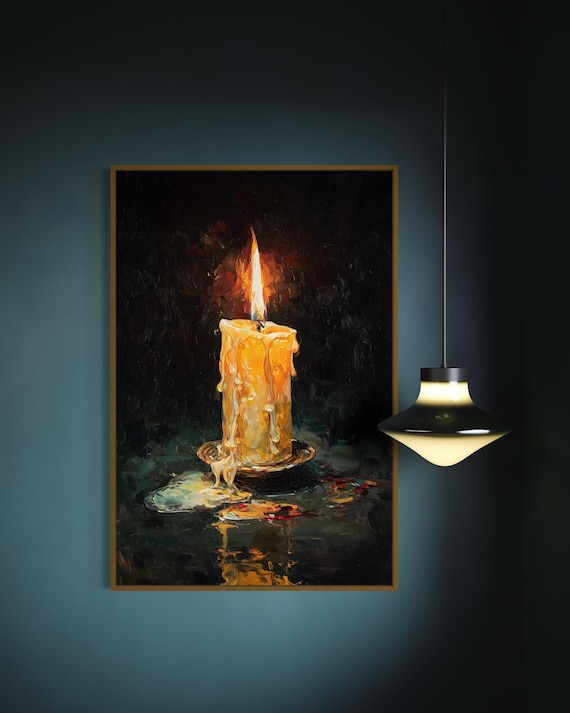
Credit: www.etsy.com
Comparing Candle Flame Effects
Let’s compare how different backgrounds and candle colors affect the look of the flame.
| Background | Flame Glow | Overall Effect |
|---|---|---|
| Dark (black, navy) | Very strong, bright glow | Flame looks dramatic, eye-catching |
| Medium (brown, gray) | Soft glow | Balanced, natural look |
| Light (cream, pale blue) | Faint glow, less contrast | Flame looks gentle, subtle |
Insight: Artists often forget that background color changes how bright the flame appears. Test different backgrounds to see what works for your painting.
Fixing Common Problems
Painting a candle flame can go wrong if you’re not careful. Here’s how to solve common issues:
Flame Looks Flat
- Add more color variation (blue, orange, white)
- Increase contrast between the core and edges
Edges Too Hard
- Blend with a clean, dry brush
- Use glazing to soften the glow
Flame Too Large Or Small
- Check your reference photo
- Adjust the size with careful repainting
Muddy Colors
- Clean your brush often
- Use fewer colors in each mix
Practicing Candle Flames
Like anything in art, practice helps. Try painting flames from different angles—side view, above, even two flames together. Use small canvas scraps to practice just the flame before starting a full painting.
If you want to study more about fire and light, you can visit the Wikipedia entry on fire for scientific details about flames and their colors.
Advanced Tips For Realism
If you’re ready to push your flame paintings further, try these tips:
- Use transparent paint for the outer glow. It lets underlayers show through, creating a soft effect.
- Add a faint hint of blue or violet at the very edge of the glow for extra realism.
- Paint reflections if the candle is near glass or metal. The flame will reflect and add more interest.
- Try painting a candle from life in a dark room. Your eyes will see subtle colors that photos often miss.
Example Color Mixes For Candle Flames
Here are some tried-and-true mixes for each part of the flame:
| Flame Area | Color Mix | Application Tip |
|---|---|---|
| Inner core | Titanium white + ultramarine blue | Use a tiny brush, keep it bright |
| Main body | Cadmium yellow + titanium white | Apply in one stroke, blend softly |
| Orange ring | Cadmium yellow + cadmium red | Feather edges outward |
| Base blue | Ultramarine blue + burnt umber | Thin, transparent layer |
| Glow | White + yellow (very thin glaze) | Soft dry brush or glaze method |
Frequently Asked Questions
How Do I Make The Flame Look Bright In Oil Paint?
Use high-contrast colors. Keep the background dark and the flame’s core very light with plenty of white. Use thin, transparent layers for the glow.
Why Does My Candle Flame Look Flat?
A flat flame usually means not enough color variation. Add touches of blue, orange, and pure white. Blend softly from the center outwards.
Can I Paint A Candle Flame Without A Real Candle As Reference?
Yes, but having a real candle or good photo helps. You can find reference images online or even use slow-motion videos to study how flames move.
What Brush Should I Use For The Soft Glow?
A clean, soft blending brush works best. Fan brushes or large soft rounds help blend the glow smoothly around the flame.
How Long Does It Take For Oil Paint To Dry When Painting A Flame?
Thin layers around the flame dry faster, usually in a few days. The thicker candle and background may take a week or more. Use fast-drying mediums if you want quicker results.
Painting a candle flame in oil is a rewarding project for any artist. It teaches you about light, color, and subtle blending—skills that improve all your paintings. With careful observation, good materials, and patient practice, you can create a flame that looks truly luminous and alive.
Enjoy the process and keep experimenting with different flames, colors, and glows. Your next candle flame could be your best yet!

Credit: www.reddit.com


